Black and White Photography: The Beginner’s Guide
In this era of ubiquitous high-resolution color screens, it seems hard to recall that photography established itself without color. The medium earned its position in the worlds of journalism, popular culture, and fine arts long before Kodak introduced color film. But this does not relegate black-and-white photography to the basement. The genre remains powerful, present, and widely practiced today, with both film and digital cameras.
Here’s a guide to black-and-white photography, from the photographer’s eye to post-processing.
Table of Contents
Why Shoot in Black-and-White?
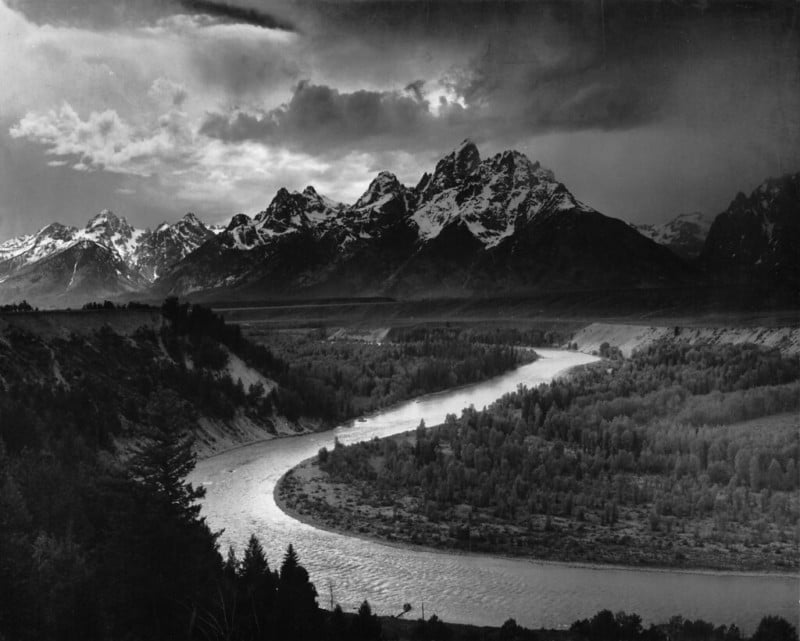
Some seek the classic, “timeless” look inherent to monochrome photos, as represented by the likes of Sebastião Salgado, Henri Cartier-Bresson, or Ansel Adams, whose iconic image of the Tetons is shown above. Others wish to focus viewers’ attention on elements such as contrast, texture, and form. Plenty of reasons exist for pursuing monochrome images today, yet the genre remains so established within photography — it represents the core, the foundation of photography — that no excuse is needed to produce black-and-white photos.
This wasn’t the case when color photography arrived. Color film had to prove its worth against its monochrome predecessor, which it clearly did. Both camps represented photography on their own terms: Color photos show viewers what something looked like, while black-and-white shows how it felt.

This isn’t to say that color photos lack feeling. In fact, colors bring so much emotion, each color representing various emotions for different cultures, that color can sometimes overwhelm the message a photographer seeks to deliver. When color begins to distract from the photograph’s intention, it is best left as shades of gray.
What to Look for in a Black-and-White Scene
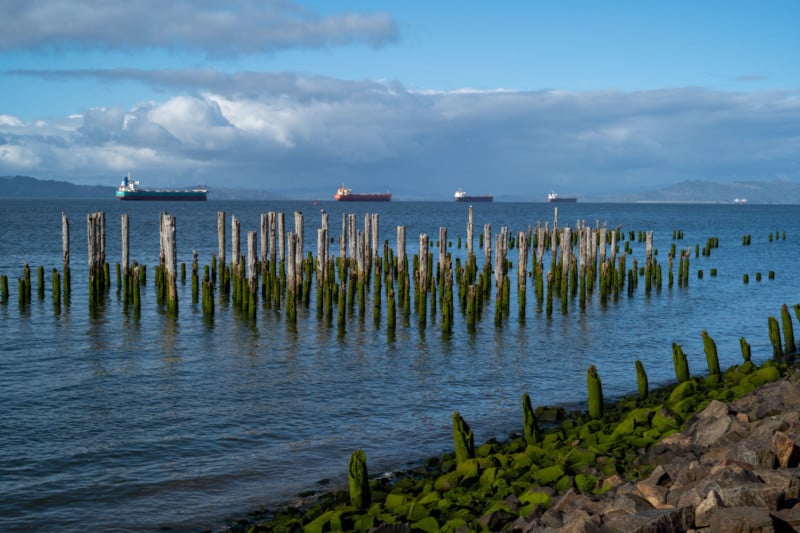
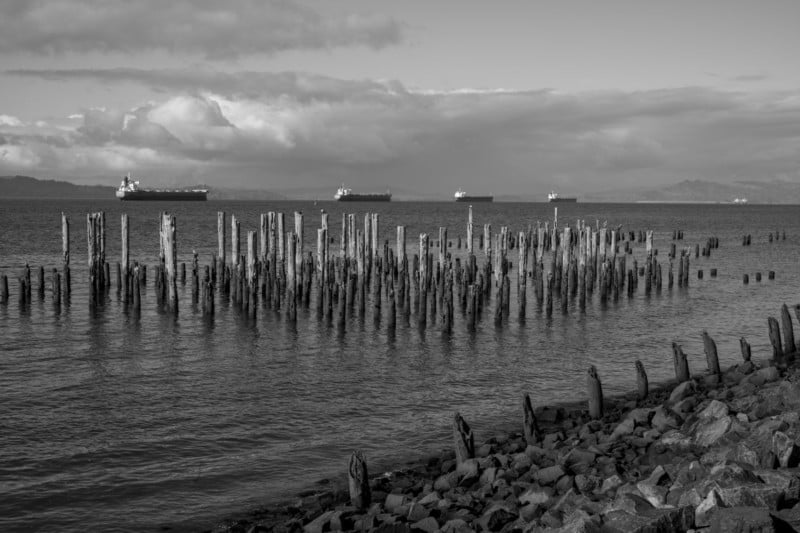
The trained monochrome eye can estimate how certain hues and luminances would render in black-and-white. A beginner can simply look for contrast, the juxtaposition of darks and whites in a scene. Monochrome photography relies on contrast for visual strength. The human eye is programmed to pick up on contrast, perhaps helping our primal ancestors discern fruit amongst a canopy of leaves. This partly explains our continued appreciation for black-and-white images.

Other elements figure prominently in monochrome. Texture can appear three-dimensional when something like a strip of weathered wood shows its intricacies in a range of tones from black to myriad grays to white. Form finds definite expression in monochrome as well, as lines and shapes gain prominence through contrast and the absence of distracting color.
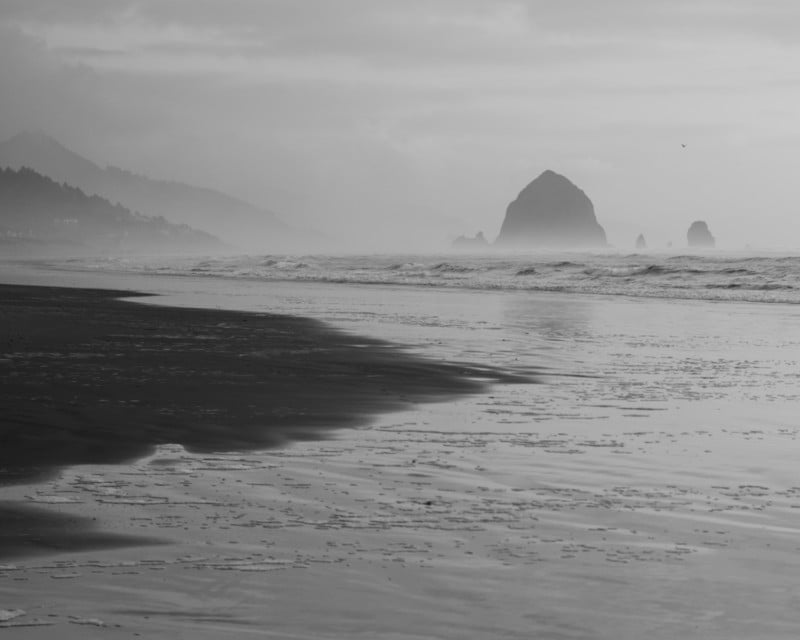
Monochrome photos taken to the extreme produce high-contrast yet very dark (low key) or bright (high key) images. Such a range of allowed tonality (contrast) also makes black-and-white well suited to harsh lighting conditions such as low light and “high noon” light (between the golden hours).
While sunrises and sunsets don’t find their full expression in black-and-white, most scenes and subjects do work well without color, and some excel in monochrome. Thorough experimentation will teach you how to see in black-and-white.
Camera Settings for Shooting in Black-and-White
As a beginner, seeing monochrome in a world full of color can feel challenging. Many current cameras lend a hand in this process with electronic viewfinders and black-and-white mode. This allows the photographer to see the image in monochrome before the shutter is released. It can also help to look only for monochrome shots on a given shoot, as if all you had was a camera loaded with black-and-white film.
With enough practice, the black-and-white mode won’t even be necessary, and your eye will see potential monochrome shots even when you don’t have a camera in hand. The eye of the monochrome photographer sees beyond the colors, recognizing the play between dark and light in a subject or scene.

In-camera black-and-white mode can make a permanent difference in your photos if you shoot jpegs, which will remain in black-and-white. To maintain the possibility of making an image either color or monochrome, it is best to shoot RAW images. This not only preserves a color version but also allows for full manipulation of the conversion from color to black-and-white, as discussed below.
Exposure of monochrome images differs slightly from color protocol. Where color shots require a fairly exact exposure, black-and-white shots allow for extremes, including clipping, so underexposure works well here. Blown highlights cannot be recovered, but shadows can be, so prioritize exposure for the highlights and work on the shadows in post-processing.
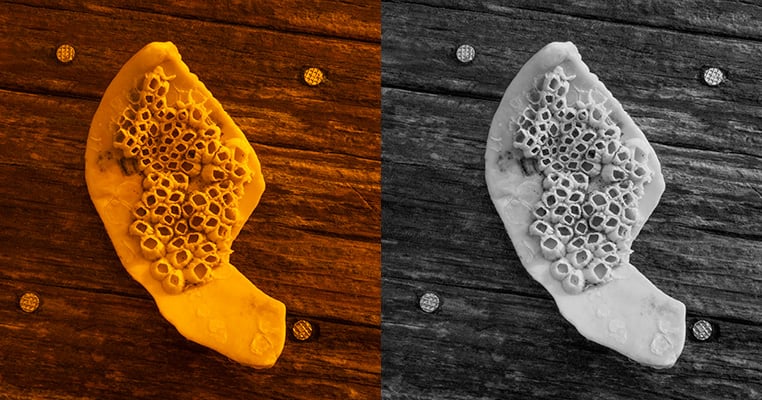
Attachable lens filters have long added artistic nuances to black-and-white photography. Yellow, orange, red, green, or even blue filters on a lens will alter, sometimes dramatically, a monochrome image. This can help boost contrast, darken skies, or minimize certain hues. Post-processing software offers an assortment of filters for the less dedicated monochrome photographer.
Black-and-White Conversion and Editing
Conversion from color to monochrome requires one click in post-processing: black-and-white. Once converted into grays, photo editing follows a similar flow as for color. Each photographer evolves a workflow for monochrome images, some choosing to edit tones and colors before converting to black-and-white, others preferring to make those adjustments from a monochrome base. Either is fine.
Any photographer converting a color RAW file into monochrome should consider making a duplicate file for conversion, in order to keep a color copy. Once converted, the next step is to evaluate the photo: determine what needs improvement and how to achieve this. Tonal sliders (blacks, midtones, whites, exposure) adjust the light just as they do in a color photo.
The color channels contained in the RAW file provide further influence over how the image looks. Color filters work in this same way. Adding or subtracting blue in a monochrome photo, for example, can turn any object with blue in it into a lighter gray or a much darker gray. This can darken the sky as well as a forested hill or body of water.
White balance works differently in black-and-white. While a photograph no longer requires white balance to correct colors, the white balance sliders affect the colors underneath the conversion just as the color channels do. This adds another level of complexity and control to the editing process for monochrome images.
Further adjustments exist in the many additional filters offered by software companies today. Some offer the look of a specific film type, and others, like Silver Efex, take care of the black-and-white conversion while also offering various editing controls.
When working in blacks and whites, it often helps to brighten or darken certain areas of a photograph. Monochrome film photographers have always relied on the techniques of dodging (brightening) and burning (darkening) an image in the darkroom. Post-processing software offers these same tools in digital format, and a digital black-and-white photographer should become familiar with their use.
Conclusion
You don’t have to shoot film or own a specialty monochrome-only camera to make stunning monochrome photos. If intimidating at first, black-and-white photography eventually becomes second nature, partly because of its roots in photography, partly because our eyes instinctively appreciate it, and also because it still just looks cool.
No wizardry is required to capture or edit monochrome images. Practice and familiarity will make the conversion process as simple as, perhaps easier than, the editing process required of color photos. With more leeway in exposure, even the shooting process becomes more forgiving. In fact, with a folder of color RAW images waiting on a computer or hard drive, your journey in black-and-white photography can begin immediately. Find a color photo with good contrast, convert to black-and-white, play with some sliders and you’re already on your way.
Image creditsHeader photo is The Tetons and the Snake River
(1942) by Ansel Adams