Using the Hasselblad 907X and CFV II 50C with Legacy Gear
![]()
I shot the photo above during a visit to Zermatt in October 2020. It was my fifth time there, and the second time the weather had been clear enough to allow me to see the famous mountain. The first time I saw this scene, in May 2019, I knew immediately it was a photo. I mean, I knew immediately it was an interesting photo.
I only had my iPhone (5C) with me the first time, so I took a photo to make a note of the scene assuming I would come back to it at some point with a camera designed for shooting scenes like this.
That turned out to be 18 months later, resulting in the photo you see at the top, and I had a dedicated camera with me and not just my phone.
Is all that necessary though? If you’re (mis)representing what the landscape really looks like does it matter what you take the photo with? If I had shot this with an 8×10 large format camera with Fuji Velvia slide film and the image included the verification borders would it be more meaningful? Or would that be way too meta?2
It took about 20 minutes to shoot the above image, as I waited patiently for the steady stream of other photographers and tourists to leave the scene. Each one of them wandering up to the edge of the concrete barrier to get a view of the mountain unpolluted by all that concrete. Unobstructed, free from distractions, free from the truth of what it really looks like at the Gornergrat top station.
What I’m trying to express is that, like nearly all photography, most landscape photography is a lie. When I shoot landscapes my first priority is the composition, and if that should happen to include man-made elements then even better. Because, as is probably self-evident, that’s what most of these landscapes actually look like. There are millions of photographs of the Matterhorn, most of which are taken from this place, or a short walk from the train stop one below this one. Yet 99.9% of them feature no discernible evidence of human involvement.
Whenever I’m out shooting landscapes I’ve always got a scene from Takahata Isao’s “Only Yesterday” in my mind; in which Taeko, wanting to escape the city and get back to nature, comes to realize that the “natural” landscape is entirely man-made and man-managed. It is no more natural than the city she was trying to escape, she had fallen for a type of learned idealism about the countryside. Call it nostalgia perhaps?
Hasselblad
![]()
Nostalgia can be a powerful thing, and of course extremely lucrative. Hasselblad’s latest camera, the 907x + CFV II 50c, has nostalgia written all over it; from the limited edition fifty years on the moon edition, to the ad campaigns for the standard edition featuring an old guy, his record player, vintage car, and 501cm – a camera body that hasn’t been manufactured in over 15 years.
Watching that I can’t help but feel like it’s screaming TARGET MARKET at me, as I sit here in front of my ever-growing record collection, with my MINI downstairs in the garage, and my 202FA and 203FE Hasselblad cameras in the other room – those not having been manufactured in 18 and 16 years respectively.
Anyway, I thought about this for a while, and given that Hasselblad staggered the release of the camera, it gave me time to think some more. I’ve written about the quirks of using Hasselblad cameras previously, and this camera is not cheap. $6,399. That’s a lot of money to spend on something that will be full of compromises from the offset. It’s a lot of money to spend on anything. I wasn’t going to purchase this thing. It’s too expensive given the compromises. However, I ended up making quite a large profit on, ironically, selling a load of old film. That covered more than half of the cost of the camera, so I figured why not.
Yes, I bought this camera. It’s not a loaner. I intend to keep it. I wanted to use this camera for at least six months before coming to some sort of opinion on it, rather than rushing any sort of “review” out for clicks. Medium format cameras take time to get comfortable with, to get used to working around those compromises. It’s now been almost a year so I thought I should explain what those are.
So yes. A seven thousand Swiss franc camera. What will its quirks and annoyances be? What is the reality of using this new old tech?
Working Fast
Fast here is relative. I mean, if you’re used to shooting with a modern camera from just about any other manufacturer this camera is not fast. Not at all. It is slow to compose with due to its awkward ergonomics, slow to focus, slow to process, slow to navigate with its largely driven touch screen interface. But on the flip side, if you’re used to shooting with a large-format camera then all of those slow things suddenly seem light speed. So it’s all relative.
The fastest way you’re going to use this camera, and the most seamless way, is with a dedicated X lens. I held off on getting one of those for the first six months of having this camera but came to realize that the compromises in using it with other lenses were too much for some approaches (see “Slower” below). There are some times in which having that autofocus, higher ISO, and flash capability is necessary.
The X lenses start at expensive and go up to silly prices, but they do add features you won’t be able to get when using this camera with other bodies/lenses. Autofocus (shock!), flash synchronization up to 1/2000 due to their leaf shutters, much more modern rendering, and so on. None of that is really compelling.
What is compelling is that this combination gives you a small, (relatively) lightweight, high resolution, medium format camera, with all of that and is designed to allow you to use it with other camera bodies and lenses when you want to change up your approach. You can also hook this combination up to a computer for tethered shooting for precise focus control/stacking and all that kind of stuff.
I’d been using my older Hasselblad a lot in the local jazz club but was struggling due to the nature of the lighting in there. Pushing my film to 6,400 and shooting wide open at f2 or f2.8. Consequently missing a lot of shots and wasting a lot of film, because that will happen under those conditions. I plan to take along the new camera when the club finally reopens, but that might not be for a while yet. I assume the camera will allow me to work in the same way, shooting low down to isolate musicians against the ceiling – not being a distraction myself to the audience or the musicians. Having enough depth to blur backgrounds.
Also, the highlight and shadow recovery possibilities of this camera are up there with the best, even though the sensor itself is effectively old tech – I can’t remember exactly, but it’s the same as in the first iteration of this back, which was released several years ago. In the above image, I can get all the detail back from the shadows, although I find that doing this looks weird and removes ambiguity. Often you want areas of little or no detail, but it’s nice to have a choice. When I am pushing film to 6,400 I don’t have the option to recover those shadows, here I do.
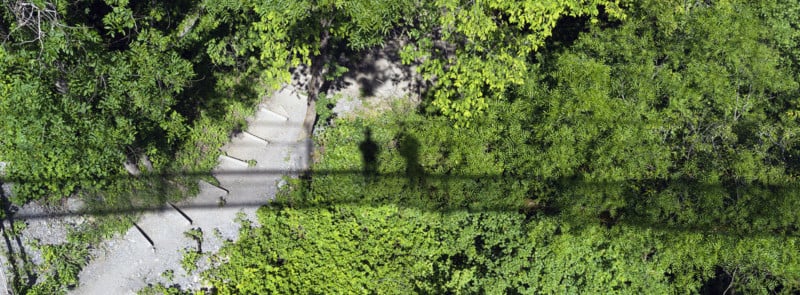
As a walk-around camera, the camera is… OK. It hangs a bit awkwardly over your shoulder due to the odd balance. The touchscreen is nice at first but in reality a faff, and changing settings with a prod/touch/swipe becomes annoying if you’re working in changeable light. Maybe it’s best to stick auto ISO on and a minimum shutter speed to avoid having to change those all the time? No built-in viewfinder makes precise composition difficult. No worries though, frame loose and crop in post since you have a lot of resolution to play with. It feels most a lot like an SWC.
In a mid to low light setting this combination is fine. Take it out into bright daylight and you’ll soon discover the biggest weakness; the screen is absolutely terrible in bright light, shadows will look three, four, five stops underexposed, even completely black, until you check the histogram after taking the shot to learn the exposure was spot on.
The screen in bright daylight is the biggest flaw in this setup I find, and you’ll be trying to emulate having a dark cloth so you can see the composition, focus, and exposure correctly in many situations. If Hasselblad eventually releases an electronic viewfinder attachment for this camera I would deem it essential when using this combination.
Working Slow
Slow here is relative too, of course, and this is where the nostalgia starts to kick in. The CFV back is designed to allow it to attach it to almost any of Hasselblad’s legacy V bodies. Some of these cameras are now seventy years old. The one here is a mere twenty years old, it comes from the period when Hasselblad was trying to add “modern” features to their V line:
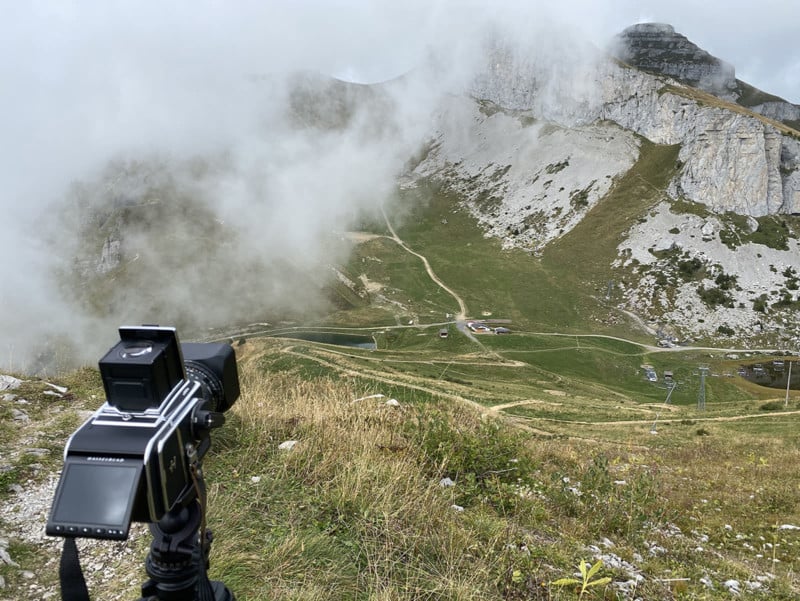
Most of the time I don’t bother with a tripod when using the above combination, and the body being a 200 series gives me built-in metering. This is about as close to point-and-shoot as you can get with a Hasselblad V series camera – assuming you want accurate exposures. All of the work you see on the front page of this site, with the exception of the panoramics, was shot with this camera – none of it studio-based. And when you use this combination with the new digital back you quickly start to find the compromises.
The first is obviously the crop factor of the digital back. The V cameras are “6×6”, about 56mm x 56mm. The back is 44mm x 33mm. So a) no longer square, b) cropped enough to make your standard lens now a telephoto lens. Eh, that’s not a big problem. Want square? Crop the crop. Need a wider angle? Walk back a few dozen steps. You will need a crop guideline for your focusing screen, and that is included with the CFV, or you could buy a replacement screen for a few hundred more Swiss Francs. Or you can take my low-tech approach and use a marker pen.
On the subject of focus screens – get yourself one with a split image (optional micro-prism) feature, if you don’t have one already, as that will help significantly. The slightest misfocus with the camera will be obvious in the recorded images, such is the nature of an SLR camera with parts that can ever-so-slightly go out of alignment, waist-level finders (which aren’t really supposed to be used for critical focus), and age-related eye issues – the aforementioned old guy almost certainly doesn’t have perfect eyesight anymore.
There’s a reason why mirrorless is becoming the norm with high-resolution digital sensor cameras. When you have a big flapping piece of metal/glass right next to the sensor it turns out that can be bad for sharpness. This is quite evident when using the CFV with a V camera. Combine that with the focal plane shutter in the 200 series bodies and you have even more large moving parts that add vibration.
I quickly discovered that, with the high resolution of the digital back, I need to approximately double the focal length when using the camera handheld to account for mirror vibration. This means with the standard 80mm lens I need 1/125, or better 1/250 minimum. Yes this was always an issue even on film but no you didn’t see it due to the inherent differences in the medium (film has grain, it increases apparent sharpness); and yes there will be those who say they can handhold down to 1/15 and still achieve sharp images because they’ve perfected their technique and blah blah blah but no they’re talking nonsense: there is a great big flapping piece of glass in this camera when you fire the shutter, no amount of technique can negate that.
Stick the camera on a tripod and use mirror lock-up, or live view with the electronic shutter, and you reduce that requirement significantly. Live view will allow you to confirm accurate focus as well. Of course, that is not how I use this combination 90% of the time. It also has other limitations we will get to later.
The final issues are not really issues but worth mentioning: dust. You would think moving from a film to digital workflow would cut down on that but no. It’s probably about the same since these old cameras are in no way sealed enough to prevent dust from getting in them. If you’re switching and swapping the digital back around you’re going to make the problem worse. Most dust can be dealt with trivially by a rocket air blower, more stubborn dust with a sensor cleaning kit. At worst you fix it in post.

The quality of the older Hasselblad/Zeiss lenses? A lot of photographers will use euphemisms to describe them, like “character”. I’ll call it as it is: most of them are nowhere near as good as newer dedicated lenses. The old ones are not optimized for a digital sensor, show chromatic aberration, color issues, aren’t that sharp, can have contrast issues in difficult light, blah blah blah, it doesn’t really matter anyway. They’re good enough for 99.9% of use cases, and that other 0.1% is probably someone shooting MTF and color charts then posting the images at full resolution in forums and blog posts to argue over the differences. Nobody cares. Really. Nobody.
There’s a couple of final quirks in using this back with the 200 series cameras – the back recording an image is triggered by a pin in the camera linked to the shutter button. The same button can be used to take a meter reading without firing the shutter, so you can end up with lots of blank frames if you work that way (which I do). Also, the 200 series meters only go up to 6400 ISO, whereas the back can go to 25,600 meaning if you’re shooting at that you need to also set the 200 series body to underexpose by 2 stops. There is no electronic synchronization with the 200 series bodies, so changing ISOs can, again, be a bit of a faff (back and body). Minor issues.
Slower
If you don’t want to attach the CFV II 50c back to an existing Hasselblad camera, or any other camera for that matter (which we will get to) and you don’t want to purchase one of the dedicated X lenses, which are quite expensive, you can keep the 907x shim and put a lens adaptor on the front.
Hasselblad is making these adaptors for their own existing lens range, XPan, V, H, and you can pick up third-party adaptors for many other lens brands. I’ll leave you to find those, just know they exist. The prerequisite is that the lens you are attaching has a large enough image circle to cover the 44x33mm sensor, which generally shouldn’t be too much of a constraint – the sensor isn’t that much bigger than a full-frame 35mm sensor.
Since I have an XPan I picked up the XPan lens adaptor, which goes for one-tenth of the price of the cheapest dedicated X lens. You can see how this might be a compelling use case for the camera if you have more than a couple of lenses.
The lens doesn’t even need to have a built-in shutter, which the XPan lenses don’t, as using the camera in this way requires you to use the electronic shutter of the digital back. That itself results in some restrictions: your maximum ISO will be 3200, you won’t be able to use flash, and the scanning nature of the shutter means you won’t really be able to shoot anything moving faster than a walking pace.
The main issue you will perhaps see using older lenses is the same as I’ve already mentioned – their quality may not be up to what the 50MP back can capture. Again, do you care? Again, probably not, if you do then pick up one of the dedicated X lenses. A lot of the issues are fixable in post anyway, at least to some degree.
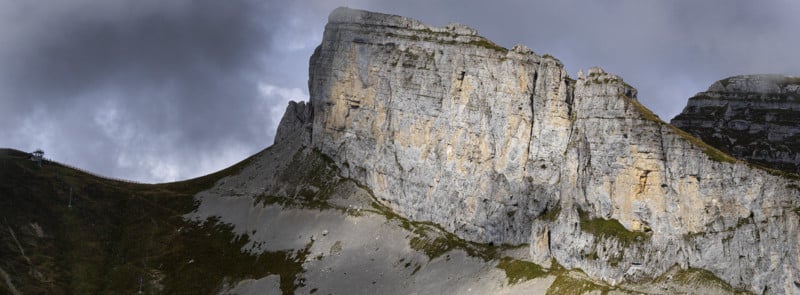
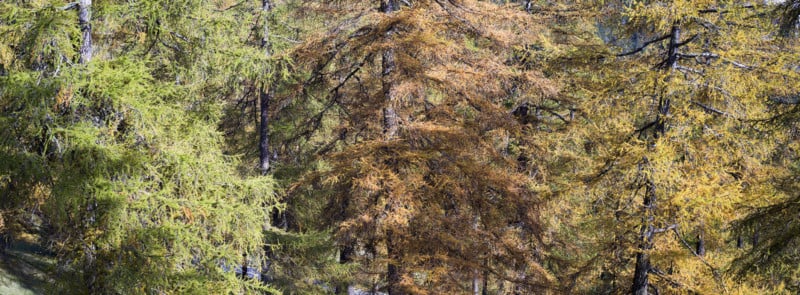
I ended up using this combination, the back + shim + an XPan lens for the first few months with the camera, as I didn’t see the need to purchase an X lens. I had 45mm and 90mm XPan lenses and they seem to work very well. The above image was shot on the Col de Planches, after one of the best years for autumn colors in a long time.

Then I managed to capture the conjunction of Jupiter and Saturn, with an eight-minute-long exposure. This image is cropped for the panoramic format but also cropped more for composition, as the 90mm was too tight and the 45mm was too wide. Despite the heavy crop, this photo printed very nicely at 60cm on the long edge, that resolution proving its worth.
The biggest compromise in using the camera in this way, with old lenses and an adaptor, is the focus flow and shutter scan speed. Since you have to use manual focus, you need to use the 100% view on the screen to confirm focus, or you need to use focus peaking, which may not be good enough for you. So: zoom to 100%, focus, focus, focus some more, zoom back out, compose, shoot. A little cumbersome.
One last image shot after dark, in the rain – the camera is not weather-sealed so I went with a plastic bag. It seemed to do the job. I probably wouldn’t want to use this combination in anything more than very light rain, and not without some sort of protection:

The shutter scan speed is more of a problem. The electronic shutter takes 0.3s to scan across the entire frame, meaning moving subjects are difficult to capture. If you’re using this combination handheld you’re probably going to see artifacts from that. Really you want to put this on a tripod, and as I’ve already said I don’t really work that way. Although to be fair it seems I am increasingly working that way…
Slowest
The CFV II 50c harkens back to the beginnings of photography and the camera obscura: It’s just a thing that can display and optionally record an image. If you can attach it to something that is light tight with an opening on the front, and that something on the front can focus, then you can use it.
That light-tight thing in this case happens to be my Toyo-Field 45AII, a large format camera. These tend to be cumbersome to transport and use, although that depends on your approach. Here I am out snowboarding having taken the camera, tripod, and all the other necessary stuff to shoot an image with this thing. With the exception of the tripod, all this stuff fits in the small green backpack you see. So cumbersome is also relative.
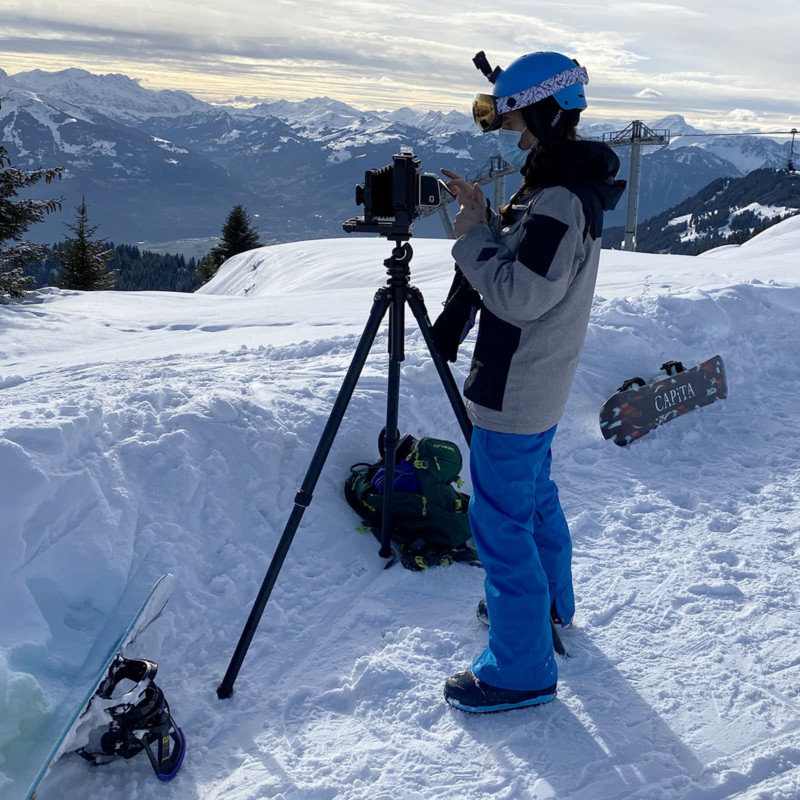
To attach the back to the camera you need an adaptor – in this case, a Graflok compatible adaptor that features an in-built shift control. This is quite nice, since using movements is 99% of the purpose of a large-format camera for me. You focus and compose on the ground glass, get your movements in place, and then replace the ground glass with the adaptor. Unfortunately, the back is slightly recessed so you end up having to refocus: Compromise number one.
And you are only getting a small section of the frame you composed – the back’s sensor is about one-tenth of the area of the 4×5” frame. So your effective focal length is significantly increased. A wide-angle 4×5” lens (say 90mm) becomes a telephoto with the digital back: Compromise number two.
But you can gain some of this back by stitching together images. The image below is made up of nine frames, shot with my 150mm lens and then stitched in post. This is trivial to do with software these days.
The coverage of the frame even with stitching still doesn’t come close to the full 4×5” frame, it’s about 75%: Compromise number three. Note that since the image is stitched the resolution is significantly increased. Not that you really need more resolution here, but there it is.
Stitching seems like a nice solution until you do start to pixel peep, at which point you might find that subtle movements in your, er, movements can lead to changes in the plane of focus and you end up with a final composition that has sharp and unsharp sections. Here’s a 100% crop from the above image, can you see the problems? Where one frame from the stitch was ever so slightly out of focus? This is the problem in using this back with a traditional large format camera, there is enough play in the mechanisms such that when you rise/fall/shift you can introduce subtle errors in focus.
Given the above, you may have realized that getting a wide-angle shot with the back on a 4×5” camera is difficult, and worse is compounded by a final issue – even if you do have wide-angle lenses, and even if you can get enough movement to stitch enough frames to claw back enough of the frame, you’re going to have color fringing issues. 4×5” wide angle lenses are not optimized for digital sensors, it’s pure physics. If you want to have true wide-angle, you will need to purchase digital optimized lenses: Compromise number four. This is correctable in post however, so not a big one.
Oh, and I haven’t yet mentioned diffraction reducing sharpness if you stop down to more than about f/22. Compromise number five.
So yes, it seems using this back with an adaptor on any existing film 4×5” kit you have is going to be one long list of compromises. So will I continue to do it? Almost certainly. Using a 4×5” kit with film is already a long list of compromises, not least of which is the ever-increasing expense in shooting film. A box of 20 sheets of Velvia is now selling for about $100+. If I save ten boxes in using the back here I’ve already covered one-third of the cost of the Hasselblad setup3. That is pretty compelling.
So What Next?
I will probably shoot far less film than I used to, although this has never been an issue. The camera to me is a tool to inform your approach, the medium it records on is not really important. The approach with this camera is different from others, and that is the reason to use it.
There will be many who don’t see the point of this camera, and state that any of the above images could have been shot on another with far fewer compromises and far more advantages. Well yes: just look at the top image in this blog post and then the one I link to in the second paragraph, which was shot on an iPhone 5C. The same place, the same composition, the same idea. In fact, I think the photo shot on the iPhone is better. If you don’t understand why then you’re probably more of a technologist than a photographer, you’re looking hard but at all the wrong things.
The reality of using this setup is one of the compromises. Lots in some ways, few in others. But it’s another way of seeing, and that should be embraced. Another reality of that this setup is the huge benefit if you are already invested in a Hasselblad system (V/H/Xpan/X), a view camera, or some other system that would work with it. Or if you plan to be invested in one of those. If you’re not invested and don’t plan to be, then the compromises don’t outweigh the benefits and you probably want to look elsewhere.
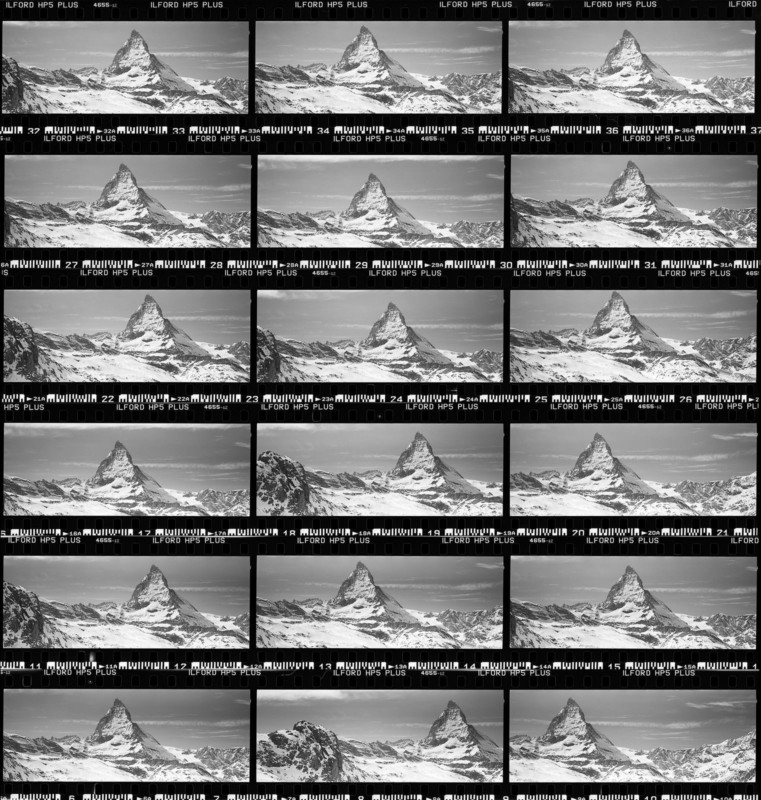
I will still happily burn through an entire roll of film, at least in smaller formats, in a couple of minutes on a single shot if necessary; like the one below, when we returned to Zermatt for a sixth time in March 2021. I was snowboarding around Zermatt’s pistes, with my XPan around my neck – something I’m not quite ready to do with the 907x/CFV II 50c…
1 Originally I had the word “traditional” in quotes here, trying to emphasize that I’m referring to what most people think of as landscape photography. The landscape has changed significantly since the time of Adams, et al, and the photography of the landscape should probably reflect that. Even Adams would occasionally include human elements in his photographs.
And of course a lot of that changed in the 70s/80s with Shore, Sternfeld, et al, who shot the landscape with large format, intentionally included many human elements, even visiting the places Adams had to show what they now looked like. You can’t shoot this kind of photo now without referencing them, who in turn were referencing those who came before.
My maths isn’t bad here: 20 sheets of Velvia: 100 Swiss Francs (where I live). Cost of developing 20 sheets: 124 CHF. That’s 224 CHF (~$250) in total. So the cost of this camera is (currently) equivalent to about 600 sheets of 4×5” Fuji Velvia + development costs. A film that’s probably going to be much more expensive soon, if not discontinued.
About the author: Lee Johnson is a photographer and software developer based in Switzerland. The opinions expressed in this article are solely those of the author. Johnson has been a contributing photographer to several print and online magazines in the past and is now working on a few long-term photographic projects. You can find more of his work on GitHub, Twitter, Facebook, and Instagram. This article was also published here.
Image credits: Header photo “Concrete Chocolate Mountain, Oct 2020. Xpan 45mm/907x”