Creating a ‘Time-Blend’ to Enhance the Drama in Your Landscape Photography
In my last article, I wrote in depth about my emotional connection to the subjects that I photograph and my artistic process in creating imagery. As I said before, to me photography is much more than capturing a single moment in time. I want to portray the sensory experiences that I have when I am immersed in nature or wilderness and pour that into an image that tells a story related to those experiences.
On Location
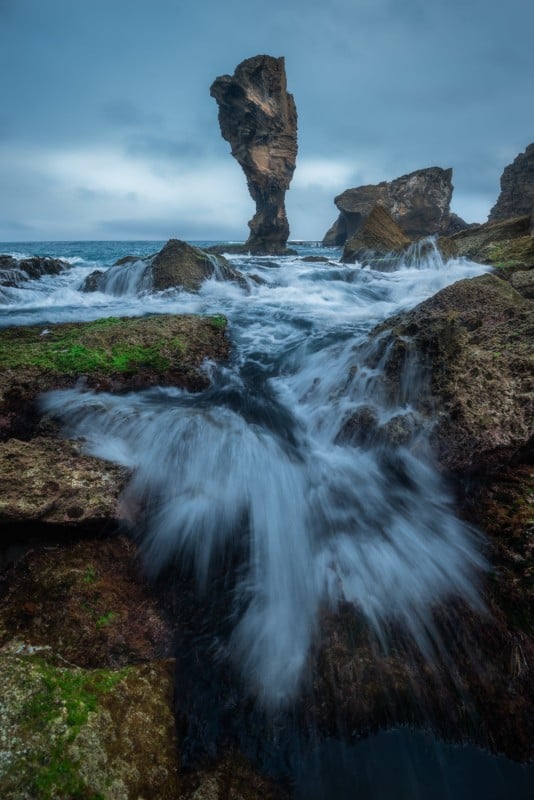
This image was captured early in 2020 along the coast of Southern Australia. The area is a geological marvel, with limestone cliffs blanketing the coastline, the ocean steadily eroding the rock, creating massive sea stacks and spires that jut out of the water.
The particular location in this image requires a short hike along the coast to reach the secluded inlet where the rock that is the main subject of my composition rises out of the ocean, unbelievably retaining its structure while the ocean pounds away at its ever-narrowing trunk. Because of its shape, it makes a striking focal point for this composition.
On this day, I had the spot all to myself and the only sounds to disrupt the surrounding silence were the crashing of the relentless waves on the rock. It was a foggy, dark, and moody type of morning as I scrambled down an embankment to situate myself on the slippery rocks below.
As I set up the composition, I thought about the story I wanted to tell and began to conceptualize a final image. I wanted to showcase the relentless quality of the ocean and its impact on the surrounding sea stacks. Although the rock is resilient and its refusal to give in to the water can create beauty like that seen in this image, the ocean’s victory is inevitable.
Composition
The composition I picked out here is meant to accentuate the drama and power of the ocean. The light was flat and uninteresting, and so I chose to focus all the ‘action’ of the image into the motion of the water. In order to do that, I positioned the camera very close to the ground, about a foot above the water.
This puts the foreground of the composition right in the face of the viewer, with the intention of pulling the eyes through the scene and creating a sensory experience. If I had positioned the camera at eye height, I would not have been able to capture the same drama and action in the tidal motion, creating a less engaging image.
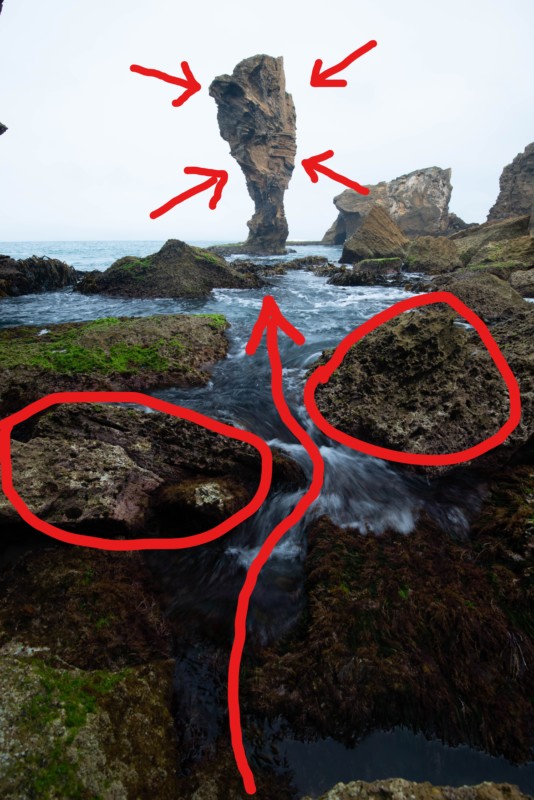
Additionally, I found these two large, encrusted and textured rocks that I positioned on either side of the frame to build a natural ‘pathway’ to the balanced sea stack beyond, the final and central focal point of the image. I was also watching the tide come in and out for a while before choosing this spot, as I noticed how the incoming waves would fill the space between the two rocks, creating a motion and action that created additional lead-in to the sea stack.
Settings
Now, let’s talk camera settings.
For this image, I was using a 16-35mm F/4 lens. This is a classic wide-angle composition, with a big, in-your-face foreground meant to attract the viewer’s initial attentions. Because of the physics of a wide-angle lens, at 16mm, subjects close to the camera appear larger than to the human eye, and subjects farther from the camera appear to be even more distant. It creates an elongating effect that can either be an advantage or detriment to the photographer, depending on the situation and subject matter.
In this image, I shot at 16mm to use this effect to build up the drama in the foreground, and the main subject (the sea stack) is close enough to the camera to remain impactful at this wide angle.
Normally, I shoot most of my landscape images in aperture priority mode, letting the depth-of-field that I desire dictate my shutter speed. These concepts are part of the ‘exposure triangle’ that is one of the fundamental pillars of photography and essential in learning how to use a camera.
If you are unfamiliar with the term, an internet search should produce a bunch of great articles that can be helpful in learning some foundational concepts to use in your own photography. However, in this instance, shutter speed was of equal importance to aperture. For that reason, I chose to shoot in manual mode.
After some test shots, I determined that I needed an aperture of F/11 to get the entire frame in focus because of the proximity of the foreground to the camera.
However, at F/11, I was getting slightly too long of a shutter speed to my liking. For this image, I desired a certain level of detail in the motion of the water in order to exemplify the drama, speed, and strength of the ocean in the scene. So, switching to manual mode, I underexposed the scene a bit in order to get a desirable shutter speed of 1/13 of a second that gave me just the right balance of motion-blur and detail in the water that I wanted.
‘Time-Blending’
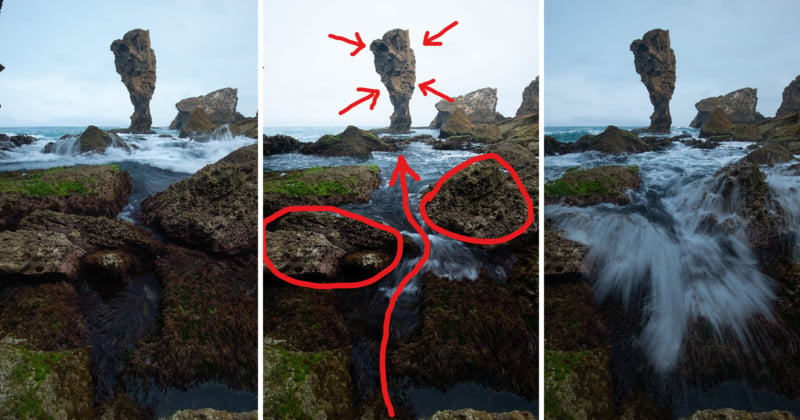
First, why I employed a ‘time-blending’ technique in this image is just as important as how it is done. While I was composing, I noticed that the way the tide was crashing over the rocks in my frame, the action and motion in the water was not happening all at the same time.
I wanted to encompass the full drama and mood of the ocean I saw and experienced in person within a single image.
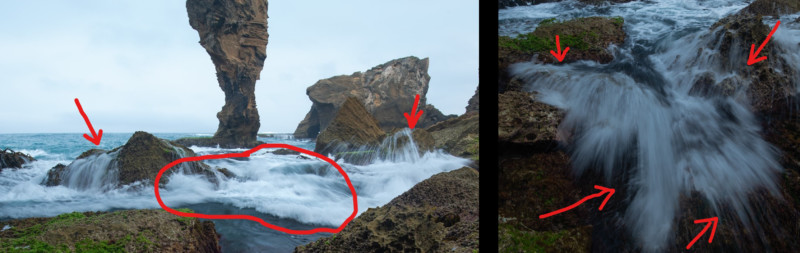
In order to show the tidal motion in the midground as well as the foreground, I would need to combine two different images to do so. Additionally, because of the close proximity in time of a wave hitting the midground rocks and its impact on the foreground rocks where I had positioned my camera, it was necessary to shoot in continuous mode on the camera in order to capture both impacts, firing off several shots within less than a second.
To do this, I used an external shutter-release, an inexpensive camera accessory that plugs in to the camera body and enables you to press and hold the shutter down, taking continuous exposures until the button is released without having to worry about shake from your hand on the camera body.
Using the shutter release, I took dozens of images before I found the perfect wave action that I had been looking to capture:
This was exactly what I was looking for and it created that drama and lead-in effect that I wanted to show in a final image.
Post-Processing
It can be difficult to conceptualize an image like this in the field that combines two or more exposures. It does not come to full fruition until you piece the exposures together in post-processing to get that final image that you will do final adjustments and edits upon.
Because of this, it can take practice and imagination to visualize the final product in the field.
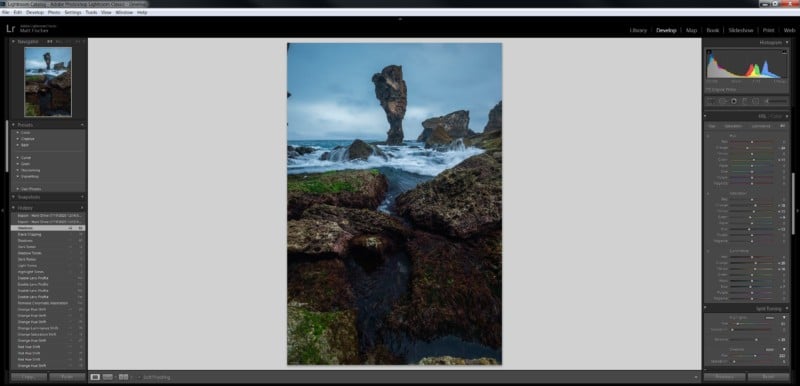
My post-processing workflow almost always consists of initial ‘global’ edits to images in Adobe Lightroom, before bringing the images into Photoshop for ‘local’ adjustments and fine-tuning before reaching a final product.
When I am working on a ‘time-blended’ image, my first steps are to synchronize exposures and white balances in the images that are to be combined. While in the field, I made the mistake of having my camera’s bracketing setting on, meaning that the two images here had slightly different shutter speeds and exposures. Because of that, I had to alter the exposures so that they matched.
I also cooled the white balance significantly, added contrast, and made some HSL slider adjustments in both images to enhance the bleak, stormy, and angry mood that I wanted:
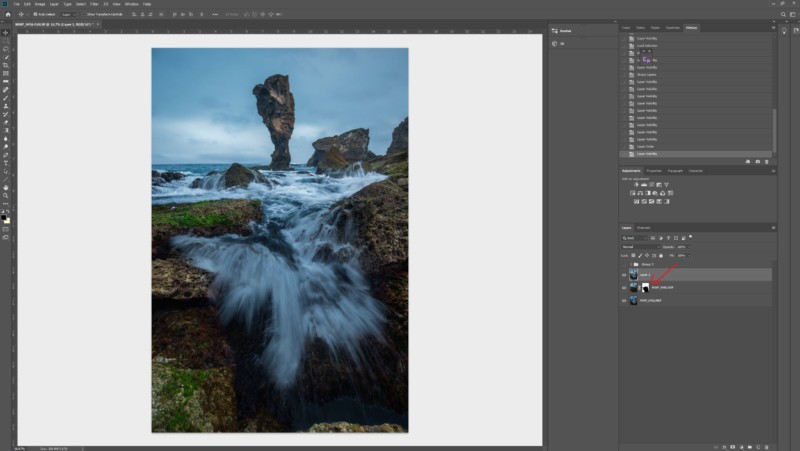
At this point, I was ready to import the images into Photoshop by selecting both, right-clicking, and selecting ‘Open as Layers in Photoshop.’
This provides the opportunity to combine the two images using layer masks. But before I can do that, I need to make sure that the images are aligned perfectly. Even while using a tripod, two exposures can alter slightly if the tripod was moved the tiniest amount whether because it was knocked into, moved in the wind, or shifted by the ocean current.
To do this, I use the ‘Edit’ Dropdown in the toolbar and select ‘Auto-align layers’ and I let Photoshop render this function using its auto settings. Sometimes, if the two images have more than negligible differences, the auto-align function may not work as well. So, I always check the differences by changing the blending mode of the top layer to ‘Difference’ which will show the areas where the two images differ in white.
If necessary, I will manually align them by moving one’s position, or slightly warping it (usually necessary when focus stacking as widely differing focal points can slightly alter the focal length of your lens; but that is a different subject for a different time).
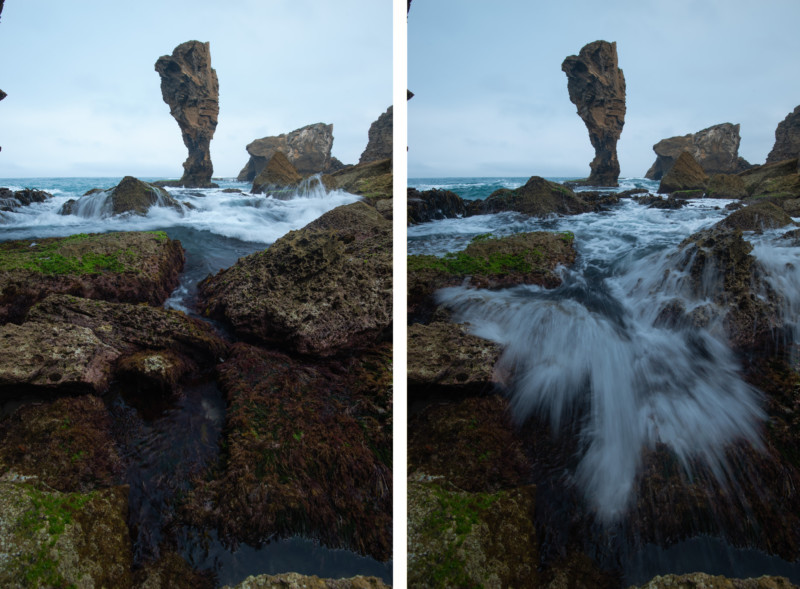
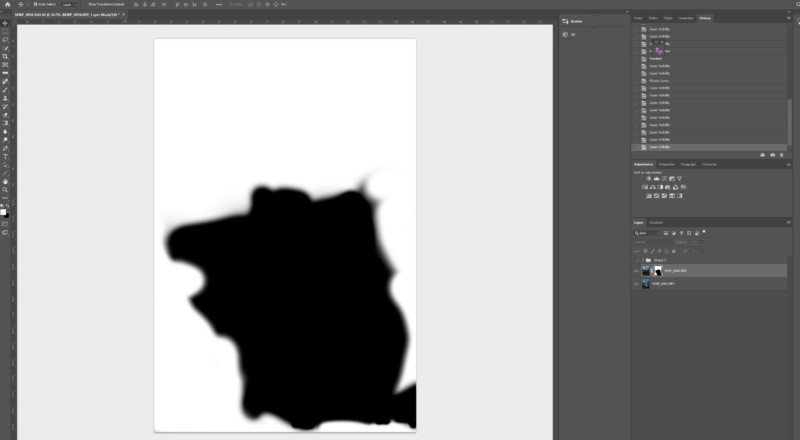
Now, the fun part. Once properly aligned, I add a layer mask to the top exposure (my baseline image). On this occasion, this was the first exposure taken as that will be what I will use for the majority of my image. The second exposure will be used in the foreground wave action.
With the layer mask selected, I use a 0% hardness, black brush and paint over the areas where the foreground water motion is in the second image, revealing that portion of the lower layer, creating a combination of the two exposures in one final ‘time-blended’ exposure:
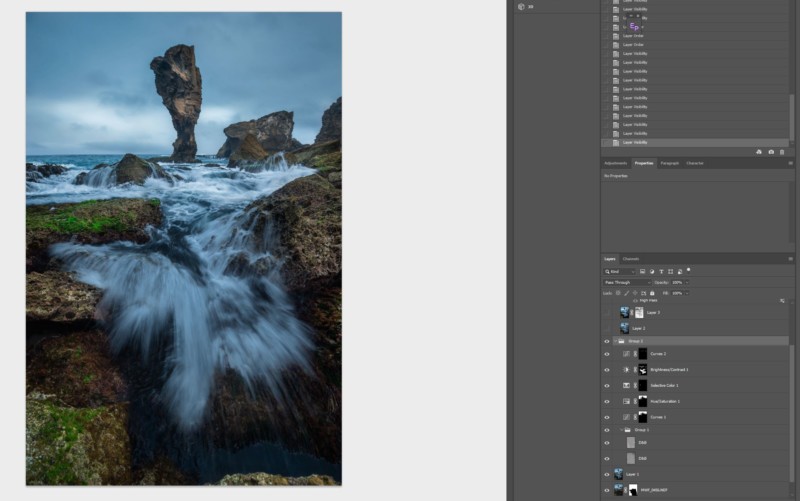
Once I am satisfied with the layer mask, I merge all layers (Ctrl/Cmd + Shift + Alt +E) for final adjustments.
After some local and selective contrast, color, and dodging and burning adjustments, we have our final image!
Hopefully, this article was educational and gave you some ideas of your own on how to compose in the field while visualizing a final image. This technique is not applicable in all situations, but it can be used effectively to tell an impactful story in many environments.
About the author: Matt Fischer is a wilderness and landscape photographer from West Chester, Pennsylvania. His passion for preserving the beautiful, wild and untouched landscapes of the world are a driving force in the emotional connections to the natural world that he aims to cultivate through his imagery.
You can find more of his portfolio and content at www.GoneFisching.com or on Instagram at @mattfischer_photo. This article was also published here.