Beginner’s Guide to Focus Stacking for Macro Photography
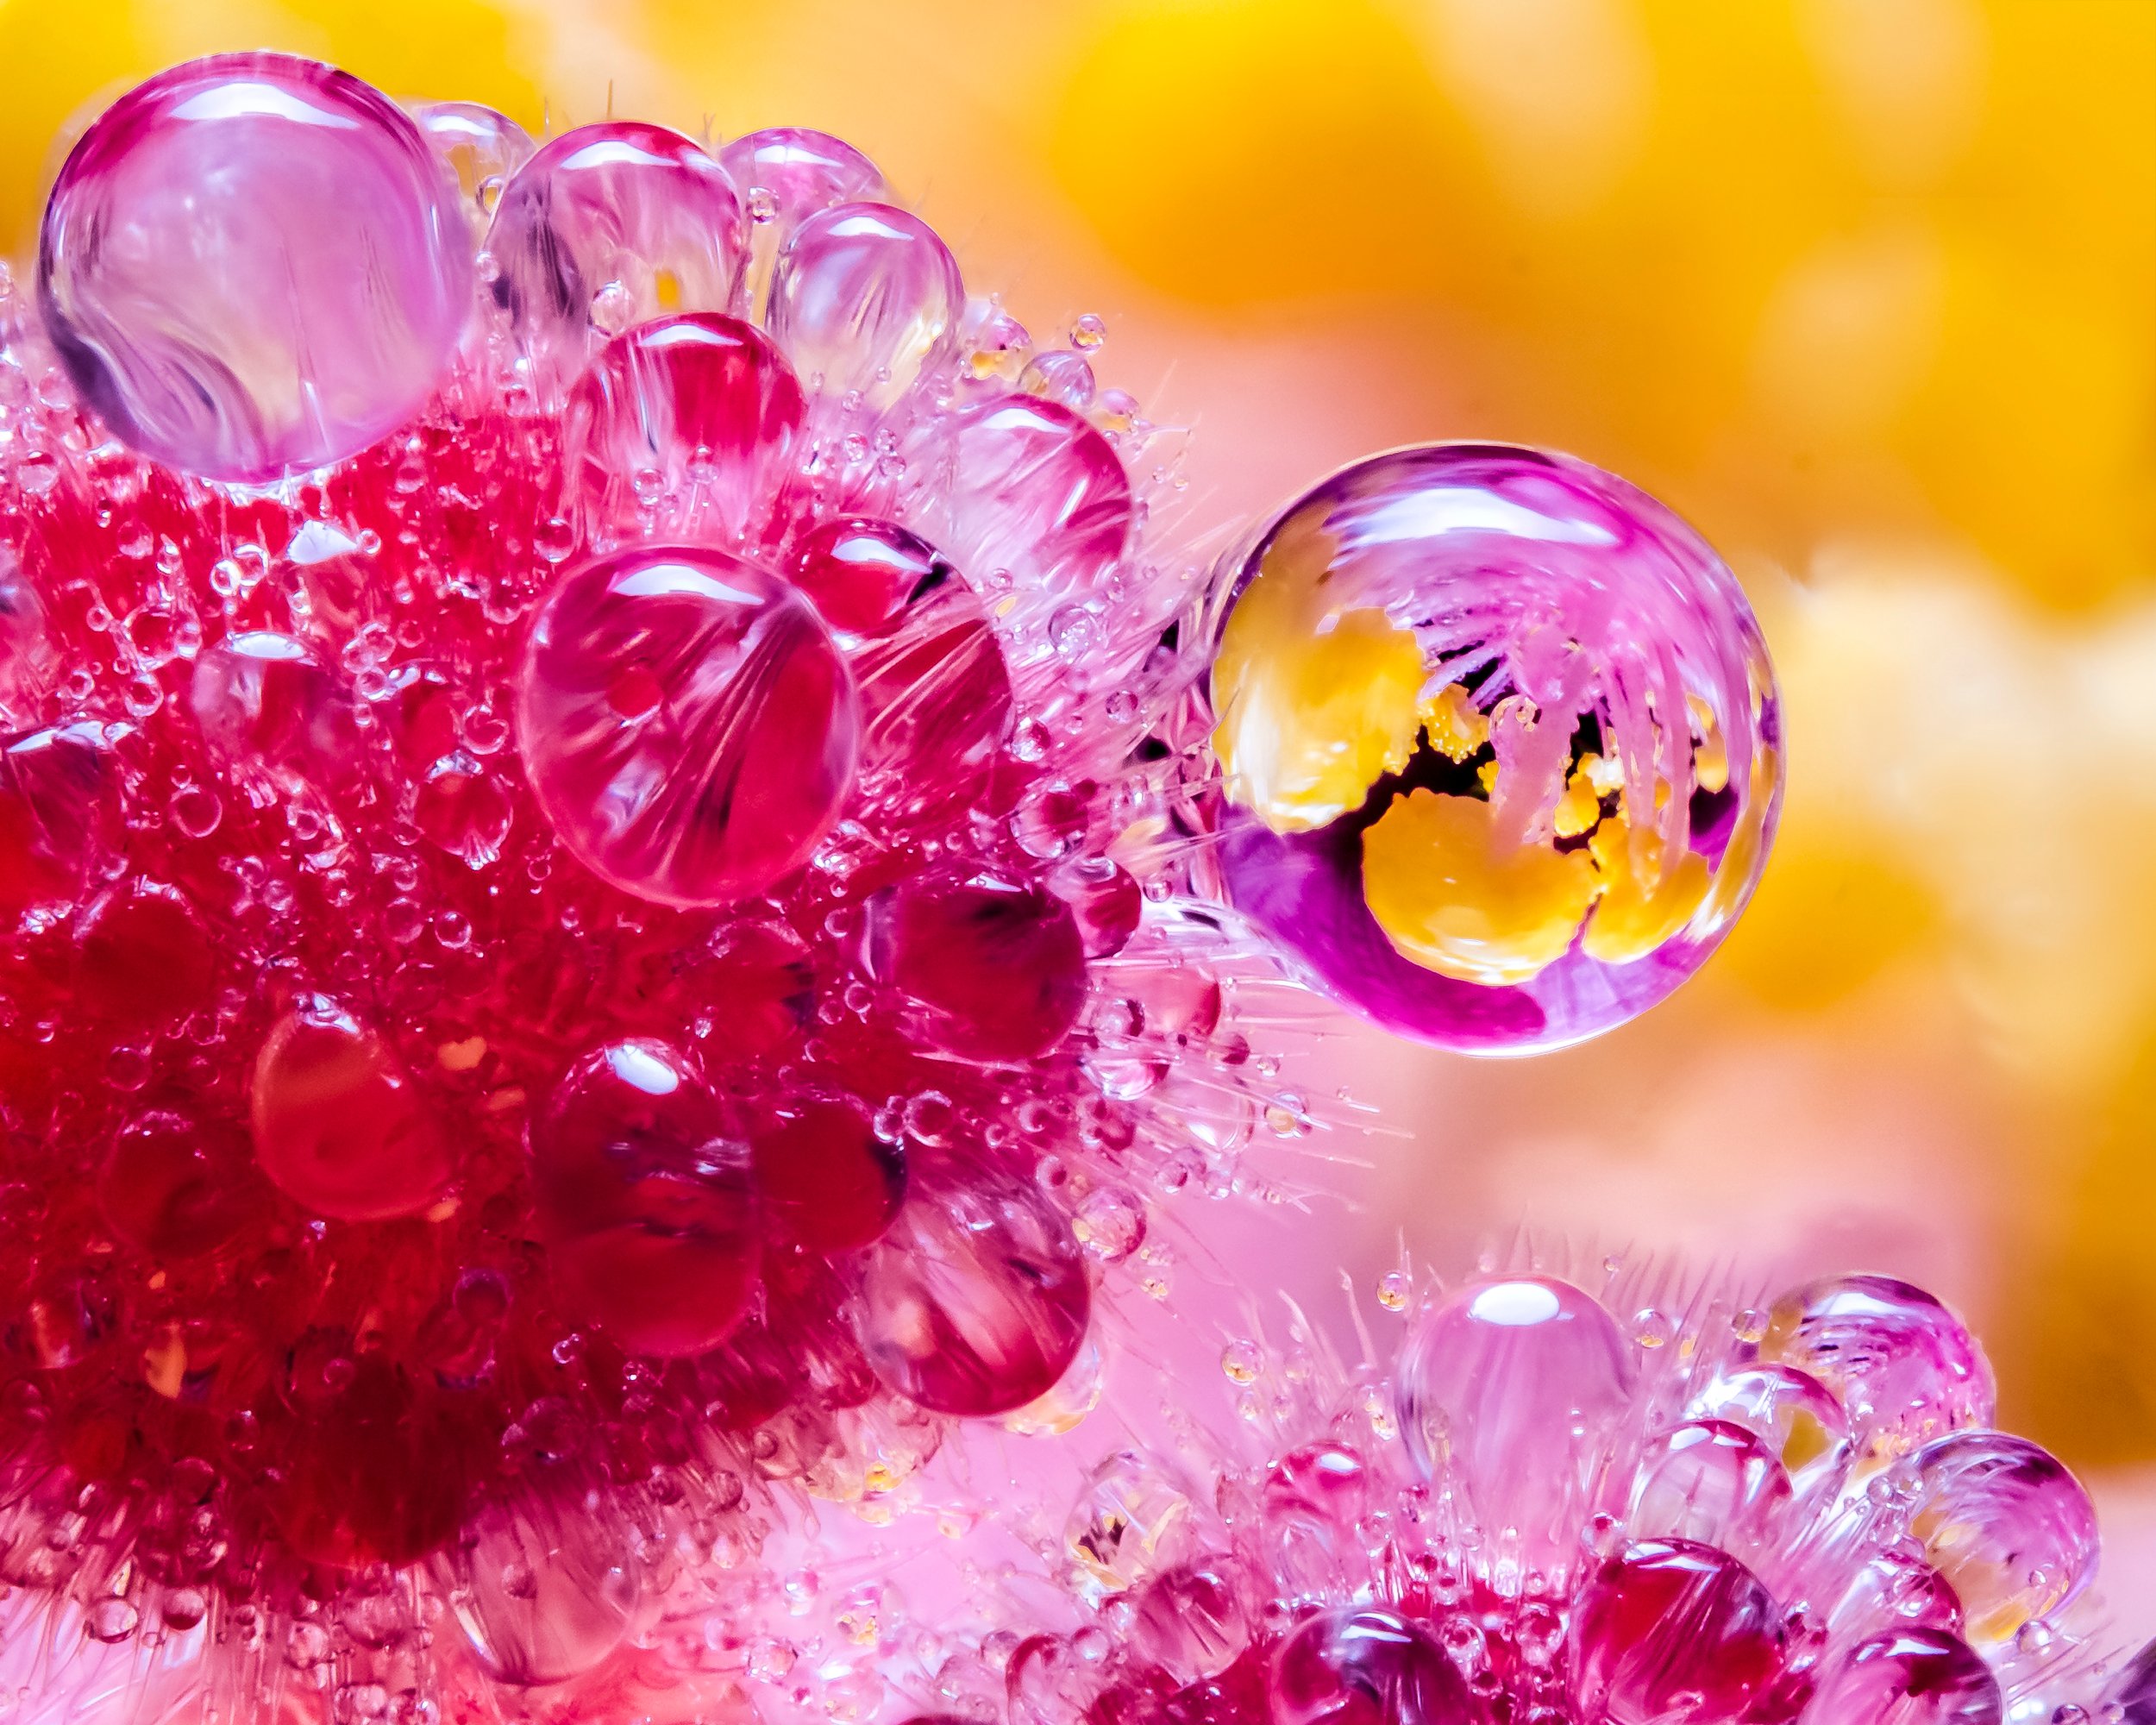
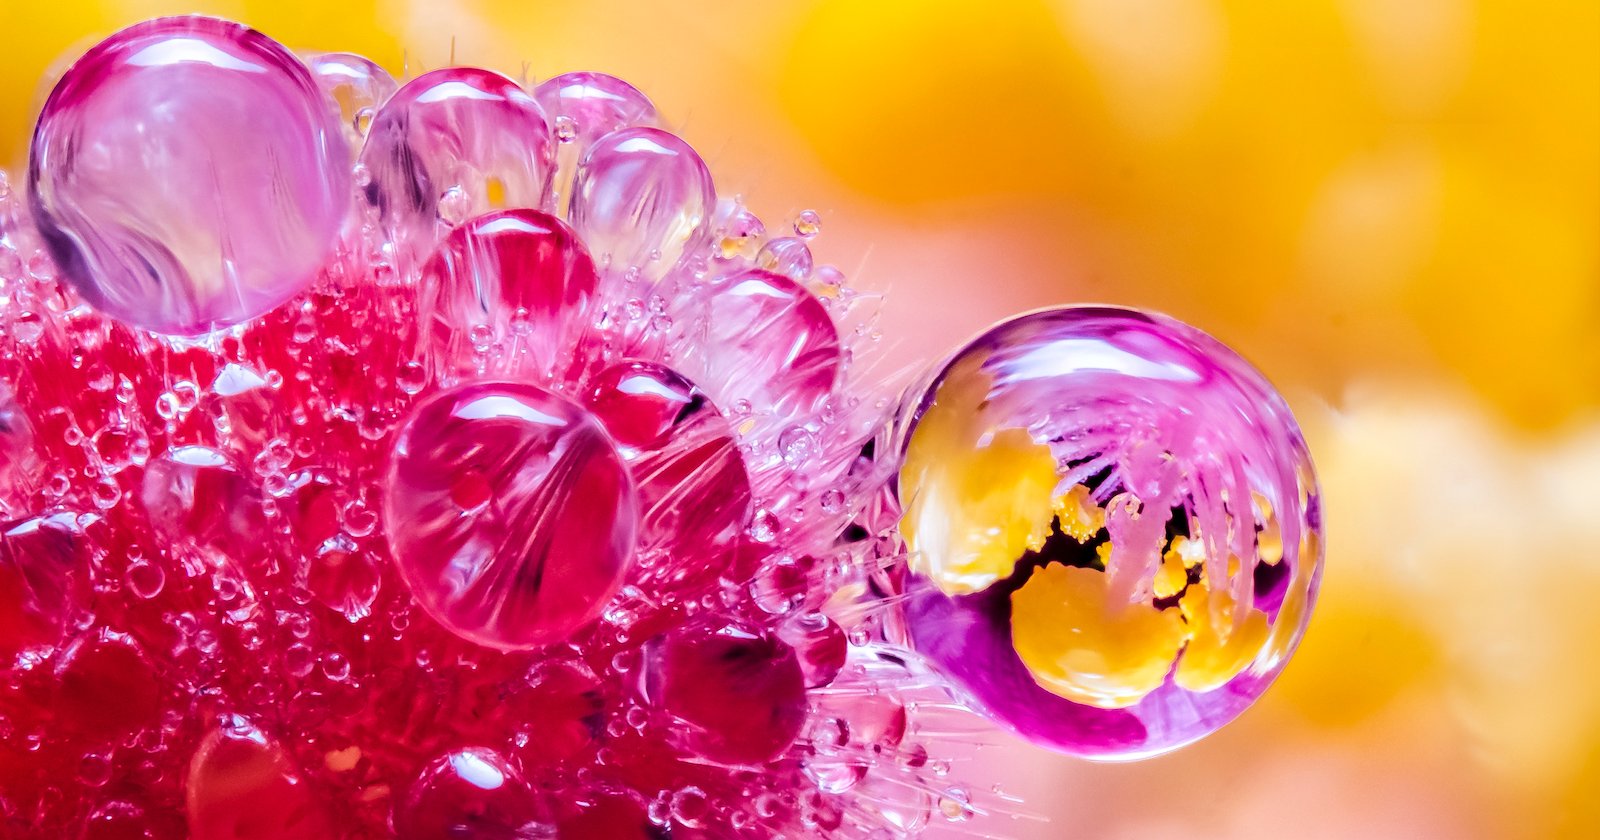
One of the greatest challenges in macro photography is the depth of field, or DOF for short. Not only does the zone of sharpness drastically fall off as we get closer to our subjects, other factors such as the lack of light and diffraction softening make it tricky to use narrow apertures on top of that.
At a magnification ratio of 1:1, it is already impossible to get the entire scene in focus unless you are photographing your stamp collection, and it only gets worse as we increase the magnification ratio.

The DOF-Challenge and Its Solution
The reason for that is, as mentioned above, the very nature of optics: the closer a subject is to the lens, the shallower the depth of field is going to be. This can be counteracted by a narrow aperture, which cancels out a large portion of the light cone in order to decrease the fall-off in sharpness.
But this only works to a certain degree. If the aperture opening becomes too narrow, light waves begin to bend and soften the image. This phenomenon is called diffraction. Luckily, there is a technique called Focus Stacking, that allows us to work around this challenge by combining multiple images.
Focus Stacking
As the name suggests, focus stacking is a technique where you take multiple photos of the same subject, but at slightly different focusing distances, and “stack” them. When we merge these images in post processing, we produce one overall sharp image where the whole frame is in focus. Many landscape photographers like using this method to get both their foreground and far background in focus, but it’s especially useful for macro photography.
The basic idea is to mount your camera on a tripod, compose the shot, and then take a sequence of images while slightly shifting focus between shots.
When it comes to performing a focus stack there are quite a few ways to do it, so let’s have a look!
Option 1: Manually shifting focus
This works best in live-view at full zoom or with focus peaking enabled. The advantage of this technique is that you won’t need any additional equipment besides your camera and a tripod, so this is perfect if you are just starting out and want to get a feel for it.
The downside of this technique is that, depending on your lens, it can require a good amount of cropping. Some lenses change their focal length as you shift focus (focus breathing) and your final image can only be as large as the smallest image in the stack:
Option 2: Manual focusing rail
One of the big advantages of using manual focusing rails is the avoidance of focus breathing. They also make it easier to execute a consistent step size.
Manual focus sliders are quite affordable, but please don’t buy the cheapest one you can find on eBay—the $20 models are constructed quite poorly and have very “wobbly” performance. Manual focus sliders are easy to bring into the field and work well enough for magnification ratios up to 5x.
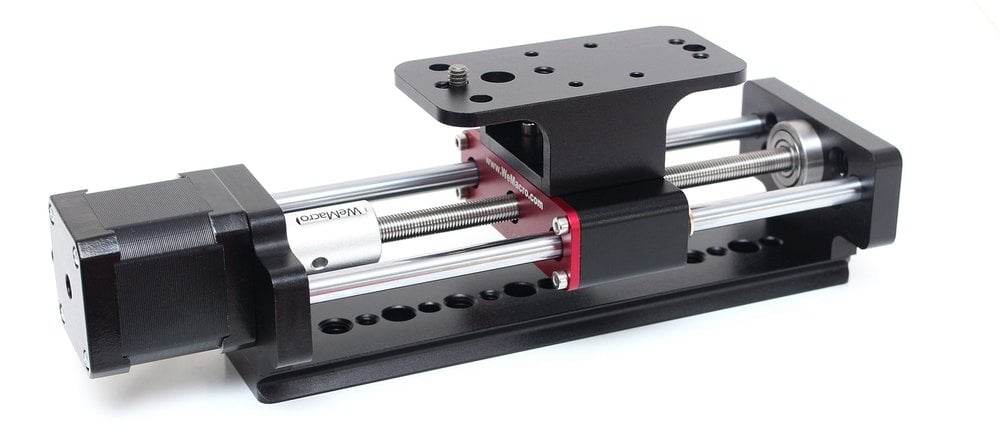
Option 3: Automated focusing rail
This is the most advanced option: step sizes are electronically controlled, and you’re all-but-guaranteed a perfect stack.
Such sliders can be found as DIY Kits or as pre-assembled products, and typically start at a price point of around $200. There are also DIY instructions on the web, in case you feel crafty. A great rail that many macro photographers recommend is the Wemacro focusing slider.
Option 4: Automated stacking in-camera
Some cameras come with an internal focus stacking function, which allows you to define the start and end point of your stack, and the number of images you want it to take. Many Olympus cameras have this feature and most Canon DSLRs can obtain it by installing the third party Magic Lantern firmware (at your own risk).
In-camera focus stacking is a brilliant feature, as it allows to precisely control the step size between frames and doesn’t require any additional equipment. Unfortunately, this only works for electronically controlled lenses.
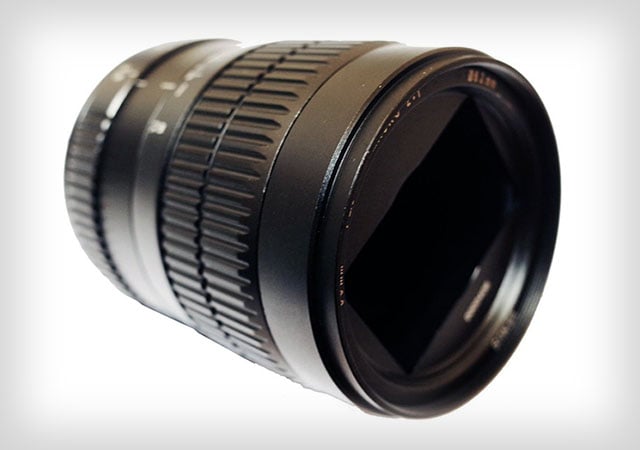
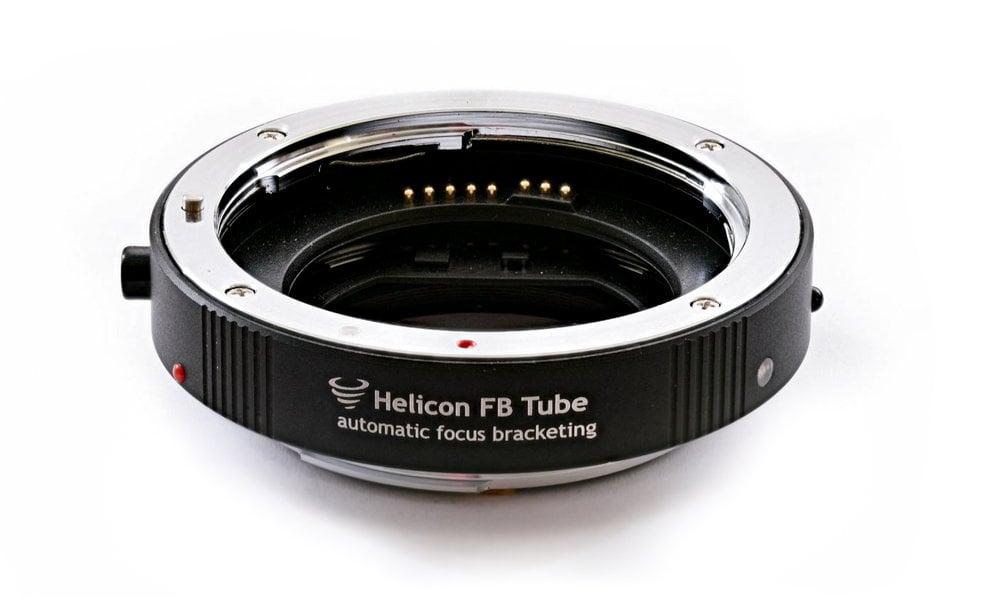
Option 5: The Helicon Tube
The Helicon Tube is a specialized extension tube that enables your camera to perform automated and software-controlled stacks. Conveniently, it’s brought to you by Helicon, one of the leading focus stacking software producers in the industry.
This is an ideal solution, that unfortunately only works for electronically controlled lenses.
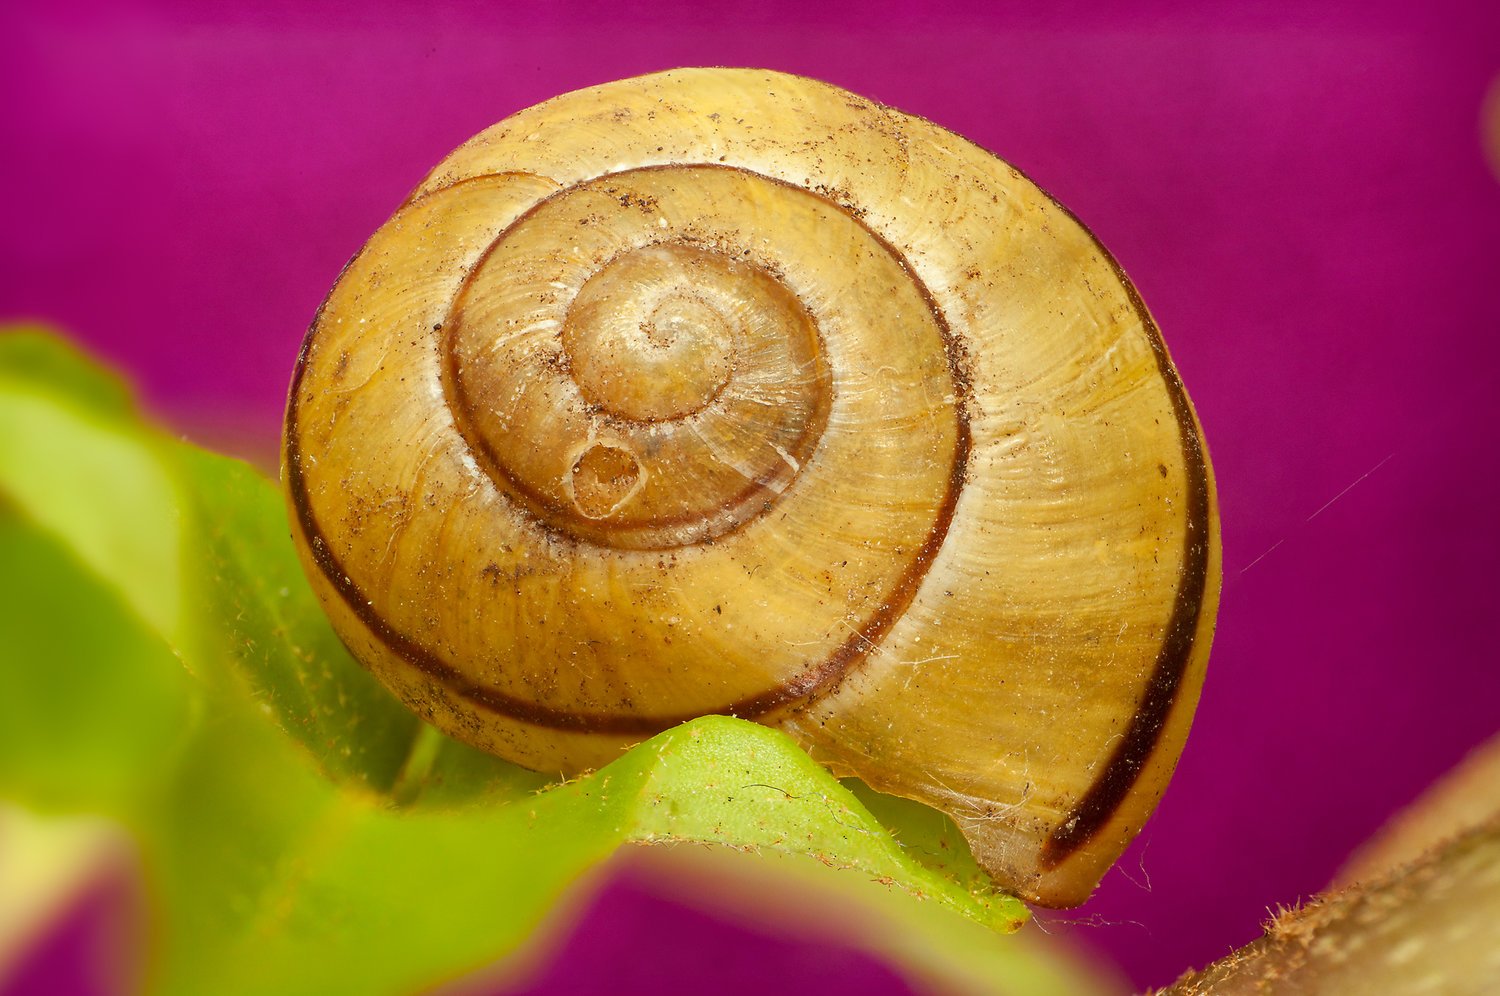
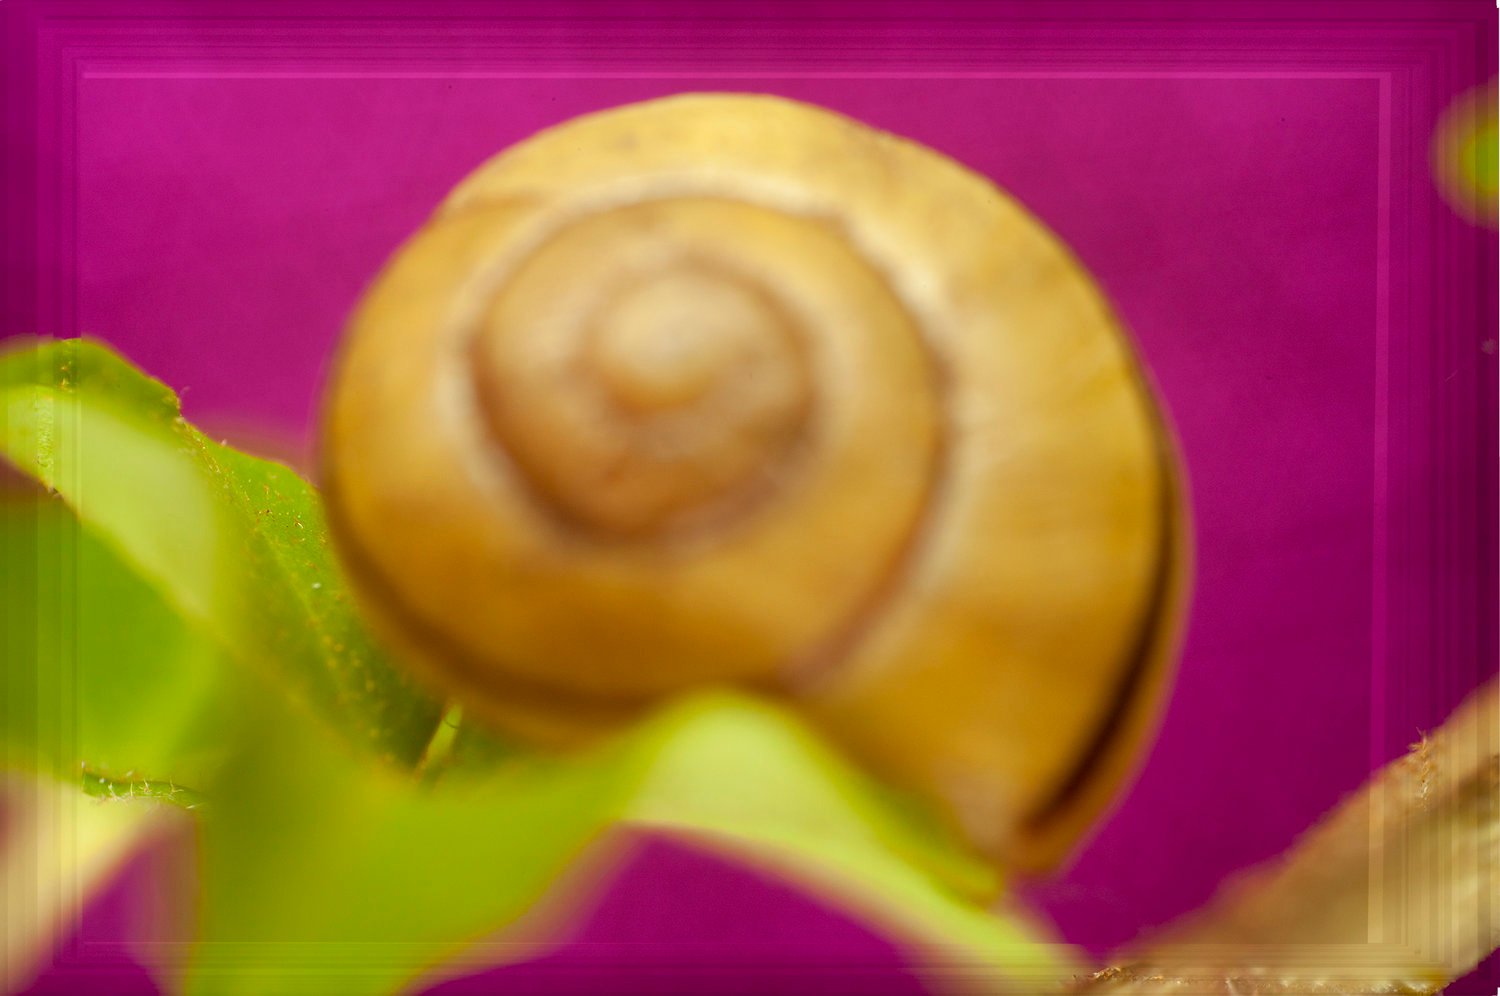
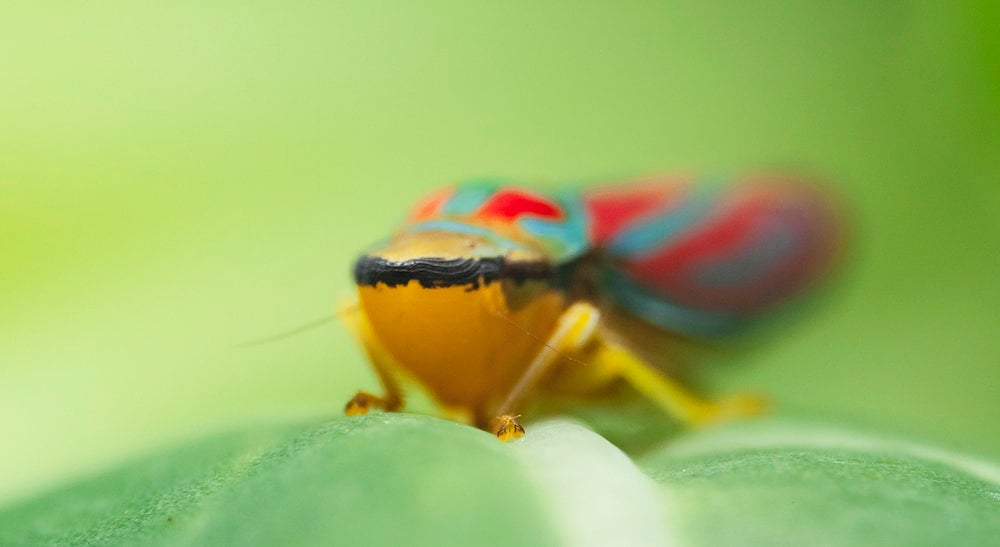
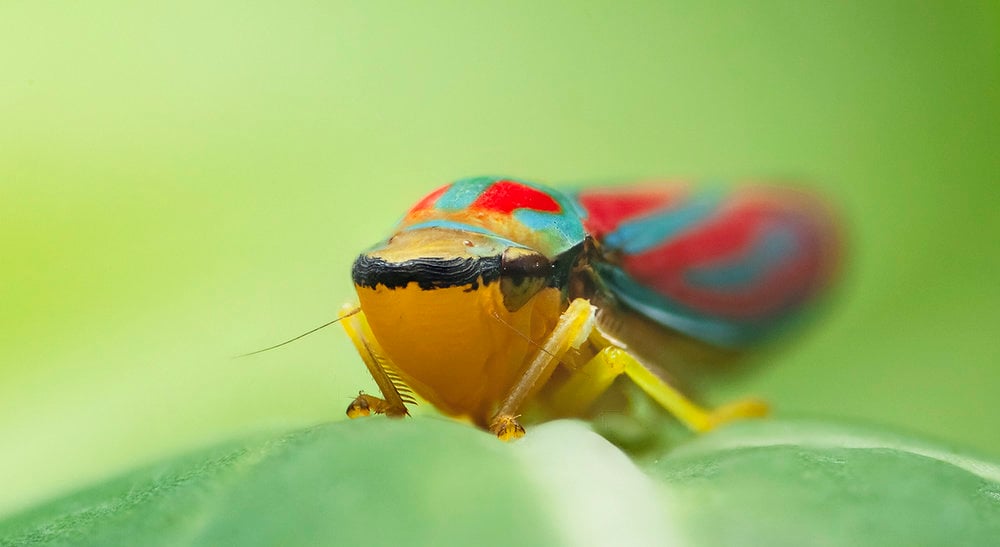
Option 6: Handheld stacking
Handheld focus stacking is another way to create stacks without additional equipment. It takes a fair bit of practice and post-production, but it rewards you with a maximum of flexibility and images you wouldn’t be able to take otherwise.
Unlike all of the other methods mentioned above, this one does not require a tripod, which makes it ideal for insects that won’t stand still for long. This candy striped leaf-hopper is a good example; compare the images before and after focus stacking the scene:
These are a lot of different techniques to choose from, and which one is the right for you really boils down to what you are photographing and your personal preference.
Before You Start Stacking
Before you take a focus stack, please read over this checklist for best results:
- Make sure your batteries are charged and you’ve got enough space on your memory card.
- Compose your shot whilst focus on the very end of the zone you’d like to stack. Your final image will only be as large as the image focused the furthest away from the camera.
- Use live-view at full zoom. If you’re using a camera that doesn’t have live-view, start stacking before the zone of focus and finish beyond it. It is easy to get tricked by the viewfinder, and if you miss just one shot, the entire stack might be useless.
- Use a self-timer or, even better, a remote control/intervalometer to avoid camera shake.
- Use the sensor-cleaning function of your camera to avoid dirt specs in your photos. Automated focus stacking typically renders all of these into the final image.
After You Completed Your Stack
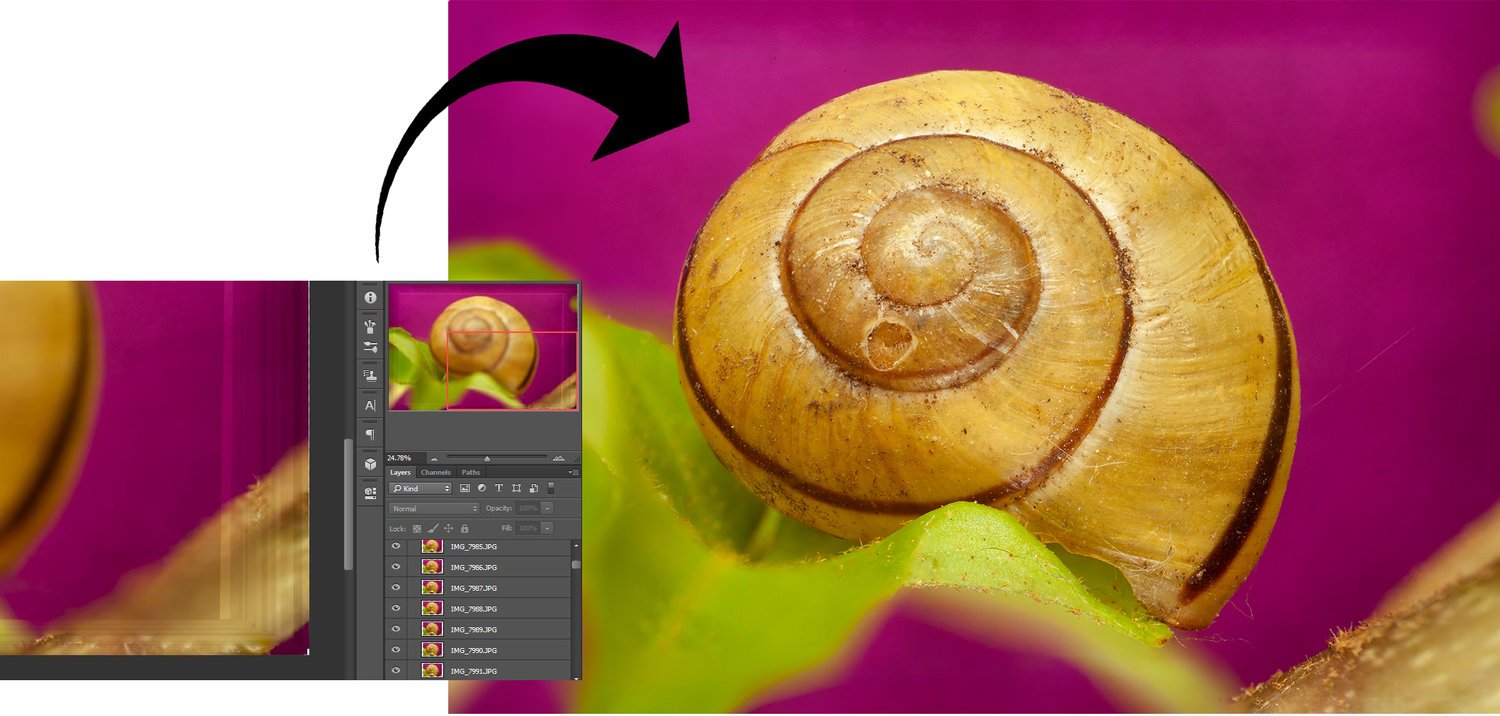
Once you have all the images you need, it is time to stack them together. If your camera doesn’t support in-camera stacking you will have to use a computer for this task.
There is a variety of specialized software available. Helicon Focus and Zerene are two of the most popular tools, and both work very well. Both are great pieces of software, particularly Helicon software used alongside the Helicon Tube, because they make automated focus stacking easy.
Nevertheless, I personally prefer Photoshop. It has a great built-in stacking function and countless other tools that allow more control and fine tuning. Especially for handheld focus stacking, PS is the ideal application. To learn more about focus stacking in Photoshop, read the follow-up article here.