How We Made a Mobile Darkroom for a Homemade 16×20″ Camera
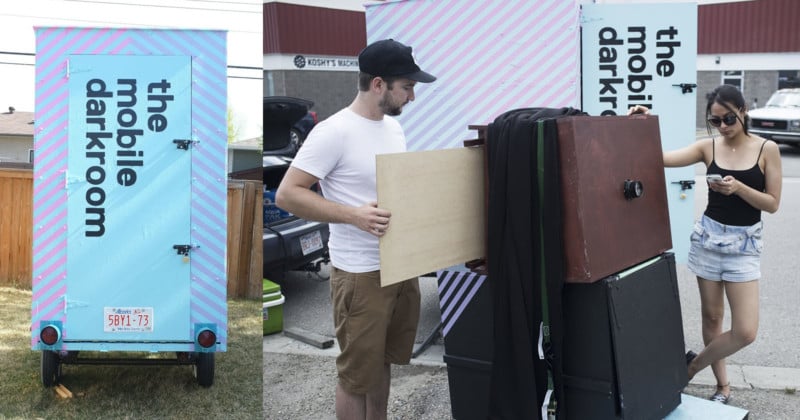
In December 2015, Shane Arsenault and I had started talking about a joint photography project with the purpose of using his 16”x20” Bellows Camera on a larger scale, which would give us the freedom to work outside a conventional studio space.
With the intention of getting out of the studio and photographing the beautiful Alberta landscape, we set a goal: a fully functioning and easily transportable darkroom to develop the images shot with the camera on location.
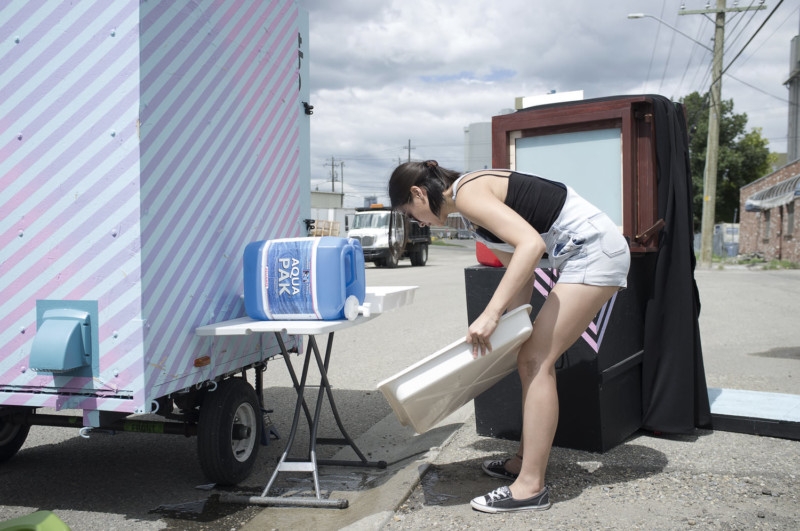
We started by creating a list of things that the darkroom would store while keeping in mind the weight limit on the axel. This would include but is not be limited to: the camera, photo paper, chemistry, 4 chemistry trays, and water. We also had to consider ourselves when calculating the weight limit, since we would be inside the darkroom while developing.
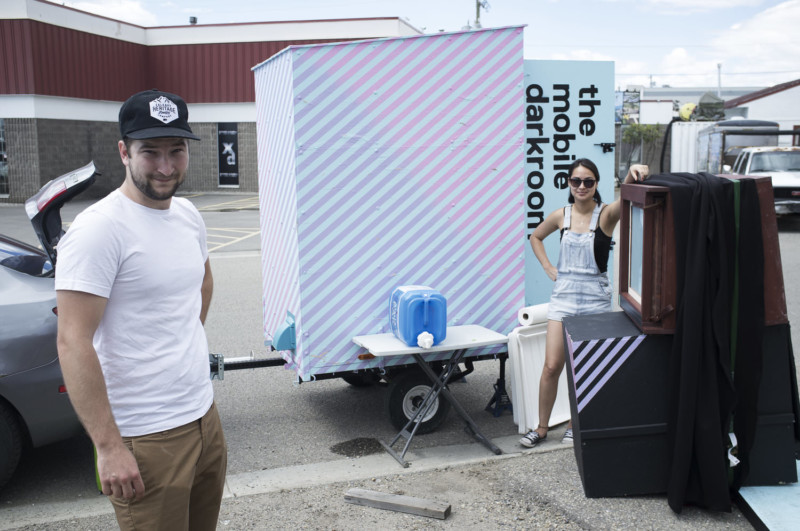
After much consideration and thoughtful planning, we bought a second-hand trailer for $80 and a pack of beer in February of 2016. It was in bad shape but good enough condition to build on.
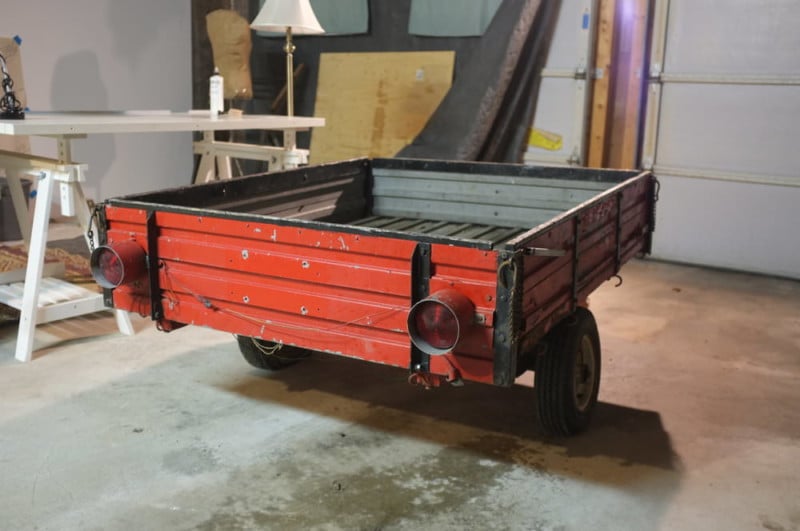
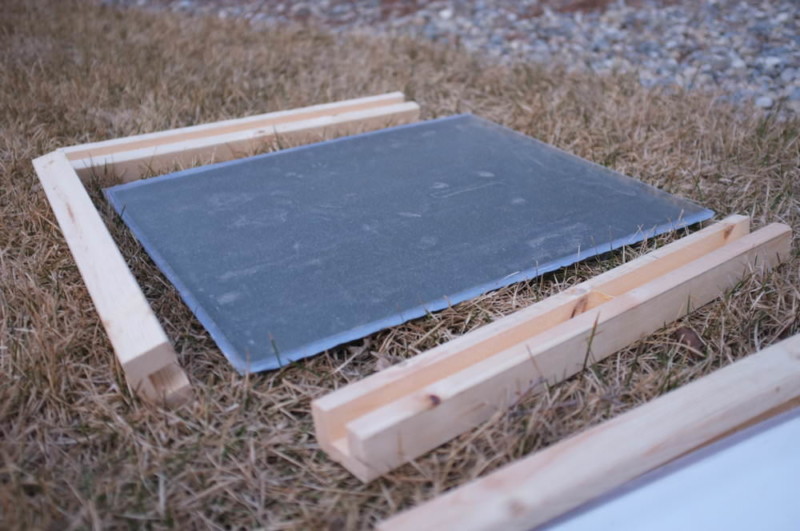
The axel was badly dented and had been clearly neglected for many years. We stripped the trailer of any unnecessary material and set up the foundation with a new axel and sub-floor.
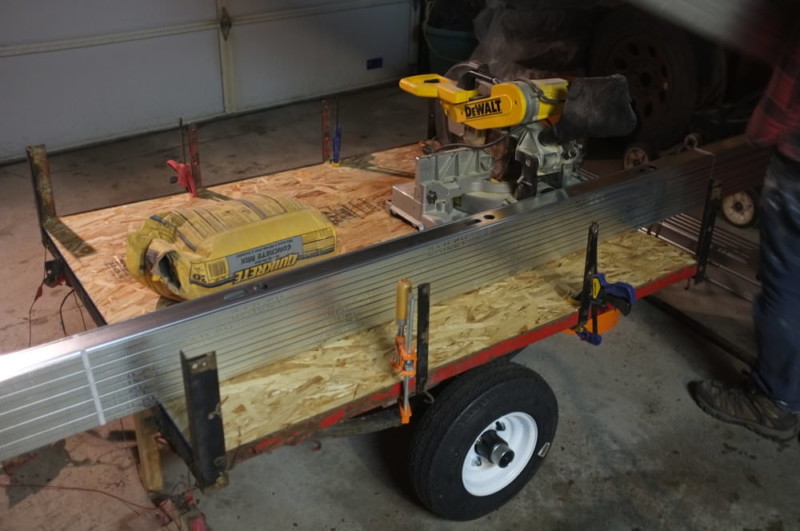
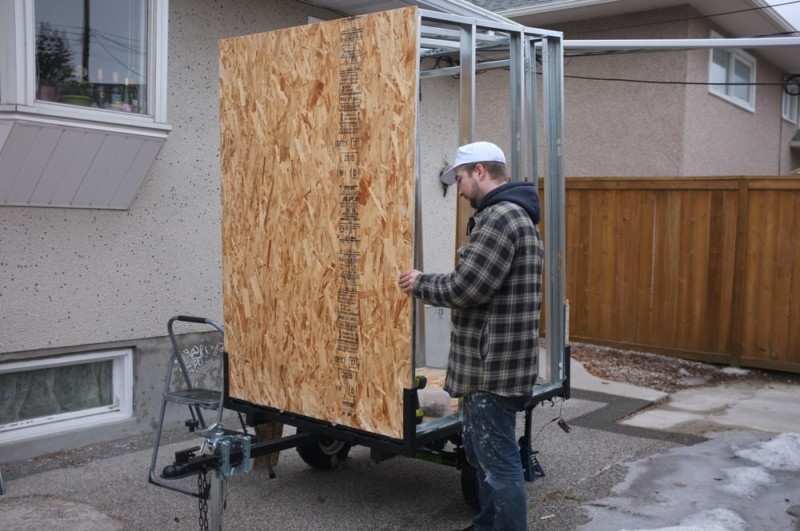
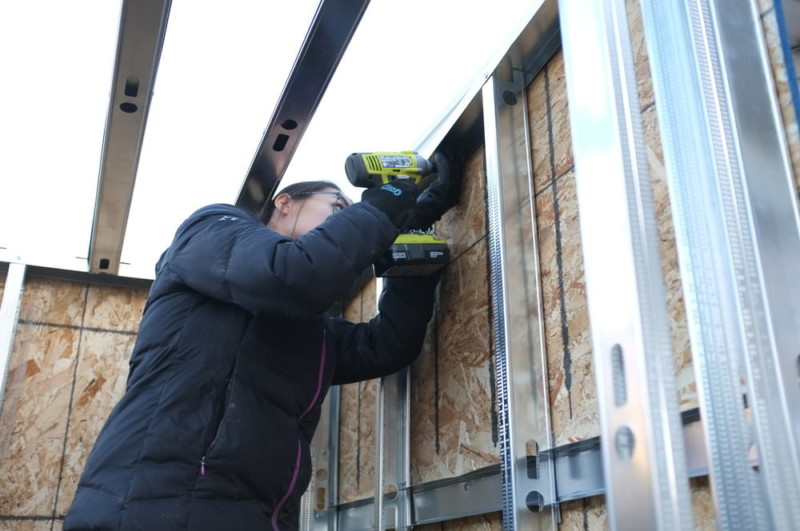
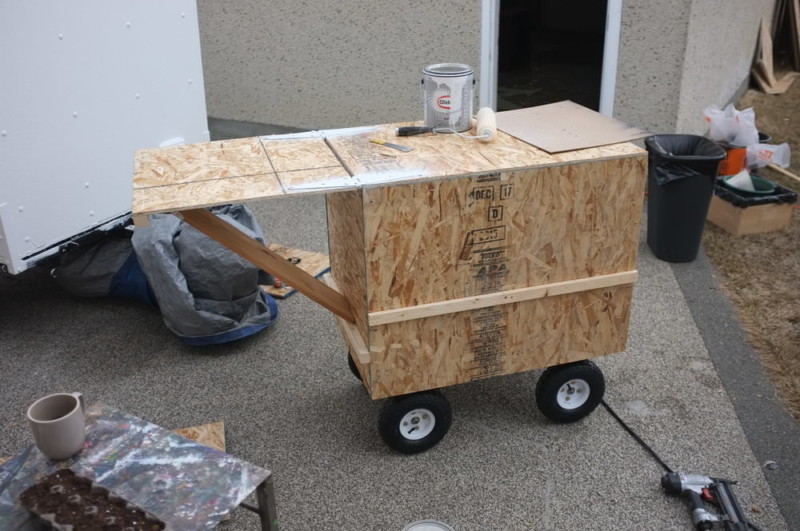
We then proceeded to build the frame out of aluminum studs for the walls and roofing. Once the framing was secure to the base of the trailer, the OSB walls and roof were bolted on. Since we planned on taking the darkroom on long road trips through all sorts of weather, we worked diligently to make sure the structure was strong, stable, weather resistant and light tight of course.
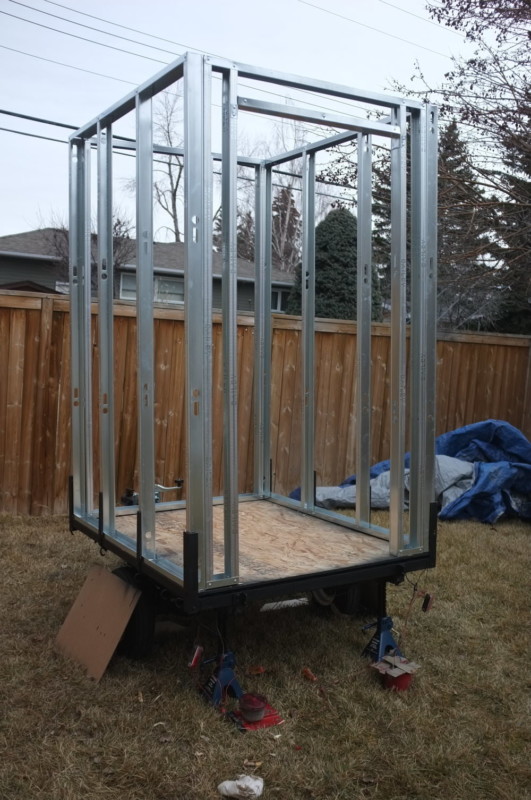
By mid-March, the roof was set in the same way as the walls, lots of glue and bolts to ensure there would be no issues in the future and no cracks for light to leak into our darkroom.
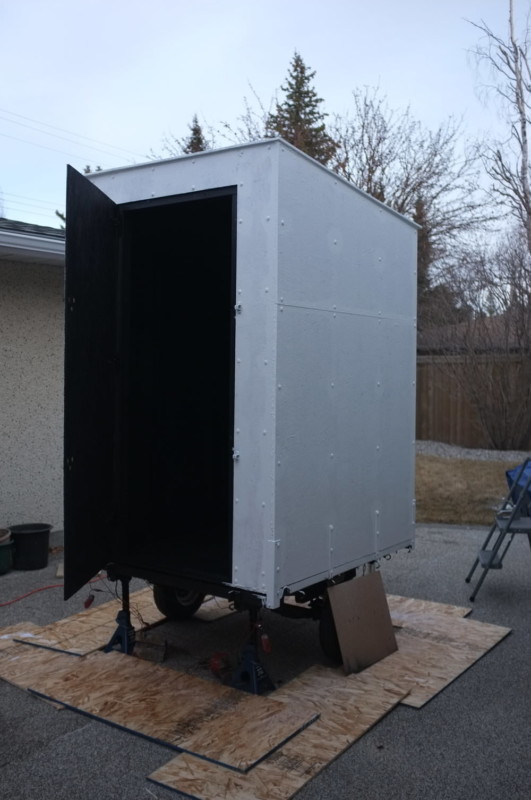
After all the walls were up and the roof set, we focused our efforts on the door and then once completed, started to weather seal the darkroom using a water-resistant paint.
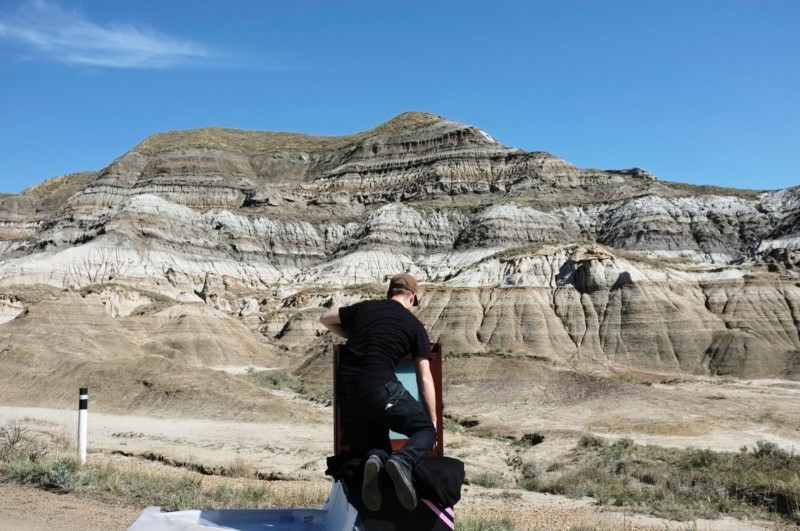
Once we were close to the end of the building process (or so we thought!), we began to design what the inside of the darkroom should look like. We started thinking about how the camera would fit and quickly realized that due to the sheer size of the camera, the entire inside would have to be designed around it.
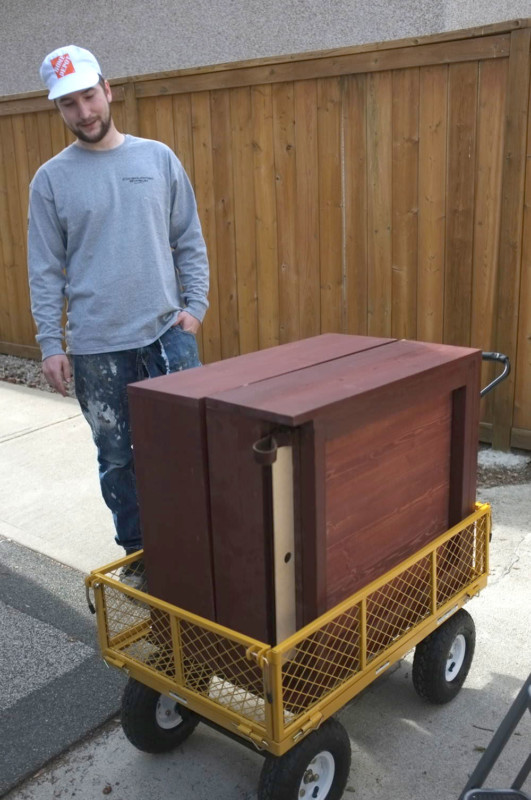
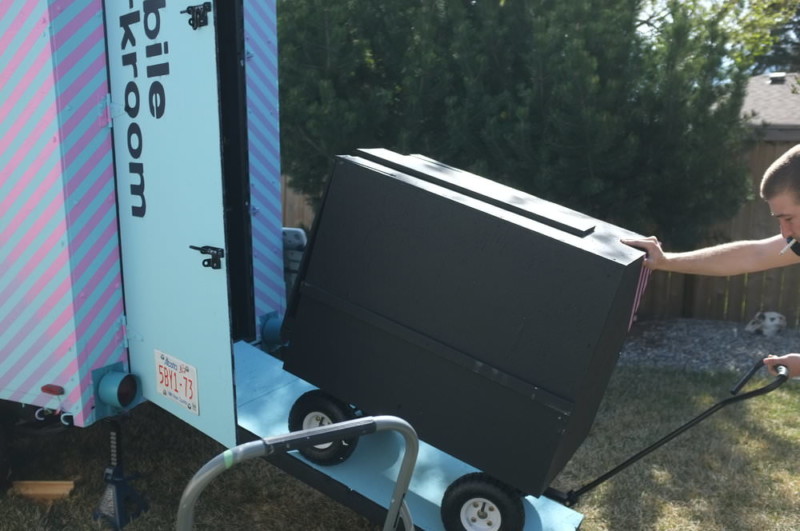
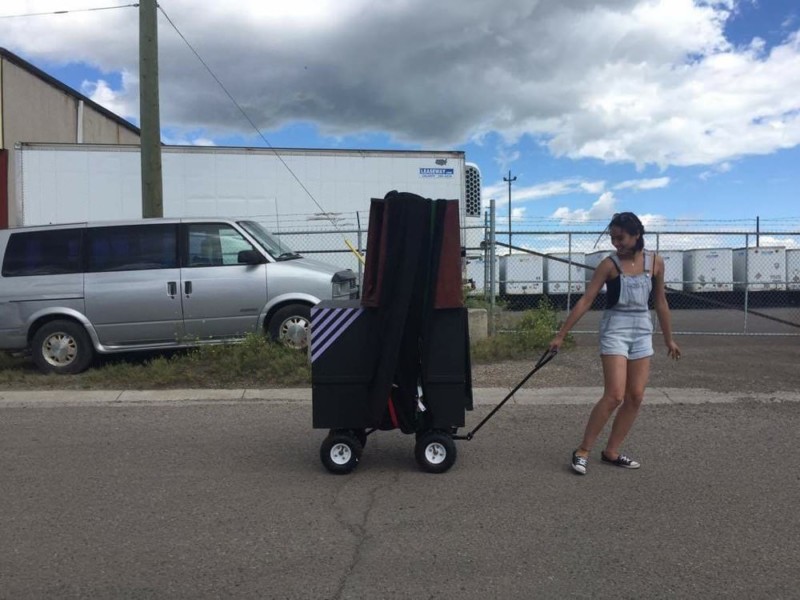
We figured that by customizing a utility wagon, transportation of the camera inside and outside of the darkroom would be much easier – and also double as our “tripod”. After all, the camera weighs over 30lbs.
We built shelves inside the darkroom in order to fit the camera snug on both sides; these would be perfect for storage and prevent the camera and small objects from rolling around whilst in motion.

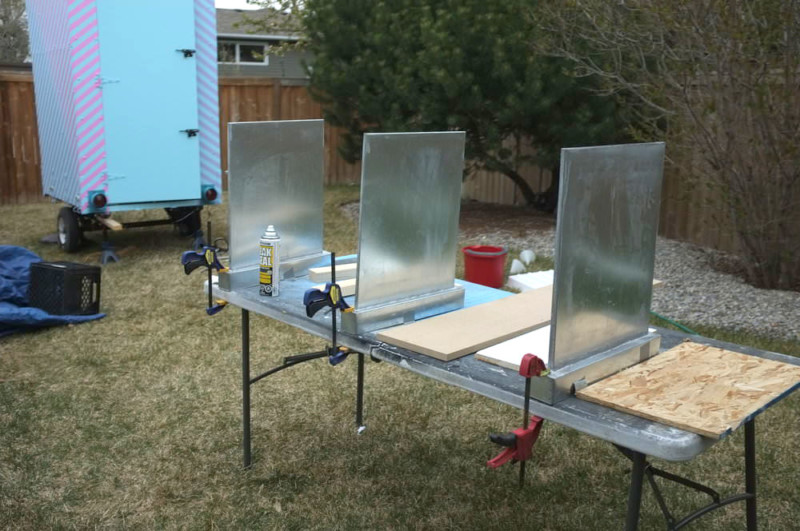
In order to be space efficient, we thought of ways to put developing trays inside the darkroom without having to put shelves on the walls. We bought three 16×20” chemistry trays and cut them through the middle horizontally. We then glued cut plexiglass to create a sort of “envelope” for the unexposed prints. The idea was to have the chemistry inside these vertical tanks and to dip the paper in and out of the chemistry. Needless to say, they didn’t work.
We tried to make them more resistant to leaks by building clamps to hold them together.
Still didn’t work. So we moved on to our next great idea: same concept but metal tanks. We custom ordered steel tanks, but they cracked too. We had put so much time and money into this idea, so we sealed the cracks with a spray-on sealant, wrapped the tanks in duct tape, and built braces to stop the steel from bulging under the weight of the water. This worked… for a little while.
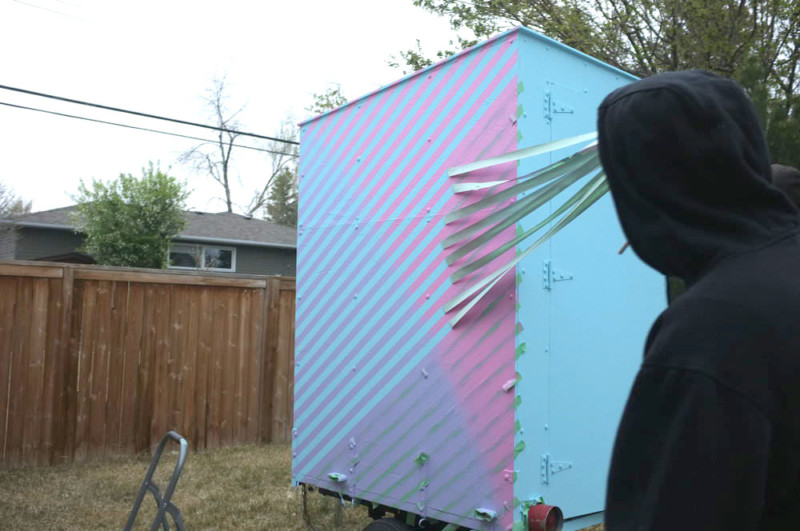
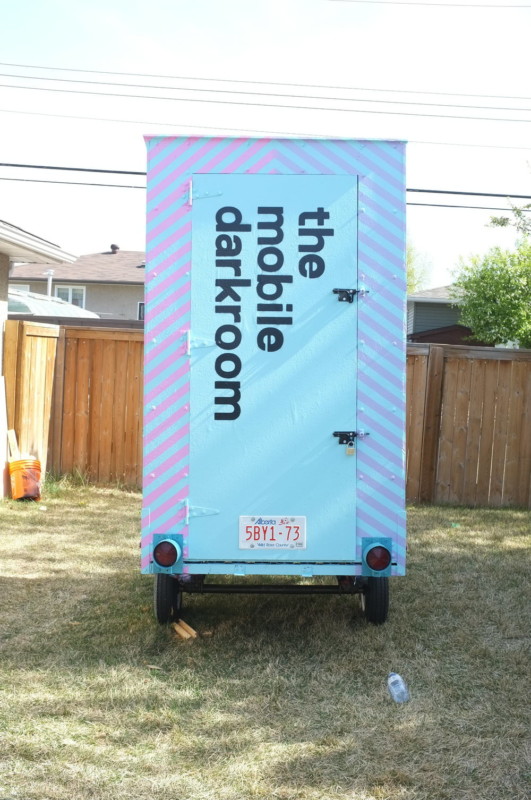
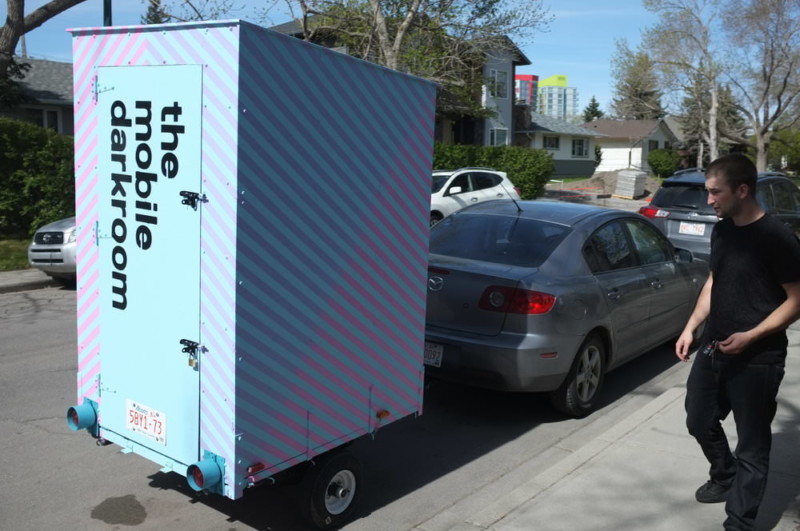
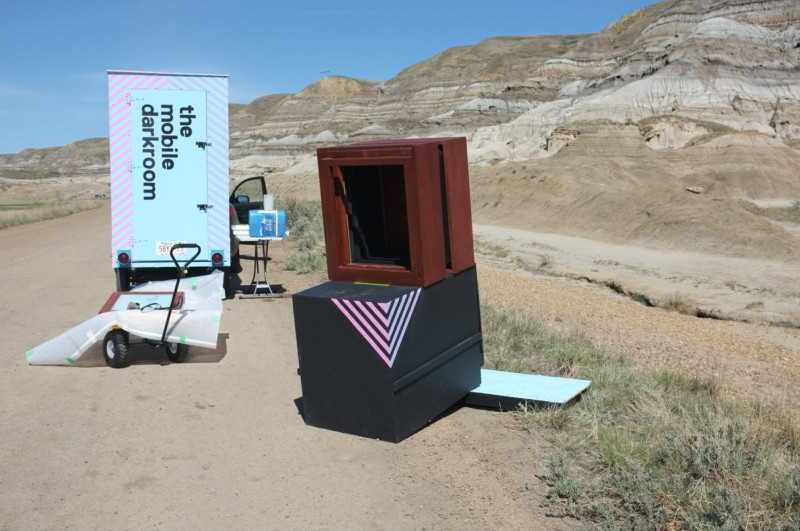
All the while, our good friend and fellow artist Rhys Farrell was kind enough to paint the exterior of our darkroom in his signature flashy and colorful style. This would help highlight our darkroom from the busy landscape and invite people to approach us about our project. We wanted people to reach out to us to ask, “what the heck is that!”
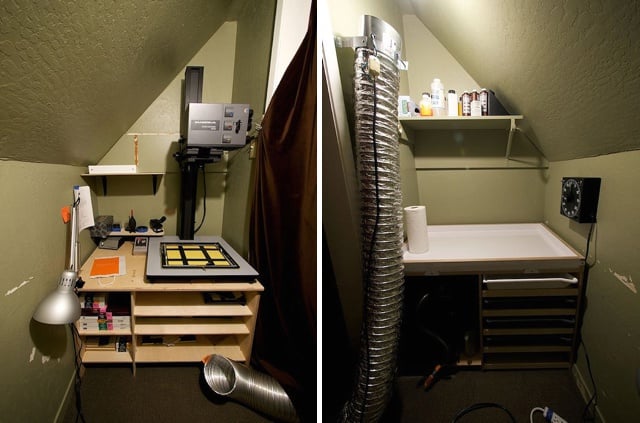
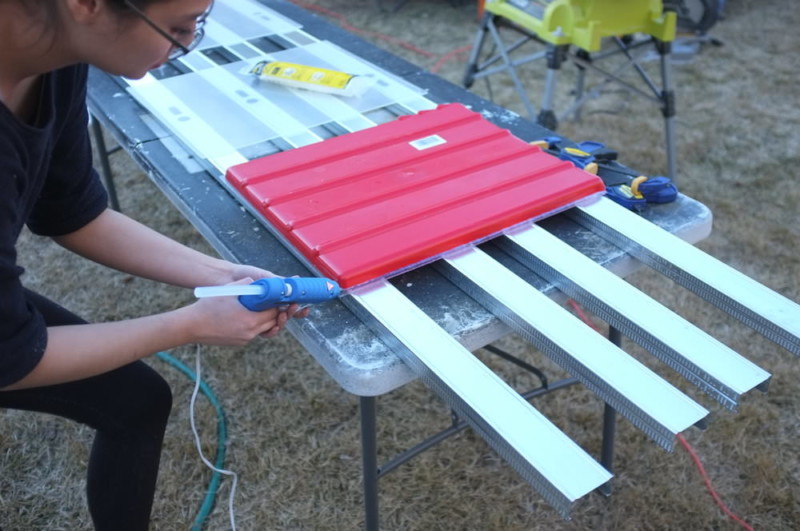
The next task was what to figure out what to do with the prints once washed. Conventionally, photographers would let their prints dry in screened cabinets or suspended from hangers. Neither one of these would work for the sake of space and functionality. Just like everything in our darkroom, we knew we would have to develop a simple and efficient way to dry our prints.
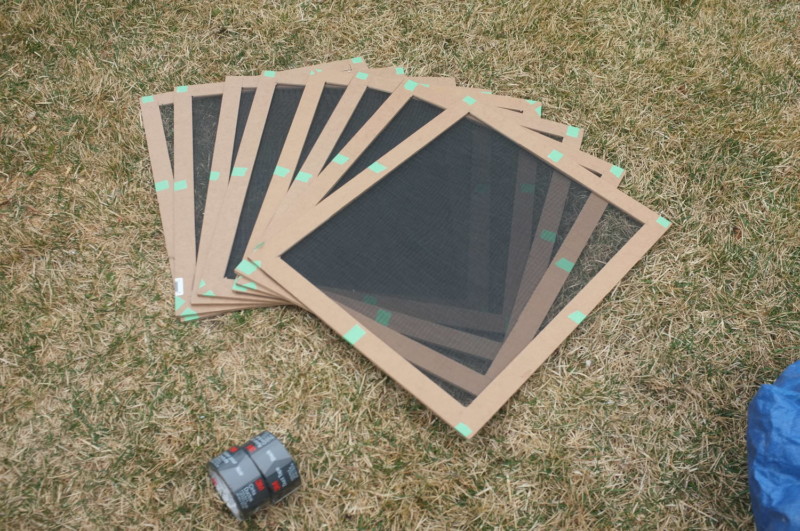
The drying racks shown above would allow us to transport our prints without compromising the image. All that was needed was some window lining screens, particleboards, and duct tape. The end result was 4 book like dry racks that allowed us to sandwich a freshly washed print between two screens.
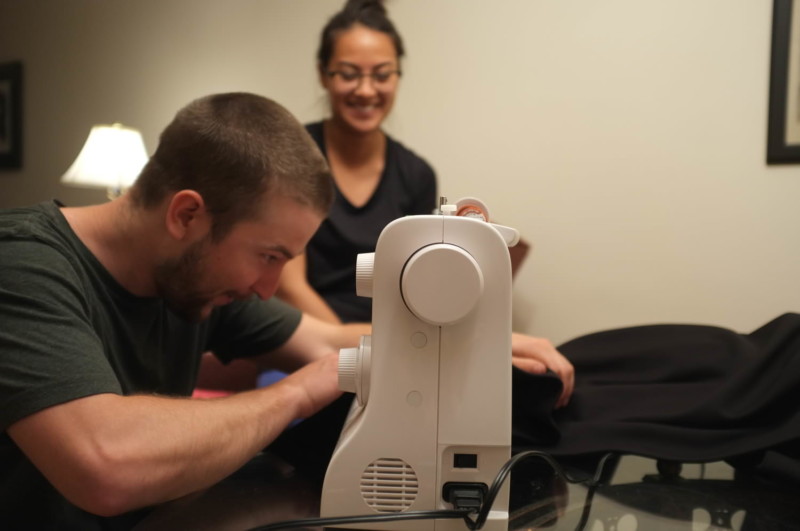
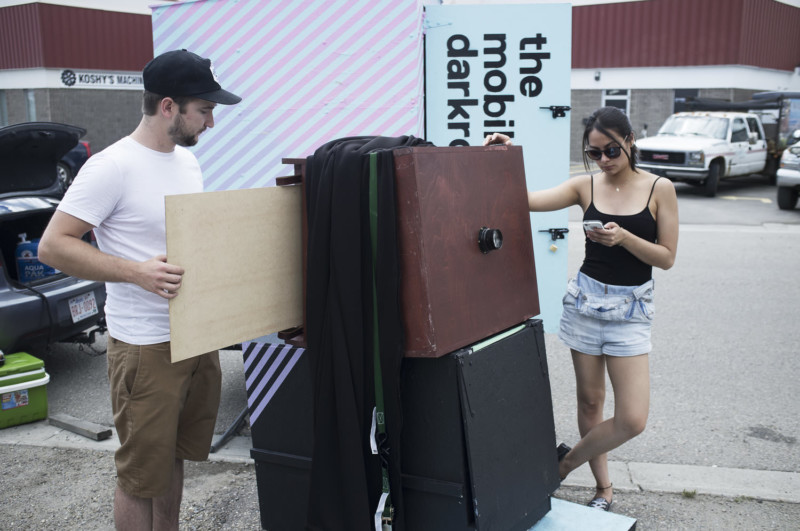
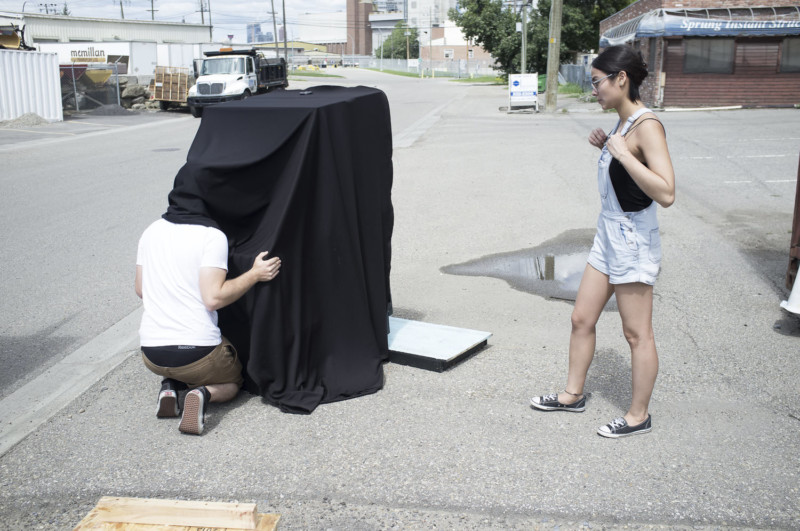
Shane’s camera had only been used in studio settings before, so we proceeded to sew a massive dark cloth to cover the back of the camera while we were focusing. The enormous size of the dark cloth also ended up doubling as padding inside the camera-wagon-box-thing we built to transport the camera.
Next, the ramp to push the camera wagon into the trailer would be the easiest, but extremely essential to move things in and out of the darkroom efficiently.
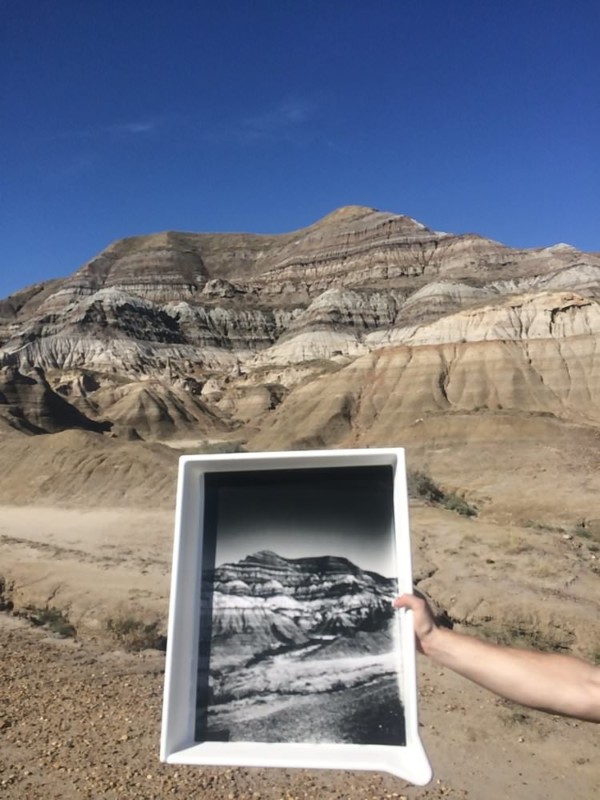
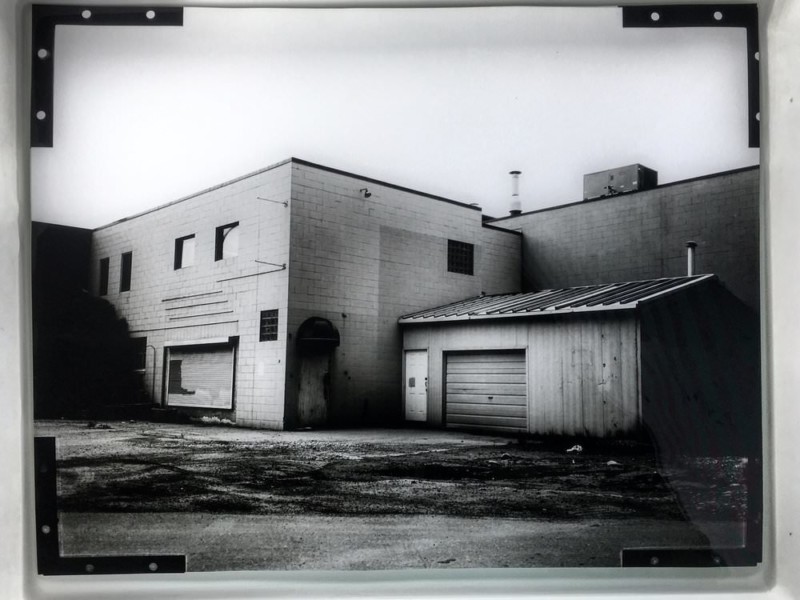
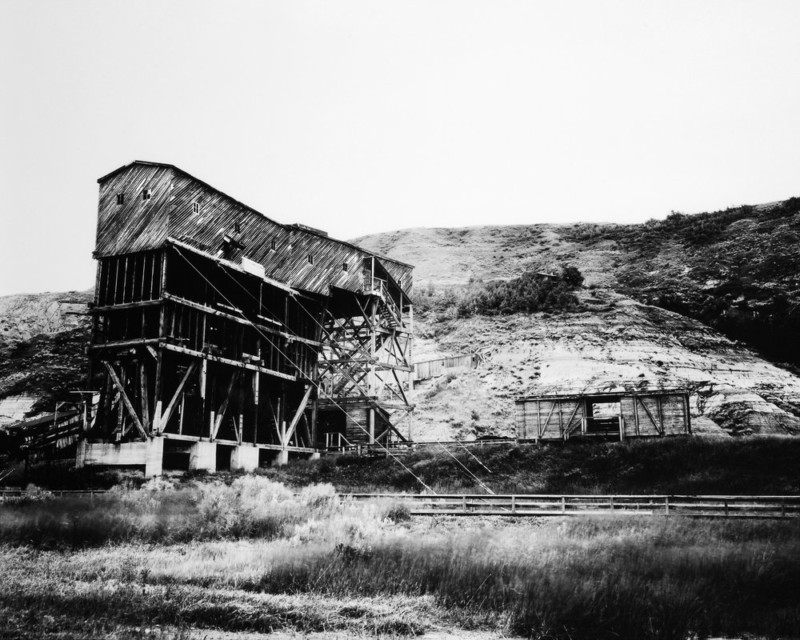
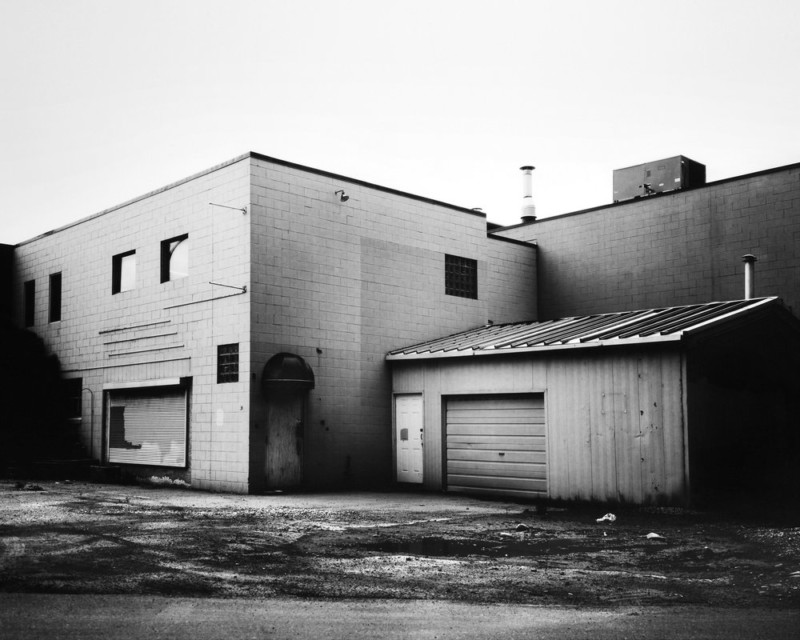
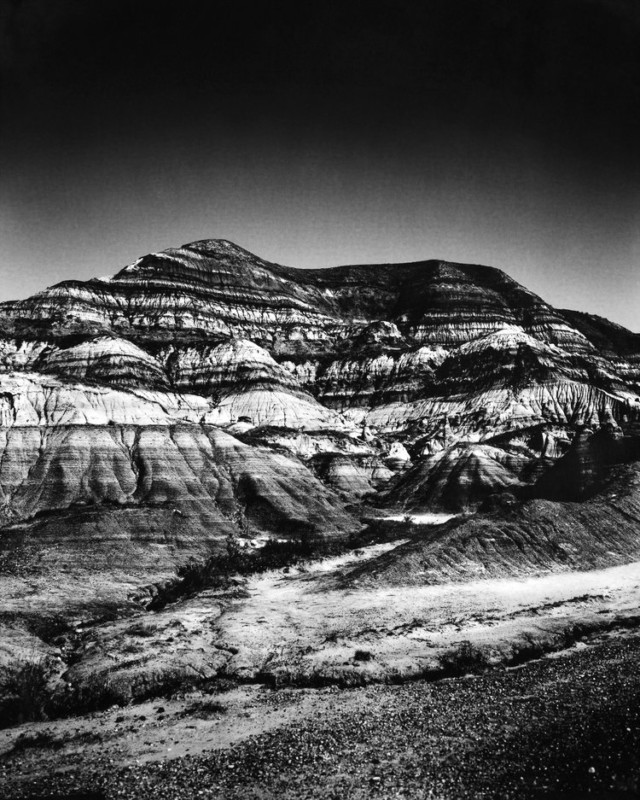
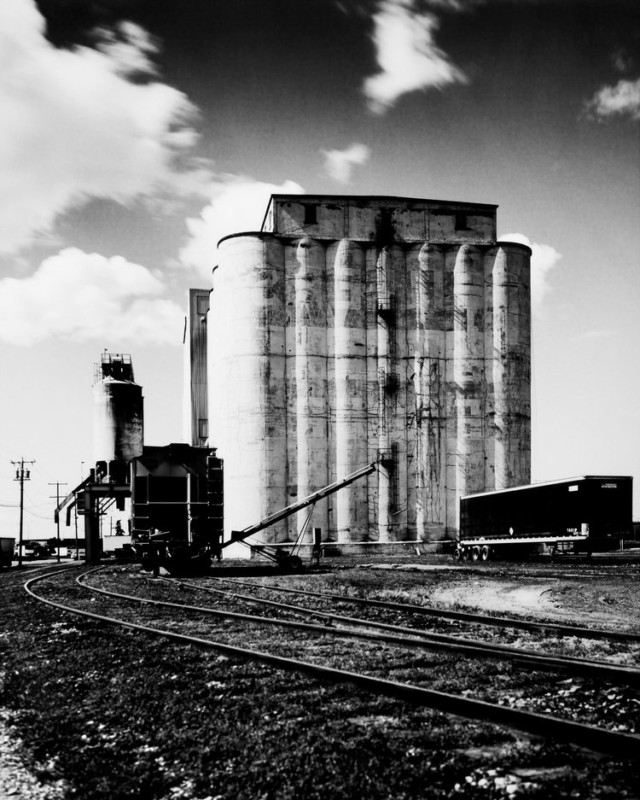
We were finally ready to take our darkroom on a trial run on May 1st of 2016. We were so excited to put our darkroom to use that we neglected to check the camera for any light leaks, and there were plenty we tell you. After 6 hours of trial and error, fixing and unfixing, we finally managed to cover all the light leaks and achieved a beautiful shot of the coolies in Drumheller.
After that day, we realized what was and wasn’t working for us. For starters our steel developing tanks were scratching our prints, the camera needed repair, we didn’t want to tape the light-sensitive paper to the back of the camera any longer, and the red light, from a headlamp, was exposing our light-sensitive paper.
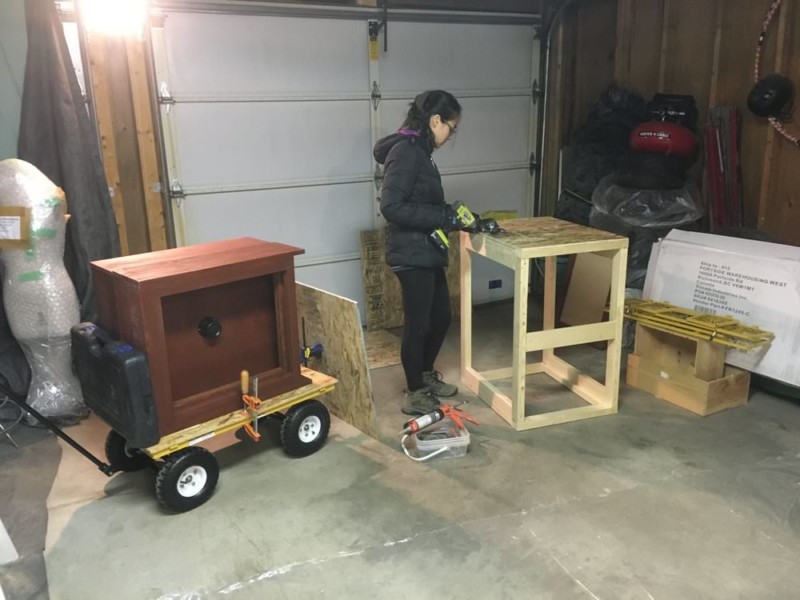
The vertical steel-developing tanks would have to go, so we built new shelves in the darkroom and set up traditional developing trays instead. Shane repaired the camera and added metal slips on the film back so we could easily slide the images in and out without having to use tape. And as for the red light – we ditched that too, we found it to be much easier and less worrisome to simply work in the dark.
After a lot of problem-solving and hard work, we managed to turn what took 6 hours to shoot one worthy image, down to 2 hours per image. All of these shots have allowed us to grow as a team as well as understand what techniques to use to maximize productivity while shooting.
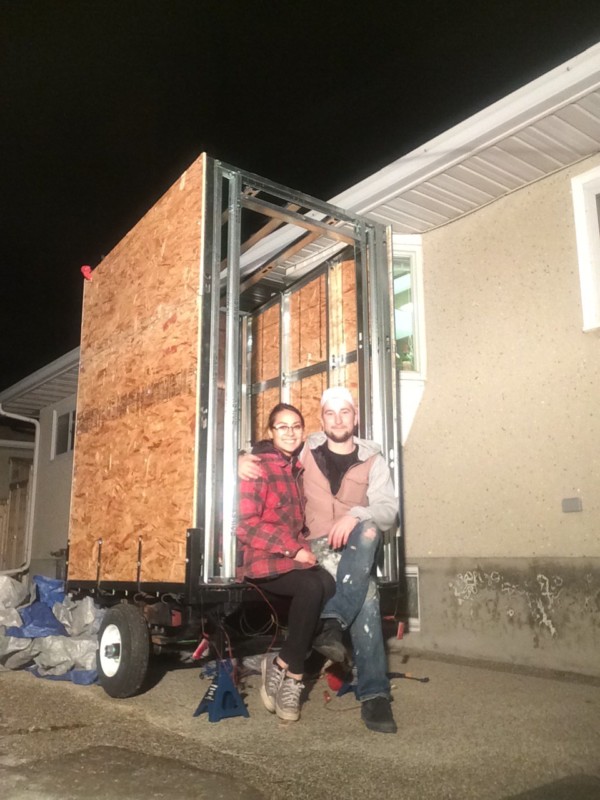
In only 5 months we managed to plan and design the darkroom and build it with our bare hands. It felt good.
We are currently in the process of preparing for our exhibition, titled “Alberta”, which will showcase all the work created so far with The Mobile Darkroom. The show is February 16th, 2018 from 6pm until late. The exhibition will be at Loft 704 Photo Studio in Calgary, Alberta as part of Exposure Photography Festival.
Make sure to also visit our website or follow our Instagram to catch up with what we are doing!
About the author: Natalia Barberis is an analog photographer and artist based out of Calgary, creating epic bodies of work photographing and documenting people and places all around the world. She graduated from ACAD in 2014 with a Bachelor of Design, majoring in photography and has over 10 solo and group shows to her name. You can find more of her work on her website. This article originally appeared here.