DIY: How to Create an Entire Darkroom In a 3.5×7-Foot Closet
Do you love the smell of fixer on your fingertips and the ominous red glow of the safety light, but don’t have enough space to build your very own darkroom at home? Well, you might want to reevaluate your definition of “enough.”
Instructables user wackybit recently managed to pack an entire darkroom into a decent-sized closet. And rather than keeping it a secret, he was kind enough to share his entire setup with the rest of us poor darkroom-less mortals.
360 view of my converted closet – Spherical Image – RICOH THETA
To help create his darkroom, wackybit relied heavily on The New Darkroom Handbook, a vital resource for anyone looking to create their own. But when big ambitions clashed with lack of space, it took a great deal of meticulous planning to get sorted out.
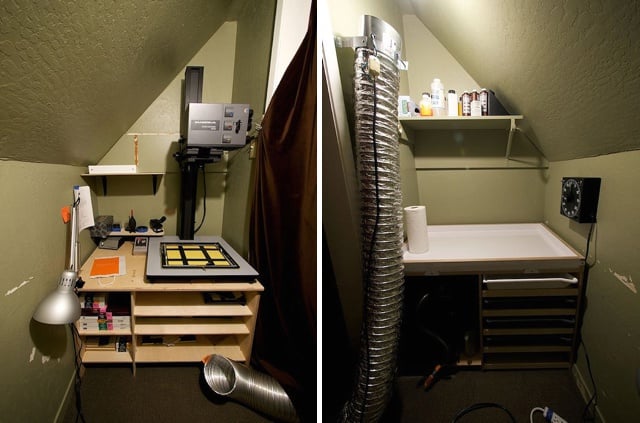
After a lot of troubleshooting, though, wackybit now has a darkroom that lets him create prints as large as 16×20” while standing in a closet that is only 3.5’ by 7 feet.

The first step was to test the room for ventilation. Considering the amount of chemicals used to develop film, proper ventilation is key to a clean darkroom and not damaging your health any more than you need to.
Since, as you might imagine, there wasn’t nearly enough ventilation in the closet, wackybit installed a clever ventilation system using fairly standard ductwork and an in-line duct fan.
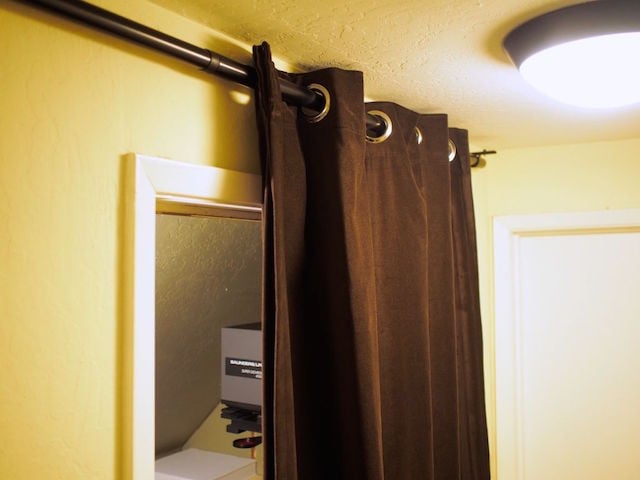
The next step was to ensure the closet was dark. Really dark. To do this, wackybit used a matte black IKEA curtain and curtain rod to block out the main light source that could be shining into the closet.
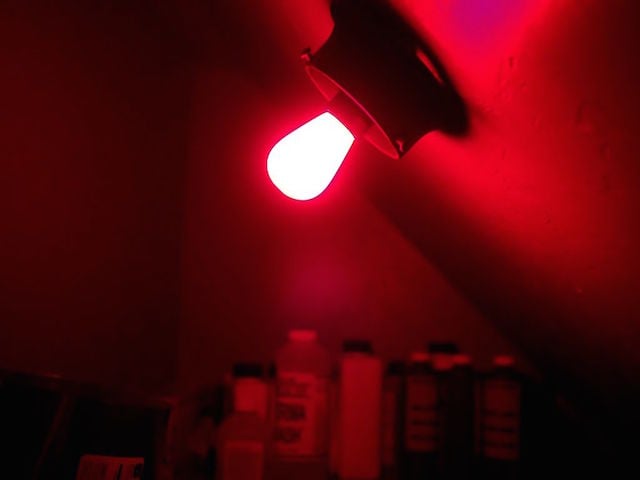
Quite contrary to step two, step three was to light the closet… with a safelight, that is. Considering the closet already had a socket built-in, this step only required the purchase and quick installation of a safelight.
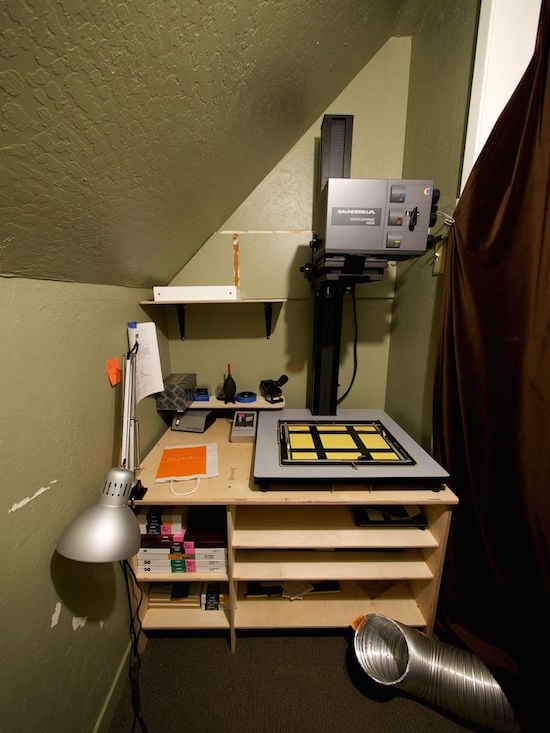
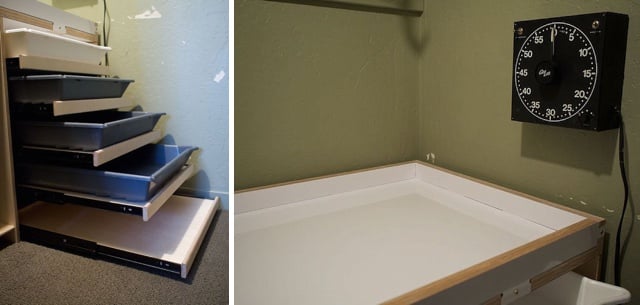
Up next was putting together the ‘dry side’ of the darkroom. This is where the paper, enlarger, loupe, negatives and more would go.
The shelving unit he made from plywood, using 1”-thick pieces for the outer panels and 1/2”-thick pieces for the inner-shelving. By using plywood, he was able to more effectively shape and size the desk to the closet’s dimensions.
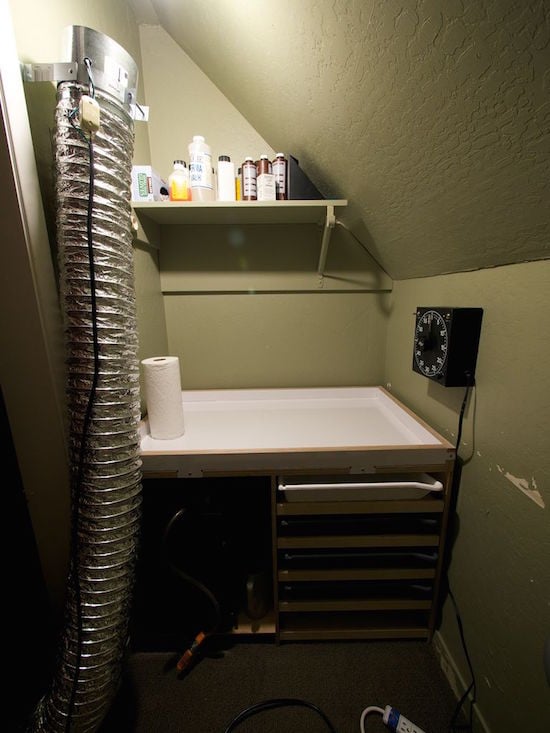
The last step was setting up the ‘wet side’ of the darkroom. The centerpiece of the wet side is the splash zone, which allows for more leeway when adding liquid to the trays, moving paper around in them and more. Since a sink wasn’t an option in the closet, this was the second-best solution.
And that’s it! Once built, all that was left was acquiring the necessary chemicals.
As wackybit explains at the beginning of his Instructables post, there’s no one-size-fits-all darkroom stop, so you’ll probably need to experiment to see what works best for you. Still, the 3D renderings of his setup and the step-by-step walkthrough of how he built his own darkroom gives you a great reference point if you’re planning to take on a similar project.
Home Darkroom design for small spaces [Instructables]