Field Test: Using the Loupedeck to Up My Lightroom Game
I’m going to start this field test back to front and for one reason only: the LoupeDeck system blew my socks off. If you’re a wedding photographer — in fact, if you’re into any genre of photography — the Loupedeck is a game changer.
I recently returned from shooting a wedding in Treviso, Italy, and there was a package waiting for me. The guys over at Loupedeck had let me know they were sending across a system for me to try out, and I thought why not give it a proper field test and really put it through its paces by editing a week’s worth of wedding images on Adobe Lightroom.
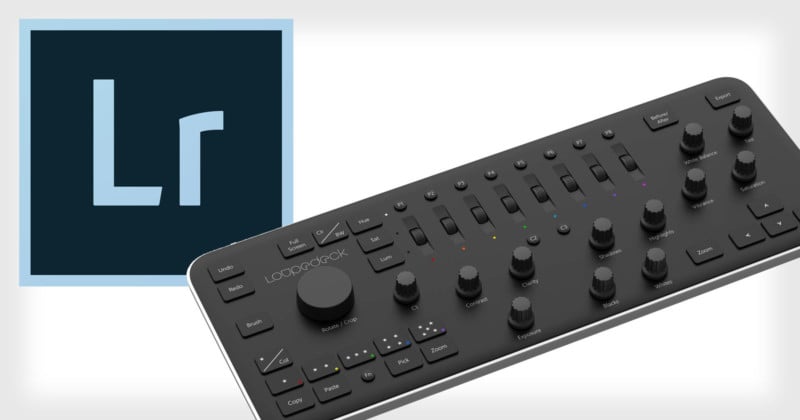
In a nutshell, the Loupedeck is a console that has a whole host of buttons, twisty knobs and sliders/rollers that all represent those sliders you see on the right of Adobe Lightroom. Its aim is to save you time on both a PC or Mac, become more creative with your photographs, and unlock the potential and detail of every single image you work on.
Initially launched on Indiegogo, the Loupedeck campaign finished 488% above target. People could see the huge potential in Loupedeck, and they weren’t wrong!
As always, I’m brutally honest with my Field Tests, if I were to purchase the Loupedeck initially without reading any reviews, the price does appear to be slightly steep. At $299, it certainly wouldn’t be something I would rush into and I would have probably found myself searching Google to see if it really is worth it. It is.
As any professional wedding photographer will tell you, time is money, especially when you’re shooting 35+ weddings per year, so any product that can aid your time efficiency is certainly worth considering.
So here are my views and test of the Loupedeck. I’ve just returned back home with over 3,000 RAW wedding snaps to rate, edit, and send to the clients, and I’m going to do it all using this new console:
First Impressions
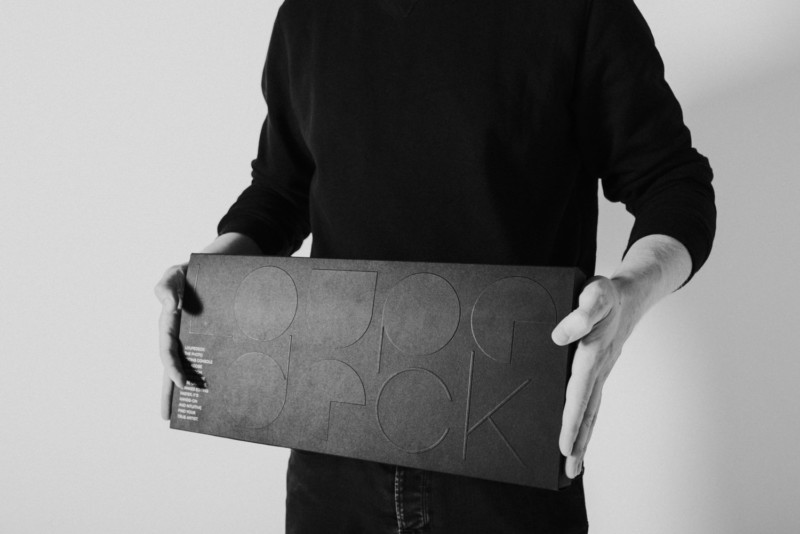
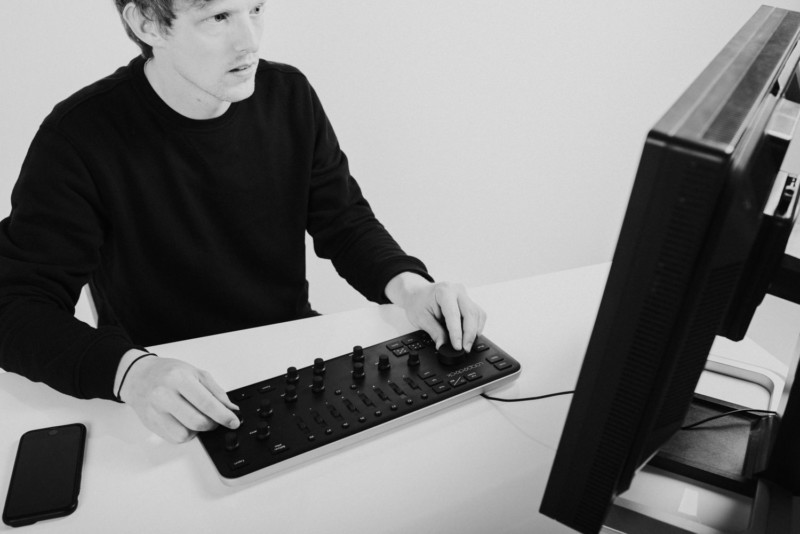
First impressions aren’t everything and in Loupedeck’s case, we’re all more focused on how the console performs than its overall appearance. But — and a big but — there has to be some credit given to the packaging. The Loupedeck comes in a very stylish black box, firstly with its own sleeve that features the logo in raised text which houses the main box. When you’re investing in what may be a considerable amount of money to many photographers, you appreciate a well-packaged product and it certainly screams “professional” from the outset.
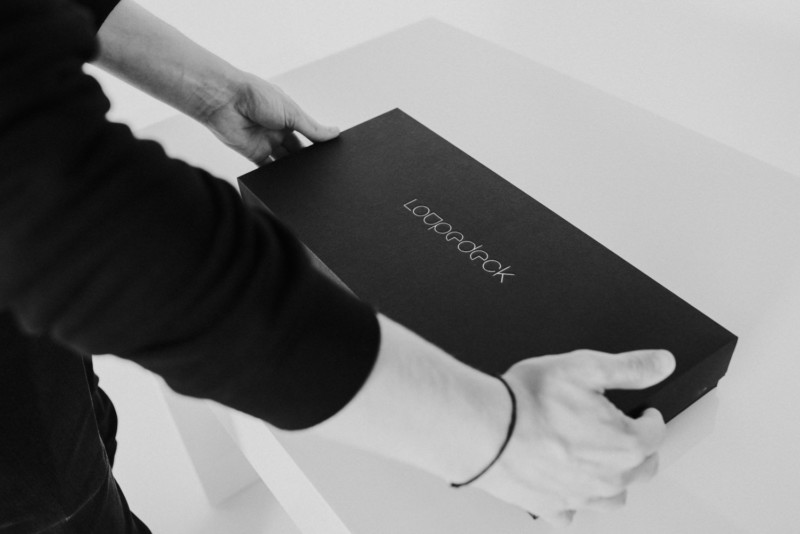
Once you open the box, the console is packed just like you see with Apple Products: compact, neat, and simple. You’ve got the console itself, the USB cable housed in its own box and a black card with the worlds simplest set up instructions. You can have the Loupedeck from doorstep to plugged within a matter of minutes and still appreciate how sharp it looks along the way.
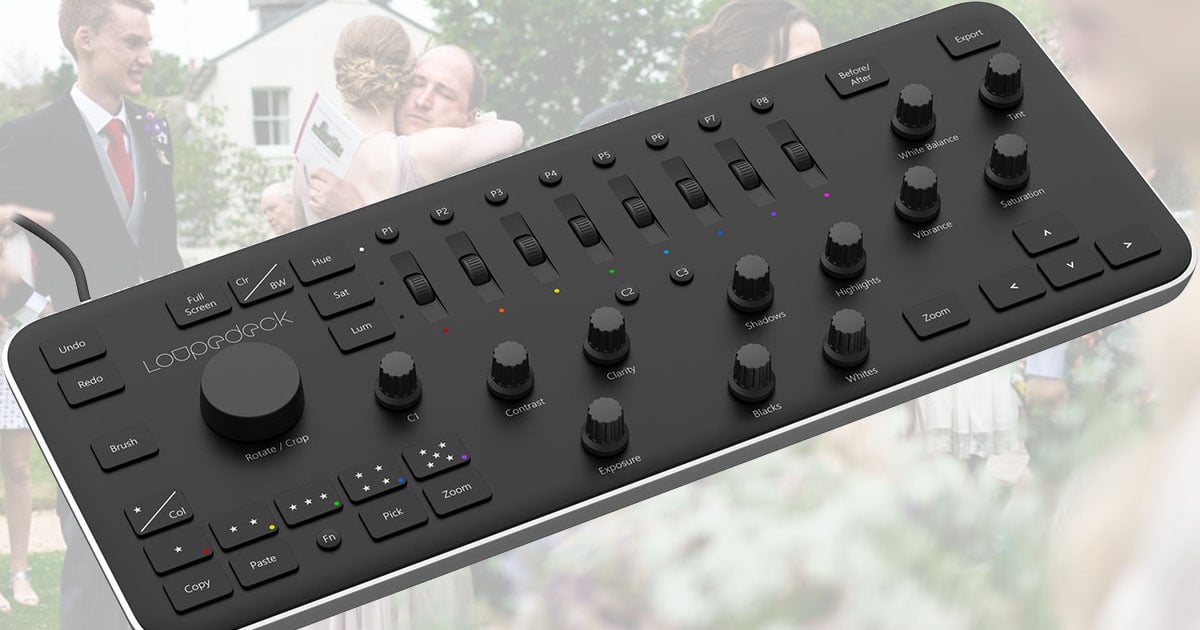
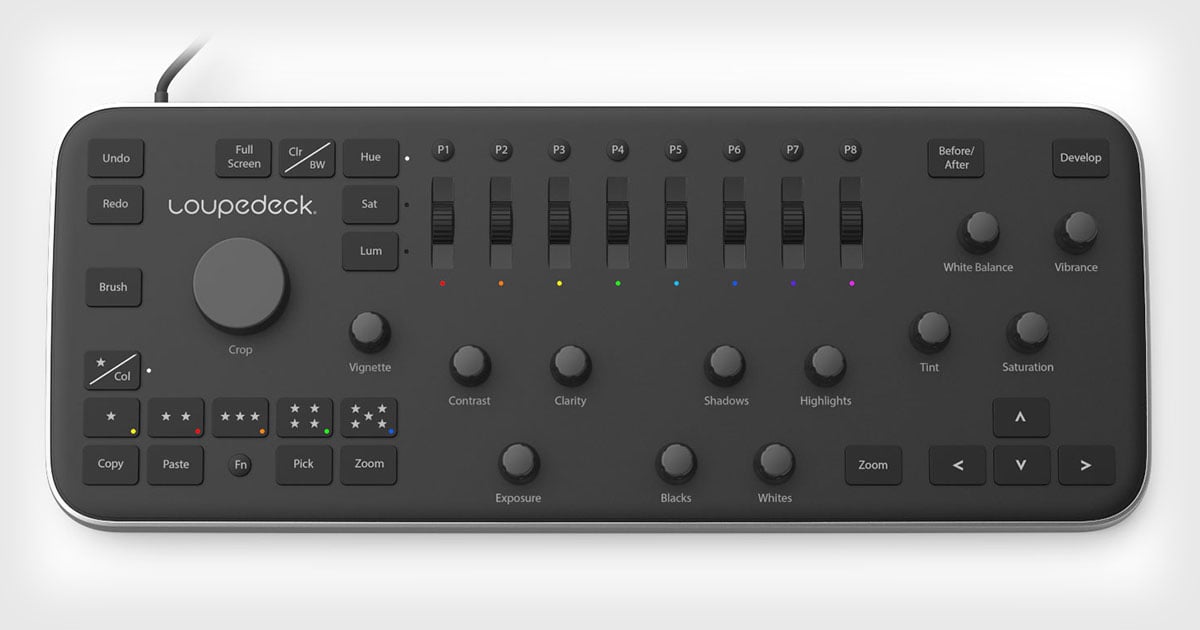
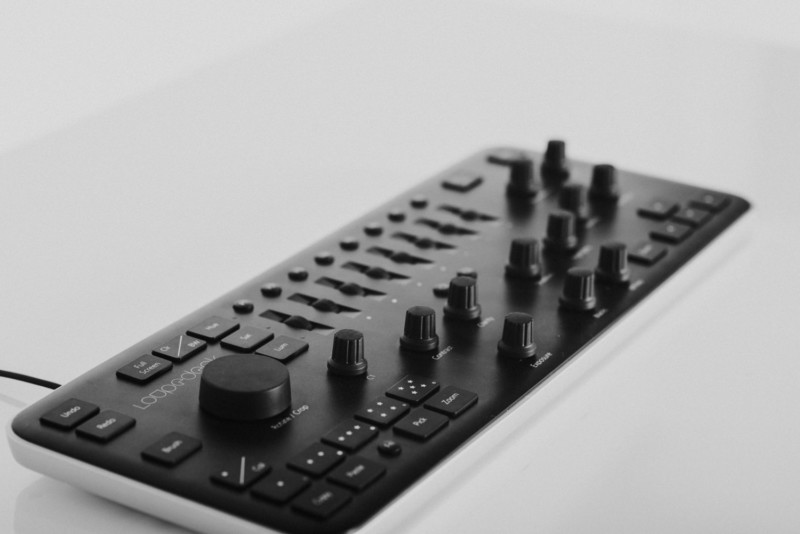
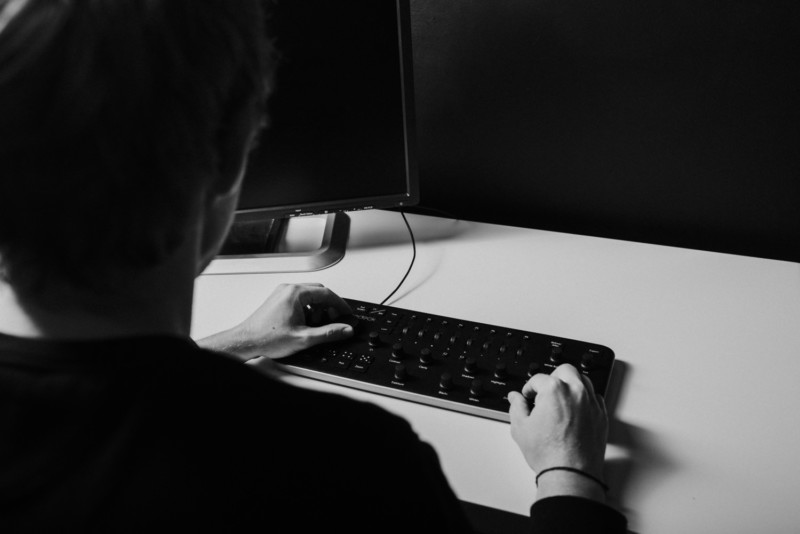
The console itself is approximately 400x150x40mm and weighs 600g, it hosts over 50 controls including buttons, rollers, and dials. Each one is individually labeled with various effects, controls, and adjustments you will commonly see on the right of the developed model in Adobe Lightroom. Everything is clear and from the outset looks easy to use, with everything clearly highlighted with text and pro or hobbyist could pick up the Loupedeck and be up and running almost straight away. The console’s look and feel are spot on, the matt black works and there’s one LED light that signifies if you’re editing Hue, Saturation, or Luminance. It’s actually quite lightweight, I expected it to feel a little heavier, but it doesn’t feel cheap.. all the buttons, nobs and dials feel like they could take some stick… but only time will tell there.
Set Up & Installation
Seriously the installation doesn’t even need words, it’s simple, works and does exactly what it says on the tin. The black card that you receive with the Loupedeck has two instructions: firstly go to www.loupedeck.com/setup and secondly plug the console in… and that’s it, you’re up and running.
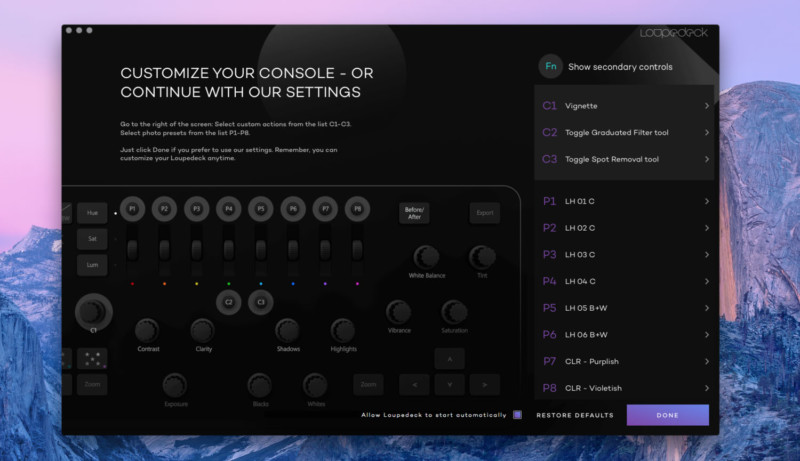
Once you’re all set up you’re good to go in Adobe Lightroom, you’ll be given the option to edit some of the custom buttons on the console, you can change these and always come back and change at any other time by just clicking the Loupedeck button at the top of Mac screen (I’m sure this is similar for Windows..).
In total there are 22 personalized functions you can add to the Loupedeck so it can become more personal to your own workflow. The main being the ‘P’ functions along the top, these can be easily programmed to your own presets and you initially have 8 of these to change, furthermore you have a second section of 8 to work with which can be enabled by holding down the ‘Fn’ key on the console. So that gives you 16 available presets, literally at your fingertips that can be applied instantly… you don’t even have to take your eyes off the image to apply them, this itself is a game changer for wedding photographers.
You also have the option to change the C1 dial which allows you to have two (using the ‘Fn’ button) customisable functions set up. Whilst the customisation of the C1 dial is limited, it can be set up for usual adjustments depending on how you edit. I have C1 to adjust both my vignette and level of noise and it works perfectly for me.
I have C2 set up to select my Graduated Filter Tool which I use heavily on my skies within my wedding photography. I also have C3 set up to toggle my Spot Removal Tool on and off, to use both of these tools you will need to grab the mouse as usual but it certainly does speed up by pre selecting the tool and then it’s ready to go with your mouse.
Selection Options
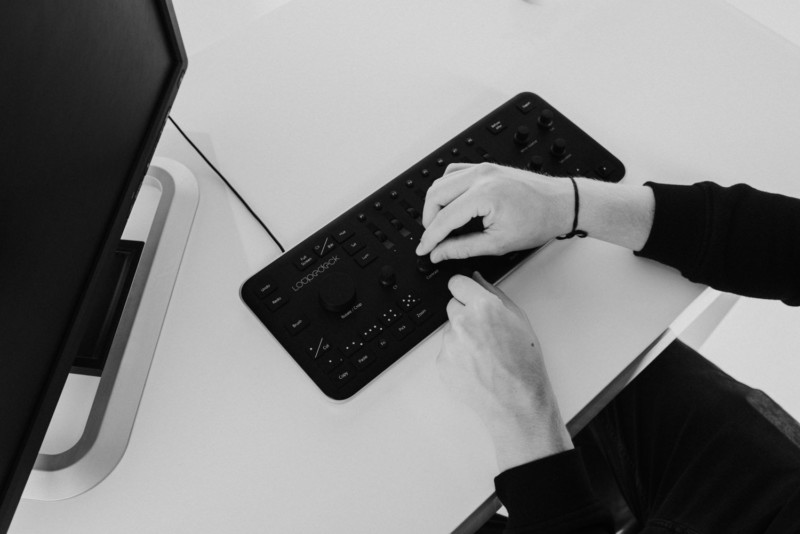
Whilst wedding photographers work flow may differ from person to person, we all start with thousands of images that firstly need selecting to move forward with our edits. Many photographers I know do this outside Adobe Lightroom, but just personal preference I work solely in Lightroom for 90% of my workflow. Loupedeck features a large host of selection tools all available at your fingertips, agreed, most of these selection tools are available on a keyboard. It’s good to know they’re still the same as a keyboard although the Loupedeck does have a more appealing visual aspect and easier to put your finger on the selection tool, physically, rather than knowing the keyboard shortcuts.
The console’s Copy and Paste features work fantastically well, you literally have ‘Copy’ and ‘Paste’ buttons to work with. Again with one click of a button, no keyboard shortcuts, you can copy and paste adjustments to a single image or Fn + Paste to paste the adjustments to all the photos that you have selected in the filmstrip.
You finally have a collection of obvious buttons, Undo, Redo, Brush, Full screen, Before/After, Export and Zoom which shouldn’t require any explanation for you readers.
Performance
So now we get to probably the most important part, how the Loupedeck performs and does it actually speed up my workflow? Firstly the responsiveness of the basic adjustments are perfect, each dial turns smoothly in the hand/fingertips, and there is no delay in the adjustment happening on screen, it works just the same as using a mouse/trackpad. As you move the dial up it makes slow adjustments, or turn the dial very quickly to move faster from end to end, you can also press each dial to return the selected adjustment to zero.
This isn’t advertised on Loupedeck’s website but I also found you can make two adjustments at once, for me, I found this useful for bumping up my Exposure and Contrast by turning both dials together, which is something I adjust on 99% of my wedding photographs. So not only can you make multiple adjustments within seconds with your fingertips, you can jump from Exposure to Vignette which with a Mouse or Trackpad would require you to move over to your develop settings and navigate up and down. So with all your adjustments such as Exposure, Contrast, Clarity, Shadows, Highlights, Vibrance, Saturation, Blacks, Whites, White Balance, Tint, and Vignette all next to each other and accessible to your hand… you genuinely forget about the mouse for all of the above.
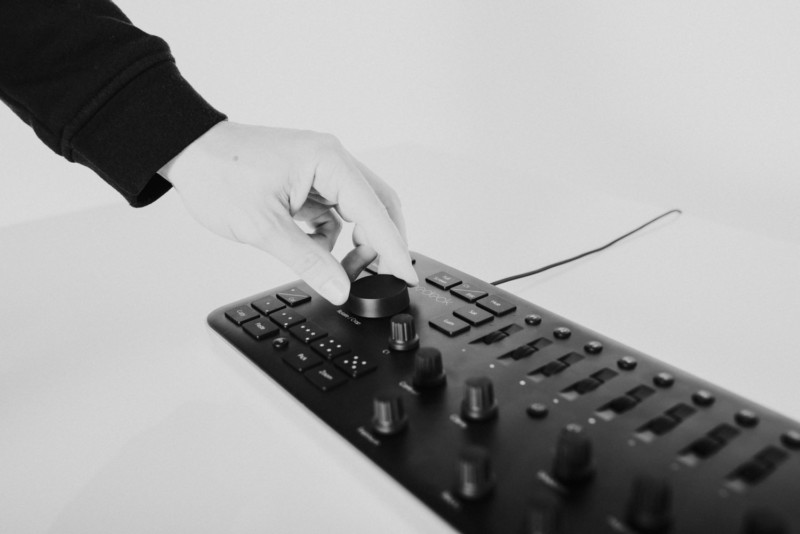
Now we move onto the Rotate/Crop button on the Loupedeck, you’ve probably noticed it already, is the big bulky round thing on the left of the console. This is an impressive function the guys have added, for Rotation it works perfectly well. As a wedding photographer, I’m the first to say I’m not always taking enough care with aligning my shots perfectly, especially when you have a split second to grab a shot. So I’m often rotating and cropping my shots and if I’m truly honest, a mouse can be a bit of a nuisance to get it perfect straight away. With the Loupedeck you move the big chunky circle dial and your rotation grid will pop up instantly, from there the rest is fairly straight forward. You turn the dial left or right until you have the desired rotation, but something that is even better, if you hold the Fn key on the console, your rotation adjustments become more precise ensuring you can achieve perfection every time… this is one of my favorite features on the Loupedeck. The crop feature requires you to press the dial and then use your mouse to crop the image as normal, ok yes you have to use your mouse for the crop.. but when you think about it I’m not sure how else you could achieve a crop using a console.
The personalized functions are again a huge selling point for me as a wedding photographer, I have about 5 common presets that I use in my work and then maybe 10 others that I occasionally work with. With the 16 personalized functions all available you can quickly skip between presets within seconds, combine that with being able to make multiple colors and lighting adjustments at the same time, you are gaining a huge amount of time saved per image…HUGE!
The color adjustments, I’ll be totally honest I don’t use that much anyway, but for anyone that does, I can see the Loupedeck winning at this well. The console allows you firstly to select Hue, Sat or Lum which activates the color adjustment wheels along the top. You also have a bright LED to notify which of the above you’re currently controlling. These scrolling wheels work very like the dials, you scroll them up and down for the desired color, you can press the wheel to return to zero and move quickly from end to end for harsher results.
There are a few adjustments I make which Loupedeck doesn’t cater for, firstly we mentioned earlier you will have to grab the mouse to help with your cropping. Secondly, I regularly make Lens Correction Adjustments which again you’re going to have to rely on your mouse/trackpad. I have C2 set up to select my Graduated Filter Tool which I use heavily on my skies within my wedding photography. I also have C3 set up to toggle my Spot Removal Tool on and off, to use both of these tools you will need to grab the mouse as usual but it certainly does speed up by pre selecting the tool and then it’s ready to go with your mouse.
The Experience
As much as the performance is perfect from the Loupedeck, honestly, the experience is what sells it for me. It has completely changed my approach to my workflow and editing, those days during wedding season where I have 5 to 10 weddings all sat on external drives ready to start editing used to send me a little bit crazy with just the thought of working through them all, now I’m actually excited to stand at my desk and start editing. There’s something special about how the Loupedeck connects you with the photographs you’re editing, something that isn’t just quite there with a mouse and keyboard. I think that split second where your eyes have to move off the photograph to navigate down your develop settings or scroll for that desired preset might just be the gap Loupedeck has bridged. Without sounding too cheesy, when I first started using the console, I got the feeling this is what DJ’s must feel, creating music with their fingertips.
I would actually say I’ve gained more confidence in my editing whilst using the Loupedeck, it’s so much easier and quicker to make adjustments, it allows you to quickly combine effects together to get those images just the way you want them. I can quickly work my way through hundreds of wedding photographs and hardly — sometimes never — take my eyes of the actual images I’m editing.
It’s also got that ‘photographer’s feel’ about it, as professional photographers, we’re so used to holding something of value that creates an image, we’re constantly using our fingers and thumbs to scroll through shutter speed and apertures and select our focus points on our camera. Then we upload our images to edit and we lose that freedom of our hands, we’re almost shackled to a mouse and keyboard. The Loupedeck has something very familiar to using a camera, it’s all there at your fingertips, you don’t have to look away from the image in front of you. I guess it’s very similar to when Wacom tablet came around, which gave illustrators, designers and photographers that freedom in their editing… it’s actually surprising it’s taken so long for consoles that work in Adobe Lightroom to come along.
Summary
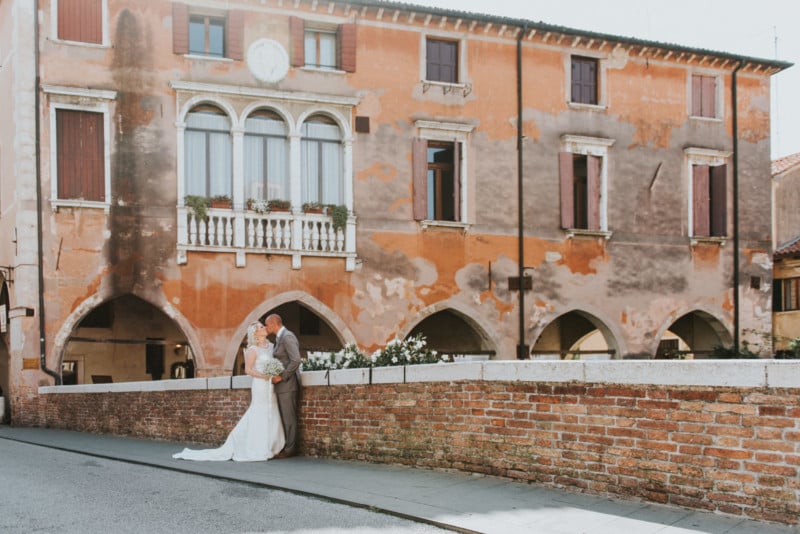
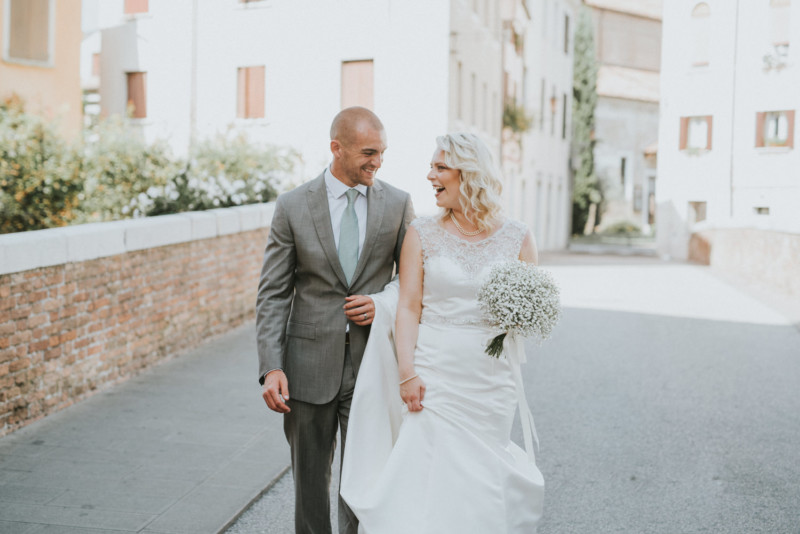
So when Loupedeck mentioned they were sending me out a console to field test I got rather excited and honestly, it didn’t disappoint. It probably landed during the busiest time for me as a wedding photographer and I was a little hesitant to unbox it and start using it during such a busy period but I’m certainly glad I did. The main selling point for me is the enjoyment and ergonomics it’s brought into my workflow, it goes without saying I won’t be touching Adobe Lightroom again without the Loupedeck to hand. I edited Kelly & Sam’s full wedding, including selecting the images to edit from over 4000 Raw files from the trip, from start to finish the Loupedeck proved an asset rather than a hindrance. For any wedding photographer who spends a considerable amount of time in front of Adobe Lightroom, it’s well worth considering.
If you’re looking to considerably speed up your editing time and replace the restrictions of a mouse and keyboard I would highly recommend, of course, it doesn’t replace the mouse/trackpad and keyboard fully (although I actually can’t remember hitting the keyboard throughout the whole edit). I see the console as a 90% replacement and then using your mouse/trackpad for particular adjustments.
The price for professional photographers I think isn’t any issue, the console is something you will use every time you load up Adobe Lightroom and will more than repay you in time saved. For amateurs and hobbyists the price might be a little steep, like everything it’s all personal preference but in my opinion, it’s a great asset to have in your editing arsenal.
Below are some of the images I edited using the Loupedeck console and you can view more of Kelly & Sam’s Italian Wedding by clicking here!


You can learn more about Loupedeck and purchase your own console for $299 by visiting the LoupeDeck website and B&H.
Full disclosure: A review unit was provided for the purpose of this article.
Image credits: Loupedeck imagery captured by DannyRichm>