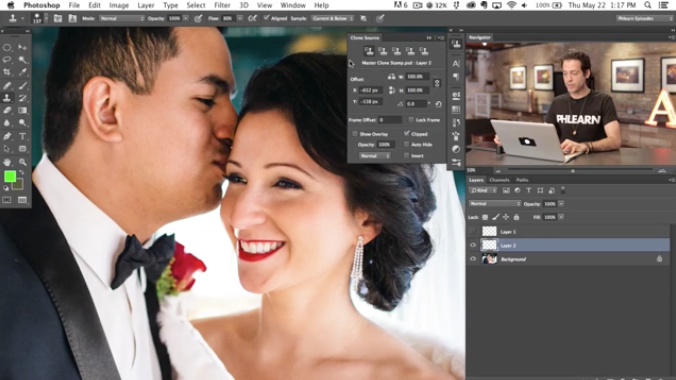
Advanced Tutorial: How to Retouch Skin Using the Clone Stamp Tool
Professional high-end retoucher Zoë Noble made this 9-minute video tutorial on how to use the Clone Stamp tool in Photoshop for effective skin retouching. After the success of her recent luminosity mask retouching tutorial, Noble is back to train you on the Clone Stamp tool.
One of the most important things that Noble does with the Clone Stamp tool in this tutorial is apply the correct blending modes to the tool. She only uses the “Darken” and “Lighten” blending modes to clean skin.
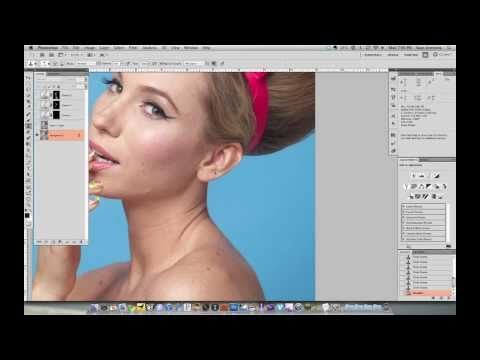
After some advanced tweaking of the brush settings, Noble is able to take this image and retouch it:

By the end of the tutorial, you’ll learn how she turned that image into this:

Can’t tell what has changed? Here’s a before-and-after comparison that toggles to show you the subtle differences:
Seamless cloning is important, but the workflow here is equally impressive. Handy hints like navigating to the “Window” menu and enabling “Tool Presets” allows you to quickly hop between multiple settings “versions” of the Clone Stamp tool at your leisure.
Watch the whole tutorial and quickly become a Clone Stamp wizard. The best thing is that it is easy to follow, meaning both beginners and more advanced users of Photoshop will be able to benefit from this. Subscribe to Noble’s channel for more retouching tutorials.