Teaching the Art of Capturing Bullets in Flight in a Classroom
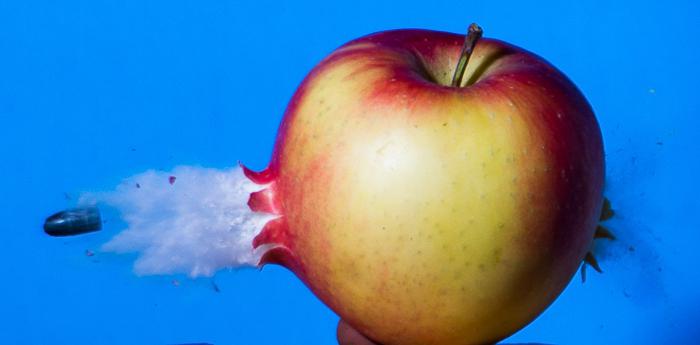
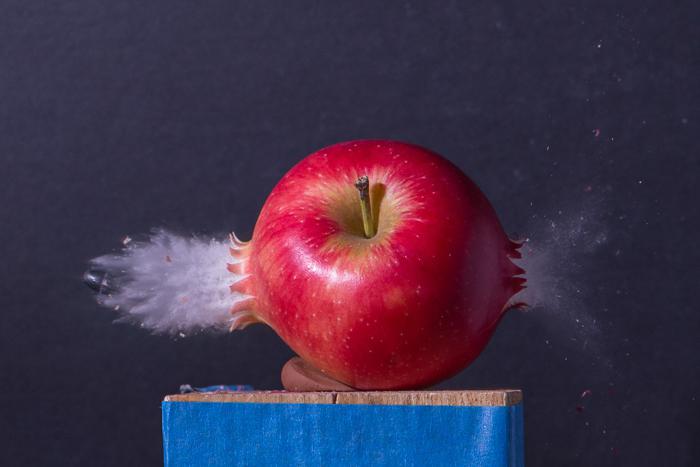
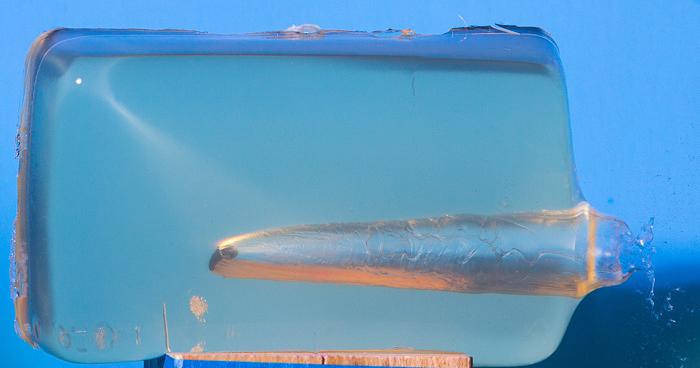
A .22 caliber bullet moving at 1,200 feet per second slices through an apple in the classic high-speed shot. This photo was created recently by Nasser Albahri at the Rochester Institute of Technology (RIT).
Although the program has a history of ballistics photography, the program needed to update to new safety standards of having a firearm discharged in a laboratory classroom. A procedure was established where a safety officer trained in firearms was the only individual to handle and operate the firearm in the classroom.
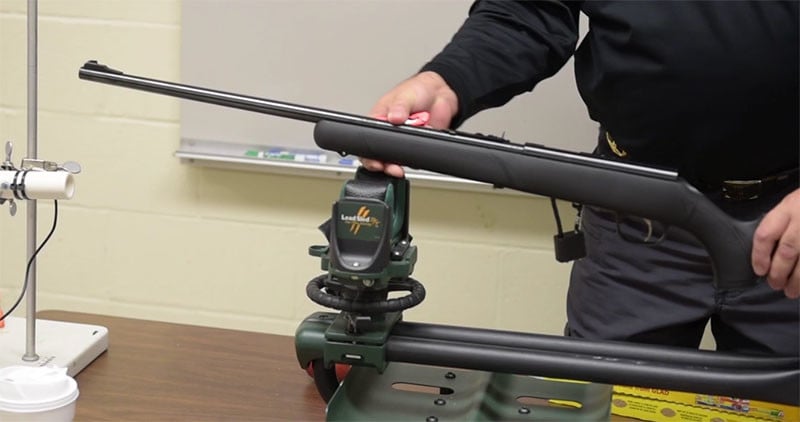
The firearm used in the lab is a .22 caliber bolt-action rifle. The bolt can easily be removed from this rifle to allow a laser to be positioned down the barrel. This is the quickest way to insure the alignment of the bullet and the target. When not in use, the rifle is stored in a locked gun safe under the supervision of campus safety and only brought to the lab when a ballistics shoot is being preformed.
The rifle is securely mounted to a gun vise that keeps the barrel aligned with a ballistics sensor, manufactured by Mumford Micro Systems, which is used to trigger a time machine camera controller. The ballistic sensor is made up of two infrared (IR) detectors mounted 4 inches apart. When a bullet traverses the two IR sensors, the microcontroller trips the high-speed flash at a desired time when the bullet is down range from the rifle. The accuracy of the trigger system is so precise that the location of a bullet only varies by a few millimeters from shot to shot.
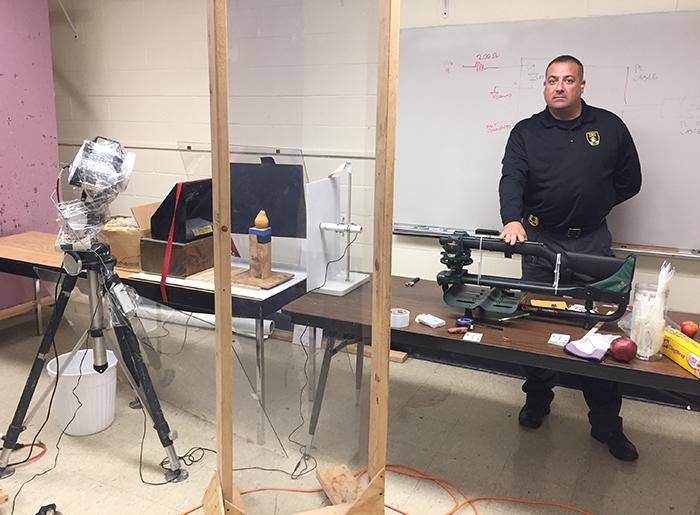
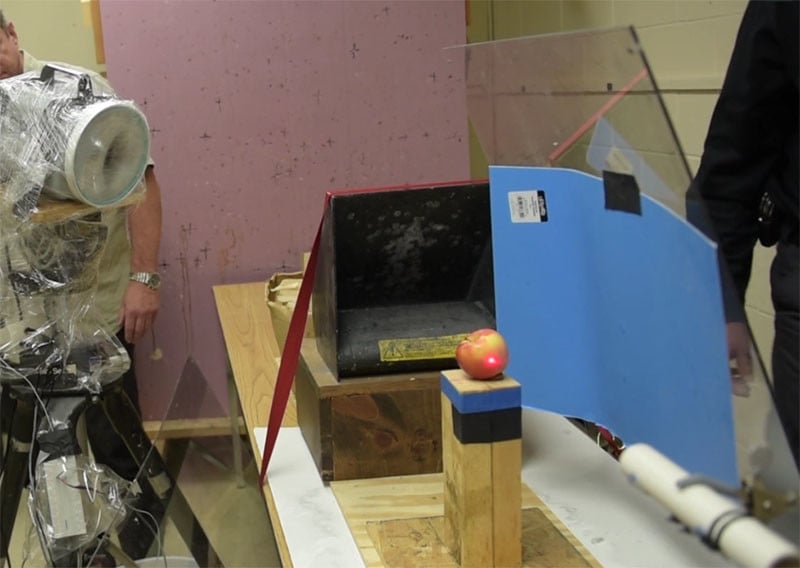
Tony Yazback, is the campus safety offer responsible for handling the rifle. The rifle shoots from right to left in the photo above. The bullet passes through the white tube, which is the ballistic sensor. A white piece of foam core stops a lot of the gun shot residue from getting in the air and making a mess.
The bullet is stopped by the bullet trap held in place with a red strap on the table. The Spot Flash is wrapped in saran wrap to protect the lens and the flash trigger is on tripod below the flash. The target is viewed through a large Plexiglas shield.
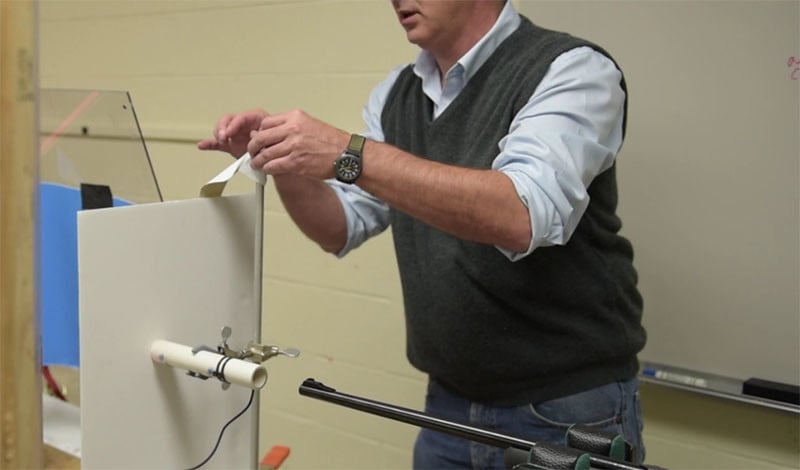
For increased safety, the bullet is stopped by a bullet trap that is only a few inches outside the camera frame. The closer the bullet trap is to the target the less the target can cause splatters. This greatly decreases the mess and allows a much easier cleanup. The high-speed flash used in these images is a Spot Flash manufactured by Prism Science Works . The flash is an air gap flash that generates a clean flash with a duration of 500 ns. Fast enough to easily stop a .22 caliber bullet.
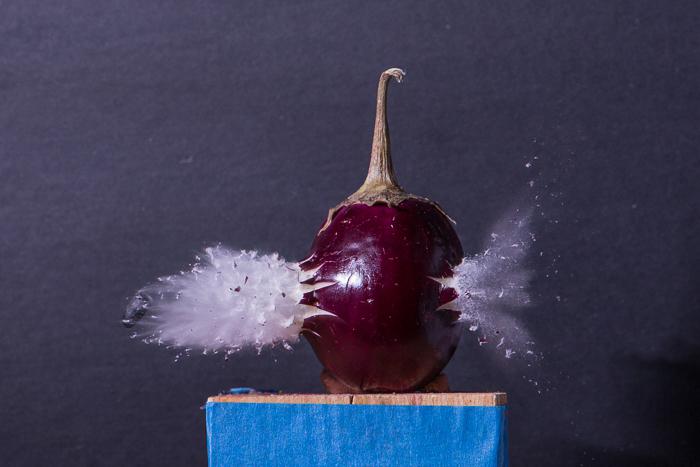
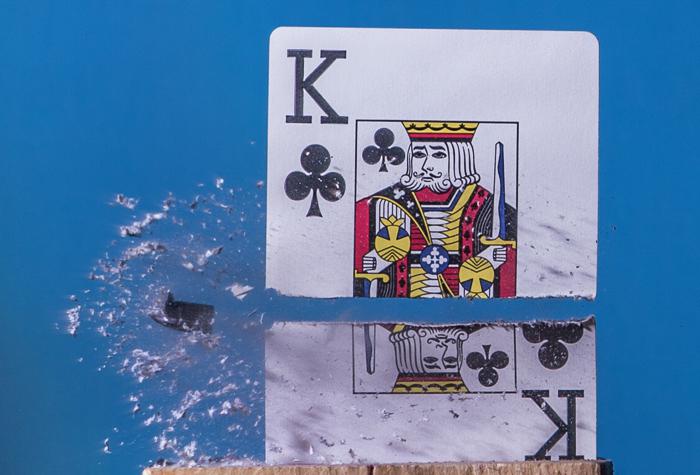
After the rifle is positioned to trigger the ballistic sensor, the students are ready to shoot objects that they bring to lab. The safety officer has final approval in what can be shot. Fruits and vegetables are acceptable, while hard objects like snow globes and alarm clocks are rejected due to the chances of a ricochet bullet. To guard against any unforeseen ricochets, the students are required to stand behind two large Plexiglas screens. Students are also wear safety glasses and ear protection during the lab.
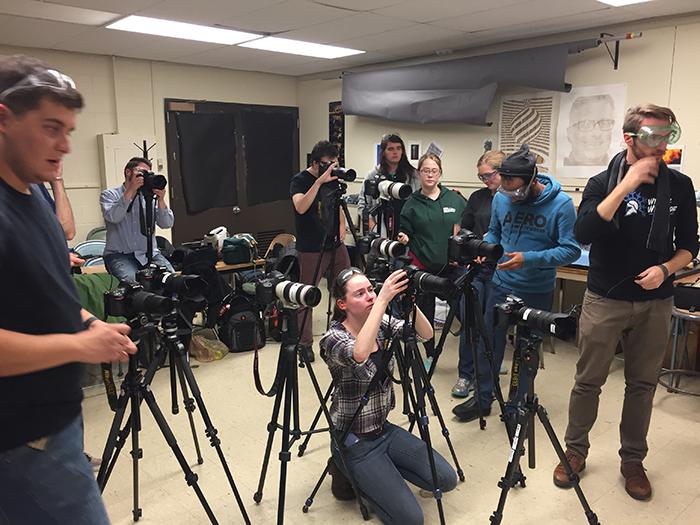
The students use an open shutter technique to capture the images. The subject to be shot is placed on a stand. The position is adjusted to take into consideration the amount the bullet will slow down going through the target. The flash is triggered by hand to tests the exposure and focus. After the students all have focus and exposure set, the rifle is loaded.
Everyone in the room is checked to see that safety glasses and ear protection is in place before the photography can start. The room lights go out, camera shutters are opened, the safety officer fires the rifle, and camera shutters are closed. Only after all the camera shutters are closed is the room lights turned on again and the exposure checked. Using this procedure, we are able to limit risk and safely achieve some amazing high-speed images.
Here’s a video showing what the class is like:
Students from this program find employment at a number of industries that utilize high-speed imagery. Former students are employed by NASA, Sandia Laboratories, and The Insurance Institute of Highway Safety.
I would like to extend special thanks to the following people that make these unique labs possible. Anthony Yazback (campus security), Michael Peres, Dr. Mary Mulligan, Amanda Kearney (Video supervision). I would also like to thank the students in the class for sharing images this short article.