How I Made a DIY Concave Flash Diffuser for Macro Photography
As long as I can remember, I’ve been fascinated with the small and wondrous world of macro imaging, predominantly as a macro videographer, but also in the stills realm as of late.
One thing that is a constant in any form of creative imaging is the need to constantly update, modify and adapt the base equipment we are dealt when we make our already-expensive gear purchases. Recently, I’ve been focusing my attention on adapting photographic flash guns for macro photography.
A flash tends to be able to cater for the most part with these needs by having access to power settings. My personal preference when shooting off-camera flash for macro — natural light is an altogether different beast — is to use the flash in manual mode and then adjust the power setting depending on my needs.
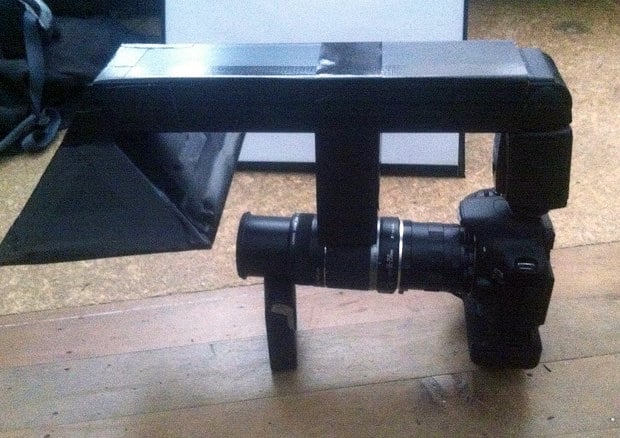
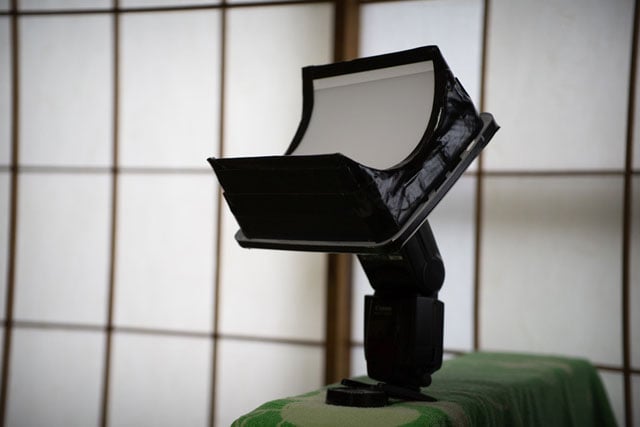
My latest lighting project looks at trying to achieve better diffusion for macro imaging — more specifically for flowers and smaller, and not as much for skittish wildlife. I wanted to create a pretty radical lighting rig. I was able to quickly source the component parts from a local hardware store. One added piece of gear was a small kitchen funnel that the wife “donated” for the cause.
Ingredients
– One tupperware container, as square as possible.
– A cylindrical plastic container. This one was 3 liters
– A roll of white soft packaging sheeting for light diffusion
– Reflective materials to line the internal surfaces. In this case, a sun reflector for a car’s windscreen
– A roll of black gaffer tape
– A small kitchen funnel

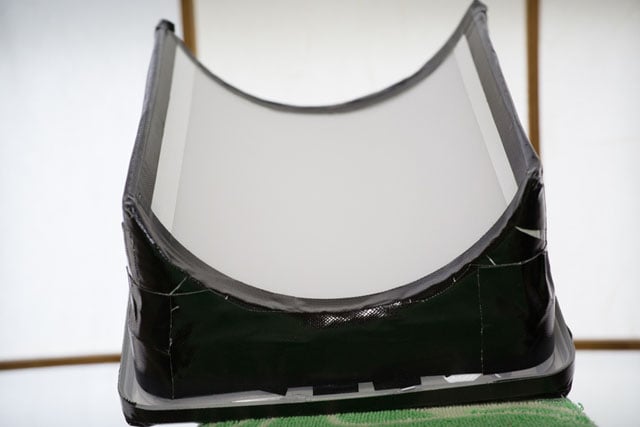
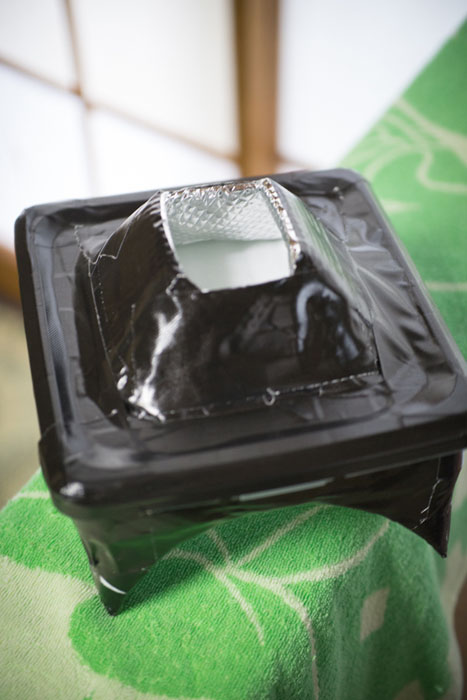
I wanted to look at diffusing the light over a much larger area, so I went for a concave design to try and also avoid any potential hotspots. Using white packaging materials, I also looked at having the option of adjusting the amount of diffusion by simply removing layers as needed.
As I was using a tupperware container for this, I simply cut out the square opening equal to the size of the kitchen funnel’s widest end and then placed a membrane of initial diffusion over that.
The top of the tupperware container still remains easily disconnected in the standard way from the main body. After having removed the base of that compartment I then cut a 3 liter cylindrical container in half through the vertical plane. This way I had two half globes, one of which was to be used for the main face of the diffused panel. Since it was made from an opaque plastic, my first level of diffusion was taken care of.
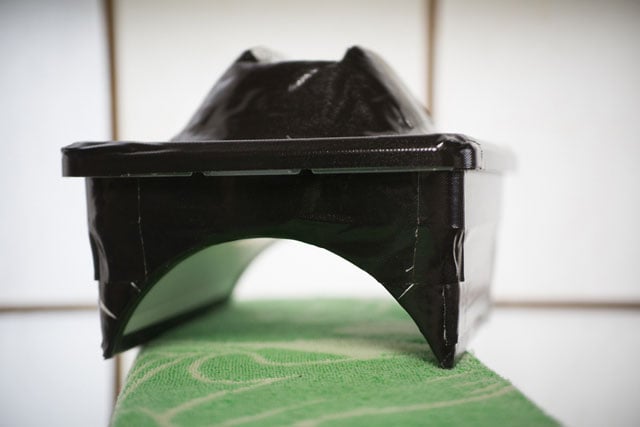
Copious amounts of gaffer tape later and the initial design started to take shape.
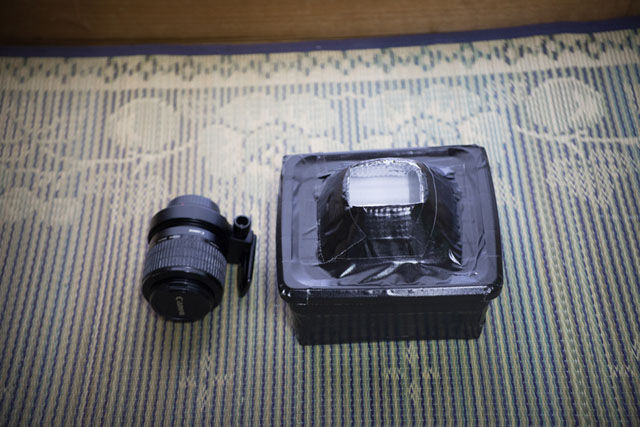
One last tweak to the design was to take off the funnel and rotate it 90 degrees so that the concave ‘tunnel’ of the diffuser runs perpendicular to the lens of the flash when it is in its standard position allowed for much easier positioning and handling of flash and camera. Prior to this I had the flash oriented in such a way that is was superbly awkward and very much off balance. This new orientation helped shift the main body of the lash over the center of gravity — it’s much easier to handle.
As for testing I’ve only had one day to find out how it works. It’s been raining cats and dogs here in Yokohama, Japan, where I’m currently based but we had a small reprieve yesterday so I headed out, under heavy, threatening skies to baptize the system in my tiny garden.
Here are some sample photos taken with this homemade concave diffuser:
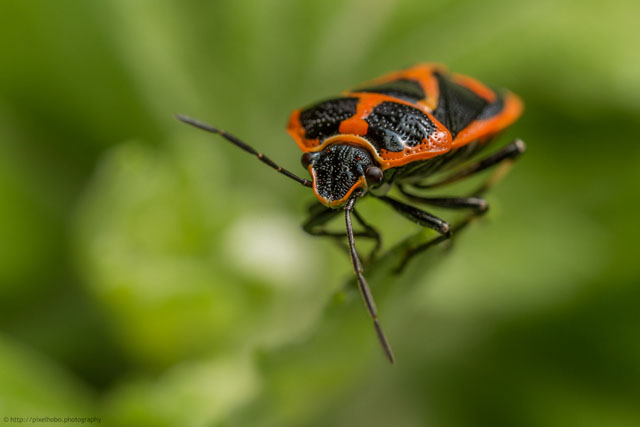
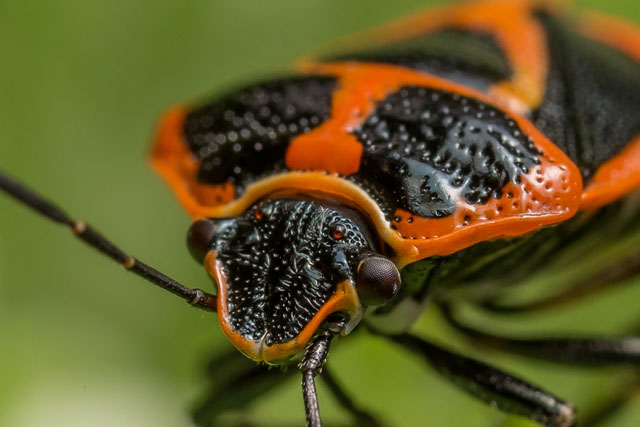
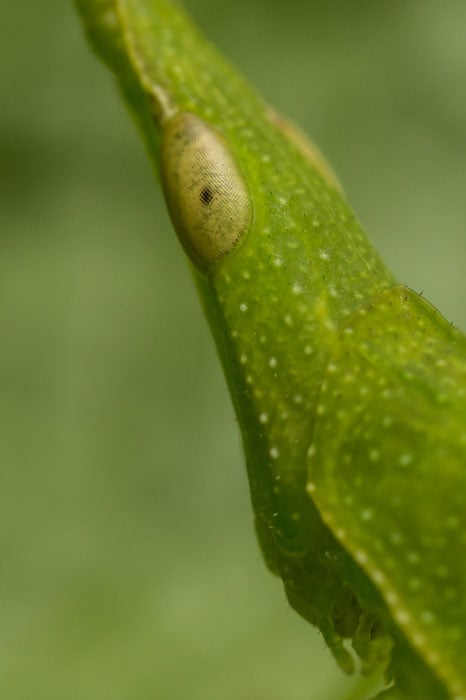
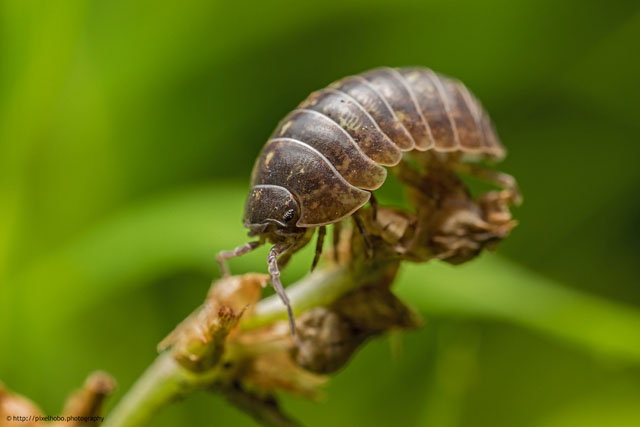
Tests are ongoing but at the outset it looks like this is certainly a design option that requires very little adjustments.
About the author: Mark Thorpe is a photographer based in Yokohama, Japan, who goes by “The Pixel Hobo” online. You can find more of his work and writing on his website and blog. He also created a community on Google+ for macro photographers who use the MP-E 65mm.