Hair Stocks Are My New Favorite Photoshop Hack
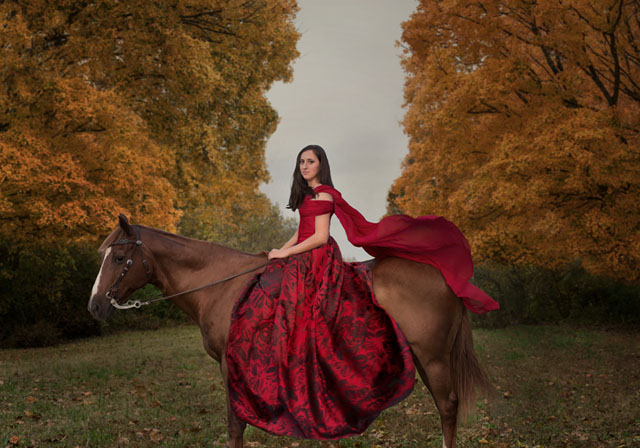
I have this project I’ve been working on for a few weeks now. It is a conceptual portrait commission for one of my clients. The goal of the image is to create something with the feeling of “The Dutch Masters” — something with a painterly feel, but not necessarily with visible paint strokes.
I finally got the image to a point where I was ready for some feedback, so I uploaded the image to get some critiques from my artistic tribe.
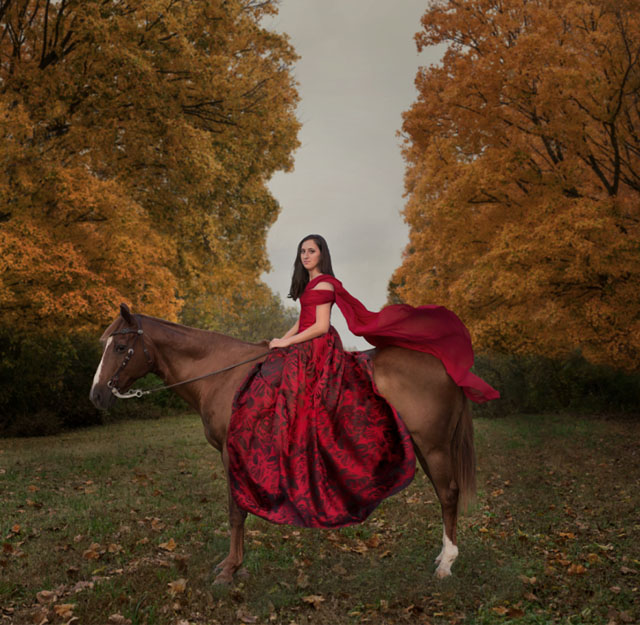
The first thing they noticed? “Why is her dress blowing in the breeze when nothing else is?” Ha! LOL! Doh!
This is what happens when you stare at an image for hours and hours. You become conceptually impaired. They mentioned a few other things but for this blog post I’m just going to show you how I fixed the hair issue.
Originally, when I shot the templates for this commission, I had created a series of images to use for just this purpose. I went back and I pulled some of the images. They were awful. I didn’t have a high enough shutter speed and there was way too much blur on them. The mask, when you applied it, looked awful. The harder I tried the worse it got.
I then decided I would hand draw strands in. If it looked realistic, it didn’t look flattering to her face. Some of the methods I tried just made her hair look like she stuck her finger in a socket. I downloaded PS hair brushes. I used every one of them. None of them looked good. I was going NUTS trying to do something that looked attractive to her face and still look light wispy.
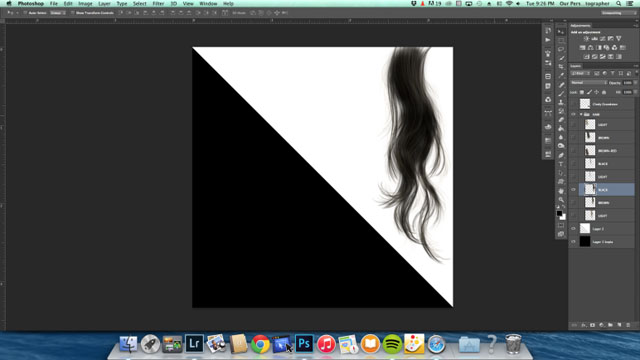
I finally threw up my hands and googled how to create hair in Photoshop and “laaaaaaahhh”: I found hair stock! And it was Creative Commons! Yes! Thank you Cindy Grundsen for your amazing contribution to the digital art world.

I selected the “Black” hair stock layer and dropped the layer into my composite image.
The first thing I needed to solve was to match the hair color. I used a hue/saturation adjustment layer, checked the “Colorize” button and messed around with the sliders until I got a close match. When you get really close to the color I recommend you start typing in the numbers and quit using the slider. You can make adjustments to the sliders in tiny increments and get the match just perfect.
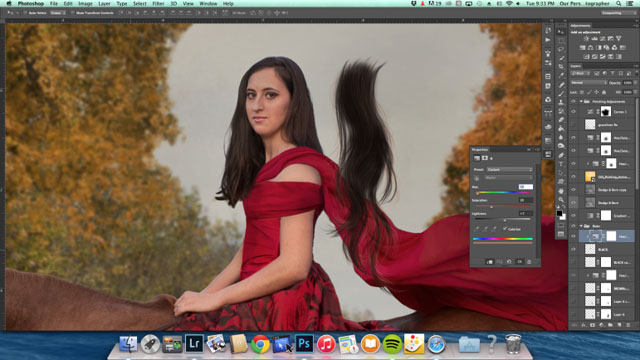
Once I matched the color I used the “Free Transform” tool and I scaled and rotated the hair swatch and placed it where it looked most natural to my eye. I decided under her chin looked the most flattering and realistic. I then used the “Warp” tool to get the hair to curve and lay naturally across her chest.
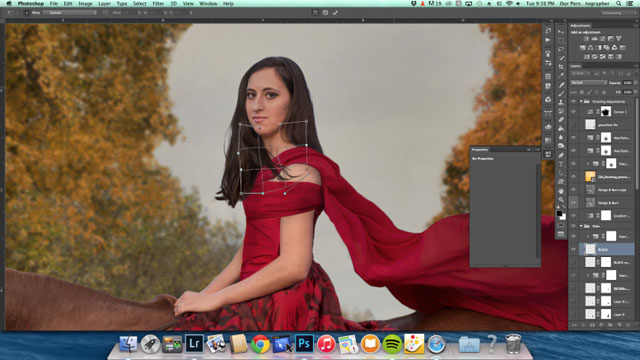
I used a low opacity brush to create a mask and blended the hair stock into her hair. Here is the final result! Subtle but effective. I love it!
The image is still a work in progress, but this was how I dealt with one particular issue in it.
About the author: Caroline Rutland is a photographer based in Spring Hill, Tennessee, who specializes in contemporary glamour portraiture, performance photography, and fine art portraits. You can find her work on her website and her blog. This article originally appeared here.