OpenReflex: A Fully Operational DIY 3D Printable SLR

The magic of 3D printing has led to the creation of a few pretty cool DIY projects we’ve featured in the past. In the world of cameras, we’ve seen everything from lens adapters to flash diffusers make their way into the real world via the 3D printer and some plastic.
What we had never seen before now, however, was a fully operational 3D printed SLR camera, but freshly graduated design student Léo Marius has created just that!
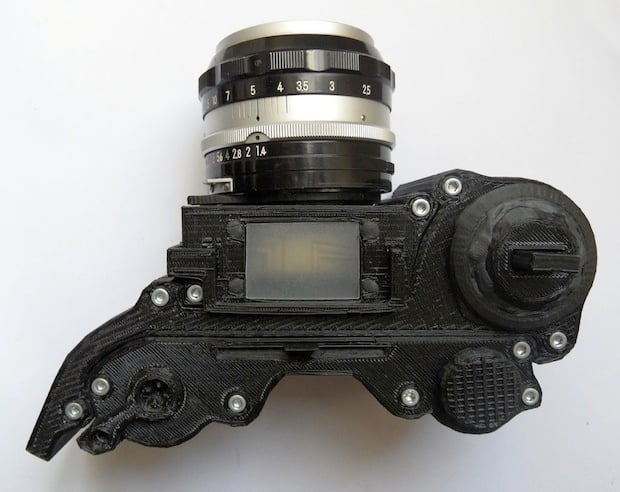
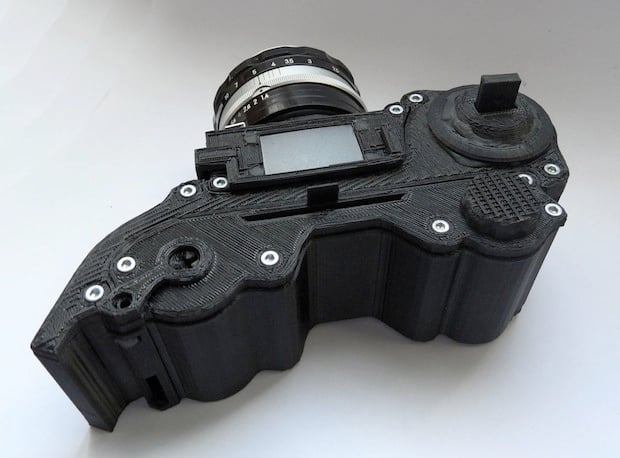
He’s calling it the “OpenReflex,” and it’s an open source analog SLR with a mirror viewfinder and mechanical shutter that you can build entirely on your own. All of the pieces can be printed on any recent RepRap-like ABS 3D-printer, after which assembly is fairly straightforward.
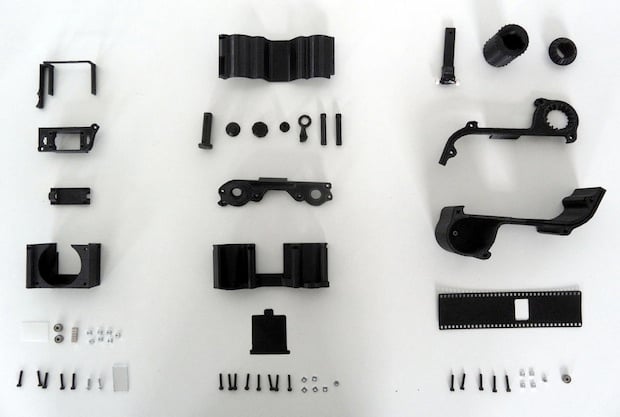
The camera comes in three distinct parts: the film receiver, the shutter and the viewfinder. He’s done it this way so that modifications and improvements can be made quickly and easily by those who would like to alter his original design.
You can find a full list of necessary equipment and materials over on the camera’s Instructables page, but assuming you have access to a 3D printer and a few other necessary tools, the cost of the actual materials you’ll need comes out to less than $30.
Once you have everything you need, each of the parts is printed to create the three disassembled final pieces. Marius estimates total printing time at less than 15 hours, with total assembly time coming in at about an hour. All of the source files you need are available on the aforementioned Instructables page.
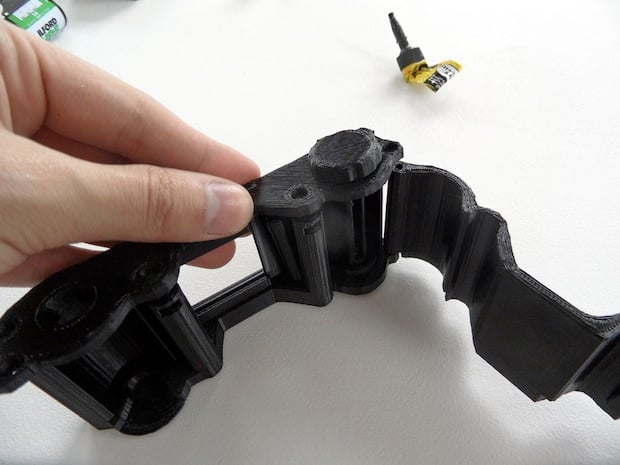
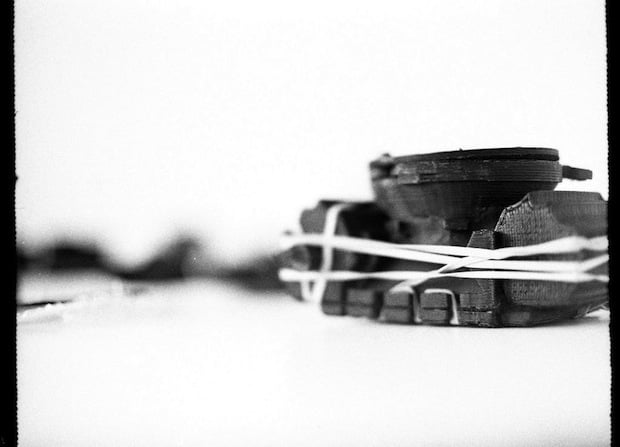
As soon as you have all of your printed materials, you can start putting the whole thing together, one piece at a time. We won’t go into a detailed step-by-step here, but you’ll be putting together the film receiver, shutter and viewfinder in that order.
After everything is assembled, you can then set about light-proofing everything using Sugru. All screw holes, nooks and crannies will need to be filled in, making sure to block out all light without getting in the way of the mechanics.
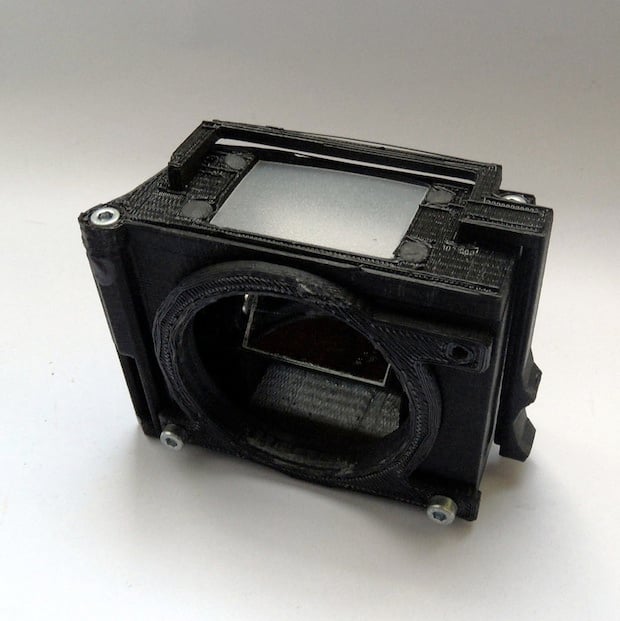
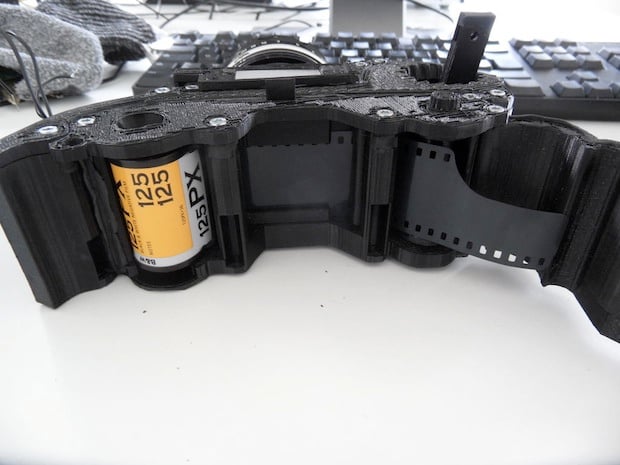
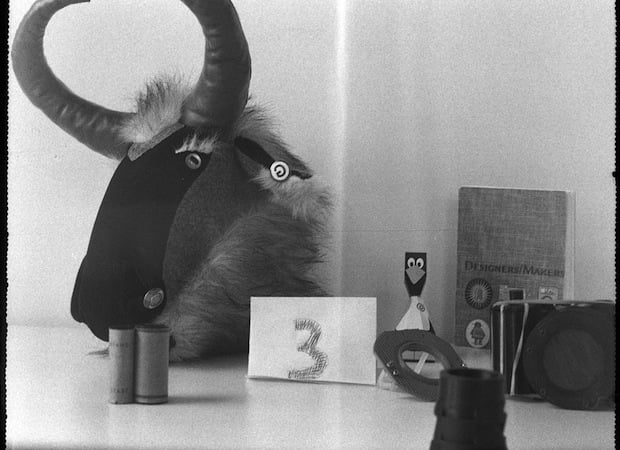
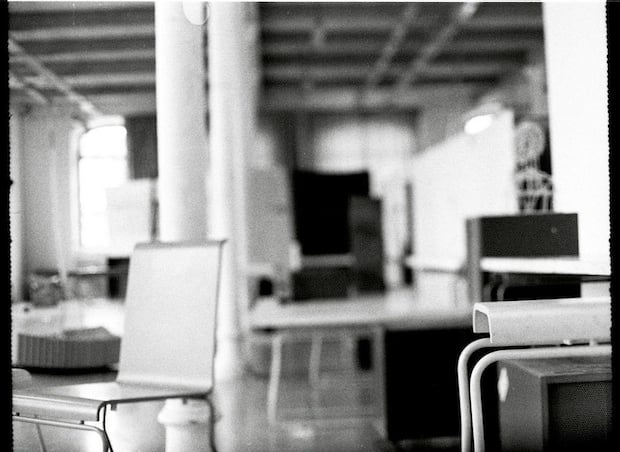
The final step is to snap (literally, they snap together) the three final pieces together into a lightproof whole. Then load your film, make sure you did a good enough job light-proofing everything, and start taking photos. If you followed all of Marius’ steps correctly, the final shots should look something like this:
The camera should be compatible with any lens, although he’s working on improving the viewfinder design to incorporate a true lens mount. You will also want to use a lens that allows you to change the aperture manually, as you’ll have to use a light meter to find the proper exposure for a 1/60 shutter speed (approximate… it really depends on your specific build and how quickly you press the mechanical shutter).
It’s not going to replace a typical 35mm camera (many of which you can buy for peanuts online), but for $30 and 16 hours of your time, you can literally build your own. And what’s more, it’s fully modifiable as you think of ways to improve it or change its function.
For a full step-by-step breakdown, a list of materials and equipment, tons more sample pics and links to all of the files you’ll need to make the OpenReflex happen for yourself, head over to Marius Instructables page here.
Image credits: Photographs by Léo Marius.