Creating a Dryad Costume for a Fantasy Photo Shoot on a Shoestring Budget

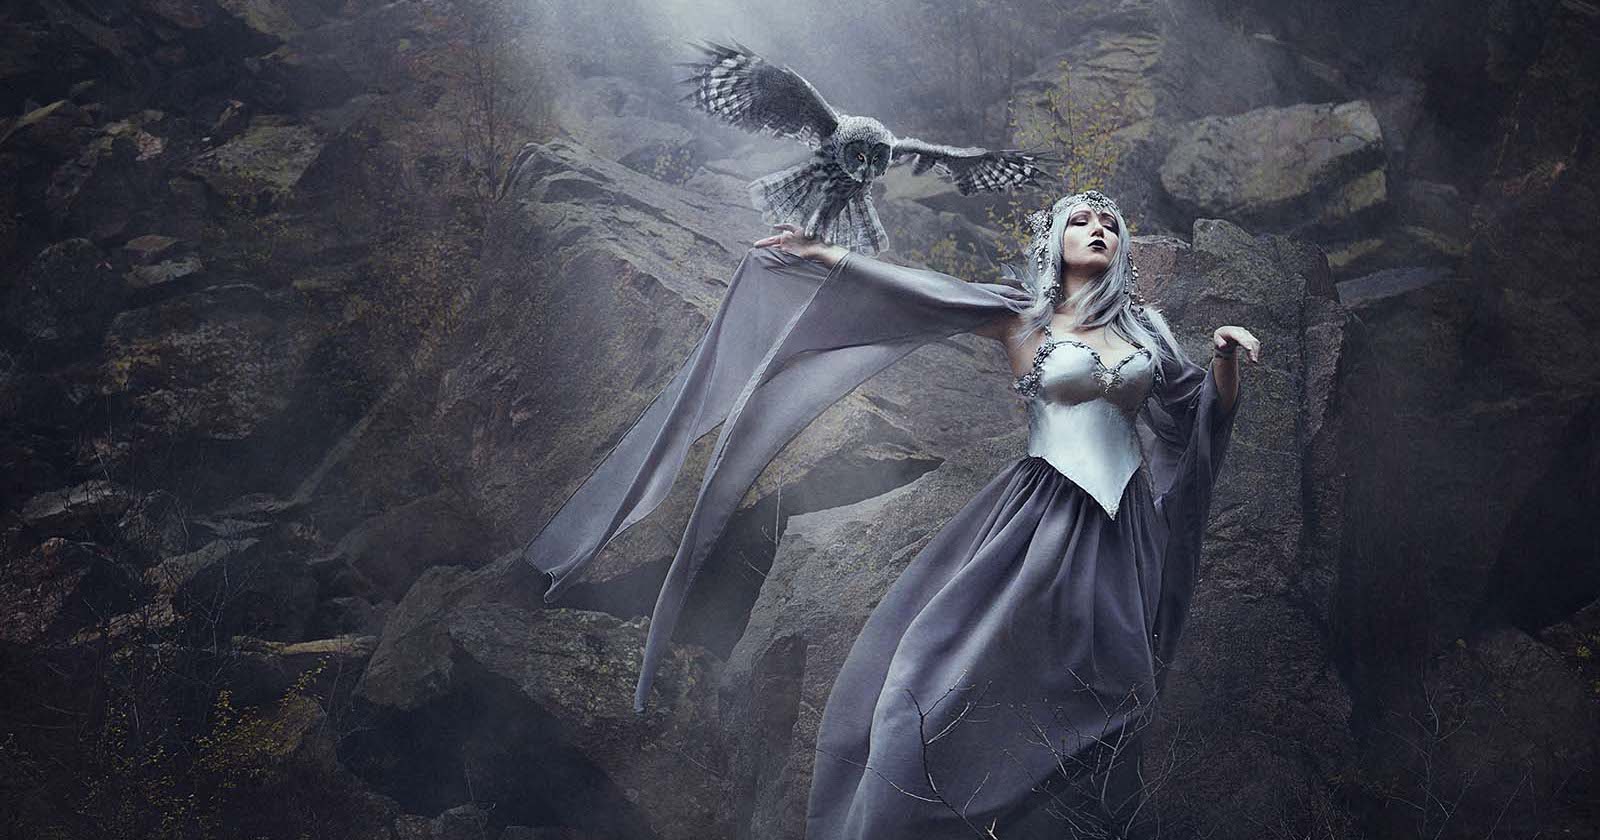
When I started planning a series titled DreamWorld, one of the first characters that came to me was a dryad: a nature spirit representing our connection with nature. I saw her as a strong, benevolent queen, keeping watch over the woodland creatures and protecting them. The first concept I came up with that made my heart pitter-patter with excitement was the idea of building a huge crown for her from sticks and branches. I had no idea how I was going to accomplish this, but I had a vision. And I have learned over the years that having a vision will pave the way to making it a reality, regardless of if I know how that will come about.
After I sketched out my designs, I decided to just dive into the project and tackle each step as it came. So the first part was simple: I needed sticks and branches. There are lots of trees in my yard, so there was no shortage of sticks to choose from. The challenge was finding ones that already held the kind of shapes and curves I was looking for.
I started by bundling the branches together into small clumps, and eventually joining the smaller clumps into larger ones.
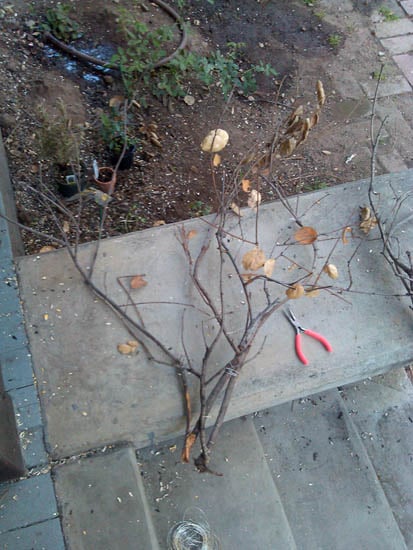
I gently guided the branches into the directions I wanted them to go, and wired them into place. It was quite simple and low-tech, it just took wire, wire cutters, pliers, time and patience.
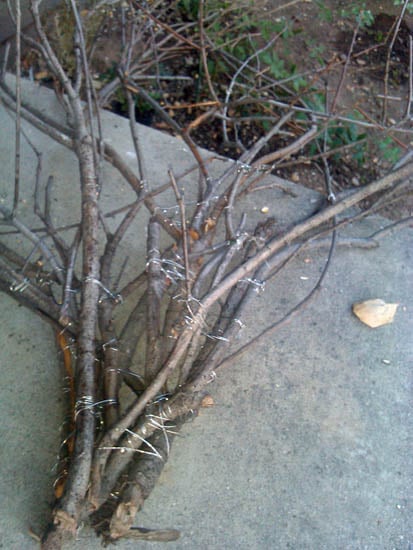
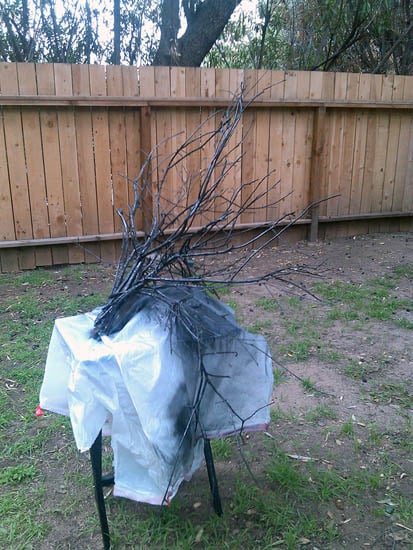
Once the shape was right, I spray painted it with various layers of black, bronze and silver paints, giving it a subtle, organic variation of colors.
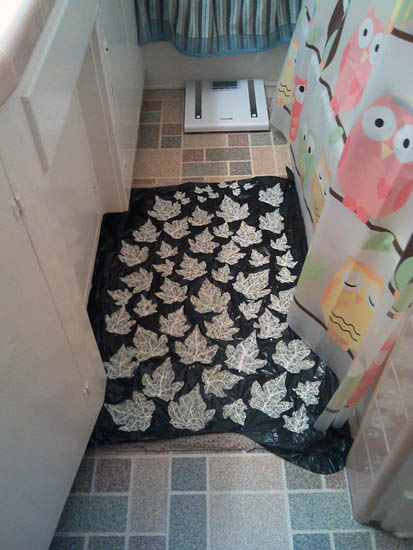
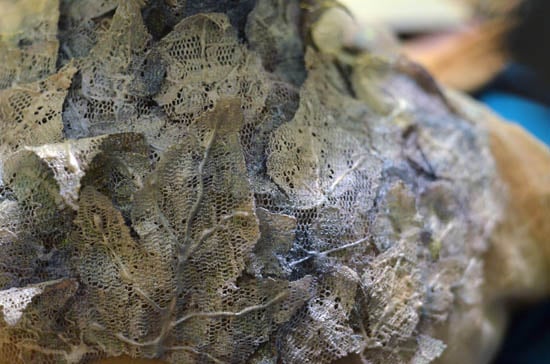
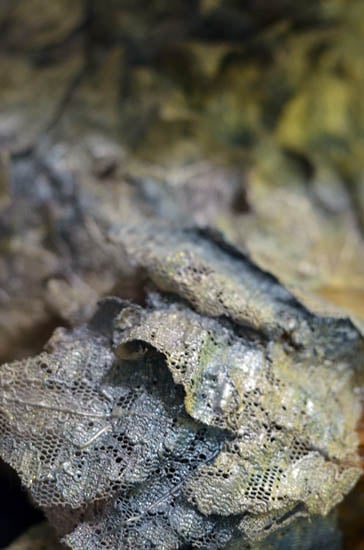
At this point I started working on the dress and, in particular, the lace leaves. Oh, I was excited about the lace leaves! I’d found a really beautiful yard of lace with an iridescent shimmer to it. I cut out hundreds of leaves from it in several different sizes. And I decided that any mild flaws would only enhance the natural and organic look I wanted.
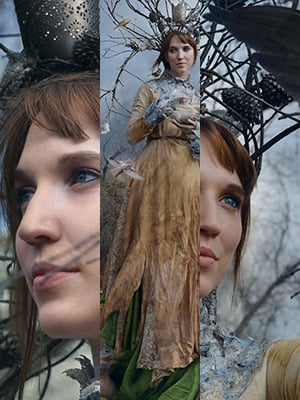
After the leaves were all cut out, I painted veins on them with pearly fabric paint; you can see a small sample of the veined leaves trying on my bathroom floor below. I had to paint them in the bathroom so they could dry without the cats trying to help.
After they were painted, I created a small landscape of bubble wrap and plastic bottles to give a wide variety of angles for them to take shape from, and covered them thoroughly with spray adhesive. As they dried, they took on gentle curves and curls much more like actual leaves.
Most of the leaves were for the dress, but I wanted to bring a few of them onto the crown as well.

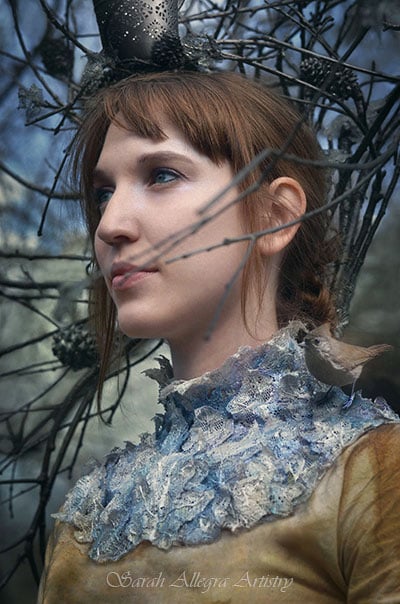
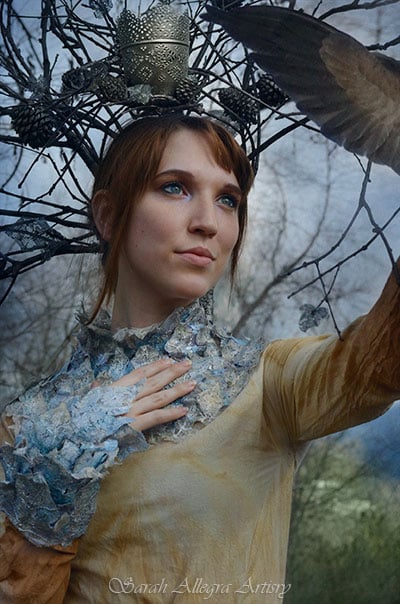
Lastly, I added pinecones and a small plant holder which I thought had a very regal look, all of which had been painted to match the rest of the crown.
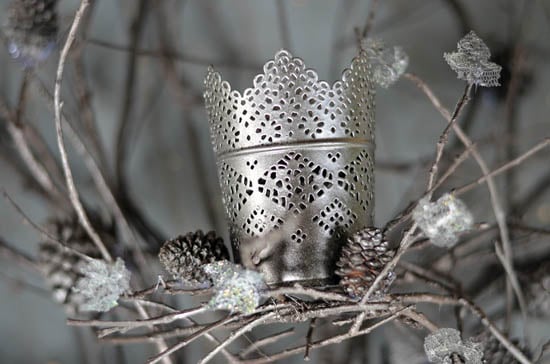
The $2 plant holder, pinecones and lace leaves:
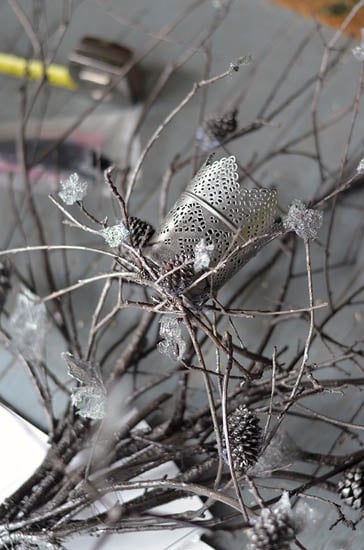
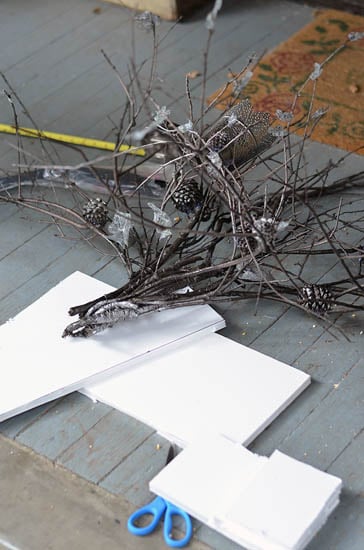
This whole time I still wasn’t sure how I would attach the crown to my model. The crown was really pretty huge, fragile and awkwardly shaped, but it was quite light.
After some deliberation, I decided to try mounting it to some extra thick foam board with zip ties, using a piece long enough piece to run from the base of the crown to where the model’s hips would be. I covered the back of the foam board with adhesive-backed Velcro, and cut matching Velcro lengths, planning to use them as straps around the model’s shoulders and waist.
There was the crown; next was the dryad’s dress! I wanted it to be long and flowing, with a very natural feel to it. I planned on having the bottom of the dress be cut into strips, using fabrics with different textures and colors to help emulate the look and feel of a tree.
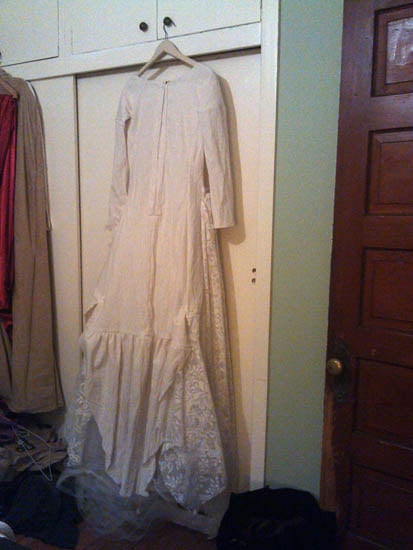
I used plain, unbleached muslin to make the dress, both for it’s inexpensive cost, and because I suspected it would dye easily. After the form of the dress was created, I tied a rope between two trees to make a clothesline, bought a HUGE amount of instant ice tea and a spray bottle…
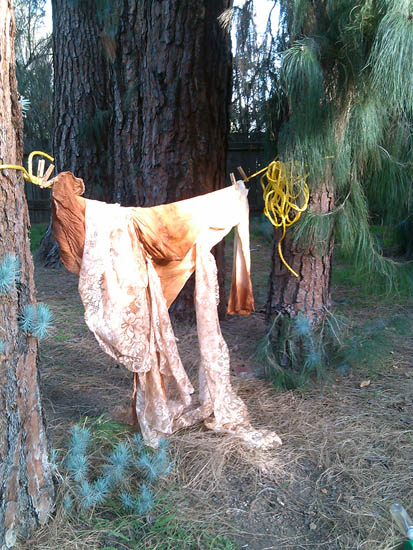
I sprayed and sprayed and sprayed it, letting each layer dry so that the color could build up and have a natural gradation. It worked, but oh my heavens, did it SMELL. I drink tea, and I’ve never found its smell offensive, but apparently I’d never experienced it in such a large and intense quantity. I had to email the model and warn her that her dress would be beautiful, but stinky. It had to lay out on a chair on the porch the first night; I couldn’t even deal with it being in the bathroom.
Once it was dyed, I needed to tie up the metaphoric loose ends of the dress; put grommets in the back, sew the ribbons around the waist, etc.
After that, it was finally time for the part I was most excited about: attaching the lace leaves! All along I had been planning on creating a collar and cuffs out of the leaves, and I was quite excited to have finally reached that point after all the work I’d done leading up to it.
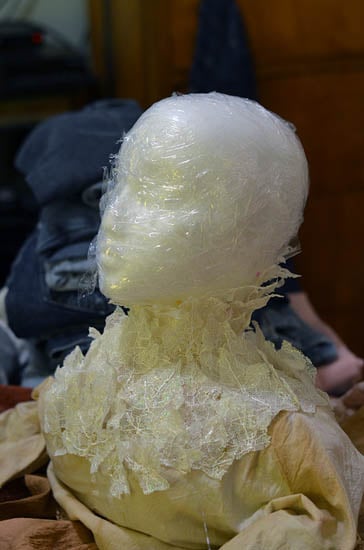
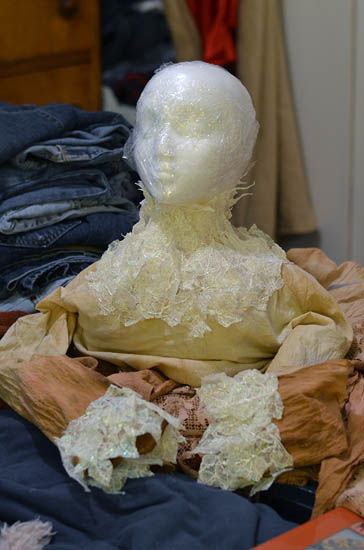
I had suspected that I would need to paint in some shadows to define the various layers of the leaves; with white on white, I thought it would look like a white blob from far away. After some thought, I decided to “paint” the shadows on using eye shadow. I wanted the shadows to be very light; I love the pearly iridescence of the leaves and I didn’t want to cover that up.
I thought eye shadow would offer me a wide range or affordable colors (and I ended up just using an eye shadow variety kit I’d had forever) and allow me to gradually build up subtle changes of color. After working on the dress all day, and the shoot looming in the near future, I spent one whole evening painting eye shadow in between the leaves of the collar and cuffs (with an awful headache, I might add). I loved the result; it was beautiful and just like I had wanted.
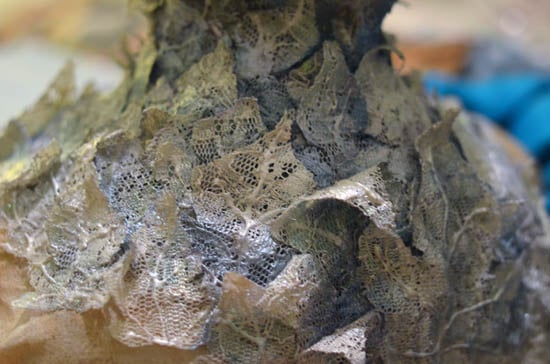
To help preserve everything, since shadow can smear so easily, and also fortify the shapes of the collar and cuffs, I gave them all a light mist of spray adhesive to bring it all together.
That was the wrong thing to do.
Somehow, the spray adhesive turned my carefully constructed, beautifully built-up shading into a nasty, muddy blob. It looked awful. I wanted to cry. At this point, I was only a day away from the shoot, and I had no idea what I was going to do. I absolutely couldn’t use the dress the way it looked. And it was now very late on a day I’d spent every hour of working on the dress, I was tired, cranky and tearful.
Just to feel like I was doing something potentially useful, I painted on a couple different colored swatches of acrylic paint I had on hand for another project, and decided to let the whole thing dry overnight. I’d figure it out in the morning.
The acrylic paint worked. And I ended up liking the end result of the paint even more than I’d liked the initial eye shadow ones. It still took a lot of time to do the next day, but I was able to work on it without feeling panicked or totally stressed out, because I knew it was going to look beautiful. And of course, acrylic paint dries quite quickly, which helped!
There! The costume was done! Here are the the final edited photos:
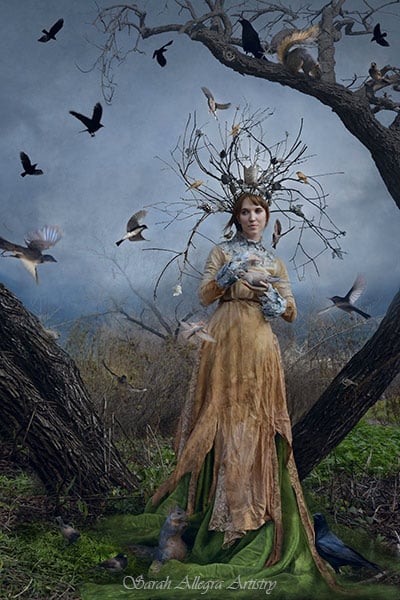
I’m really pleased with the final images, and even more pleased that I managed to create these with a very limited budget. The sticks and branches were free, I already had the wire and some of the fabric.
The only money I spent money on was some fabric, paint, instant ice tea and the crown decoration. All together I’d guess I spent about $40 or $50 on this, most of which went to the different colors of spray paint. Huge budgets are not mandatory to create great things!
About the author: Sara Allegra is a conceptual and fine art photographer based in Los Angeles, California. Visit her blog here. This post was originally published here.