Beautiful Time-Lapse of Long Exposure Star Trails Traversing the Night Sky
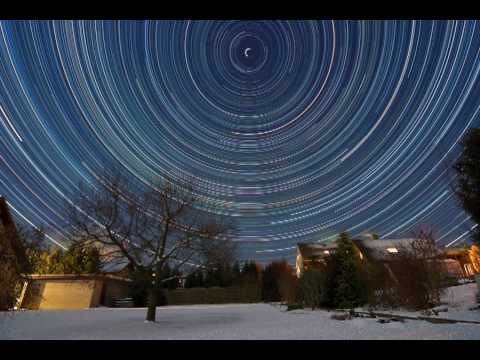
North Carolina-based photographer Daniel Lowe sent us the gorgeous video above, which shows star trails forming and floating across the sky. Most time-lapse videos of the night sky show stars as points of light, rotating around Earth’s pole. Lowe’s video shows the long streaks of star trails doing the rotating, making the video even more surreal and magical.
These scenes are created by stacking a sequence of long-exposure, high-resolution digital photographs in Adobe After Effects and allowing each photograph to linger on the screen for a short duration of time before fading.
The resulting “Startrails” video captures the actual motion and apperance of light; nothing has been added with respect to computer generated graphics.”


Want to know exactly how the video was made? We did, so we asked him. Here’s what he told us:
The photos were taken as a static, non-moving timelapse on a very clear night, with almost no clouds. This is important, as one passing cloud will “wipe” all startrails.
Each image appears for a duration of 4-6 seconds and then dissolves. As the stars move through the sky, the net effect is they appear to move and leave trails. The layers are blended using the “Lighten” blend mode.
All the images were imported into Adobe After Effects, but not as an image sequence, as you would do with an ordinary timelapse. (another hint: don’t do this with RAW images; your render time will be 20+ hours. Use TIFFs instead)
Once I got all the images imported, I selected all of them and dragged them to the timeline. After Effects prompted me with a dialogue asking me how long I wanted to display each image; and details about the image dissolve.
The sequences were then trimmed to a point where the last image was added (otherwise the video would “subtract” frames until you arrived again at one still photo)
That’s it; hit “Render”. To remove spots from hot pixels or do a panning effect in post, I used the “pre-compose layer” option in After Effects to apply the effects to all the images.
Lowe is planning to release a how-to video showing his technique. You can follow him on Facebook to see the video when it’s out, and we’ll try to update this post with it as well.
P.S. Last November we featured a video by Olivier Martel that uses a similar technique.