The Do’s and Don’ts of Photoshopping Wings Into a Surreal Portrait
Ok, let’s just be honest for a second here: everyone and everything in the world looks drastically cooler with wings. Period. It’s just the way it is.
In middle school when I was heavily into my “drawing magical fantasy creatures” phase (it never ended by the way… just ask my sketchbook), I used to check out this “how to draw animals” book from the library all the time. Really they should have just given it to me, I had it checked out so often.
I’m pretty sure about 95% of them had wings of some sort (because, as we’ve already been over, everything is more awesome with wings). Well, Internet, I’ve decided to put my many years of bestowing flight to good use and share some do’s and don’ts of adding wings to your images.
(Obviously all of these tips are just a matter of opinion, so take them as you will, but I think they should help you to create a more believable and incredibly freakin’ sweet thing with wings.)
DO: Think About Science
Obviously this is a fake thing you’re going to be making, but you still want it to be believable. Try to pay attention to the science behind your soon-to-be-flying person (or whatever it is).
You have to decide how the wings would make the most sense on your creation. If you add them somewhere like the lower back, it might look a tad funky. Most bodies don’t have the proper musculature and/or bone structure in their lower backs for wings to make sense there.
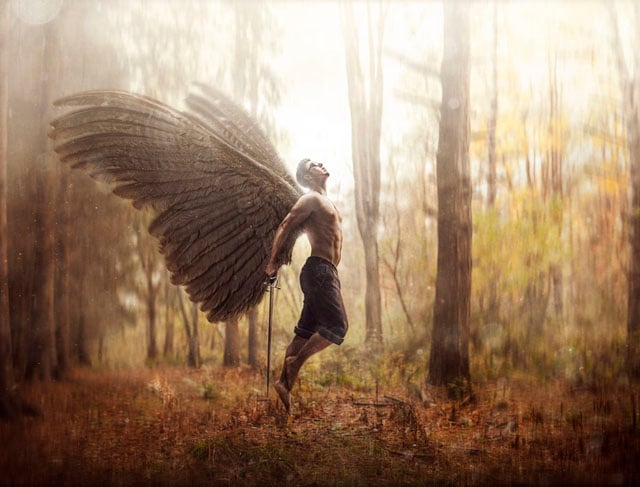
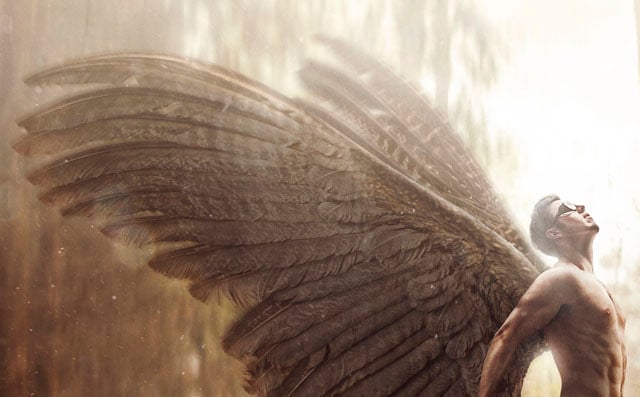
For my picture, I wanted it to appear as though the wings were coming out of the shoulder blades. It just seemed as if that’s where wings might actually be able to function. Also, basically every angel/fairy/flying-demon picture you see has the wings coming out of that area, so it was an obvious choice.
However, this is your creation so maybe you want the wings to be a bit different. Perhaps your wings are going to be more like that of a bat, where the arms are actually part of the wings. You could be going in more of a dragonfly-type direction with four smaller skinnier wings; there’s all kinds of different configurations you could play with.
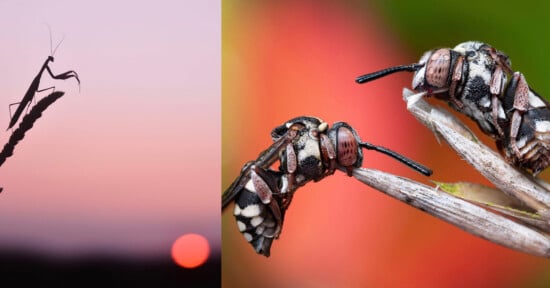
So, before you start, try looking at images of animals and insects (you know, science and stuff) to help you decide exactly what kind of wings you want to add and how they might scientifically work.
DON’T: Use the Same Exact Wing Twice
Your flying dude or dude-ette might be facing the camera straight on with their wings spread wide. You therefore may be inclined to think, “Oh, well I’ve already taken the time to cut this detailed wing out, so I’ll just save some time and flip it to use for both sides.” Please try not to think that.
(Maybe you’re going for a super symmetrical image or something, and in that case have at it. This is your art, but this is how I feel…)
We have all been training since we were adorable little children to find matches and differences in things. Games like “one of these things is not like the other,” “spot the differences picture books,” or the card game “memory,” have all helped to shape our brains and sharpened our skills to find things that are alike or not.
If both of your wings are identical, most people are going to catch on quite quickly to the matching intricacies and know that you’ve cheated, thus pulling them out of the image and smashing their suspension of disbelief to pieces.
“Oh, that’s the same wing that they’ve just flipped and put on both sides.”
We never want our audience to think the wings are “put on.” We want them to think, “Whoa look at that be-winged warrior who clearly has real wings that are really there… and real.”
DO: Remember that Size Matters
If you would like your flying person to be extra believable you have to take into account the size of the wings that would be required to actually keep them in flight. A bird’s body usually isn’t all that big, but their wingspans are proportionally quite large, often times completely dwarfing their height in comparison.
An eagle, for example, can grow to be around three feet tall but have a wingspan of close to 7 feet! So, take that little nugget of knowledge into account when adding your wings.
If the wings aren’t big enough, it’s not going to be convincing that they could actually fly. Unless, of course, you’re going for a “cupid” approach with comically small wings… then I’ll allow it. These are fantasy creatures we are making after all, so why should you have to follow any rules? You don’t I guess … but keep reading anyway.
DON’T: Forget About 3D Space
This right here is by far the most frustrating and purely evil thing about giving something wings. It’s been plaguing most of my artistic life thus far. I can’t tell you how many times as a young youth I drew wings on something (usually a dragon), then erased them, re-drew, re-erased part, re-drew, re-erased entirely, re … you get the point.
Usually I add the first wing and it immediately makes the picture way more awesome (obviously), but then I try to draw the other and everything comes crashing down. This is more so an issue when your character is in a profile position and one wing is blocking most of the other.

It’s SO HARD to decide what angle the back wing should be at. How far out it should come? Should it stick out the bottom? The top? Is it almost completely covered? You really have to think about it in a very 3D sort of way, and how a wing would look going towards the camera or away from it in space.
It helps to cut out little paper wings and hold them up in different ways to see how they would look. Also, once you’re going completely crazy and have changed the wings 42 times, it’s really helpful to have your wife look at them and tell you exactly what to do to fix them.
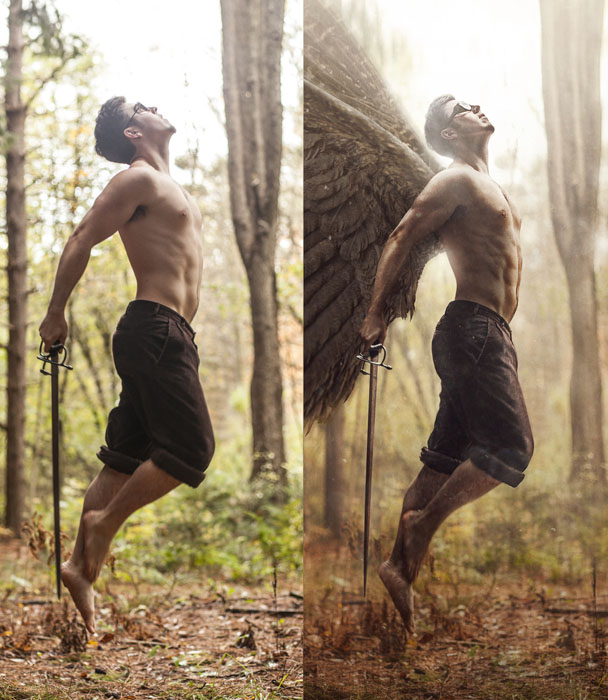
DO: Bow Down to the Majesty of the Warp Tool
Seriously people, get on those knees because the warp tool is worth groveling over. I remember the day I learned exactly what it was and how it worked … that was a good day. Basically, for all those that don’t know, it allows you to transform an object in Photoshop in a very… bendy sort of way.
You can grab different points and move/warp areas of your wing around to suit your liking. It can cause a bit of blurring, especially if you’re doing a drastic warp; I usually sharpen whatever I’ve warped afterwards.
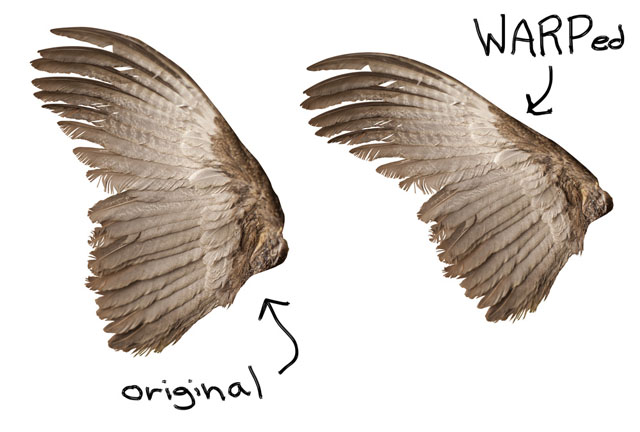
The wings I used for this picture were actually taxidermied chicken wings (the feathery kind, not the delicious kind that are usually in fact a leg anyway), that my friend graciously shared. He used these very wings for this show stopping image.
They are really beautiful, but for my vision I wanted them to be a bit more hawk-like. The warp tool gave me the liberty to stretch them out into the imagined wings flapping around in my head. Thanks, warp tool.
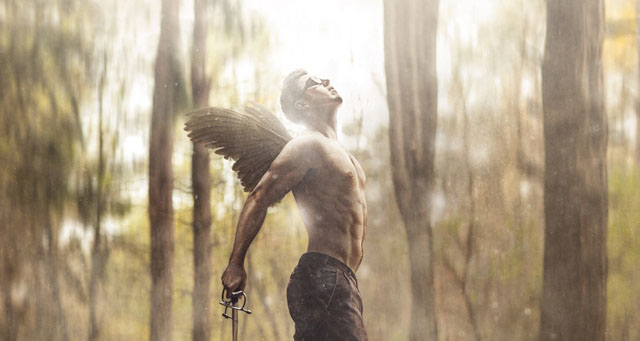
Here’s a video showing the speed edit for the video above, which I titled “Liftoff”: