What is Fill Light in Photography?
Fill light is one of the unsung heroes in the photographic industry, yet the fill light in basic three-point lighting can be just as important as the key. Getting it right can make your images look much better.
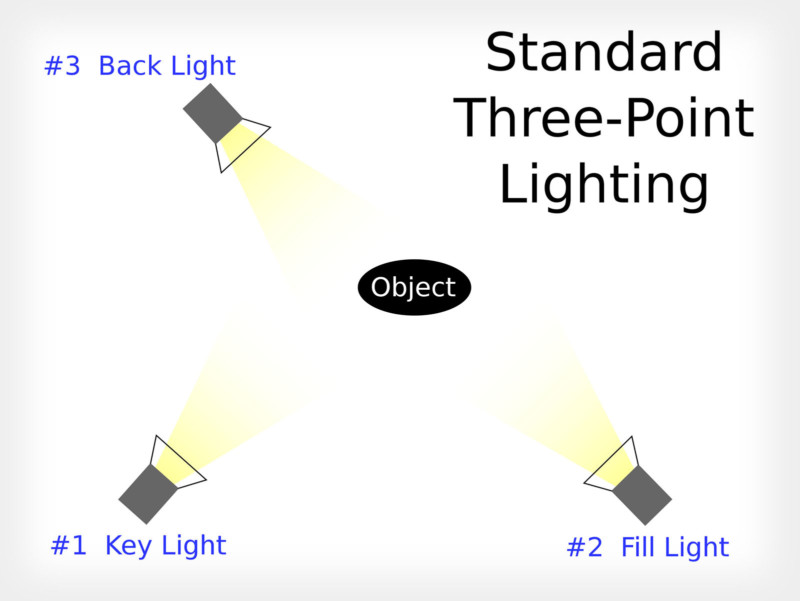
When photographers are first starting out, most may not be fully confident with how to create a good fill light while making sure that none of the other areas are overexposed. It may seem complicated trying to balance multiple lights and many will want to resort to a particular rule about fill lighting.
While there are some great guidelines on how to use fill light, it will come down to your taste in lighting to set your lights up.
Fill Light in the Studio
Let me break down how I personally tend to work with fill lights in a studio setting. This method is by no means rocket science and I certainly did not come with it, but I do strongly recommend setting things up this way as it is simple and intuitive.
There is a slightly different way of doing this when on-location, which we will cover later.
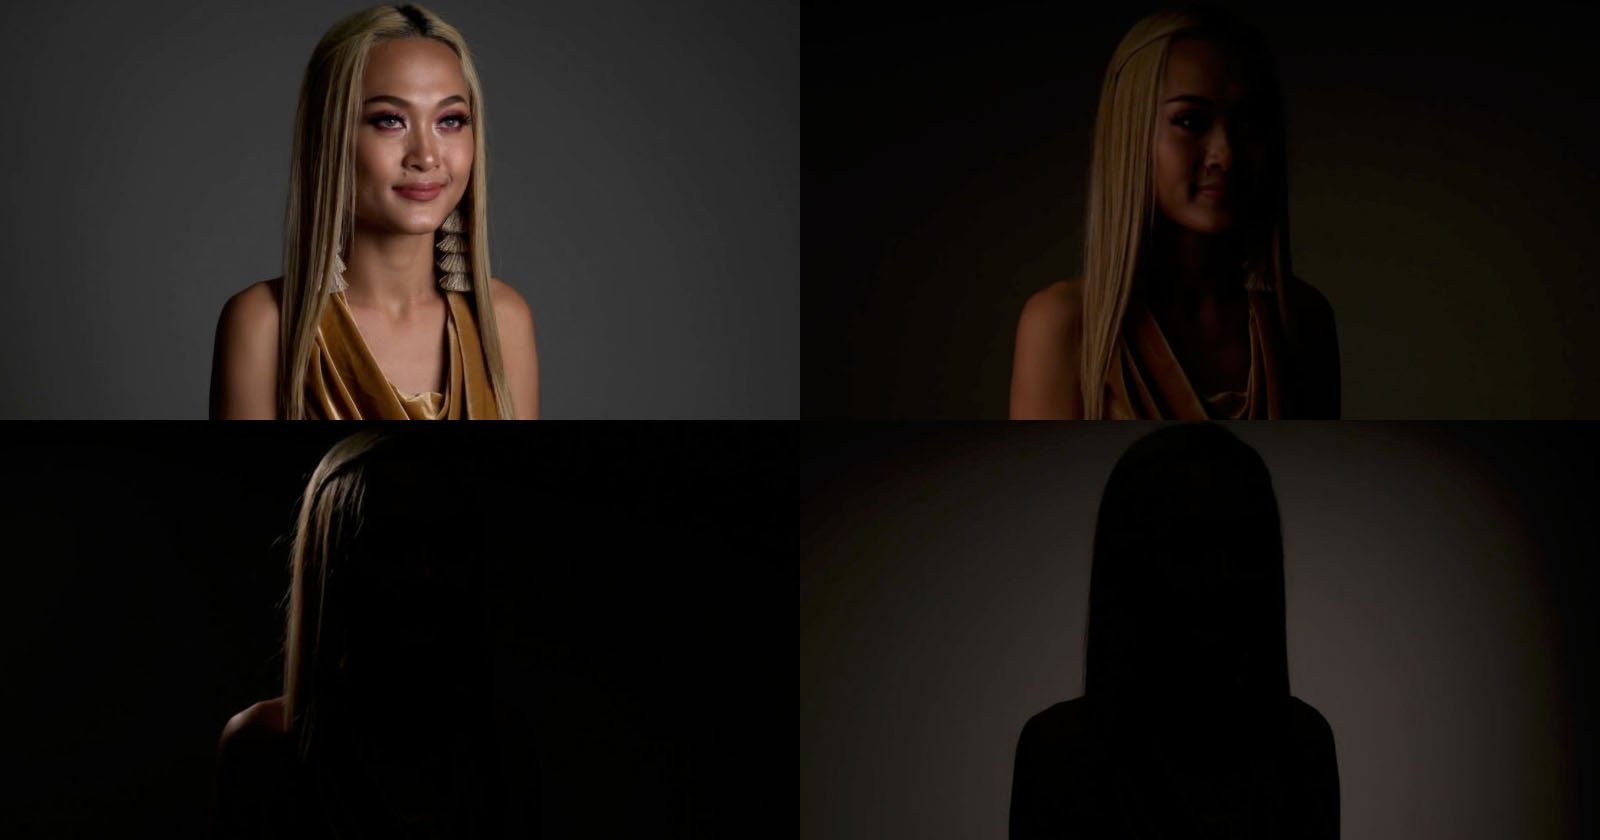
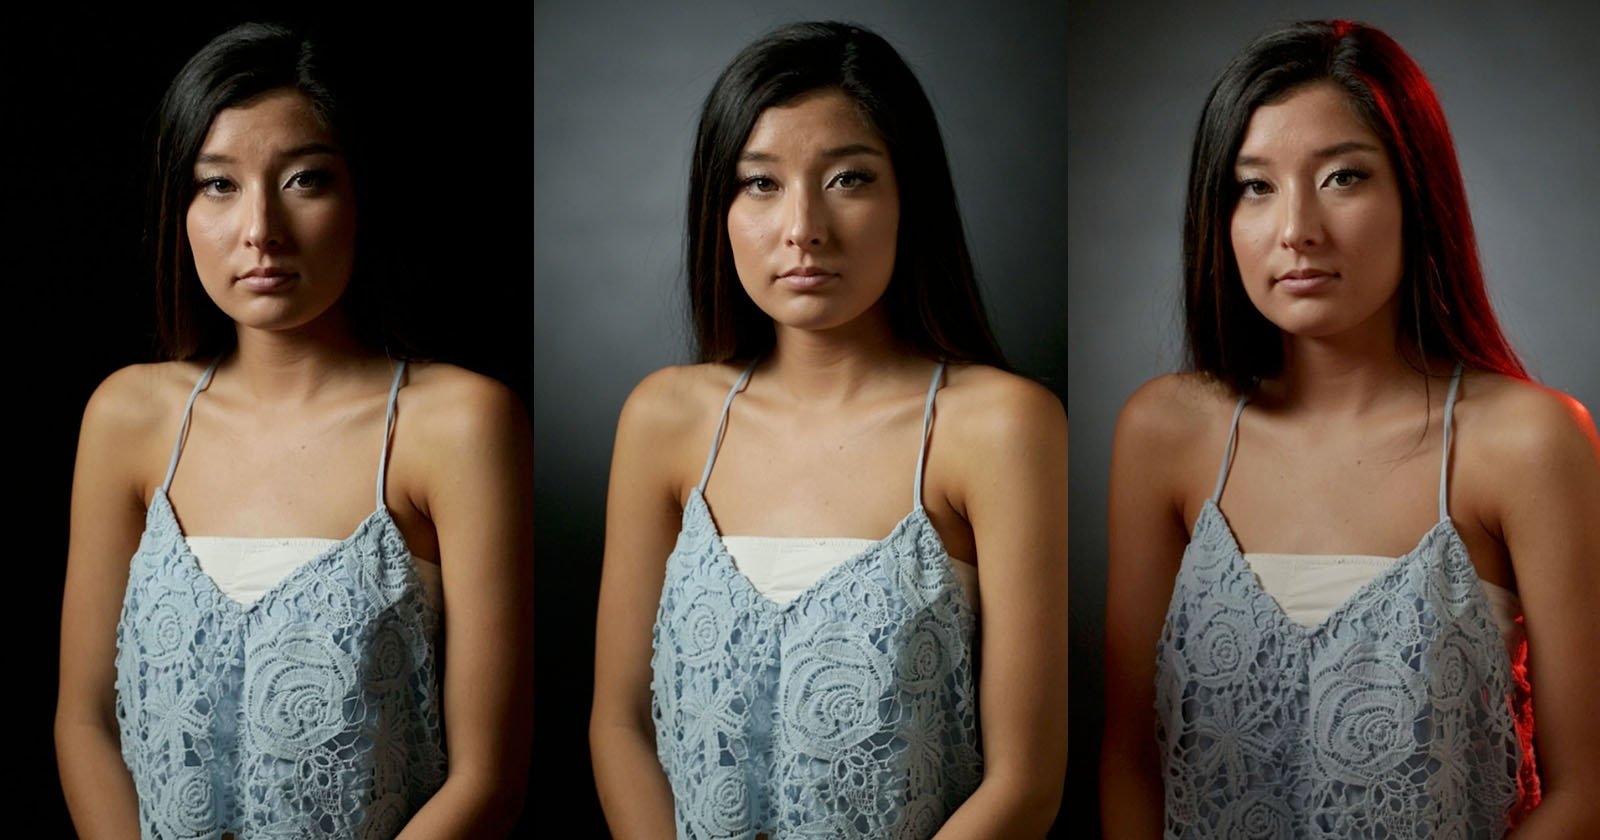
1. Achieve a Black Frame First of all, you want to turn off all strobes and make sure you get a completely black frame, eliminating any ambient light. That way you are working only with what’s needed: strobe.
2. Turn on the Fill Light The second step is to turn on the light you consider fill and dial it in so that it is only somewhat visible on the image.
3. Turn on the Key Light Lastly, turn on your key light and adjust power settings to your desired fill/key balance. Keep in mind that as you brighten up your fill light, you should dial down your key to avoid overexposure.
Fill Light On Location
When working on location, you need to be more careful with the fill. Depending on the scenario, you can use a strobe for the fill or simply use the available light ambient/daylight.
1. Expose the background. Dial in your camera settings to the desired levels and check if you are happy with the results of the light you can not control.
2. Turn on the key light. Unlike when shooting in the studio, you will first need to dial in the key.
3. Balance the key and the environment and fill. If you are choosing to use the environment as your fill light, change your camera exposure, and dial up or down your key light. Should you be using an additional strobe for fill light, be sure to balance it with the color of the surrounding lights.
Ways To Create Fill Lighting
Here are some basic ways you can create fill lighting in a photo.
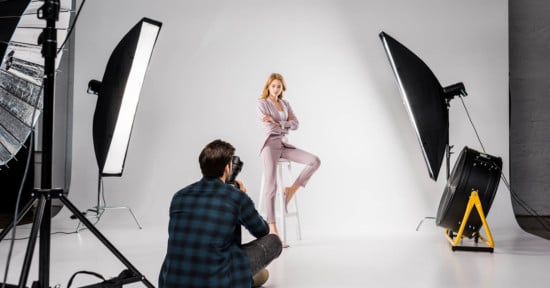
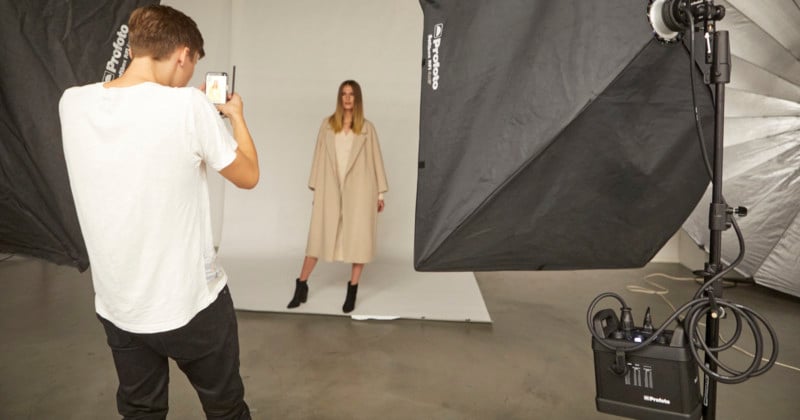
Large Softbox
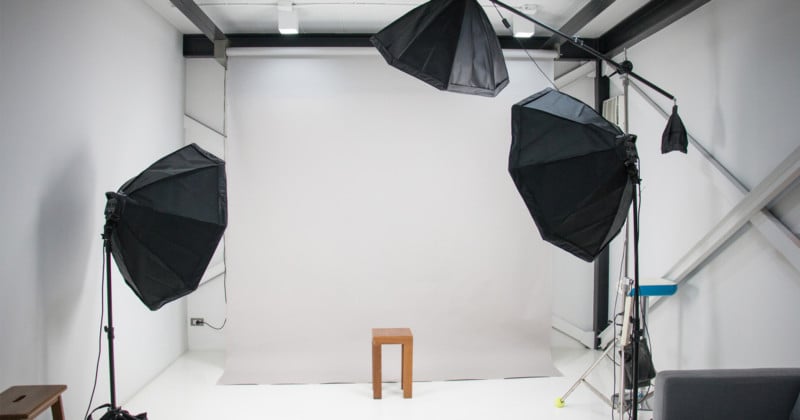
This might be the easiest way to create fill light if you’re renting a studio. Many, if not all, are bound to have a large softbox. Basically, you want to use a softbox large enough to create a shadowless light and cover the whole set.
Generally, this way of creating a fill light will involve you placing a softbox right behind your subject. The shape of the modifier isn’t that important if you want to use it as a fill light, either a 5-foot octa or a 4×6 softbox will work perfectly well for this method.
A drawback with this one is that you won’t be able to work on large sets as the softbox is far too small to cover a large set efficiently. Another drawback is portability, you will have to build your own softbox, which if you ask me, can be a pain, especially something as massive as a 4×6.
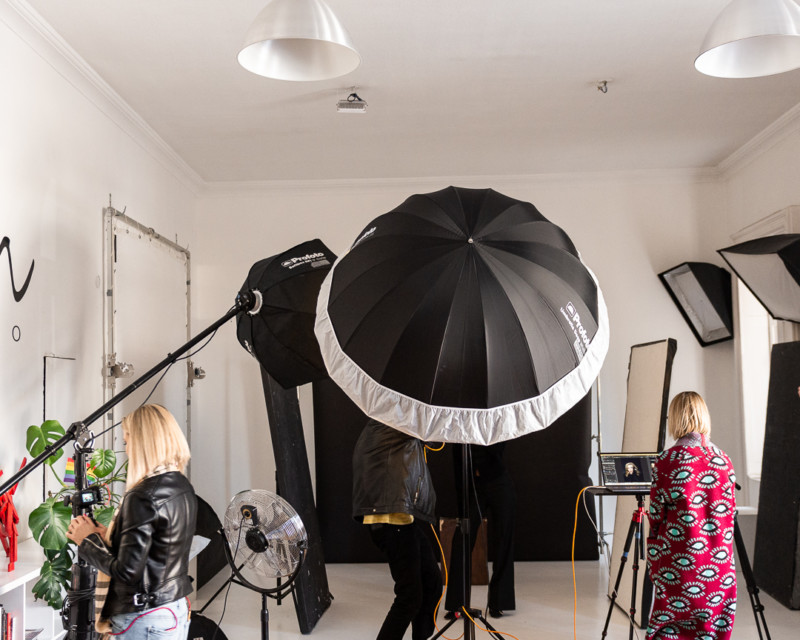
Large Umbrella
Similar to the large softbox, a large umbrella is a very common way of creating fill light and is the method I use most often with my own work. It is rare for me to not have a white umbrella with a 1.5-stop diffuser set up behind me. Even if I don’t use it, it is always there should I need it.
While this method also has set size limitations, I can combine several umbrellas into a huge light source that will be able to fill any set for fairly cheap. Another perk of using umbrellas for fill lights is that umbrellas are very compact compared to softboxes. Even the huge 165cm umbrella I own collapses to the same length as my light stand which makes it a dream on location.
Scrim With a Bare Bulb Behind
If you need some extra-large light sources, you can get a scrim and fire a light into it. This is commonly used in studio settings as this method is far too complex for most on-location work.
The great thing about using a large scrim is the ability to have a very soft fill light that is unnoticeable no matter how big the set gets. You can always opt for a bigger scrim, and if needed add more lights. Some photographers end up firing several strobes through one scrim in order to increase the power of the fill light.

Bounced Light
By far the cheapest way to produce fill light is to bounce it into a white ceiling. While being accessible to everyone, this method has a few downsides. First of all, you can’t control where your fill goes. For example, if you want to fill only a particular part of the image, you can position an umbrella or softbox to cover just that area.
Another problem you may pop up is that whenever you bounce your light off of a colored surface, it may cause a color cast, acting like subtle gel. Bounce into a yellow wall, and you’ve got yourself a yellow light, bounce into a blue one, and you have a blue light.

Ringlight
The “fake” fill light. The reason I call it fake is that it contradicts everything I said before about fill lights. Yet, a ring flash is commonly used in small spaces where you can’t always get a large softbox or scrim in. The ring flash has a magical quality to hide shadows behind the subject, making it a fake soft light. To make the light a little softer, I suggest getting a softlight reflector for the ring flash.
Closing Thoughts
Fill lights are often done in a way so that you can’t tell whether it was used or not. But rest assured, most professional images have a fill light in some shape or form. Rarely do images with deep detail-less shadows make the cut in the industry, at least with the current aesthetics.