Basic Rim Lighting with a Do-It-Yourself Striplight
In this article I will show you the basics of how to do dark field and bright field lighting and a quick way to convert any softbox into a striplight using office supplies.
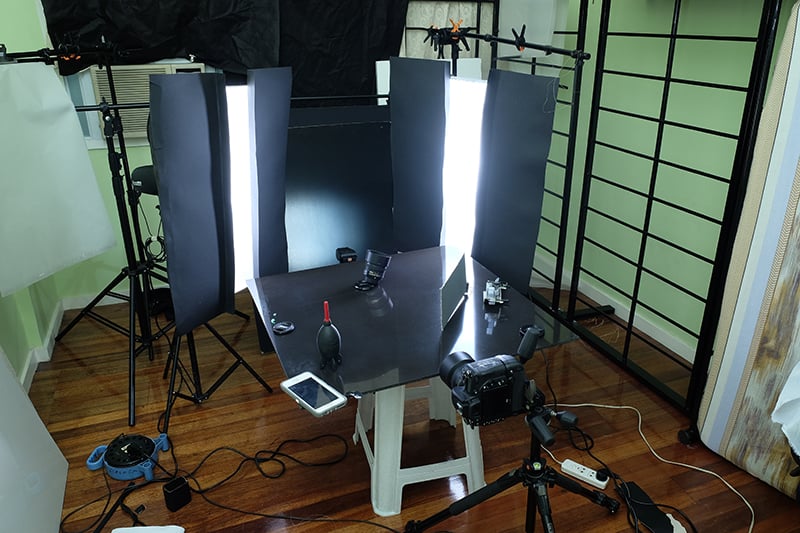
While my studio is under renovation I have no other choice but to use our guest room as a studio, which is perfect for this article because you can shoot anywhere that you have space to set up.
How to Make Any Softbox Into a Striplight
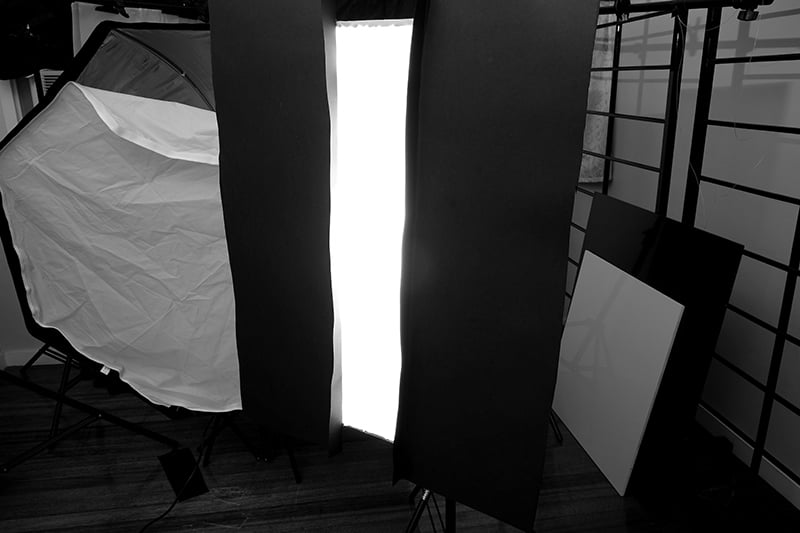
I wanted to use a striplight for this article but I use a generic studio strobe mount and after looking in different stores I could not find one. I tried looking for different do-it-yourself projects and most of them were pretty hard to do, so I made my own quick DIY striplight.
I used a thick piece of black poster paper and cut it in half and used gaffer tape and taped it on the sides and top of the softbox to make sure no light would spill from the sides of the softbox.
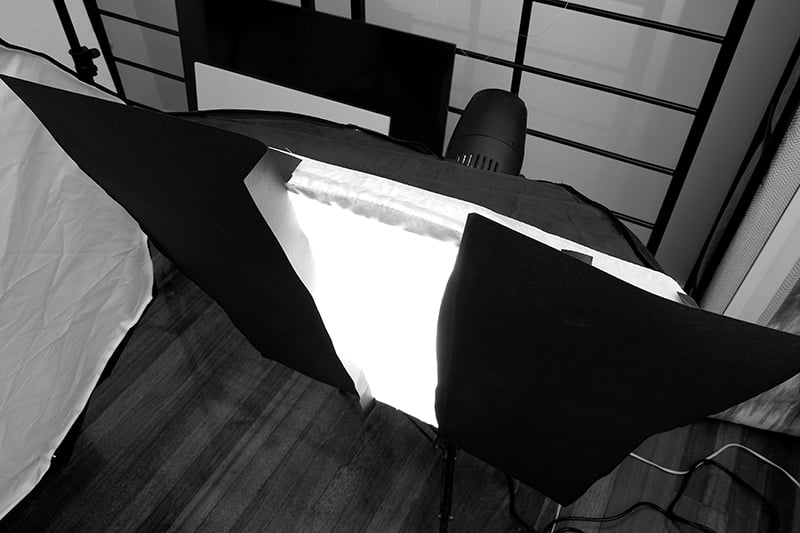
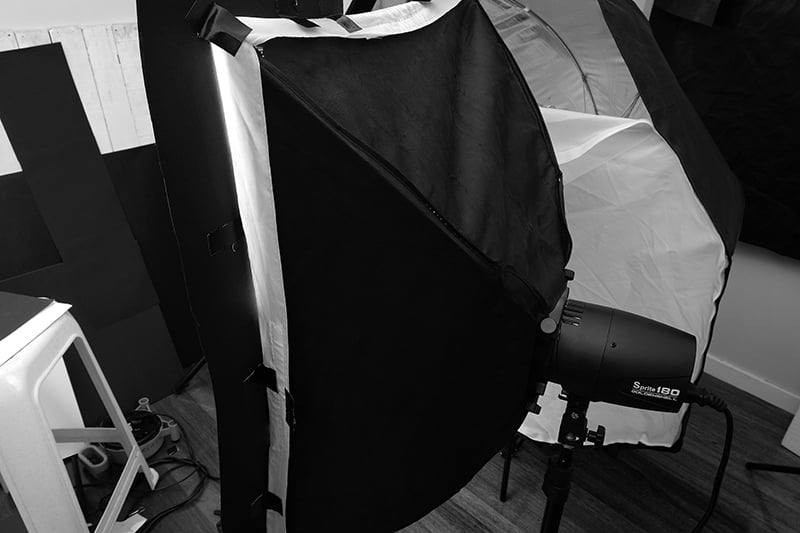
It doesn’t look pretty but it works very well.
Basics of Rim Lighting or Dark Field Lighting
There are two things you can do when you want to do rim lighting on a black background. The first is when using a black background, use a strip light or softbox on the back left and back right of the subject, which I will show in the last part.
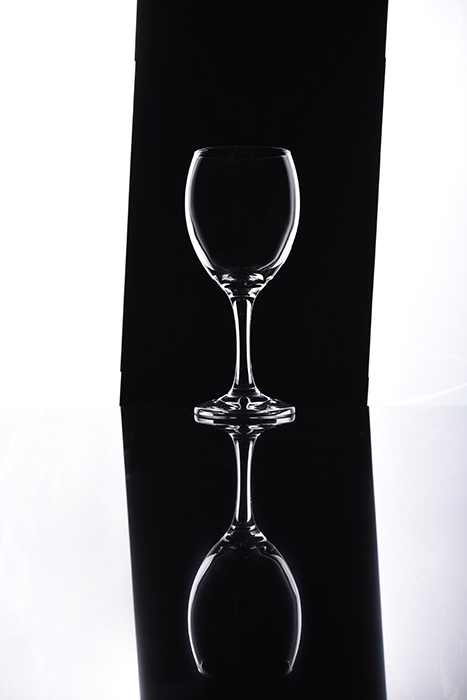
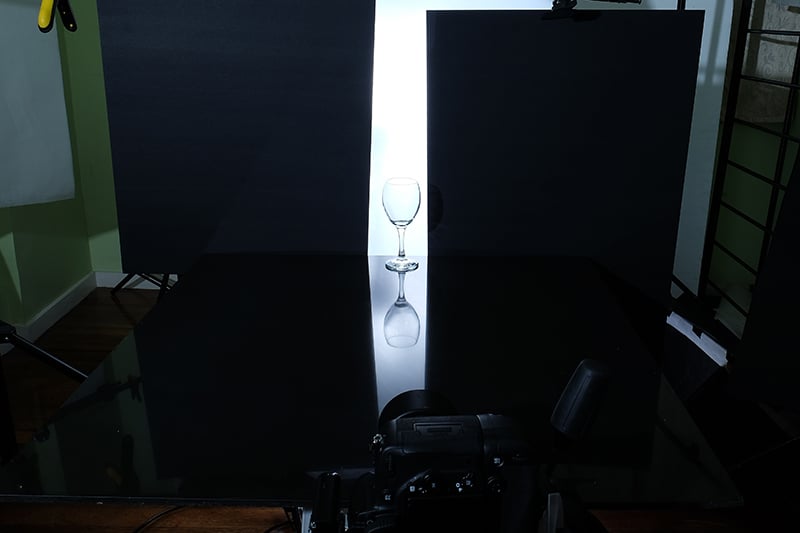
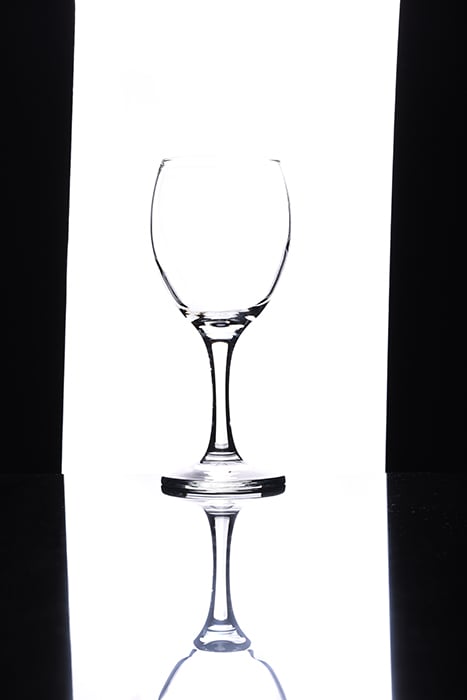
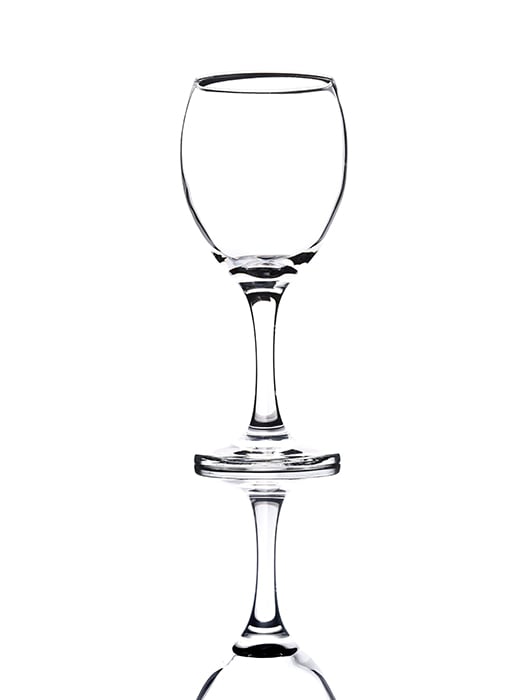
The second way is using a big light source coming from the back of your subject. The first thing I did was place my subject on top of a black granite tile (see “Tile’s are a Product Photographer’s Best Friend“). I put a studio strobe with a big softbox directly at the back of my subject. You can also use a scrim or a piece of tracing paper to replicate a big light coming from the back.
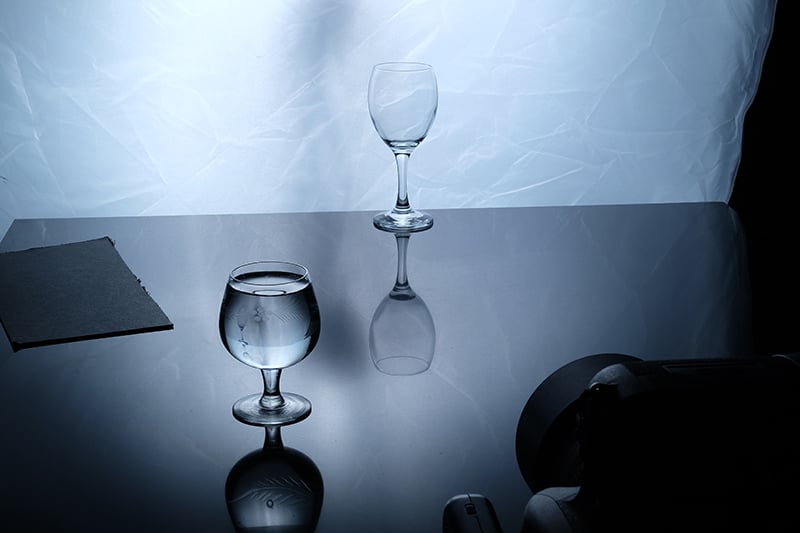
I cut a piece of black poster paper (or an illustration board) and just placed it at the back of the glass. Make sure the black paper is just slightly bigger than your glass.
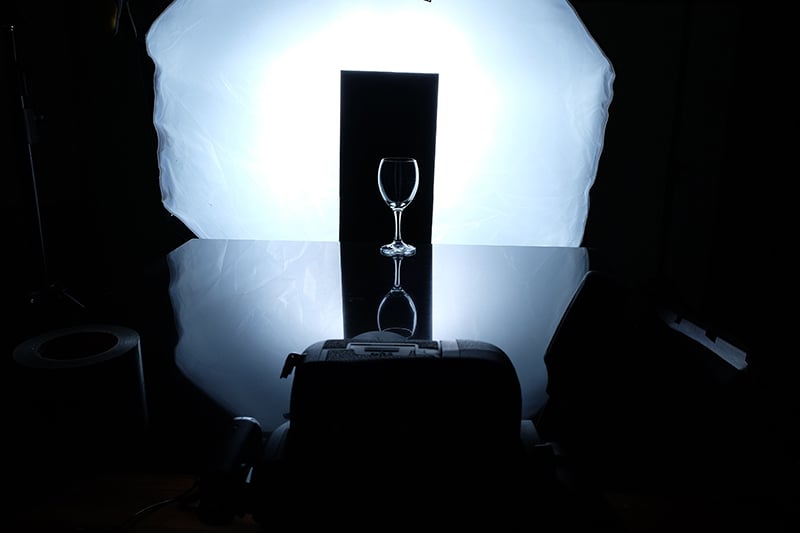
Notice that you get a different result of the rim lighting depending on how big and how you place the black paper/board at the back of your subject.
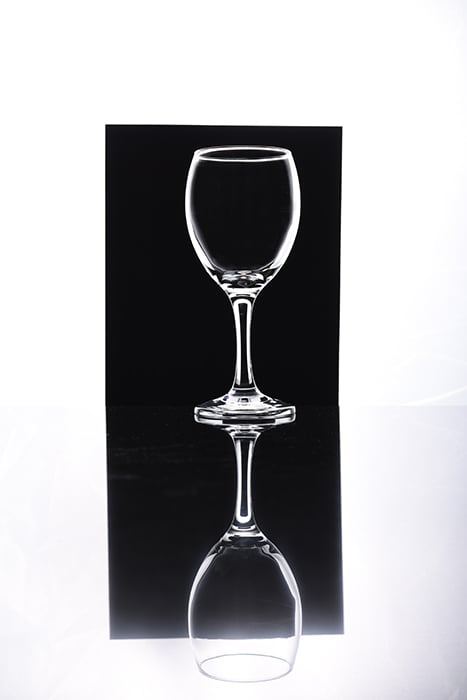
You can use a zoom lens to have the black paper fill the frame of just crop your picture in post and extend the black parts in Photoshop, which I did here.

It’s that simple!
How to Do the Bright Field Lighting
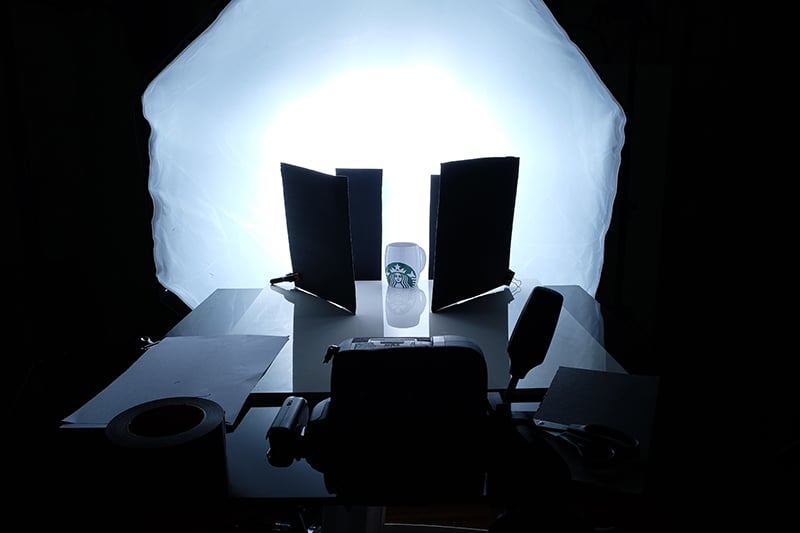
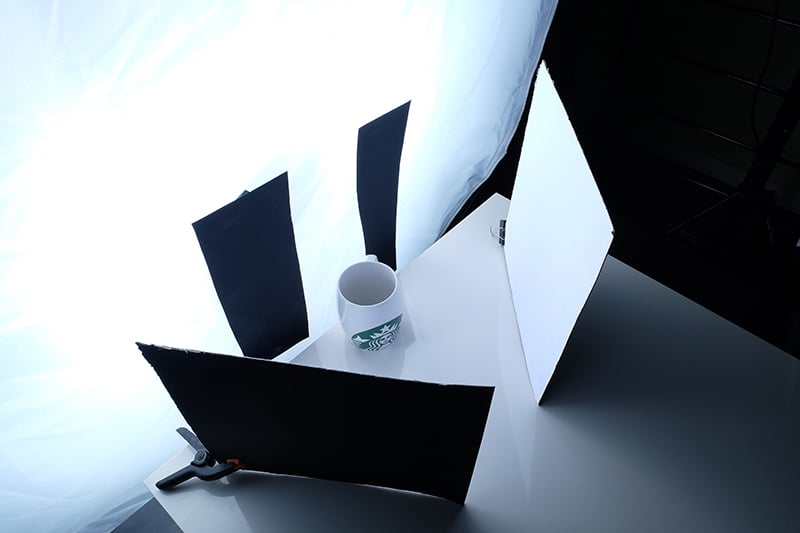
Still using the same setup, I removed the black paper at the back and placed two big pieces of black paper on the back left and right of the subject.
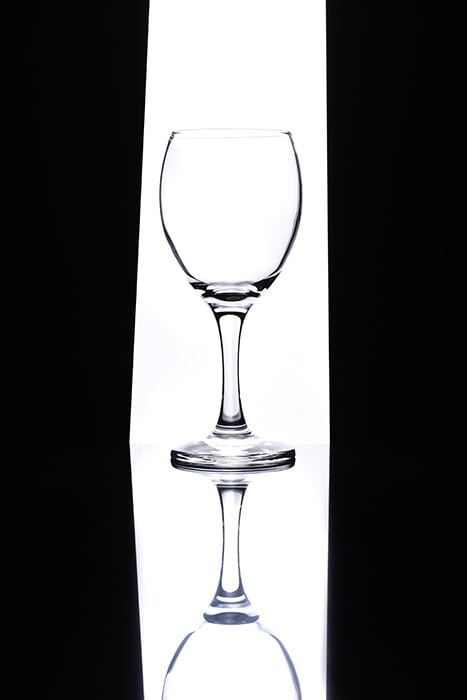
You can also place a black paper/board on top of the glass to so that you the black lines on top.
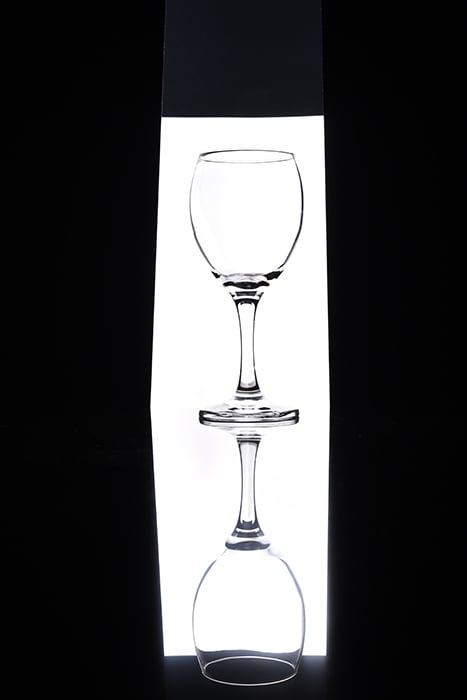
The final result looks something like this.
Now how to use it in shooting some product shots.
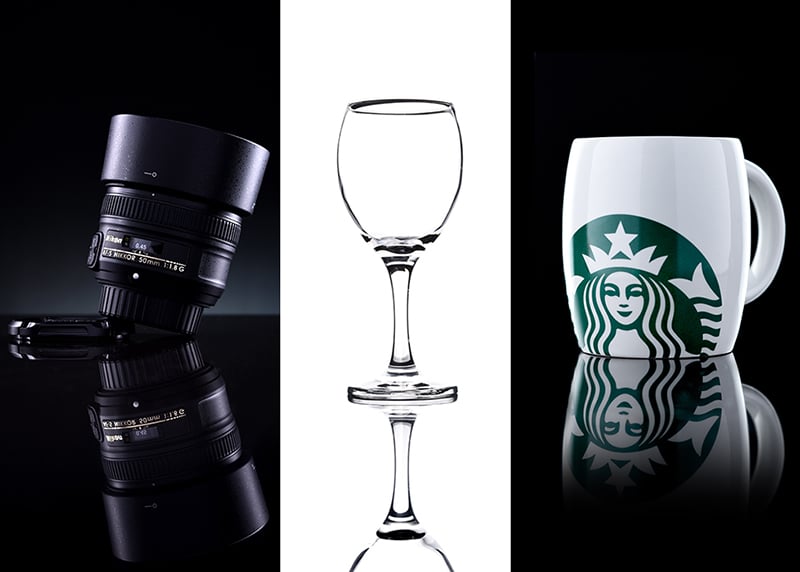
One of the best use of bright field lighting is shooting transparent things or shooting white subjects on white. I’ll use my white mug for this tutorial.
I replaced the black granite tile with a white one and still used my big octobox as my main light coming from the back.
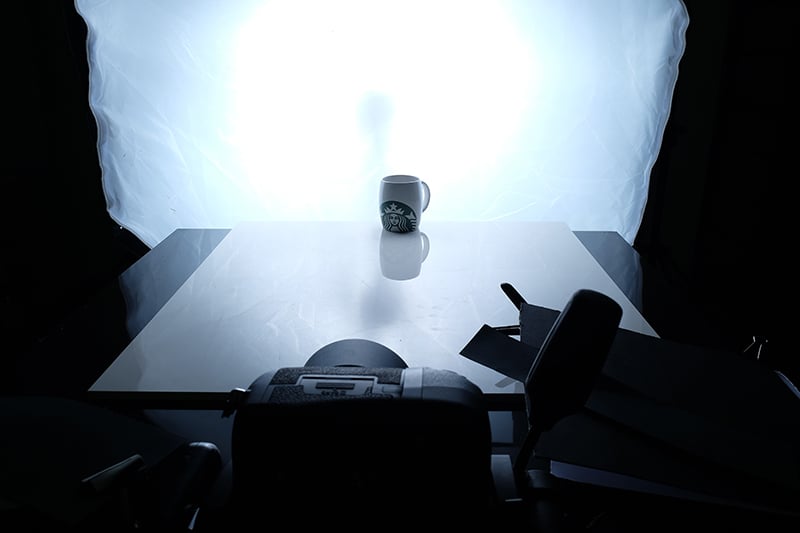
Using the bright field lighting technique I placed a black strip of paper on the back left of the subject. I made it a strip of paper because I only wanted a small black strip on the side of the mug.
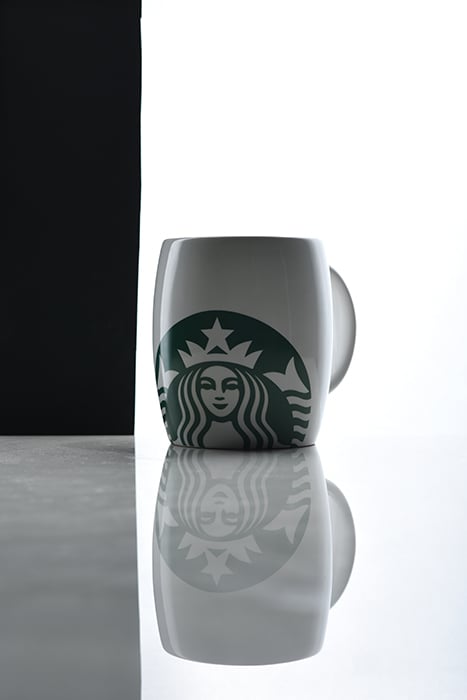
I did the same thing on the back right of the mug.
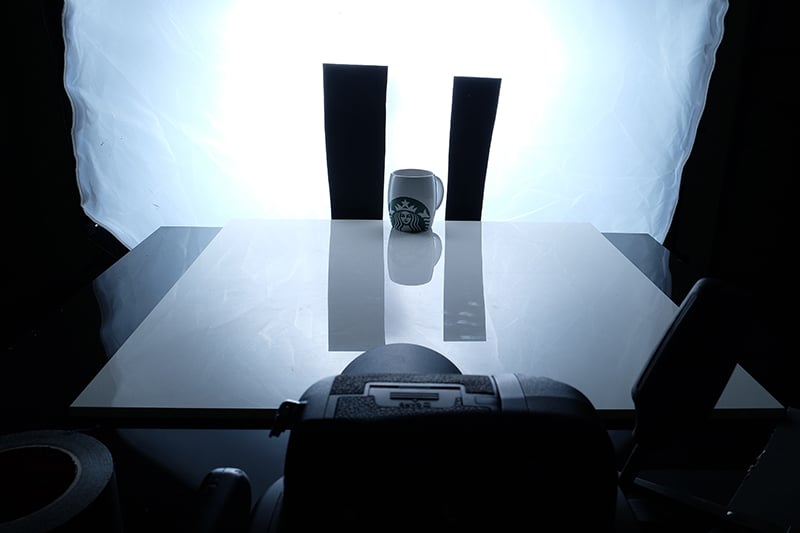
To add light to the front of the mug, I got a white illustration board and placed it on the front left of the mug.
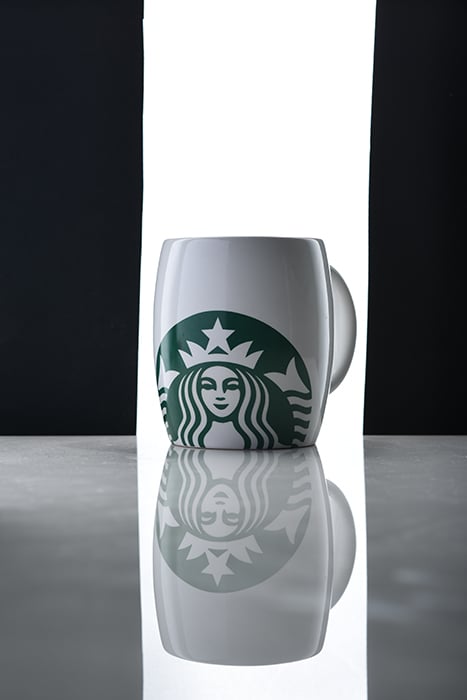
Another illustration board was placed on the front right side of the mug.
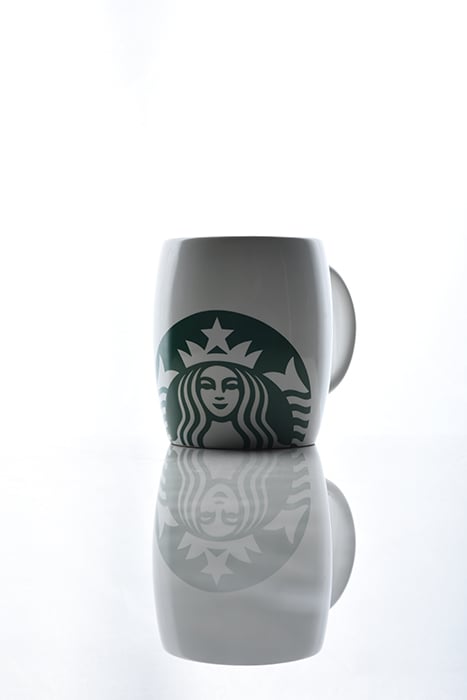
Here is the final result:

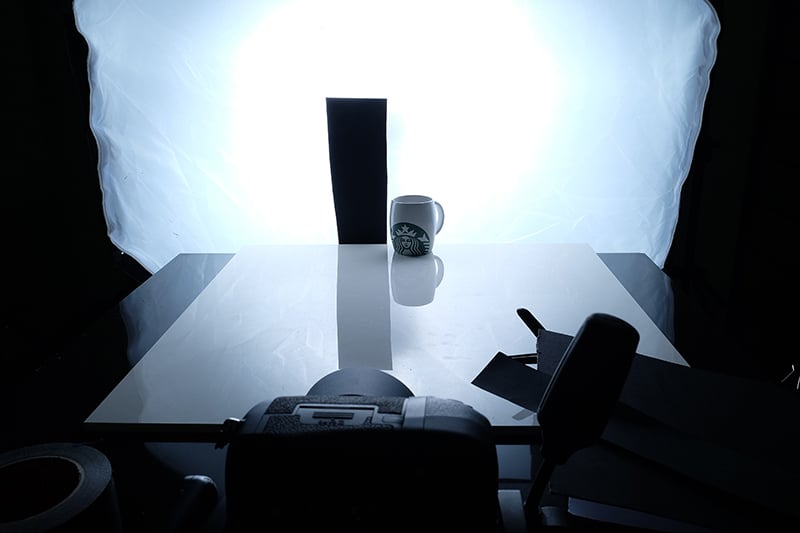
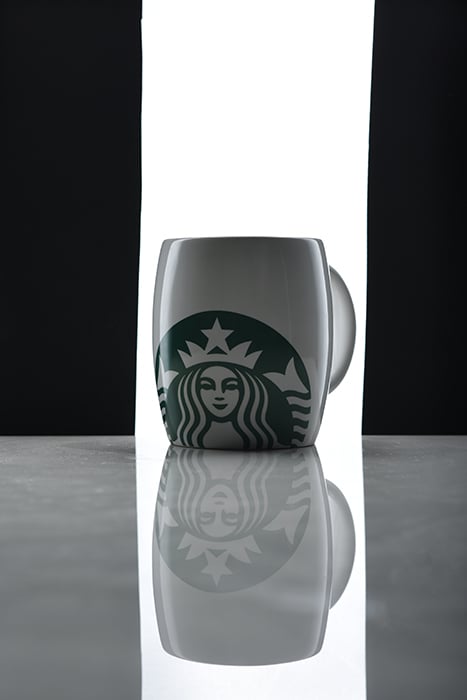
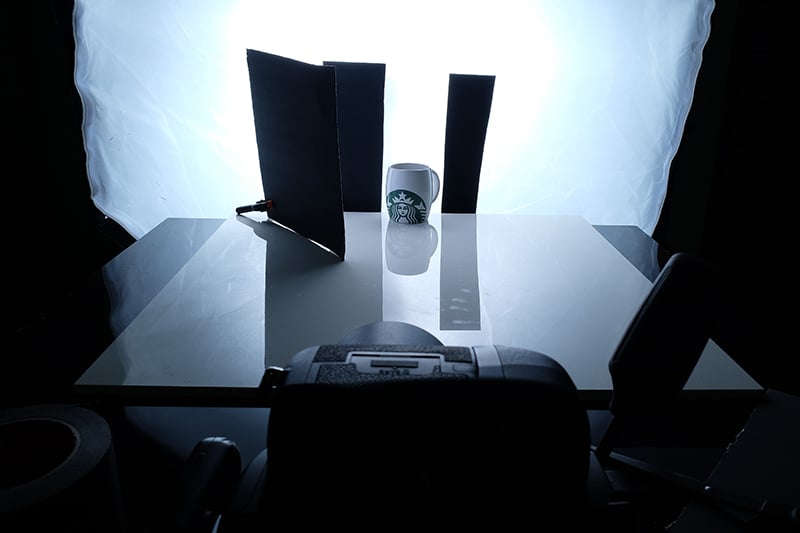
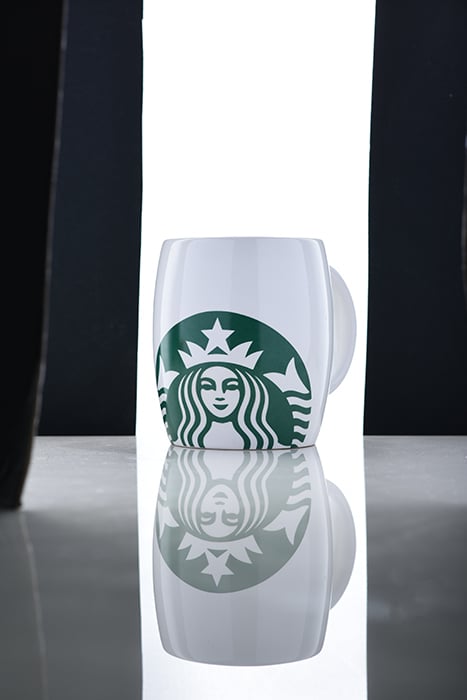
I did the same mug shot but using the dark field lighting technique. I removed the two black strips of paper from the back and replaced it with a black paper directly behind the mug.

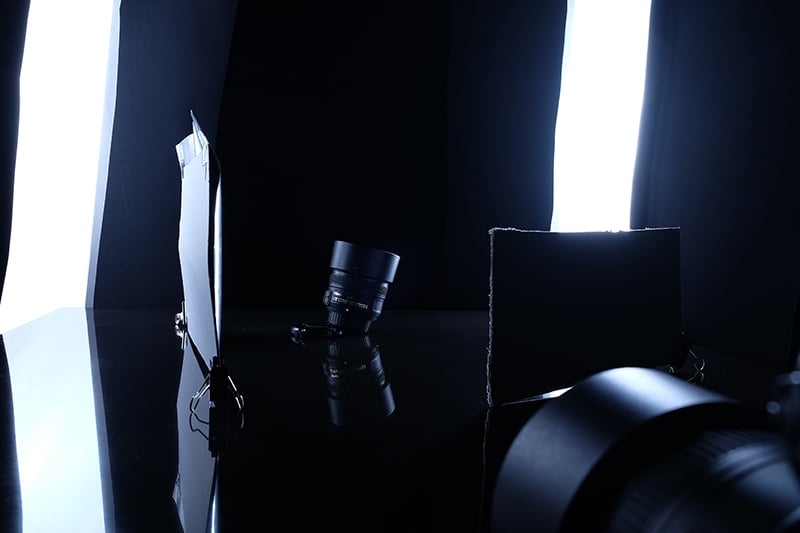
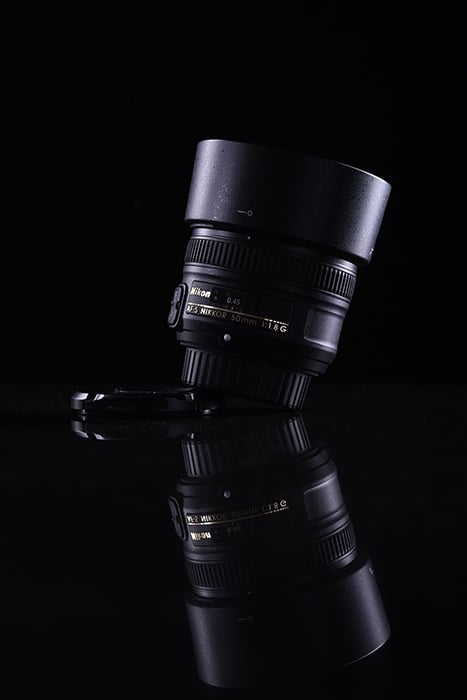
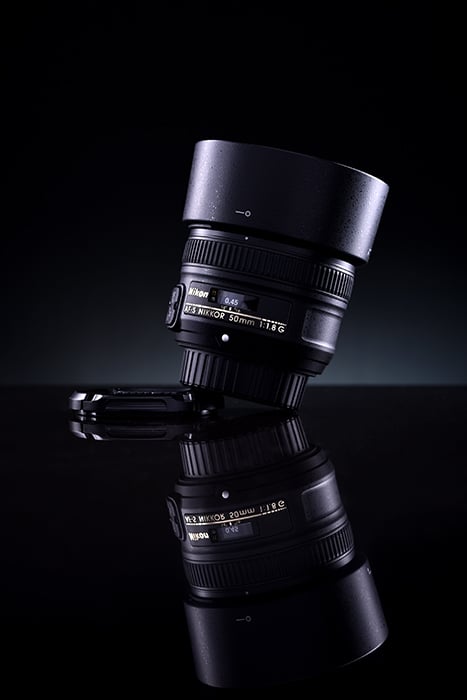
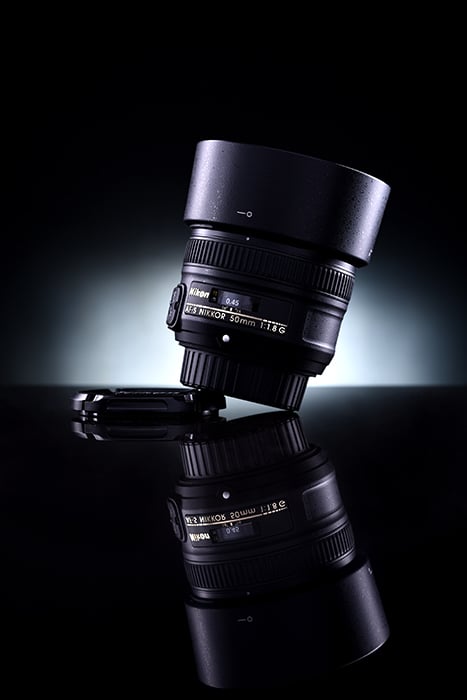
How to Do Rim Lighting on a Lens
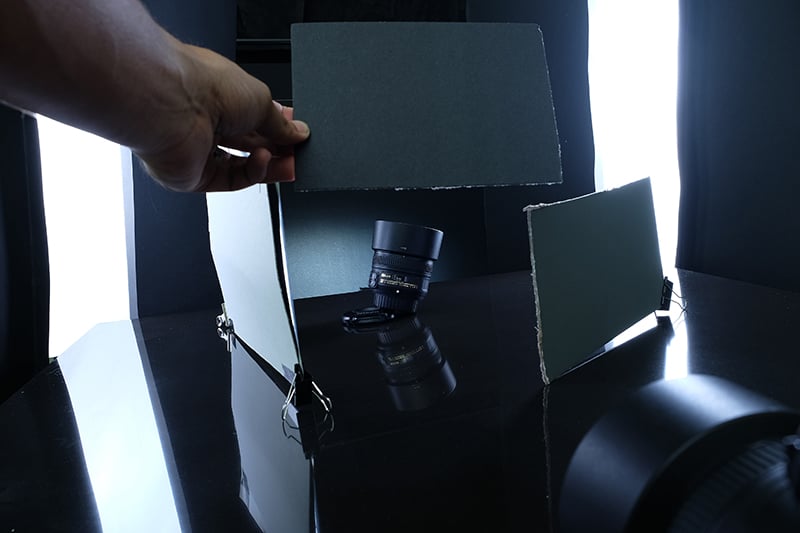
For this example I used my lens as the subject. I placed the lens on top of a black granite tile and used the black side of an illustration board for the background.
Using the DIY striplight I made I placed it on both the back left and right of the subject.
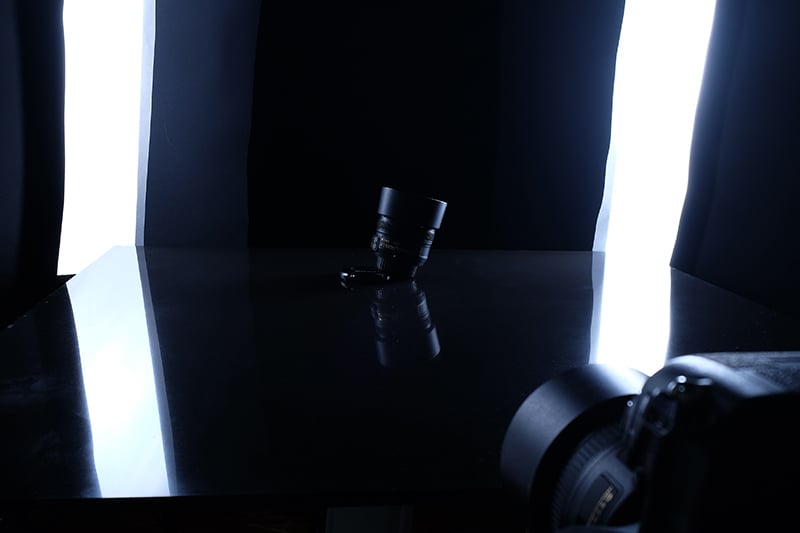
To add light to the Nikon Label on the right I used my DIY small silver reflector (you can see how I made it here) and placed it on the left side of the lens.
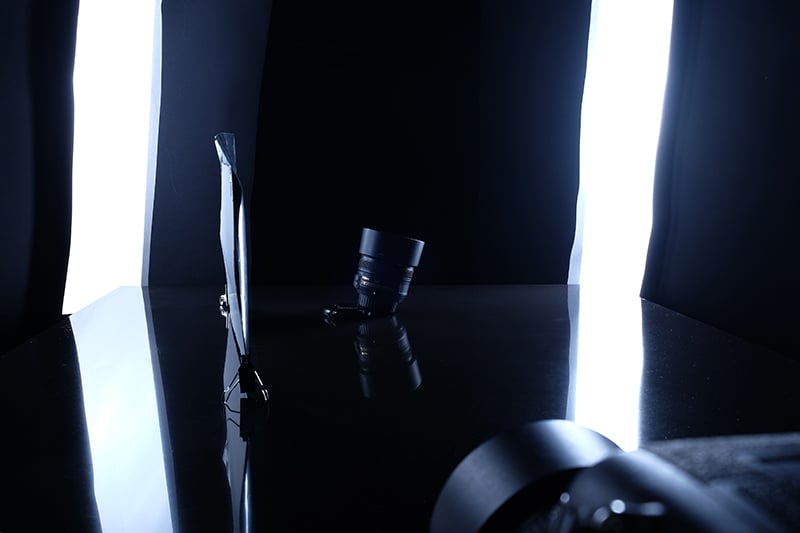
Same as the mug example, I used a white illustration board and placed it on the right side of the lens.
Now I wanted to add some gradient background light, so I used a speedlight and placed it at the back of the subject and pointed it at the background.
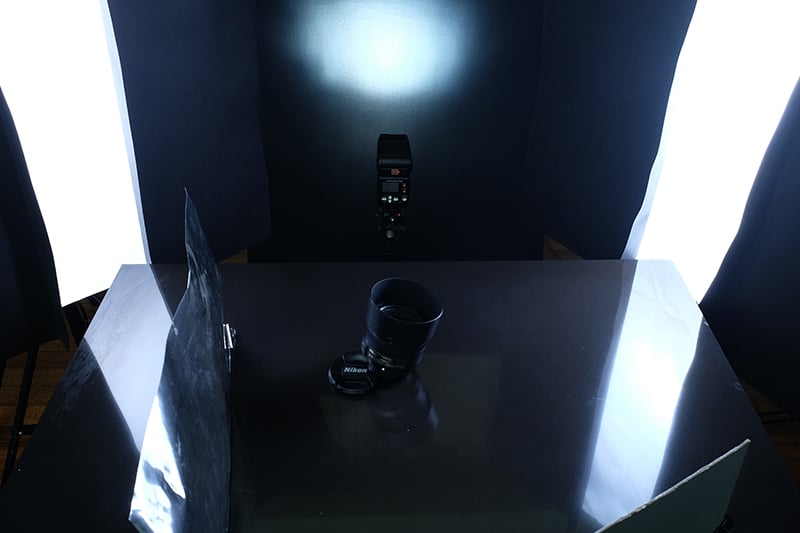
Play around with the direction and angle of the speedlight so that you can change the effect that it creates.
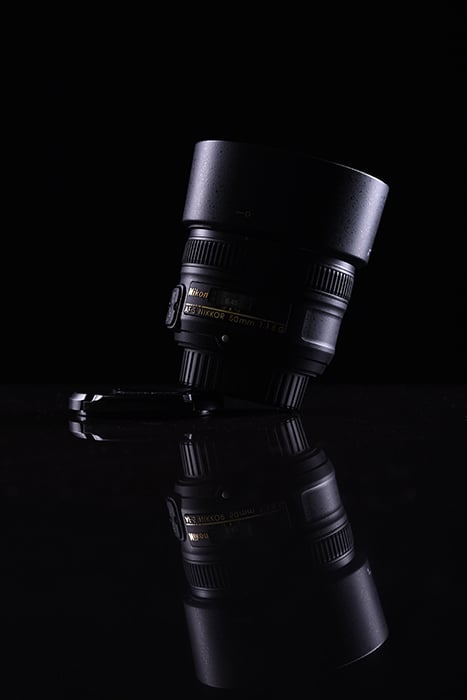
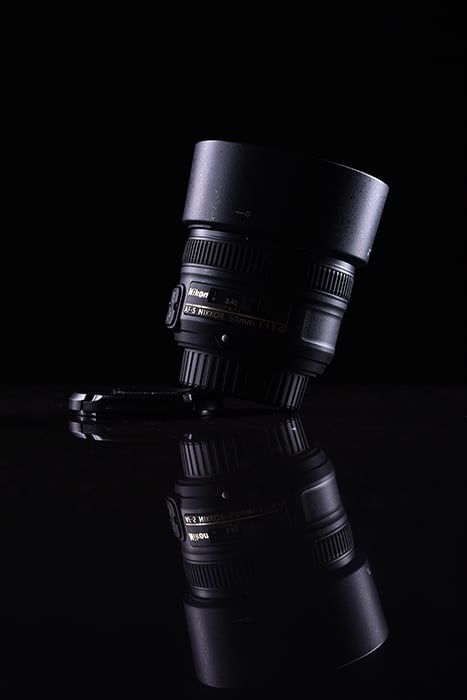
I felt that the lens was still a little too dark, so I handheld another white illustration board and held it above the lens.
The Final Results
There you have it: the simplest and most basic way of creating dark and bright field lighting.