Real Estate Photography: A Complete Guide
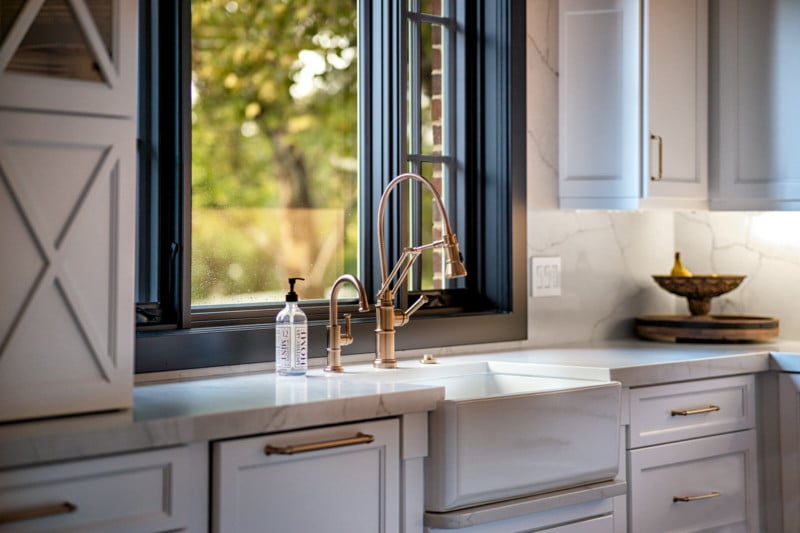
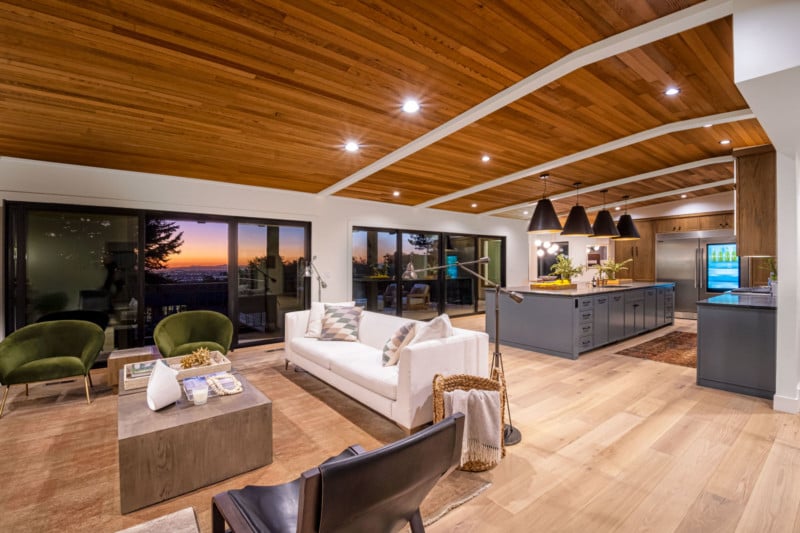
I have been shooting real estate now for over a decade, and as dry and uninteresting as shooting homes may sound, I have found this a very rewarding niche in the photography world. Sure, there are dull, boring, or repetitive days, but then there are some you walk into a home and you just thank your lucky stars the Realtor called you on this one.
Table of Contents
Your Real Estate Photography Market and Competition
Let’s make our way through the boring stuff first just to get it out of the way. It’s a good idea to know if your market can support you before you start doling out wads of cash on gear. Generally, the bigger the city, the better. If the photographers’ schedules all seem booked up, there is probably room for a fresh face. But if you live in a small town, or you see all the businesses cutting their rates, maybe you should reconsider.
As you are gauging the other photographers in the market, also take a look at their rates, and what they offer their clients. You will probably want to come in a little under them because you are the new guy and you have to make a name. I would not come in drastically under market value, that just hurts everyone in the market and honestly, you won’t last too long even if you do think you will grab a ton of business.
A race to the bottom on rates only has losers competing.
Compare Costs to Your Real Estate Photography Earnings
Now let’s take a look at your real costs. You will have insurance, business licenses, and many other items you have probably not even considered. You will need a phone, Internet, hosting fees, gas, the Adobe tax, and many other things just to get started. Oh, yeah- and taxes! Uncle Sam wants his share, too!
To help you get a realistic handle on all these costs, head over to Nick Adam’s cost calculator. Fill this out honestly, and see what you have to gross and net a month or a year to survive. How do these numbers compare to what your pricing schedule will allow you to earn? Can you make that work?
You need to plan for no business for at least six months — can you survive that long? If not, reconsider working for someone else as you bring your skill level up.
Essential Camera Equipment for Real Estate Photos
Let’s look at basic essential gear. Believe it or not, nothing fancy here.
A Camera and Lens
You will likely be delivering images at about 2000px wide, so you don’t need to buy the Nikon Z9 or Canon R3 thinking that will make you a real estate photography rock star. Some of the best shooters in the business rely on Sony APS-C cameras and 12mm Rokinons.
The initial investment in gear is not much, especially considering you can probably use the body you have now. If you insist on buying new, I suggest going mirrorless. But as far as a brand — Sony, Nikon, Canon, or Olympus — that’s all up to you. Most modern systems will have a very affordable 16-30 f/4 (APS-C 10-20mm) lens in their line; that is all you need to get started (most shoots will be f/6.3-f/11 so paying extra for an f/2.8 is throwing beginner money away!).
A Tripod
If you want to splurge, do so on a tripod. A steady, stable platform to shoot from is paramount. Though it may be hard to wrap your head around, spending a thousand on a Gitzo or an RSS will save you a lot of money in the long run as you won’t be re-buying 2 to 3 cheaper tripods down the road. (And with the money I saved you on NOT buying that 14-24 f/2.8, you can afford the Gitzo!)
For mounting, the ideal head is a geared head. Ball heads flop around too much, and are much harder to level. The Benro’s and Leofoto’s are ok to start with, and the Arca-Swiss Cube is what fills a real real estate photographers’ dreams.
A Flash
Flash. Start with simple strobes… and every few jobs, reinvest in your business by adding more and better flashes. I would recommend going with Godox (AKA Flashpoint).
Start with a couple of strobes and the R2 wireless flash system. Add an Godox AD200 when you can — this is the flash I use the most in the field. I find using a Magmod sphere on it gives a great quality of light. For the big jobs, I also keep a few Godox AD600s around — no need to pay extra for TTL, as we shoot everything manually.
Other Gear
Other gear you will need include:
Umbrellas. Shoot-through or reflector, it does not matter — just get white silk, not silver.
Light stands. Heavier is better.
Extra batteries. Get backups of every important piece of gear in your kit. Nothing is more unprofessional than NOT having a piece of gear that you need.
Extra Gear You May Not Need Right Away
Depending on your business model and what you want to do, there are at least three additional gear purchases you may want to look into for your business. I would seriously consider all of these… but you also might want to hold off on them until your business is a bit more established.
A 3D Camera
The first is a 3D camera, and while Matterport is probably the best known, there are other options. A Ricoh Theta Z for instance will set you back one thousand dollars and CAN be used on the Matterport platform. The Theta is also faster than a Matterport camera, but the Matterport camera blows it away in quality. (The full Matterport camera runs about 3 grand, and you will need an iPad also). Other options include full systems like iGuide (which is also Theta Z-based) and editor/showcase sites such as Eyespy360 and 3DVista.
A Drone
Another service you may want to add is drone footage. My favorite drone is the DJI Mavic 2 Pro- a very stable platform and a top-of-the-line camera. With the recent release of the Mavik 3, the 2’s are going down in price, which is a real plus for you just starting out. And the 3 doesn’t add any functionality you will need, certainly not when the steep price bump is taken into consideration. If you are going to shoot drone footage commercially- still or video you WILL need an FAA license. Do NOT try and get around this… this is the law, and you must follow the law here. You will also benefit from having a drone insurance rider on your regular commercial photographer’s insurance package.
Video Equipment
Finally, you almost have to consider adding video to your service list. There are so many options here, that this subject should have its own article written. But if you are thinking in terms of also shooting video, think about a video stabilization system… either as a stand-alone unit (Osmo), that your camera can mount into (Ronin), or that you can use to stabilize your iPhone with.
Basic Skills in Real Estate Photography
So now that you have a mountain of gear, what are you going to do with it? Let’s start with working on your basic skills. You can — but I don’t recommend — just hit the ground running. I feel it’s much better to go in knowing at least something about what you are doing.
Composition
The first thing you need to learn is photography composition. Composing in a frame is a skill that goes back a thousand years, so there is no shortage of places to learn good composition from. You could start by looking at how master painters composed. Then you could look at how your favorite TV show or movie is framed. They all use the same basic rules… or don’t use them when they want to shake you up.
Now I am not going to go into this, or even mention the rule of thirds, because that is not what this article is about. You want this job, here’s one of your homework assignments: learn and study composition.
Join real estate forums on Facebook and read the critiques in real-time. Even post your current images. Now is the time to learn! So put on an asbestos suit, post your test shots, and let the pros help you get better for free.
Lighting
This is also a good time to start to learn to work with light. In your own home, shoot your living room in the morning, and then in the afternoon. Take a good look at your shots. What has changed? What worked? What did not work? Get a dark spot? Add a flash and see what happens. I would HIGHLY recommend you do this and look at your shots right away, so you can see how different flashes and exposures make or break your images.
Get used to light by shooting in different weather and at different times. Bug your friends, parents, or even people you may know selling their homes. Start small, and add to your knowledge base any way you can.
Four Styles in Real Estate Photography
There are four different styles of photography in the real estate world.
Ordinary Photography
The first you probably already do: just shoot it. It won’t take you long to realize this just won’t cut it in real estate. Your interiors will either have blown-out windows or be too dark — certainly not the sweet images you aspire to shoot. What can you do to improve your images?
High Dynamic Range (HDR)
Most real estate photographers start by shooting HDR or High Dynamic Range images. In this method, you set up many exposures- one for the windows, one for the room, and one for the darks- and you combine the best parts of each for a final image. Lightroom will do this out of the box, and there are specialized add-ins (Enfuse, Photomatix, Aurora) for more finesse and control of your blending in Lightroom and Photoshop.
HDR makes shooting and editing relatively easy. For some business models, the main advantage here is the speed- you can shoot a 2000 sq ft home in 20 minutes if you are fast and know your stuff. HDR works great in some cases, and well in many. But it is not perfect, particularly with capturing accurate color. One of the key considerations is the color of the light in the scene to improve color reproduction. When you mix colors — incandescent and daylight for instance — you get tinted, skewed, and off colors.
Flash Photography
Color and light issues can be corrected by overpowering the relatively low levels of mixed light colors with a strong singular source of light: a flash. Correctly balanced, the flash will reproduce beautifully accurate colors. And flash turns dark rooms bright and light.
As problem-solving a solution as flash seems, it has major drawbacks. The cost of the units themselves is an obvious impediment. Flashes are large, cumbersome, and slow down your work process. Bringing in, setting up, and using light stands just complicate things more. Unless you are very good at lighting (and are willing to spend a LOT more time crafting the light), flash tends to be a very flat look. In a word, it looks “flashy”.
Flambient Real Estate Photography
The fourth style of photography is a literal combination of the first three, and is colloquially called “Flambient.” Here, an ambient, naturally-lit frame is combined with one (or more) flash layers emphasizing the best parts of each layer. It also combines the bad aspects of all three… it takes a lot more time, you have the additional cost of flash, and it adds a lot more time in the edit.
It takes a lot more skill on the part of the photographer to do it well.

Shooting a ‘Flambient’ Photo with HDR and Flash
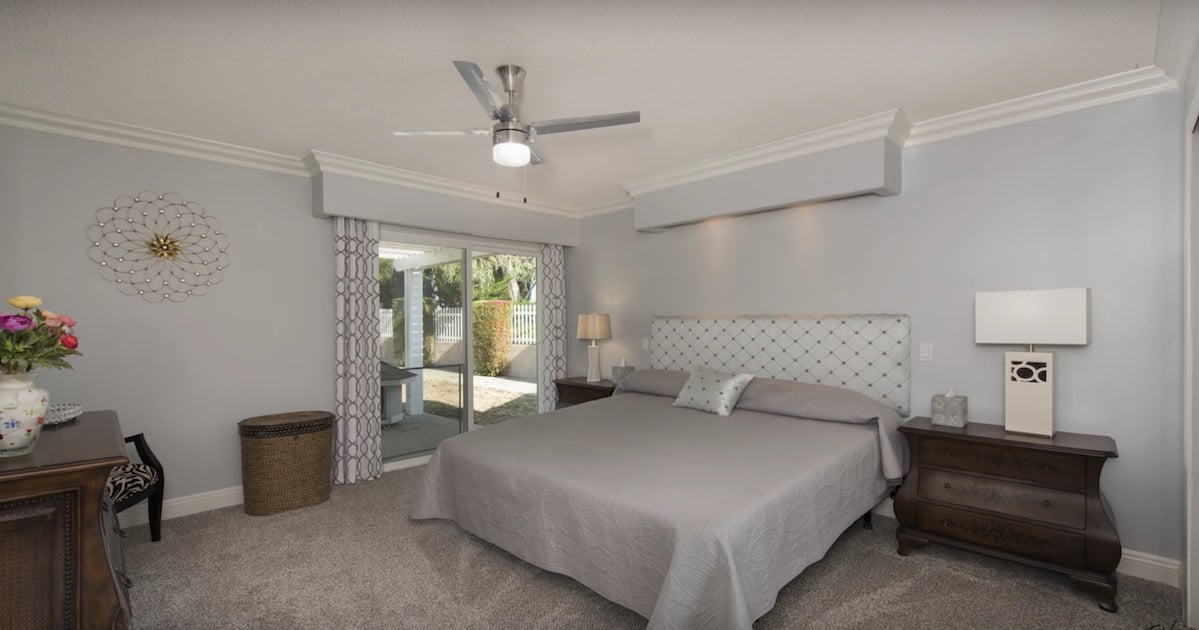
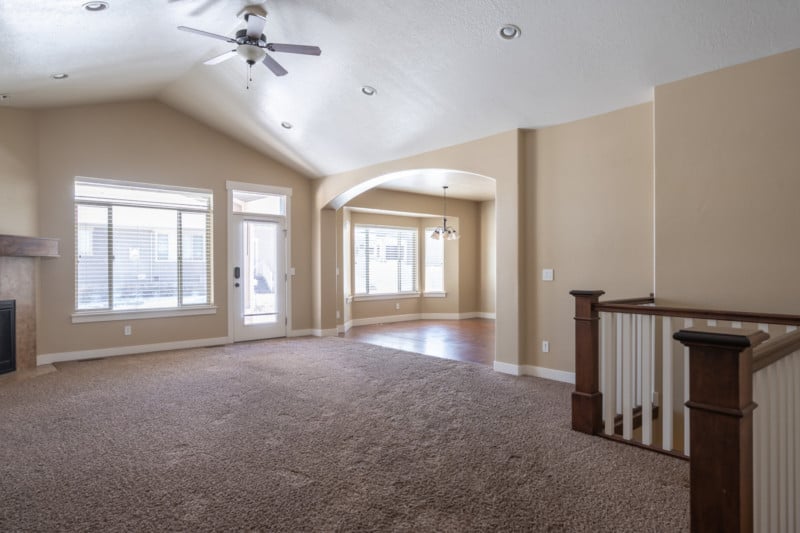
As I stated earlier, shooting an “ordinary” single photo of home interiors can be difficult and lead to poor-quality results due to the huge dynamic range between interior lighting and sunlight outside the home’s windows.
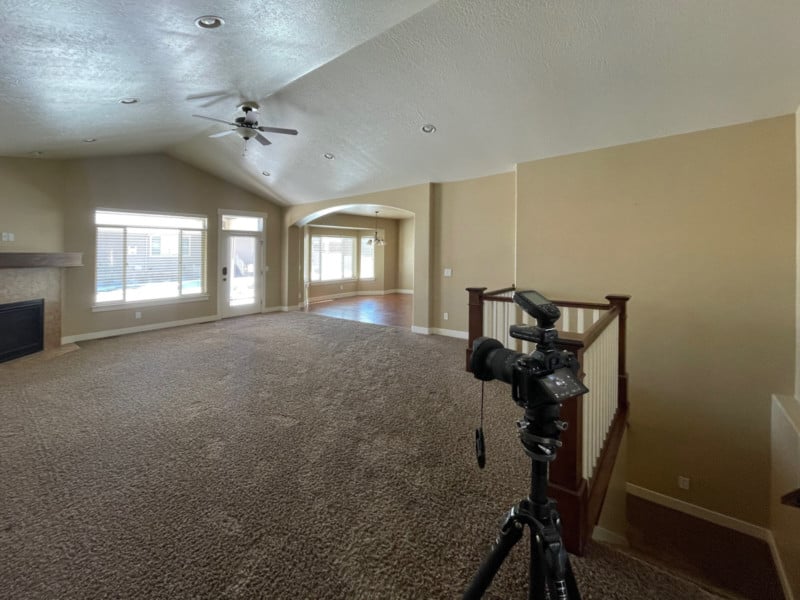
To overcome this, we can shoot a flambient photo that combines HDR and flash. We start by using exposure bracketing, or capturing the same composition in multiple photos with different exposures.
In this example, I captured a room in a photo with “correct” exposure, a photo underexposed by two stops, and a photo overexposed by two stops:
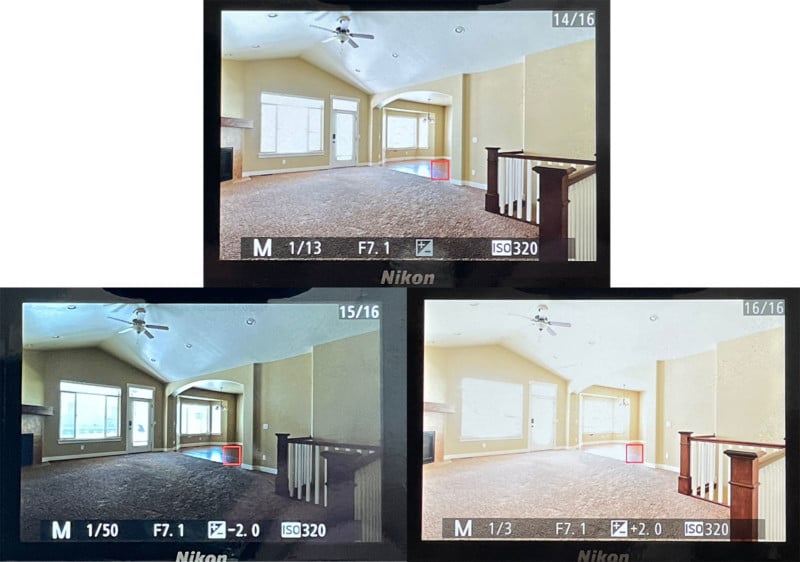
The resulting HDR photo is “good enough” for delivering to clients and for listing on MLS, but the wide dynamic range still leaves something to be desired. To reduce the dynamic range, we can use a flash to add more light to the darkest areas of the room to bring them more in line with the sunlight outside.
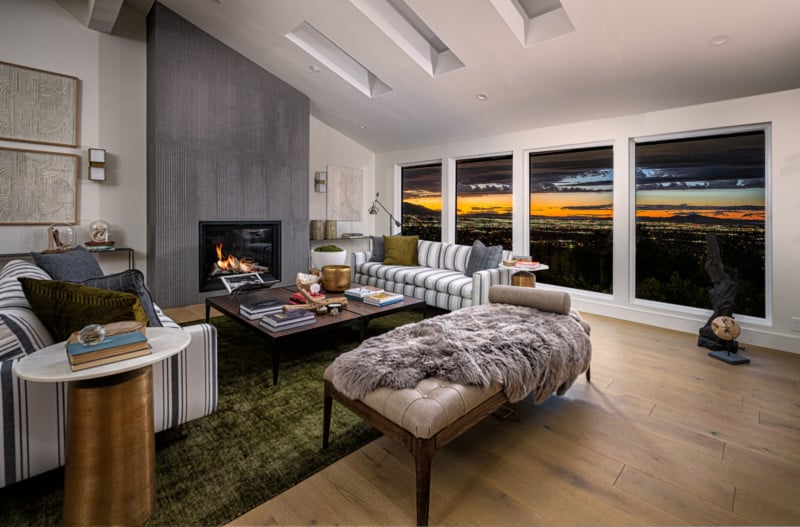
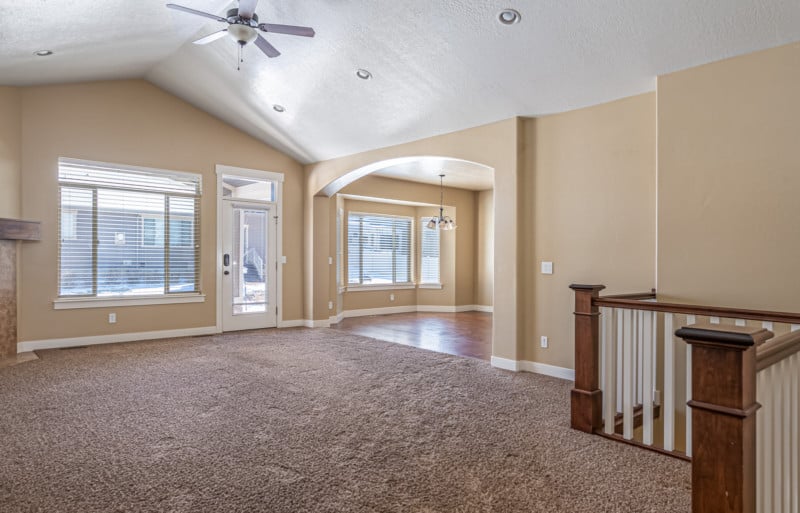
I used two flashes in this instance, one handheld behind my camera in real estate photography’s infamous “Statue of Liberty pose”, and one placed on a counter behind the wall to illuminate the adjacent space.
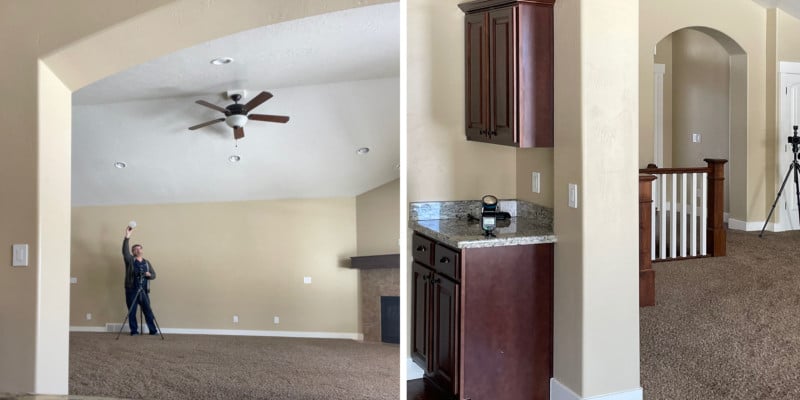
A test shot shows nice even light and color across the walls and ceiling of the room.

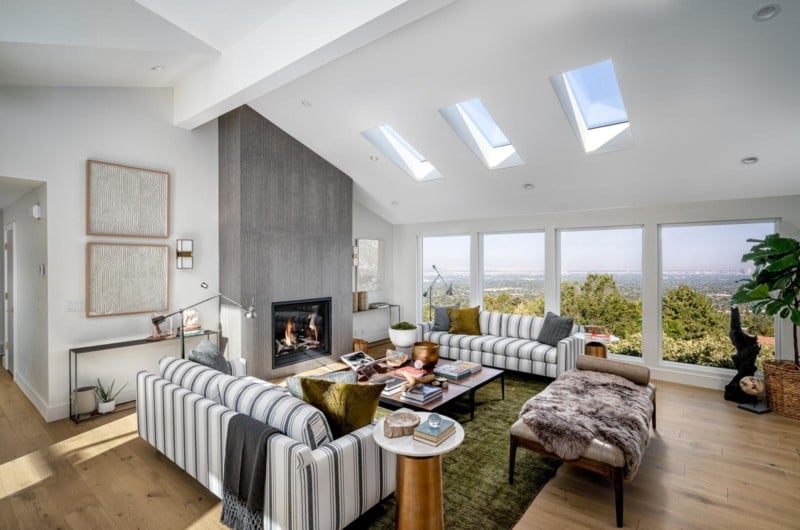
The result of this flash photo looks too “flashy,” though, so the trick is post-processing. The magic of “flambient” photography happens in editing.
By opening both the ambient HDR photo and the flash photo as layers in Photoshop, you can using masking to paint the ambient photo into areas of the flash photo that are too flashy (or paint the flash photo into areas of the ambient photo that are too dark).
The result is a more aesthetically pleasing real estate photo with a narrower dynamic range.
I have also written a more in-depth step-by-step tutorial on how to shoot HDR and flash photos and then combine them into flambient real estate photography.
The Business of Real Estate Photography
You will need to decide on a business model and a work style you feel comfortable with, and then work on the techniques that work best for that business model.
You may start just doing anything you can, and that’s fine. But there are many other options for you. You can work for someone else as you build up your skillset. Not as personally fulfilling, but a guaranteed paycheck is sorta nice.
You can decide to be a volume shooter. Shoot at very economical prices, and do a lot in a day. Do a shoot for $75, and do 7 of them and you are seeing some nice demand. This is a very viable alternative, and many places do very well with this model.
Or you can target high-end homes with higher-end photography packages. You can spend 1, 2, or even 8 hours shooting a home, and charge accordingly. But you will have to be good because you are selling quality.
Marketing Your Real Estate Photography
You also need to consider how you will drive clients to your business. As in any business, word-of-mouth is gold. and as a beginner, you won’t yet have that. You do have lots of other options. Creating a website is a great place to start. These days, that goes hand-in-hand with creating a social media presence.
Get out and meet the brokers and agents you want to hire you. And ads- don’t discount ads! While expensive, they can be a great way to jump-start an otherwise ignored business.
Finding Success as Real Estate Photographer
What will you need to do to be successful? No one can fully predict what it may take to win in this field, and I would be a fool to try. I am happy to let you know what worked for me and hope you can adapt that to your situation.
Running a Small Business is a Challenge
Honestly, a lot of things will have to come together for you. It’s not like you need Jupiter to align with Mars, but you will need to be very proactive in running your business. A lot of what you should do is just common sense, too. If you have never run a business, reach out to your local community college or Small Business Administration (SBA) center. I am sure some people there will help you plan, and critique your plan (and probably for free!)
Don’t judge your place or progress in this field by where you think other photographers are. We are all on different paths and have different goals we are trying to achieve. And we all start from different spaces. Be slow and very deliberate. This is not a race; this is something you want to get right the first time. Take your time, practice, and know what you are doing and where you are headed.
It Pays to Be Professional
Concerning business practices, do not take the cheap way out, especially if your business objectives are selling quality. Don’t fake it, and don’t lie. If you want to be treated as a professional, treat your job as a profession. Always dress appropriately; sloppiness will reflect on you (and not well, either).
If you make a mistake, take responsibility, then make it more than good to the client. Ten minutes early is on time; on time is late. When you are with your client, they should be the ONLY people on Earth to you. Do not talk about other customers, your next shoot, or answer your texts — the customer in front of you right now is your whole world, and their property is all you care about.
Stand Out from Among the Crowd
There are a hundred thousand “photographers” out there vying for jobs and a million more behind them screaming, “But my iPhone is good enough!” To stand out against this backdrop — to be noticed — you must emerge from that field and stand for something. Create your segment in your market, both in product and in the business itself. For me, I want to be known for creating quality images and premier customer service, and that is the business I have built.
Please don’t think that everything I have laid out here is the perfect path to success in this business or the only way to prosper in this field; that would be impossible to put down in an article ten times this long. This is simply what I have done, what I see as helpful, and what I wish I had known when I first started. I set this all down to give you an idea of where to place your feet as you start the journey down this road. The road is wide, it accommodates many travelers, and there are many junctions ahead; you must find your own route.
Ultimately though, you should base your path based on what is important to you in photography and in business; You be you. If you are good and honest in your dealings with customers as well as colleagues you have every reason to succeed.
Be Active in Your Photography Career
Once you have established your business, you will have to work equally hard to keep it relevant and alive. You have to be active in your career and work hard to be a better photographer every day. My friend Joe Edelman has a saying I simply love: “Your BEST shot, is your NEXT shot!” Figure out what that means, and apply it to your daily workflow. Be active in the forums on Facebook, and in professional organizations like PFRE and PPA.
Look at and analyze the work done by your peers, and those the industry regards as good. Look at other photographers on Instagram. And not just real estate photographers! For sure you will follow real estate and architectural photographers such as Mike Kelley, Scott Hargis, Rich Baum, Wayne Capili. But you would also be well served by spending time keeping up with a broad spectrum of visual artists like Kat Irlin, Lindsay Adler, Joanie Simon, Joe McNally, Dondre Green, Moose Peterson, Sean Tucker, Simone Bramante, and anyone else that catches your eye.
You can learn from anyone, and bring what you like into your style. Never stop feeding your eye; never stop being inspired, and placing yourself in positions to be inspired.
And always ask questions online: there is NOTHING professional real estate photographers love more than sharing their opinions!
Real Estate Photography is 1% Picture Taking
Photography is about a lot more than taking pictures. There is a quote by Thomas Edison: “Genius is one percent inspiration, ninety-nine percent perspiration.” I would alter that for photography and say that this business is 99% problem solving and 1% picture taking. If you are not prepared for that, if you think a photography career is pushing a button, instantly spitting out a beautiful picture, and then collecting a large check, get ready to be massively unhappy and gravely disappointed.
But if you love the process of making pictures, problem-solving, hard work, and being your own boss, then there is no better place to be.
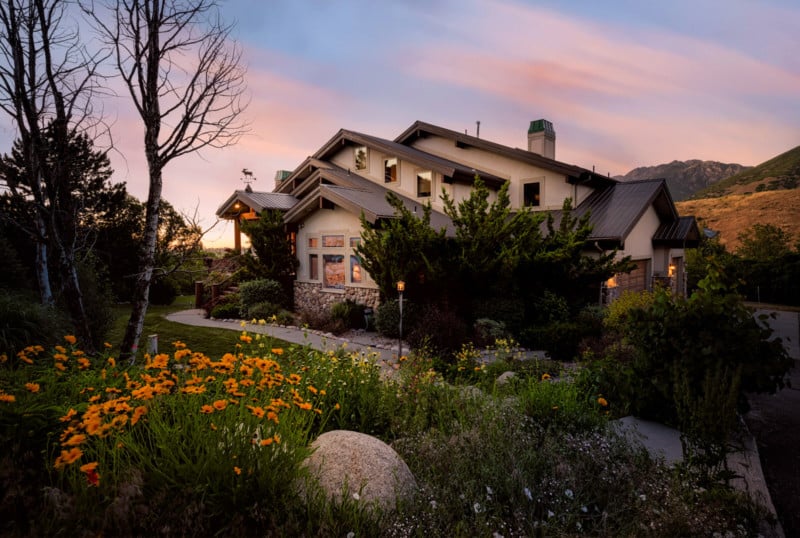
About the author: Dave Koch is a working real estate and commercial photographer based in Utah. With over a decade of experience in the field, Dave has been recognized by his peers with the Best of State award twice for his commercial photography. Before stepping out on his own, Dave spent fifteen years as a professional photojournalist across California, Arizona, and Utah. For fun, Dave enjoys spending his free time exploring the length and breadth of his adopted home state of Utah with his wife and daughter. You guessed it: taking pictures. You can find more of his work on his website, Facebook, and Instagram.
Image credits: All photographs, unless otherwise labeled, by Dave Koch.