How to Use the Camera Raw Filter in Photoshop
Adobe Photoshop contains a very broad and deep set of tools for making edits and adjustments to images. While there is little limitation to what can be achieved using the native tools available in Photoshop for more than two decades, they may not be as intuitive and user-friendly to photographers who have spent most of their time editing raw images in Lightroom.
Today, Lightroom and Adobe Camera Raw have editing tools for retouching that include tools like healing, adjustment brushes, and advanced masking. As good as some of these tools are, there are still plenty of reasons to open images in Photoshop for further editing. Just use the Healing tool in Lightroom/Camera Raw for something more than simple spot removal, and you can see why I say that.
Adobe realized that there would be instances where it would be beneficial to leverage the available tools in Camera Raw directly in Photoshop. Using the Camera Raw Filter, you may find a more direct path to certain results that could otherwise require more lengthy and varied steps to achieve.
In this article, I’m going to demonstrate how to use the Camera Raw filter and also show some specific situations where it can really be handy and save time. But first, a little history.
Table of Contents
Camera Raw Filter History
Adobe Camera Raw existed first as a new feature in Adobe Photoshop 7.0.1 released in August of 2002. Camera Raw actually predates the release of Lightroom 1.0 by about four years. While Lightroom is a standalone application that includes features beyond raw image processing, Adobe Camera Raw works more like a plug-in that can be called from Photoshop or Bridge, and only has the tools for processing raw images. Cataloging and output features in Lightroom are not found in Camera Raw.
In June 2014, Adobe added the Camera Raw Filter to Photoshop in CC 2014 (ver 15). This allowed the adjustments available in Adobe Camera Raw to be applied directly to an image within Photoshop. Before this, if one wanted to leverage the adjustments in Camera Raw/Lightroom, it was necessary to save it out of Photoshop, edit it, and then open it back up in Photoshop. Adding Camera Raw as a filter eliminated this need for round-tripping.
A note for users of Loupedeck, Tourbox, and other similar hardware interfaces.
If you use hardware controllers like the Loupedeck+ or the Tourbox NEO and have set up preferences for these tools to interact with Adobe Camera Raw, be aware of which application from which you have launched Camera Raw. Since Adobe Camera Raw can be called from Adobe Bridge, or Photoshop, or as a filter in Photoshop, your hardware device will see that instance of Camera Raw as being part of Bridge or Photoshop as Camera Raw acts as a plug-in.
If, like me, you use Camera Raw with Bridge, you will find that your controller assignments may not work the same as the Camera Raw filter opened from within Photoshop. This likely only pertains to a small group of users, but I know there are a few of you out there who might run into this issue.
Accessing the Camera Raw Filter
Once you have an image open in Photoshop, the Camera Raw filter is available from the filter menu as shown in Figure 3. It can also be called by pressing CRTL+SHIFT+A on Windows or CMD+SHIFT+A on Mac. This shortcut is currently present in Photoshop by default, but be aware that sometimes shortcuts get changed when new versions of Photoshop are released.
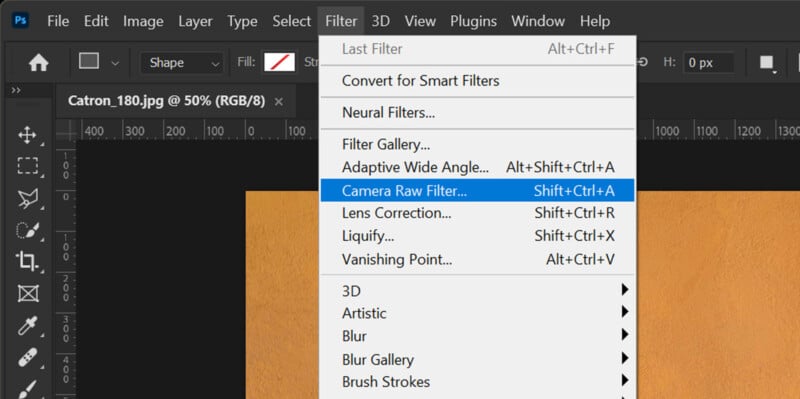
If you find that the Camera Raw Filter is grayed out and not accessible from the menu or shortcut keys, your image type may not be supported. Only RGB and grayscale images can take advantage of this filter so If you are working with CMYK, LAB, or indexed color images, you’ll need to convert them to RGB or grayscale to apply the Camera Raw filter.
I should point out that the Camera Raw filter does work on 16-bit-color images in addition to 8-bit-color ones. You may notice that some of Photoshop’s filters are greyed out and not available for 16-bit-color images, but Camera Raw is available.
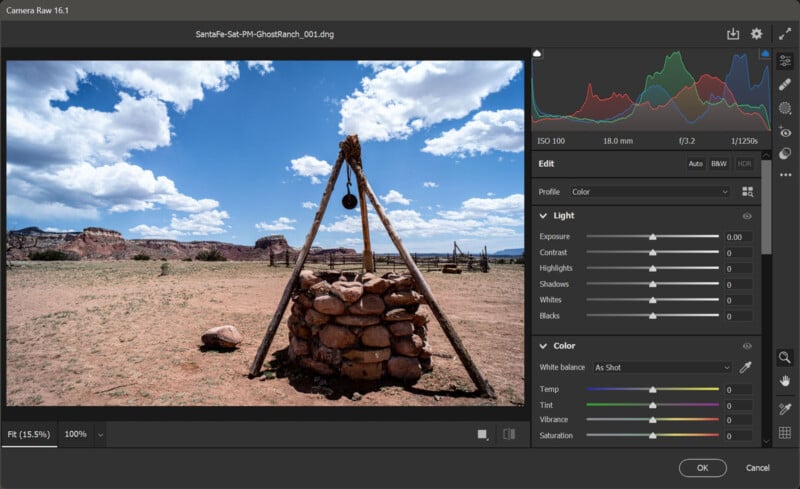
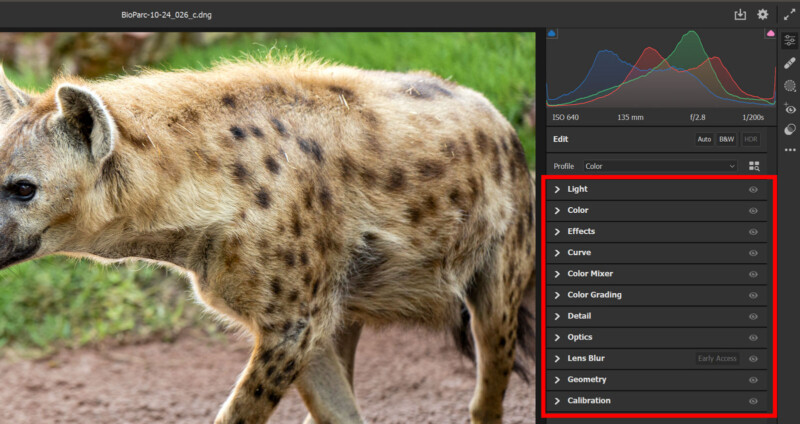
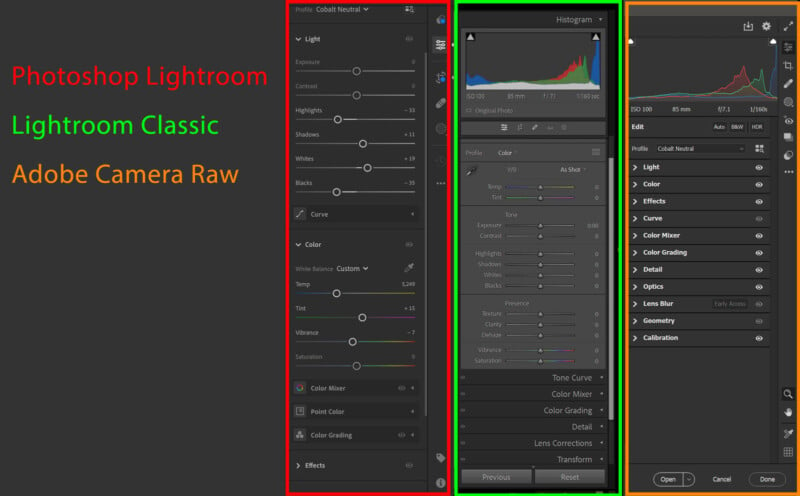
Once you select the Camera Raw Filter, you’ll be presented with the Camera Raw interface. Users of Adobe Camera Raw will be familiar with the interface presented. Lightroom users might need a minute to take in the interface, but the tools and adjustments that they are used to using in Lightroom are all there. You can see the differences in Figure 4.
Once the interface is open, you can make your edits and adjustments just as you normally would when using Camera Raw or Lightroom. When you’re finished, clicking the OK button will apply the changes and return you to the Photoshop interface.
Best Practices
Like most edits and adjustments made in Photoshop, I highly recommend creating a duplicate layer to which the Camera Raw filter will be applied. This has the benefit of not only keeping the original, or “background” layer intact but also allowing you to blend and mask the edits made with the filter in relation to other layers in your Photoshop file.
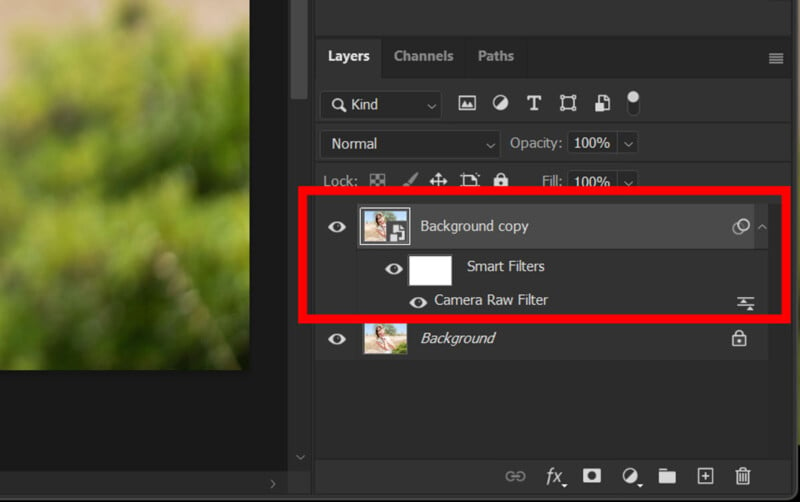
I would further suggest converting the duplicate layer into a Smart Object (figure 5) before applying the Camera Raw filter. Doing this will apply the filter to a Smart Filter. This allows you to come back to the Photoshop file and adjust the parameters just as if you had just applied the filter in the current session. This applies to most filters and adjustments in Photoshop, not just the Camera Raw filter.
Differences Between Camera Raw and the Camera Raw Filter
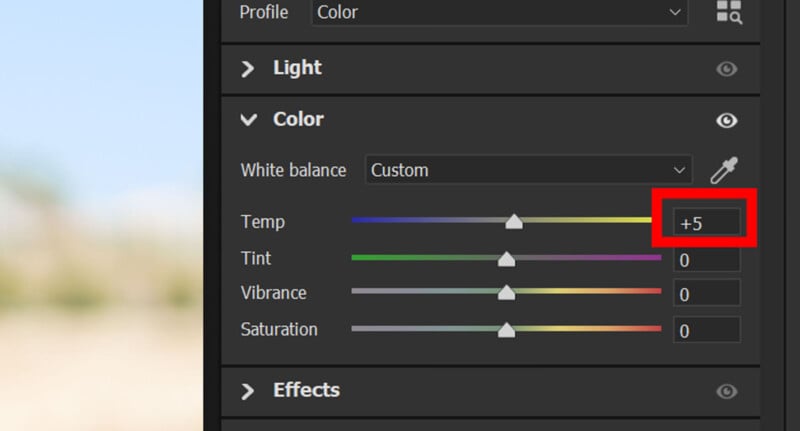
There are a couple of things that are different when launching the Camera Raw Filter versus using Adobe Camera Raw or Lightroom. First, the Color panel (formerly called White Balance) lacks the absolute values for color temperature and instead uses positive or negative integers from a baseline of ”0” as shown in Figure 6
You will find the Crop and Snapshot tools are absent from the right side menu when using the Adobe Camera Raw filter when compared to when Adobe Camera Raw opens a raw image file. This makes sense, as cropping the image should be done with Photoshop’s native crop tool. As for snapshots, Photoshop has its own Snapshot function that can be accessed in the History panel.
Using the Camera Raw Filter
Outside the Camera Raw filter, Photoshop has quite a complete set of tools, so it may not always make sense to jump into Camera Raw versus native Photoshop adjustment. For instance, the results from using Curves in Camera Raw versus the native Curves adjustment in Photoshop are going to be very similar.
I prefer the native Photoshop Curves tool if I’m already editing in Photoshop. At the same time, if you are more comfortable using the Camera Raw version, there’s no harm in using it. The same goes for using the Exposure, Contrast, and other Camera raw settings under the “Light” panel versus using native Photoshop tools.
Some tools in Camera Raw do offer some clear advantages over the native Photoshop tools, and in some cases, there’s not really a direct equivalent to some of the tools. The following are what I feel are great reasons to hit CTRL+SHIFT+A to call up the Camera Raw filter.
Black and White Mixer
Photoshop and Camera Raw both have a Black and White adjustment tool but the Camera Raw Filter provides control over eight colors in the B&W Mixer (figure 7) versus six in the Photoshop Black and White adjustment layer. These extra two colors, the Orange slider, in particular, are certainly welcome.
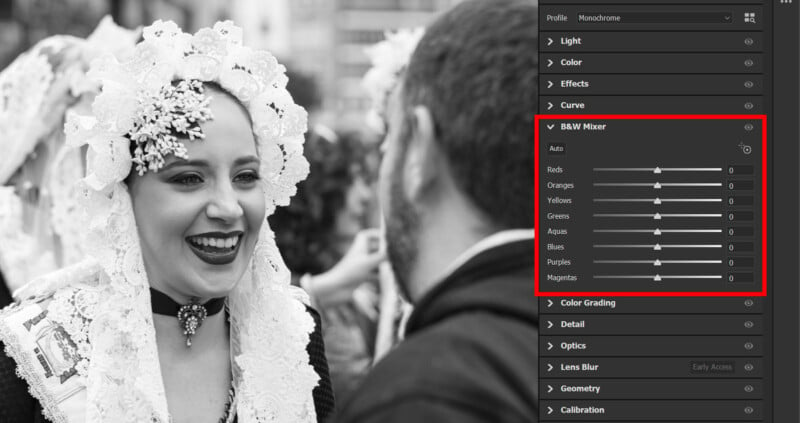
The Orange slider is particularly useful for adjusting the brightness of skin tones in a black and white conversion. This is one of the reasons I always head to the Camera Raw filter for processing black-and-white images of people.
Color Mixer
Going hand in hand with the Black and White Mixer, the Color Mixer (figure 8) is an effective way to make adjustments to specific color ranges in an image. This can also be done with the Hue/Saturation adjustment or even in curves, but the Color Mixer can effect changes quickly and easily in cases where its ability is all you need. For more advanced color editing, the native Photoshop tools are still there if needed.
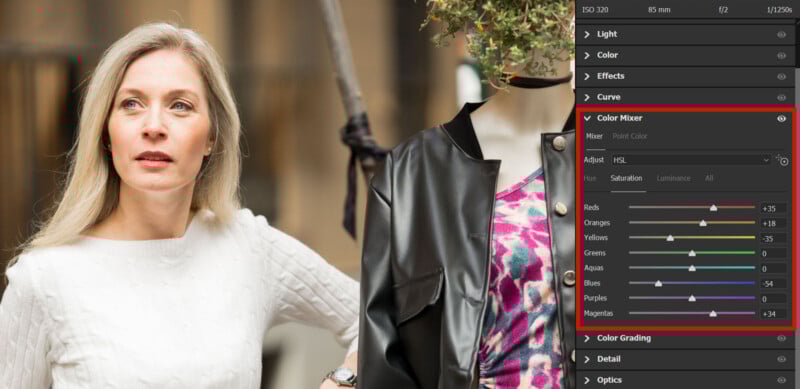
By the way, the Color Mixer and B&W Mixer are the same palette in Camera Raw, and it switches to one or the other depending on whether you are in color or in B&W mode.
Vignettes
There are several ways to create a vignette effect using Photoshop’s native tools. If you want to create a specially shaped effect as well as adjust the detailed parameters involved, then it makes sense to take those extra steps. If, however, you want to add a simple vignette, then using the vignette function in Camera Raw is fast and simple.
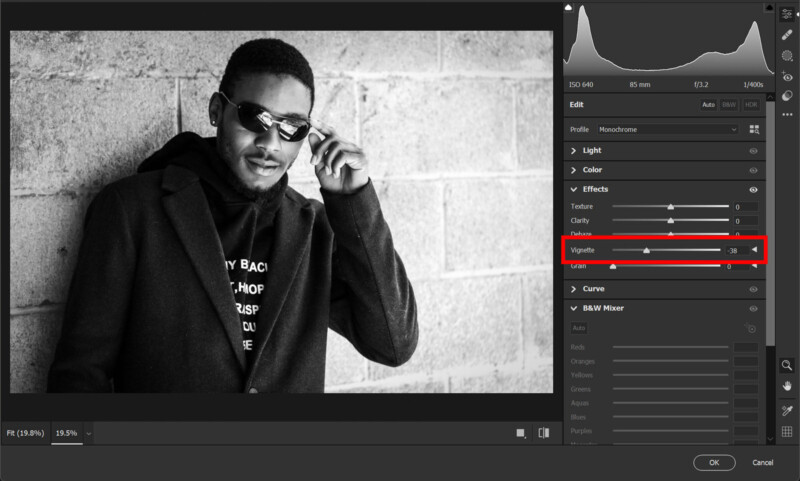
The vignette effect can not only be used to create a darkening effect but can also be moved in a positive direction to lighten edges as well. The “effect” vignette should not be confused with the vignette adjustment under Optics in Camera Raw, which is designed to correct optical vignetting from a lens.
Clarity and Texture
A lot can be done with the Unsharp Mask filter to make adjustments to contrast that create increased sharpness, or at least give the appearance of it (the whole sharpening topic is an entire article or two in itself). The Clarity and Texture tools in Lightroom and Camera Raw can also do this, but they work in their own specific ways.
Frankly, I know a lot of photographers who can’t stand the Clarity adjustment, and I can see how improper use can really wreck an image. On the other hand, small amounts of positive or negative Clarity can be helpful. I sometimes use a lot of positive Clarity (figure 10) to create some crunchy effects to an image where “wrecking it” actually works for my vision for the image.
The Texture tool can also be very useful, for instance, in bringing up the tiny details in fabrics or just as easily used for gentle skin smoothing. It can produce a pleasing and subtle effect that may often be all you need. I should make it clear that Clarity and Texture are not always the perfect solution, but when they are the right tool, it takes little time in the Camera Raw filter to implement them.
Dehaze
The Dehaze tool, located in the same palette as Texture, Clarity, and Vignette, is a tool that I really only use for one specific purpose. If I am shooting photos of a person who is wearing glasses, I often use the Dehaze tool (as an adjustment brush) in Camera Raw to help match the contrast of the area inside the lens to that of the rest of the face. In Figure 11 you can see where I have applied this to the subject’s left eye where the contrast more closely matches the rest of the face versus the right eye which is a bit “flat”.
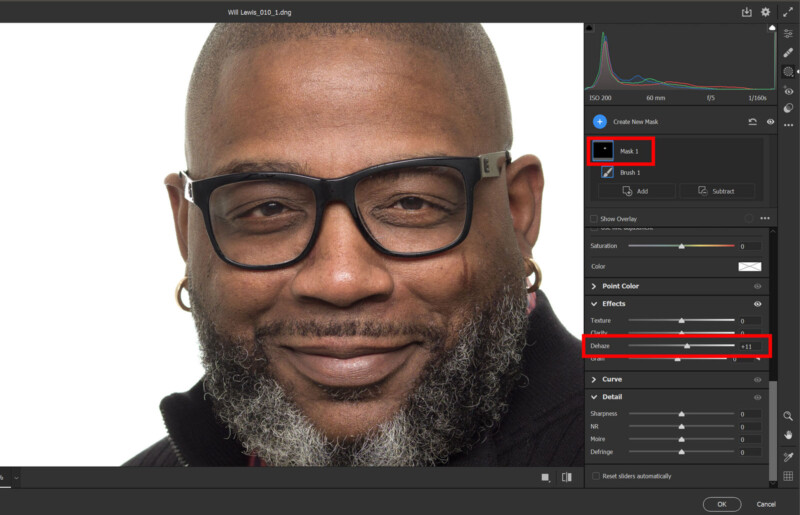
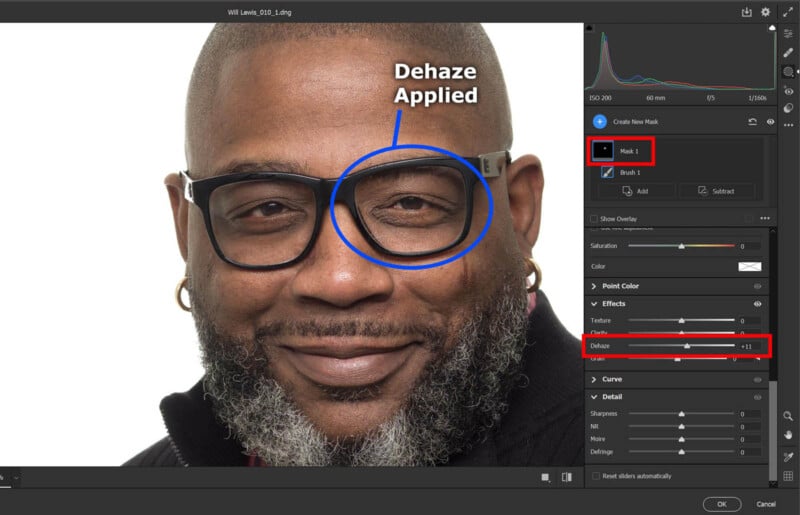
This is something I usually do in the raw photo development process, but if I’m in Photoshop retouching someone else’s image they’ve sent to me, I’ll jump into the Camera Raw filter and just “brush in” a little Dehaze. This could also be done using a Curves adjustment layer and making use of the layer mask, but the Dehaze adjustment has almost always done the job.
Color Grading
If you work in video and are used to using color wheels to grade your footage, the Color Grading palette (figure 12) in Camera Raw/Lightroom is something you might prefer using compared to some of the native Photoshop color adjustment tools. Like many things in Photoshop, there are other ways you can go about creating desired color effects, but having access to color wheel style adjustments might be the ticket if you’ve worked with them in other applications.
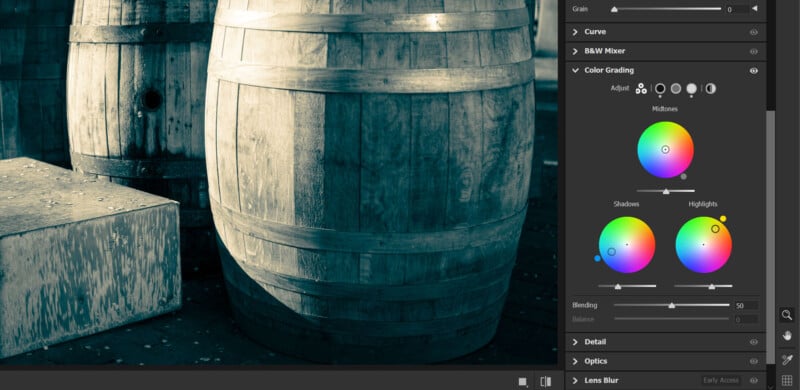
Duotones like in figure 12 are just the tip of the proverbial iceberg as far as what you can do with the Color Grading palette. Even if you are well versed in using Curves and other tools in Photoshop, Color Grading offers a great way to approach color adjustments and is worth a spin if you haven’t tried it already.
Moiré Reduction
Last, but certainly not least, is the Moiré tool in the Details panel. There are many ways to reduce moiré using Photoshop’s native tool set, but these usually involve multiple steps. Using an Adjustment Brush and applying the Moiré tool to affected areas of the image is a very quick and effective way to reduce/remove the moiré effect from an image.
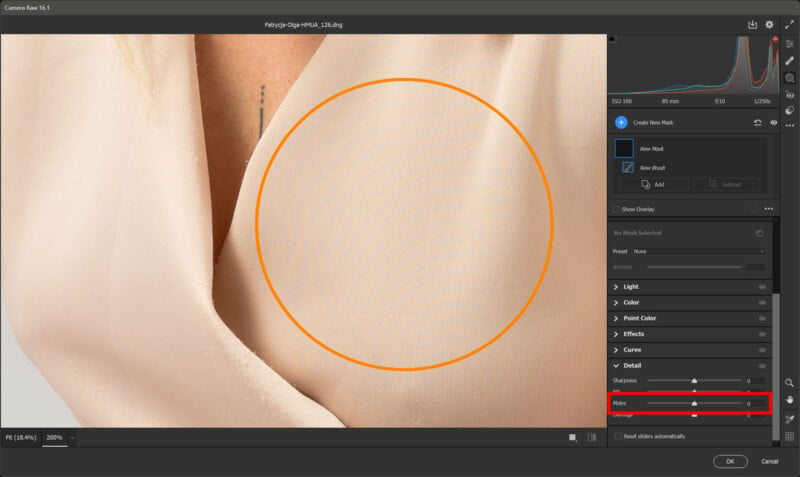
It may be difficult to see the moiré effect present in Figure 13, so I’ve circled it in orange. It should be noted that the Moiré slider doesn’t appear in the Detail palette until the Masking is selected in Camera Raw.
Conclusion
The Camera Raw filter in Photoshop certainly isn’t the perfect tool for every need in Photoshop, but there’s no denying that there are instances where it might be the quickest way to a certain result. A lot of how and why you might use the Camera Raw filter will likely depend on your comfort level with the tools in Photoshop versus your familiarity with Camera Raw and/or Lightroom.
Generally, there’s no right or wrong tool to use as long as you get the results you’re looking for, so I suggest experimenting with some of the tools and adjustments in Camera Raw to see what “speaks to you”.