How to Find a Photoshoot Location

You have a photograph in mind and now you want to try and make it a reality. Or, a client has contacted you to help them realize a photograph they have in mind. What now?
Research is Key
Once the decisions have been made about the photographic vision, the key to finding a suitable location is research.
Here are some key points to consider:
- What type of location is needed to fulfill the visualized image?
- Is the location in mind available and accessible?
- What are the alternative locations, if any?
- When to shoot (best light, sunrise, sunset, time of year, etc.)
- Are there special weather restrictions or conditions needed? (i.e. fog, hot, cold, rain, auroras, etc.)
Type of Location
This may be the easiest part to decide since the image you have in your head will usually dictate the location. It may just be a matter of narrowing down the precise location to a few spots that will work. A good idea is to use online resources such Google Maps to help you preview what a location has to offer. While you could also look at other photographers’ images of the location, you may want to avoid this as it could influence your original idea.
Accessibility
Once you have a possible location picked out you will need to find out if you can photograph there. Public areas are generally safe to freely photograph but it is a good idea to search for information about photography at the location. You may need permission, need a permit, or need to pay a fee if you have selected a location that is on private property. State and National parks can fall into this category so always do the research to avoid any surprises. A phone call may be all it takes to get your questions answered.
Helpful hint: If you talk to a person at the location and they provide the answers needed, always get their name and contact information in case difficulties come up later.
Alternative Locations
It is always a good idea to have an alternative location in mind in case the first choice does not work out. If you are working for a client, they will appreciate that you have done your homework and have a backup location. It may be that the weather is unfavorable or the location is not available on the date you need. Expect the unexpected so you can quickly pivot your plans with minimal headaches.
When to Shoot
Your image may require that it be photographed at a certain time such as sunrise or sunset. If this is the case, your location choice will need to be able to provide the conditions you need. Make sure you can gain access to the location at the time needed. Is the park you want to use for your sunset shot open after dark? If not, can you get special permission to access it after hours? It could be that you need a certain time of year to get the image.
Autumn is a popular time of year for photography because of the fall colors. Research when fall colors reach their peak at the location and plan your shoot to give you a window of several days. Perhaps you have a favorite mountain location selected but want to include wildflowers. Maybe post a question in a local hiking Facebook group for suggestions on when the wildflowers will bloom.
Above all, once you have your time planned, get there early! This will allow you time to make small adjustments to the photo shoot as needed.
Special Conditions
The need for special conditions to get your image is perhaps the trickiest part of selecting a location. Perhaps you need certain weather conditions such as snow so it is important that the location is in an area where snow has already fallen or where it is forecasted.
Selecting a location based on weather conditions can be problematic and flexibility in your timeline is needed to make sure you get the weather you want. Checking the local weather on one of the many weather apps available such as Ventusky can help with making decisions.
Also, consider contacting people who live near your selected location for advice on specific conditions. You are simply trying to put the odds in your favor.
Example: Photographing a German Skyline
As fate would have it, a recent trip to Frankfurt, Germany allowed me to put my own advice to the test. When traveling to larger cities a favorite pastime involves capturing an image of the city skyline. Since the general location was already selected for me, it was just a matter of fine-tuning it. So this became my test case to see if the suggestions above hold true.
The Location
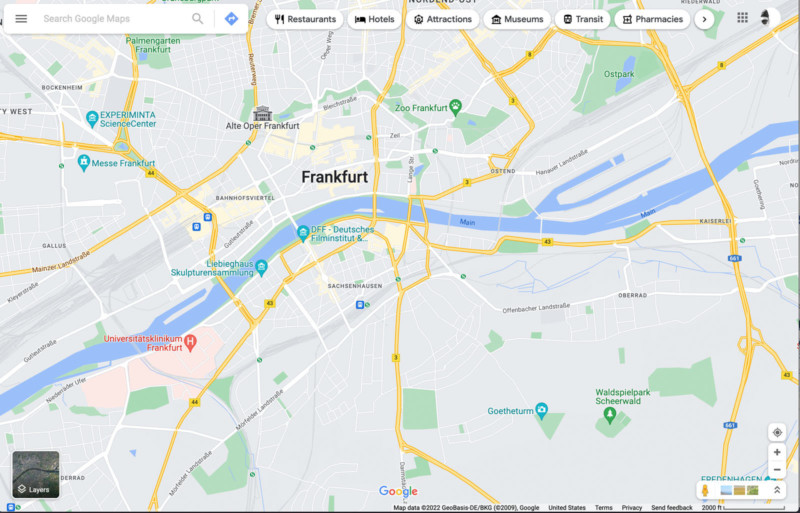
My previsualized concept basically included an image of the Frankfurt downtown skyline at either sunrise or sunset. Looking at a map of the area around the downtown core revealed that the River Main runs through the city on an east-to-west course. The image in my mind now changed to a skyline with a water foreground. Google Maps helped immensely in getting a better idea of the area on the south side of the river looking to the north at the city skyline.
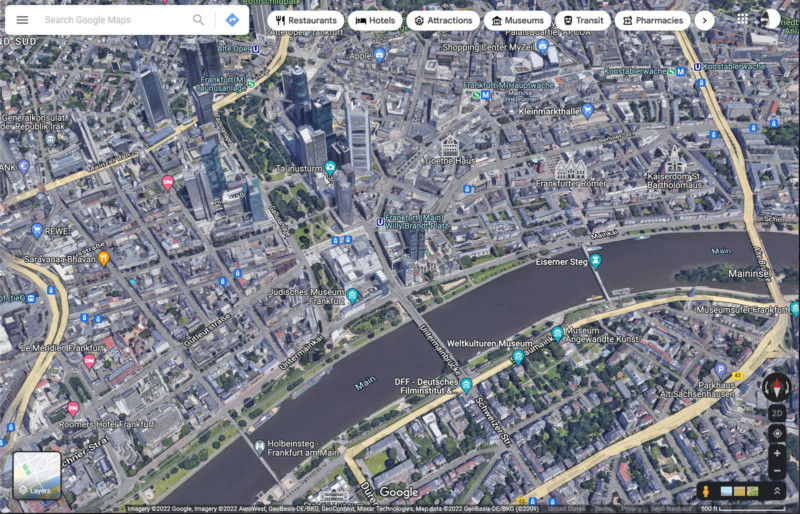
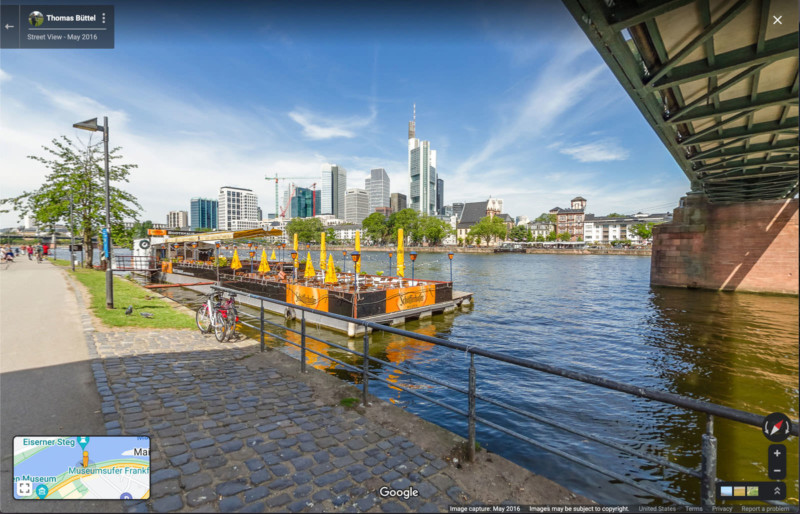
Google Maps Street View helped with deciding the viewing angle that would work best. There are several bridges that cross the river in this area with one, in particular, providing an elevated position. Google Street View also showed that there are several floating restaurants anchored along the riverside. I made a mental note to see if one of these could be part of the image once I arrived at the location.
Accessibility
Looking at the Frankfurt waterfront on both Google Maps and Google Street View showed that it is primarily a public area. Riverside walkways and pedestrian bridges are available to set up a camera and take a few shots. To make sure, I did a search on terms such as “Frankfurt photography restrictions” and came up with nothing that would affect my selected location.
When to Shoot
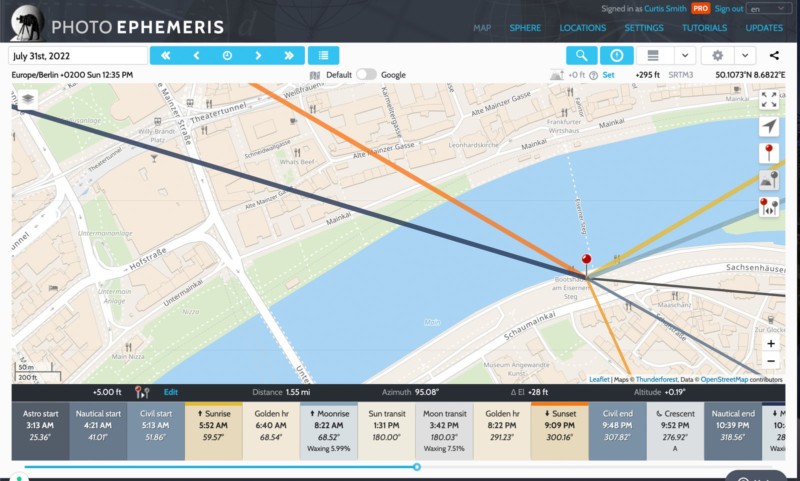
Choosing the best angle to view the city also helped in making the decision on when to shoot. In this case, a sunset image would certainly work best. Using Photo Ephemeris, the location of the setting sun was shown to be mostly behind the city skyline. Shooting at sunrise would put the best light much too far to the east.
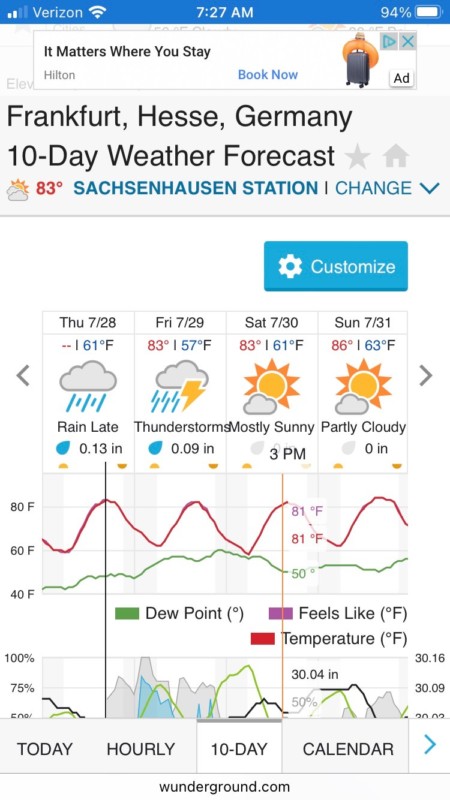
The timeframe of when I could shoot was decided for me since my time in Germany was limited. Looking at my available free time, there were two days when I could get to the location at sunset. A quick check of the weather forecast showed the first day would provide the best chance of clear conditions at sunset. The next chance would be five days later and the extended forecast was for cloudy conditions. I decided to make every effort to get to the location on the first day.
Special Conditions
Since my decision was to shoot at sunset, the weather was going to have to cooperate. As the selected day approached I kept an eye on the weather forecasts. A partly cloudy forecast actually made me happier because a sky with clouds is certainly more interesting than one without.
I also realized without planning that the image would really only work during a summer shoot. With the sun setting to the northwest, the city skyline could only be backlit during the summer months. In this case, I was lucky with my timing.
Getting the Shot
When the time came to actually capture the image, all of the planning really paid off. I knew where to go and how to get there. However, due to flight delays, I did not arrive at the location until just after sunset. Of course, I was very disappointed.
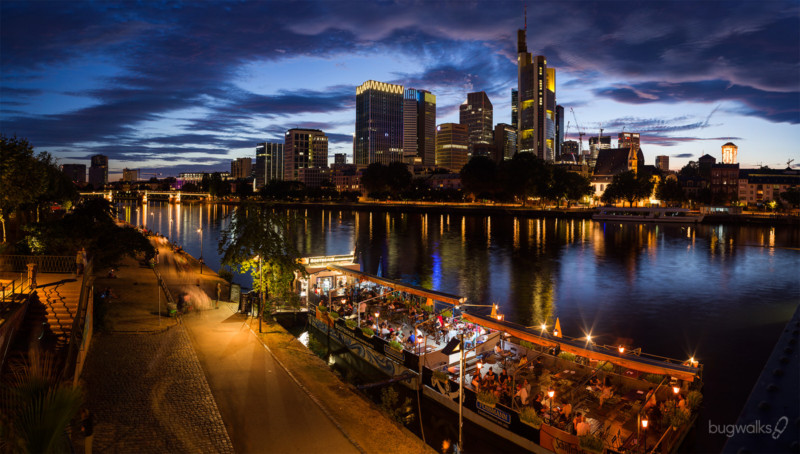
My disappointment was short-lived when the blue hour light started to add some spectacular highlights to the clouds above the city skyline. The mental note made earlier about the riverside restaurants (or beer garden in this case) helped me select the final location. Perched on the south entrance to the Eiserner Steg (Iron Footbridge) I captured a twelve-image panorama (two rows of six images).
Final Thoughts
From this experience, I learned that pre-planning your photoshoot location can pay off in many ways. The biggest benefit was that there was little wasted time searching for the right location. I knew within a few hundred feet of where I wanted to be and how to get there. The tools available to us make this type of planning very easy provided you put in the time.
I am sure every photographer has their own system for finding the right photo location. The suggestions above are meant to help you think about the process and arrive at a method that works best for you.
Image creditsHeader photo from Depositphotos