How to Create Gradients of Light for Product Photography
Gradient lighting is a more advanced technique that brings extra nuance and refinement to strobe lighting. It is an effect that is mainly used by product photographers but can have other applications as well.
Why Might You Want to Create Gradients of Light?
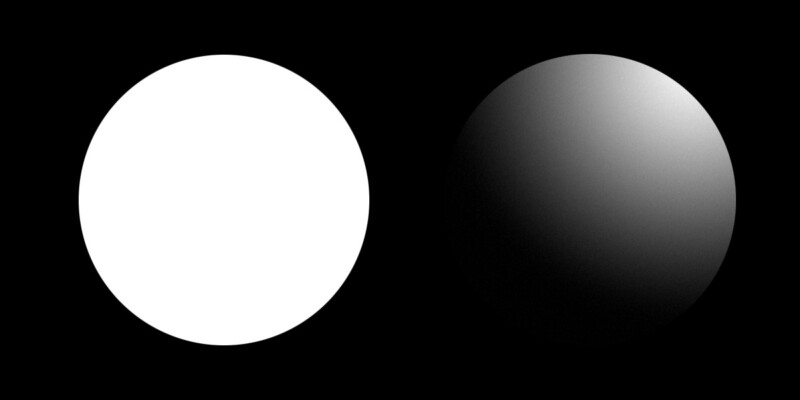
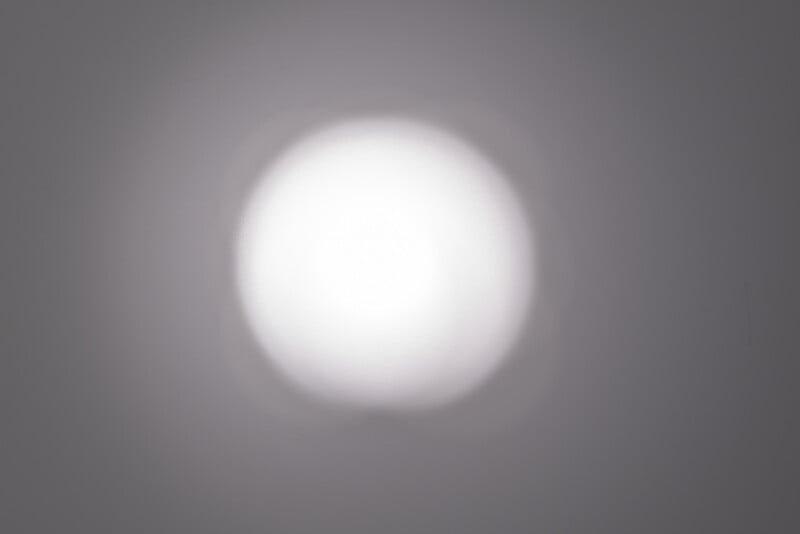
Gradients can help our brains interpret something as three-dimensional more easily than if the lighting is very flat and even. The purely white circle below looks flat, while the one on the right with a gradient gives the illusion of being more 3D.
When photographing glossy, highly reflective surfaces, we see a sharp reflection of our light source. Glossy surfaces are like mirrors, so even “soft” light sources such as octaboxes or softboxes have hard edges when reflected off materials such as glass. The image below shows the reflection of light from a stripbox on a glass bottle.
Our eyes can behave a bit like a glossy object, so when we shoot portraits you can see the shape of the modifier used as a hard-edged highlight in the eye, even if the light over the rest of the face and body looks soft. This is a handy trick for figuring out someone’s lighting setup by the way! But, it can look odd and at times quite flat if you have nothing but hard-edged reflections on glossy products.
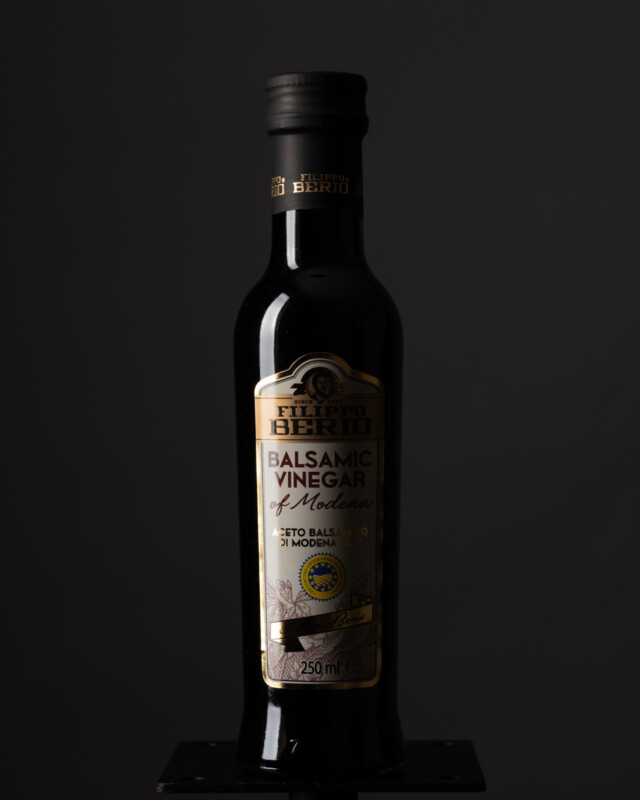
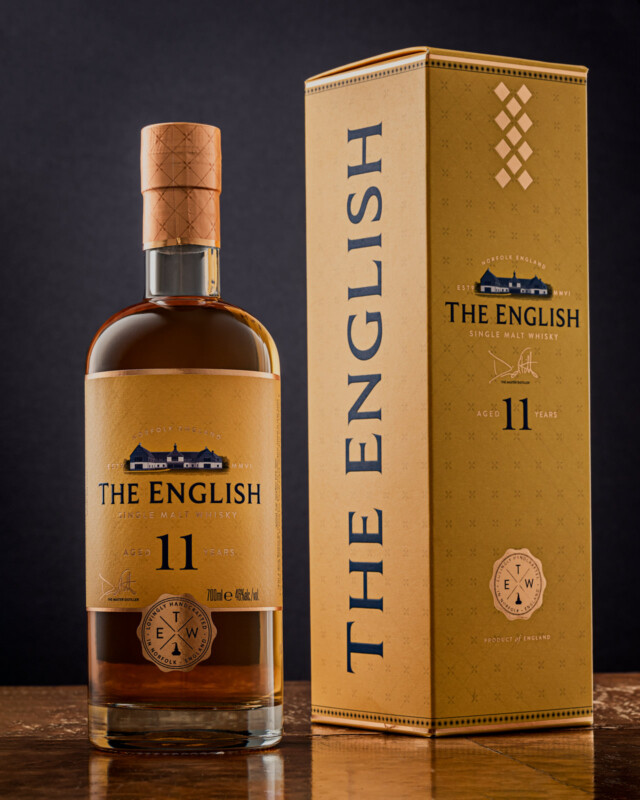
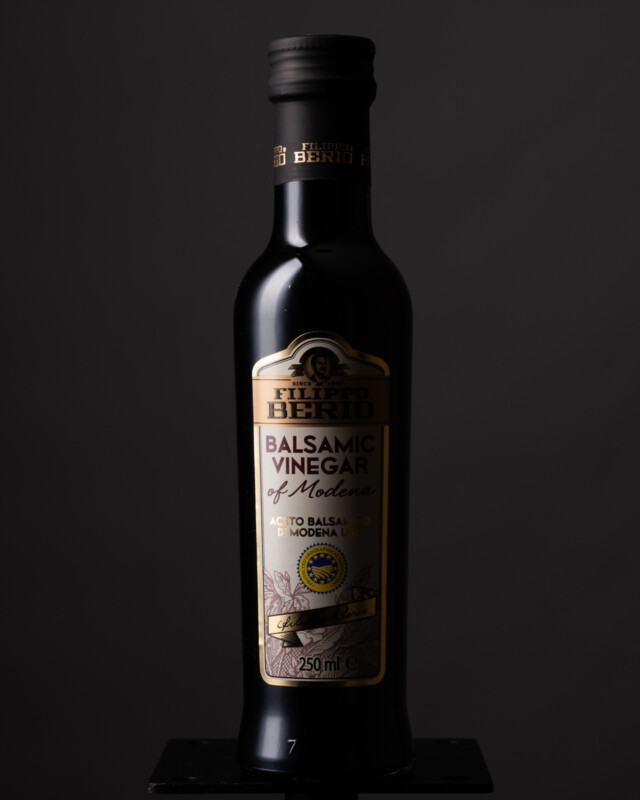
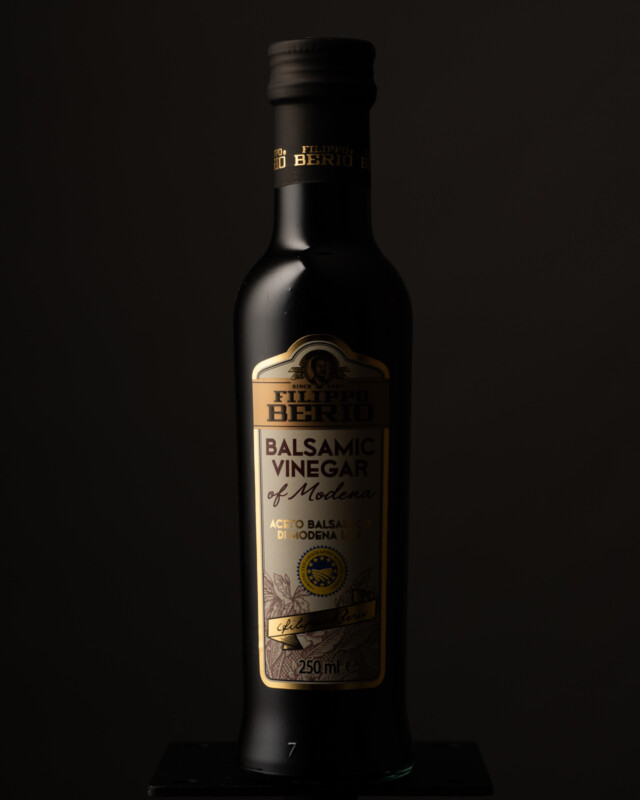
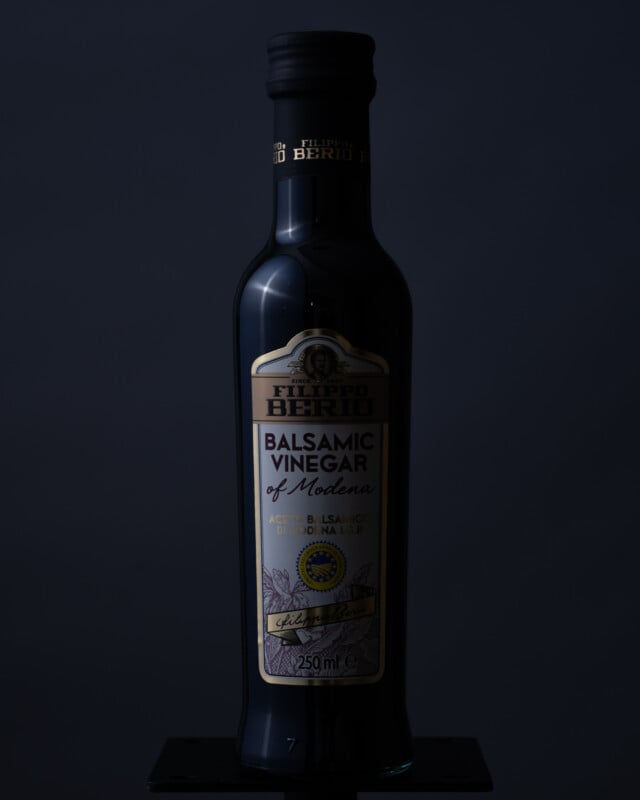
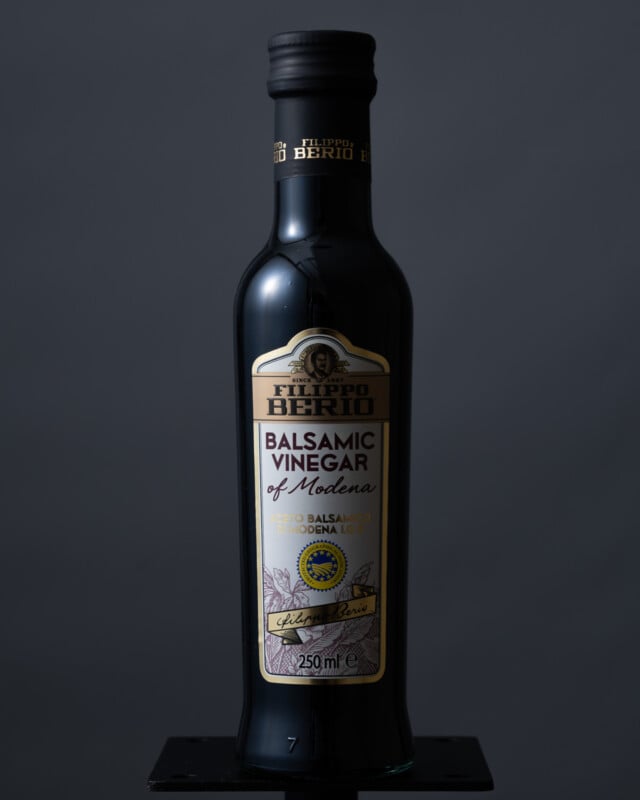
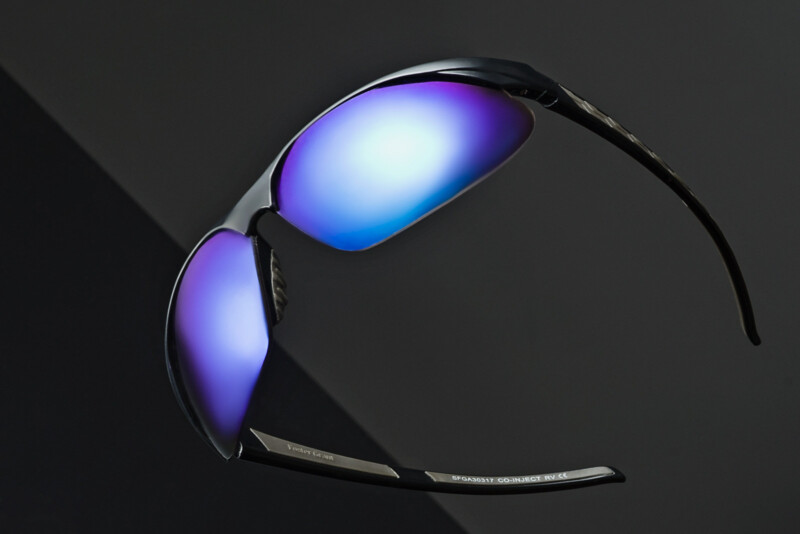
Compare the reflections on these two images of bottles:
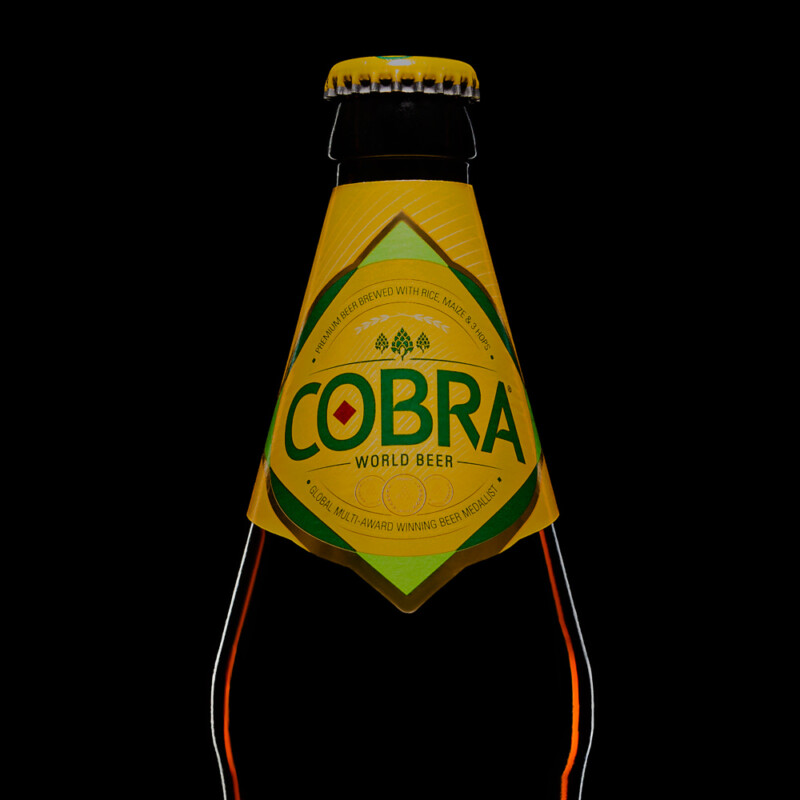
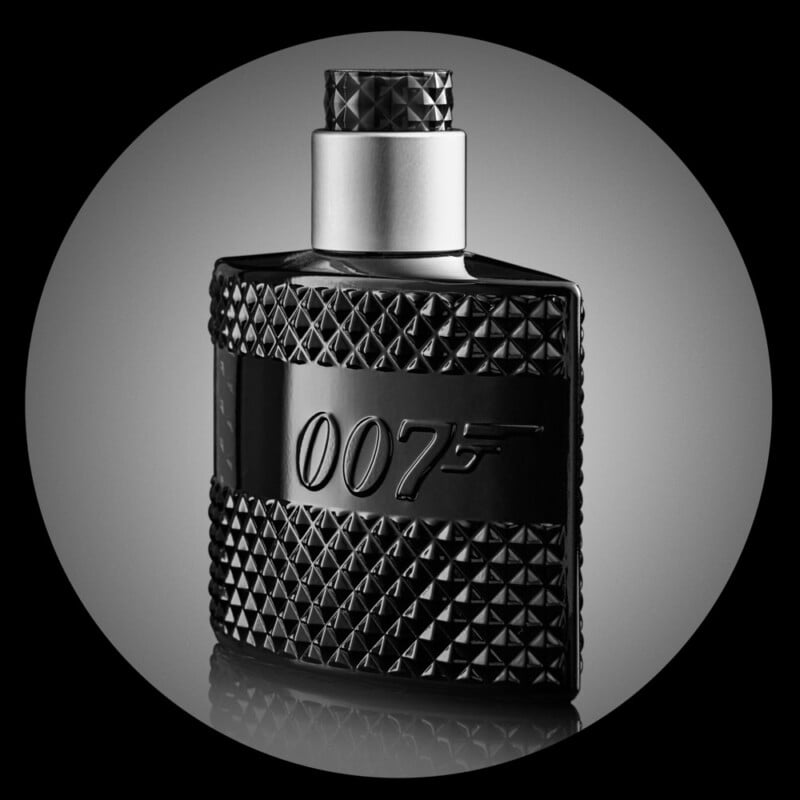
The second image uses a linear gradient to add more of a sense of shape and depth to the bottle. This doesn’t mean that sharp reflections or rim lighting like the Cobra image are wrong. It is just another option in the toolbox that enables us to refine our images further and have greater control of our final output.
There are two main types of gradient lighting: linear gradients and radial gradients. This is a bit like the main gradient tools in Lightroom and Photoshop. Either way, the idea is to have an area that is more intense, fading off to an area with less intensity. So, with lighting this means having a brighter starting point that fades out gradually to darkness. We’ll now have a look at each of these types of gradients, examining how they might be used and how we can create them.
Linear Gradients
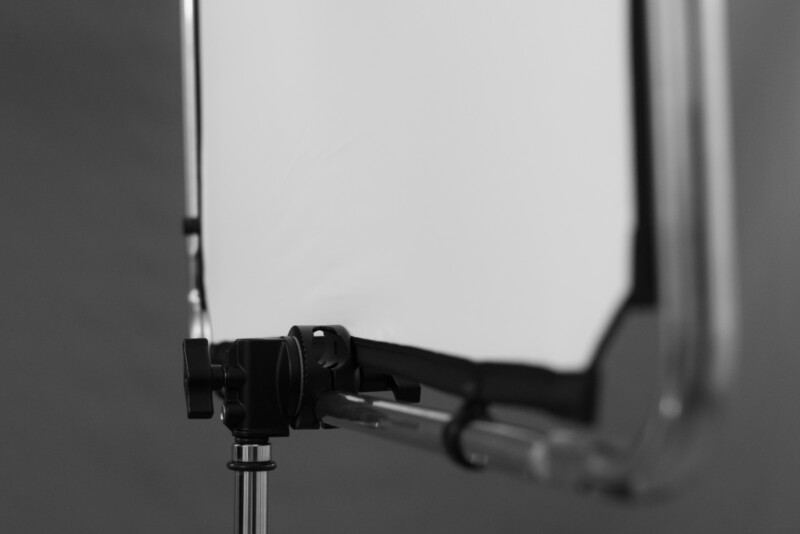
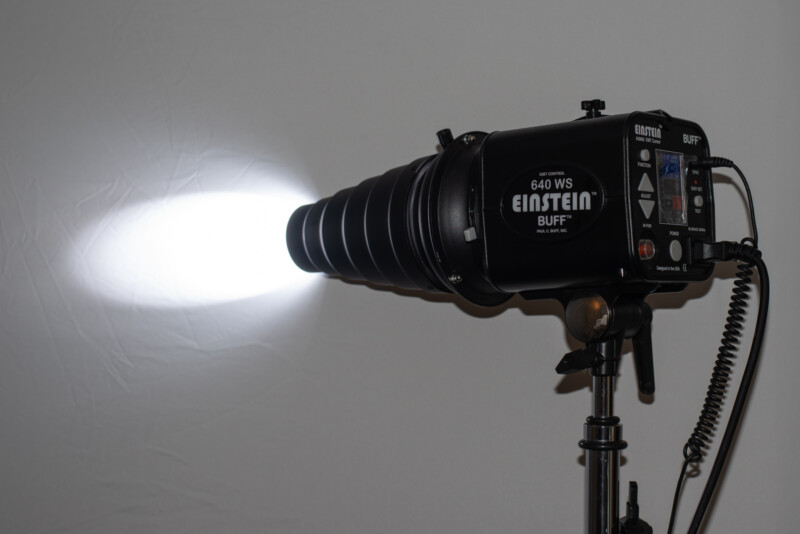
A linear gradient is one that goes in one direction away from the brightest point. This can be left to right, top to bottom, or diagonally. We can also vary the intensity and length of a gradient to give a very slim or much wider bright area depending on the effect we are after. As we want a strip of light to work with for a linear fade, we usually use a stripbox or a square-edged softbox as our modifier. To this we add a sheet of diffusion material.
Diffusion Panels and Diffusion Materials
The usual way to create a linear gradient of light is using a sheet of diffusion material between your stripbox (or softbox) and the subject. This needs to be as close to white as possible and translucent rather than opaque. You can use something like the core of a 5-in-1 reflector as a diffuser, but the texture in this material can cause some problems at times as we shall see shortly. It is generally better to use purpose-made professional diffusion material such as Savage Translum diffusion roll, LEE 216 diffusion roll, or an equivalent. This will keep your light at a more neutral tone, not imparting a color cast, and give a nice, even diffusion effect. You can find different densities of diffusion material to give a more or less pronounced effect to suit your taste. Personally, I wouldn’t go less than a 1-stop diffuser if you like a smooth look.
You can make or buy some kind of frame for your diffusion panel and then attach the material to it. Try to keep it pretty tight so that the surface of the material remains flat and even. The frame can then be clamped to a boom arm or the like to hold it in front of your studio light.
If you don’t fancy making your own diffusion panel, then you can buy ready-made panels from companies such as Manfrotto. When writing this article, Manfrotto kindly supplied me with their Skylite system with their diffusion material to test alongside other methods. I used their 1.25-stop material, but a 0.75-stop version is also available. The collapsible frame can be attached to a light stand using their grip head.
Creating a Linear Gradient
So, let’s take a look at how we can create linear gradients using our light and diffusion material. The first step is to see what the light looks like through the diffuser. Then, we will refine the position of the light to create different types of gradients.
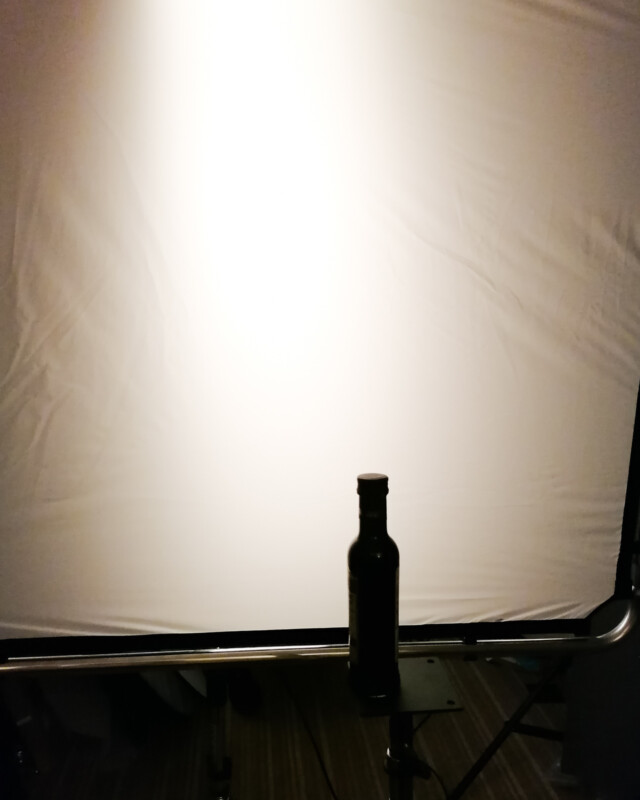
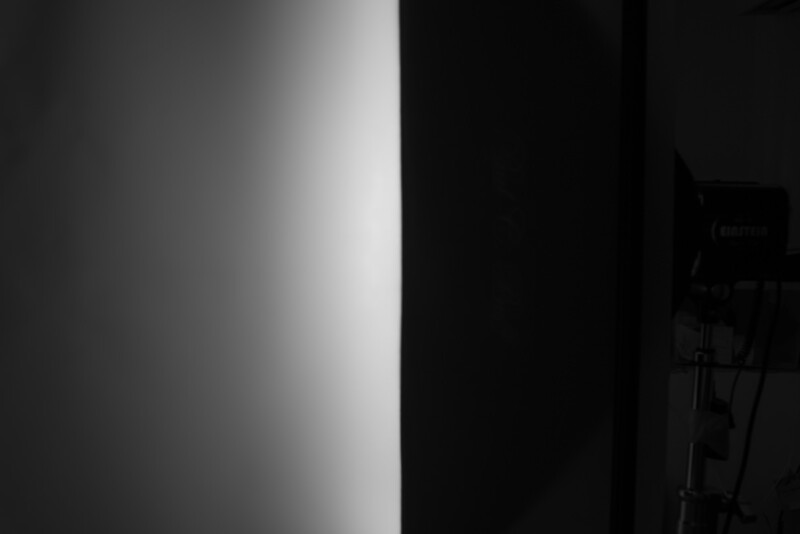
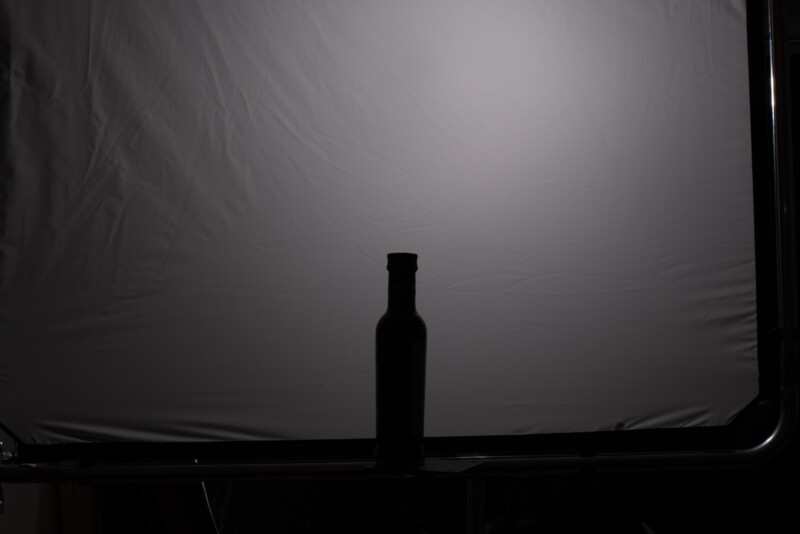
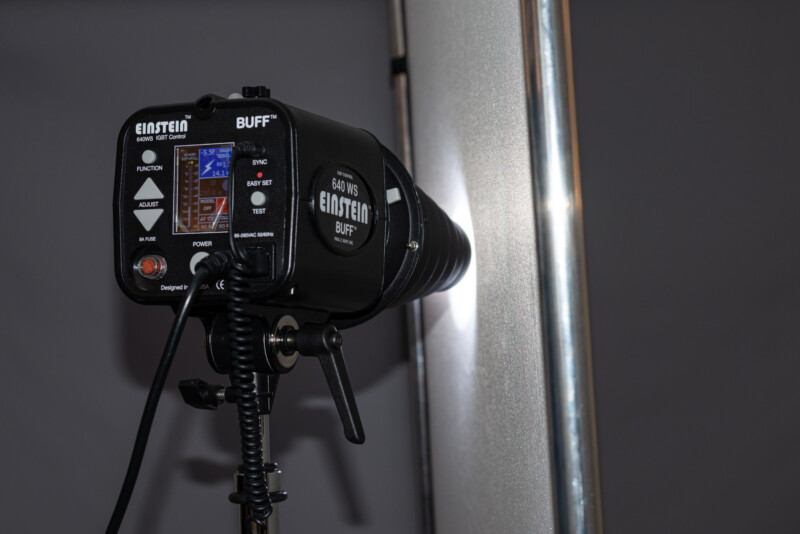
Start out with a stripbox or softbox set up next to a diffusion panel. Try facing the stripbox directly at the diffusion panel with a short distance of 20-30cm between them. Instead of a hard reflection, you now get a strip of reflection that is much softer. The pair of images below shows what happens when I use the core from a large 5-in-1 reflector to diffuse the light. This was the core from a 5ft Phot-R reflector. The first image shows the view looking at the light and the second shows how the reflection appears on the bottle.
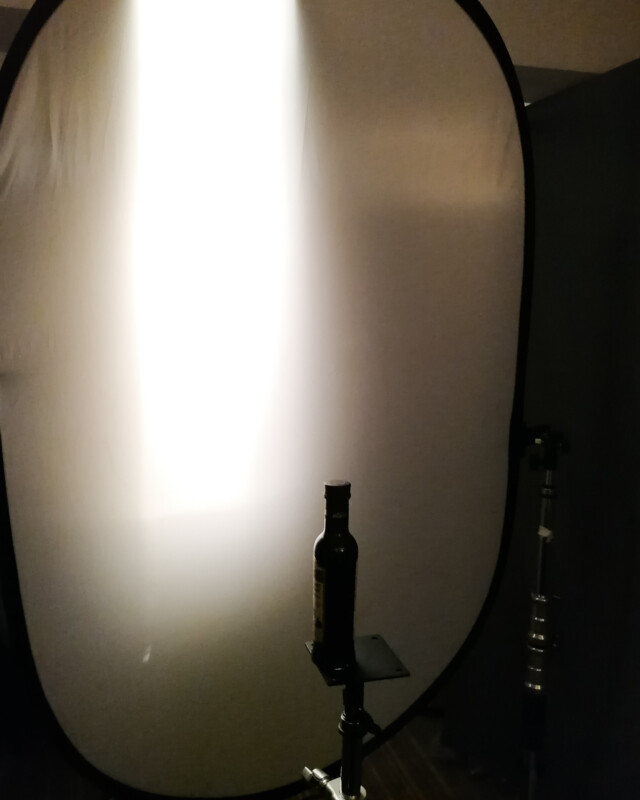
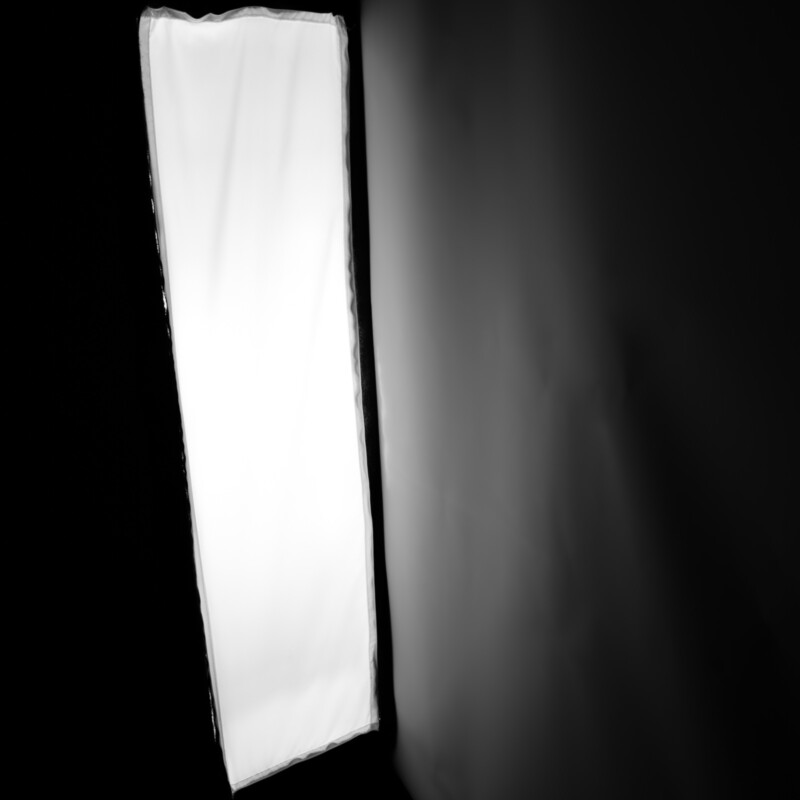
The next set of images shows the results of the same setup using the Skylite:
As you can see, it makes a difference which diffusion material you use. The amount of light blocked, the white temperature created, and the amount of diffusion are all different. So, you will need to adjust the power of your lights and do any color corrections afterward to suit your setup.
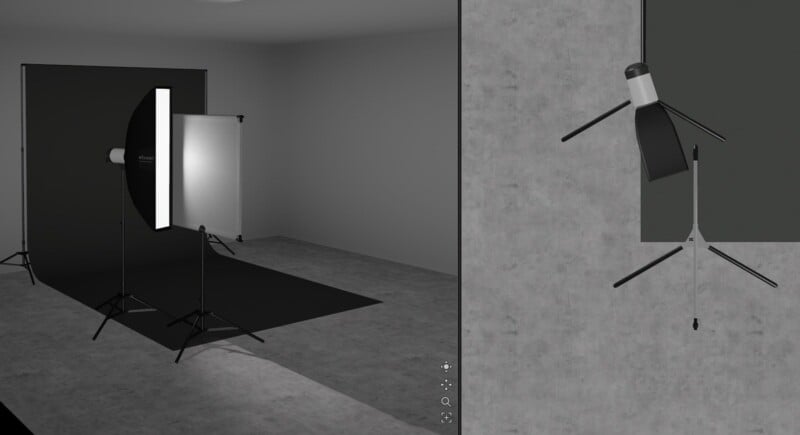
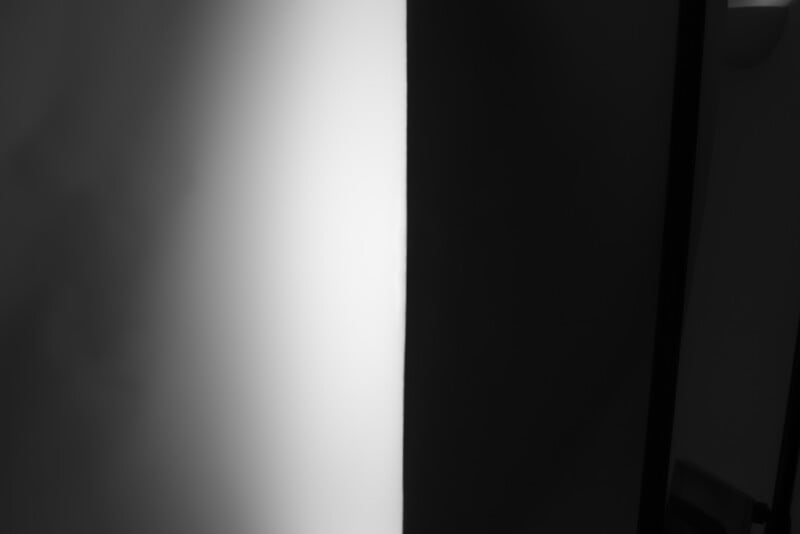
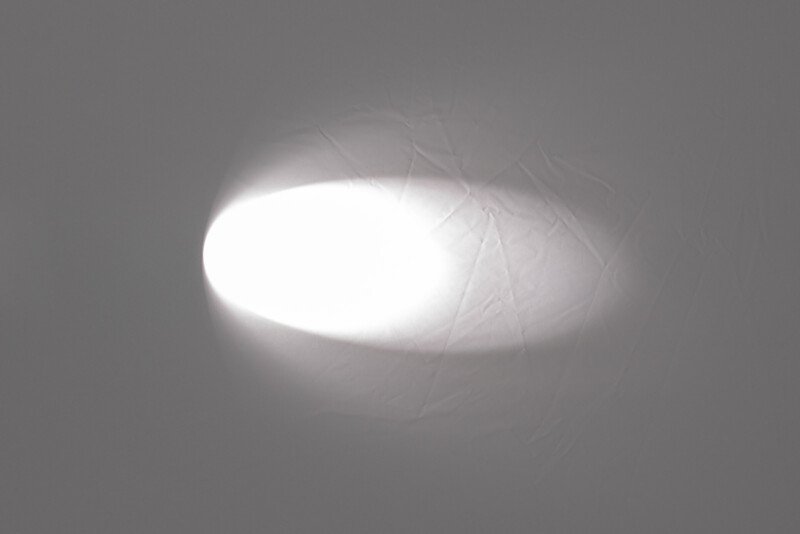
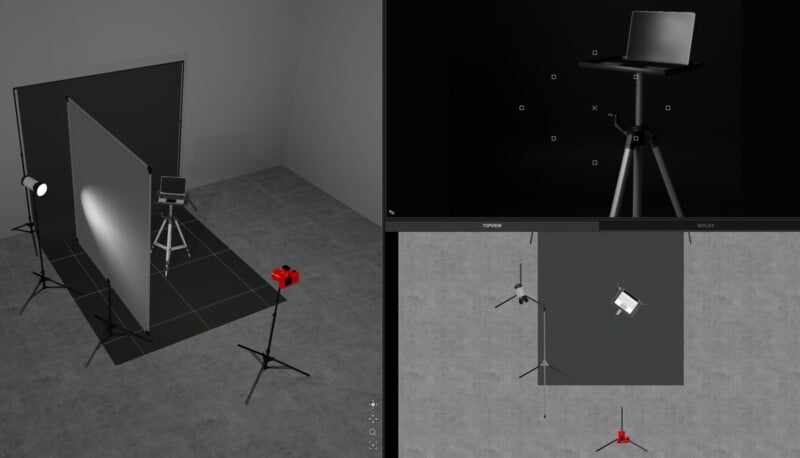
What we’ve created so far isn’t really a linear gradient. To do that, we need one edge to be brighter and fade off towards the other side. This is done by putting the stripbox at an angle to the diffuser. Take a look at the sample setup below:
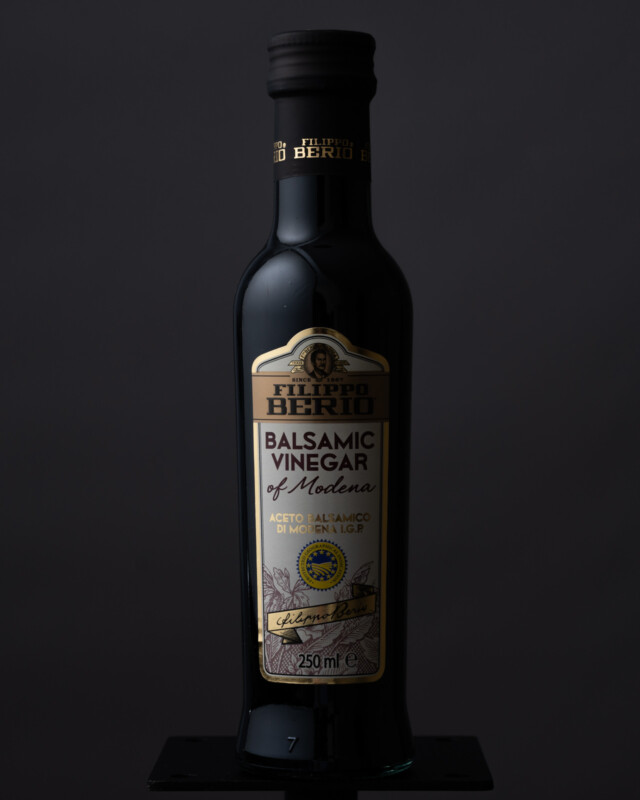
This will give you a gradient that looks similar to this example:
For a softer edge, we simply move the stripbox slightly further away from the panel. Alternatively, if we turn the stripbox towards the diffuser so it is facing it a bit more and so that it touches the diffuser we get a sharper cut-off and a larger bright area as you can see below:
By varying the angle of the softbox and the distance between its edge and the panel we can choose a longer or shorter gradient with a harder or softer cut-off to it.

Note: This image, like the rest of the basic demo shots, has not been retouched and was shot in a small studio, which has resulted in some other reflections creeping into other parts of the glass. Please ignore those.
Radial Gradients
Radial gradients emanate outwards in more than one direction from a (normally central) starting point. You can create them using a bare bulb, snoot, reflector dish (with or without grids), beauty dish, and other lighting modifiers (it works best if they are round). As with linear gradients, you use a diffusion panel between the modifier and the subject. Different materials and modifiers will give you different results. You can see the most notable variations in diffusion materials from a bare bulb, such as the results shown below.
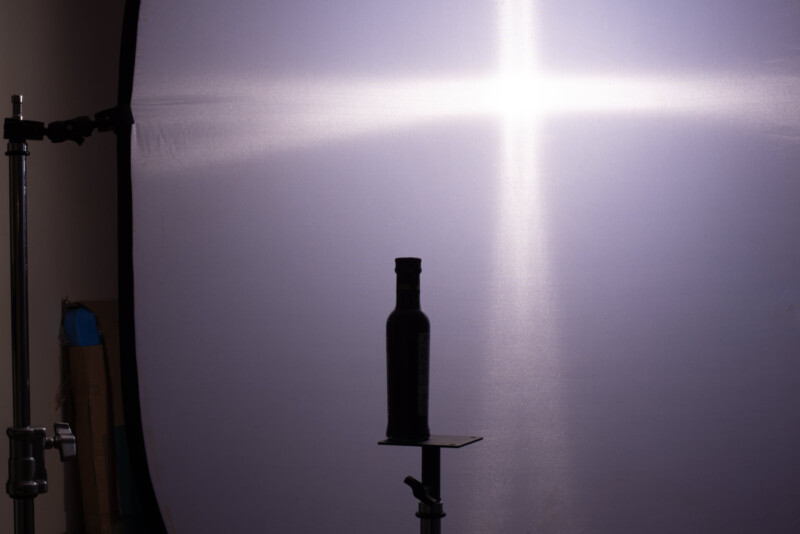
The next set of 3 images shows how this can show up on a glass object. The first image is with a reflector core, the second uses a cheap 216 diffusion material (not LEE’s original) and the third uses the Manfrotto Skylite.
The reflector core struggles to diffuse a very specular light source, giving us the cross pattern. On occasion you may find the effect useful, but generally I would avoid using this type of material for radial gradients as the quality isn’t as good. Personally, I prefer the Skylite 1.25 stop out of all of the materials I’ve tried as it gives the smoothest gradients.
Creating a Radial Gradient
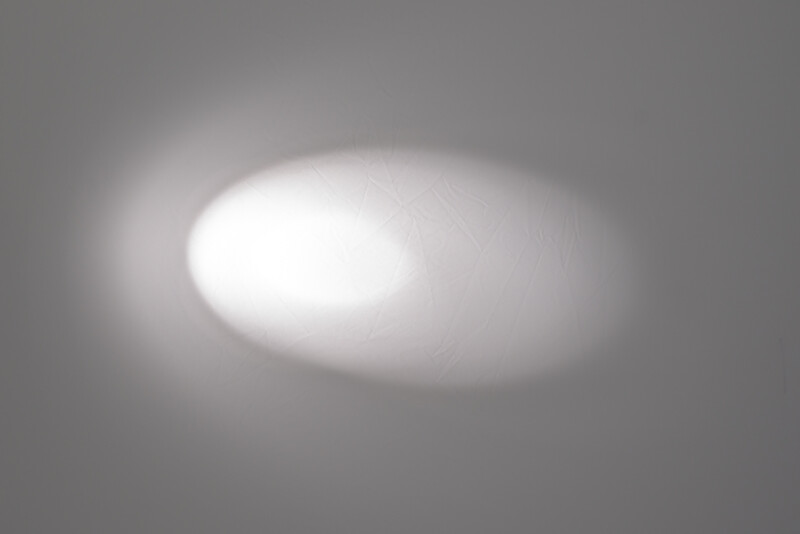
The most basic radial gradient is a bright spot that fades outwards. I tend to use either a reflector dish on my studio lights with grids to control the spot size, or a snoot. This means you can be more precise and create smaller pools of light, which is useful for small products.
We can also have a hard edge to part of the gradient if we want to. This is done using the same principle as with a hard-edged linear gradient; simply touch the panel with part of the modifier.
To soften the edges all the way around the gradient, we simply move the modifier away from the diffusion panel so that it no longer touches it.
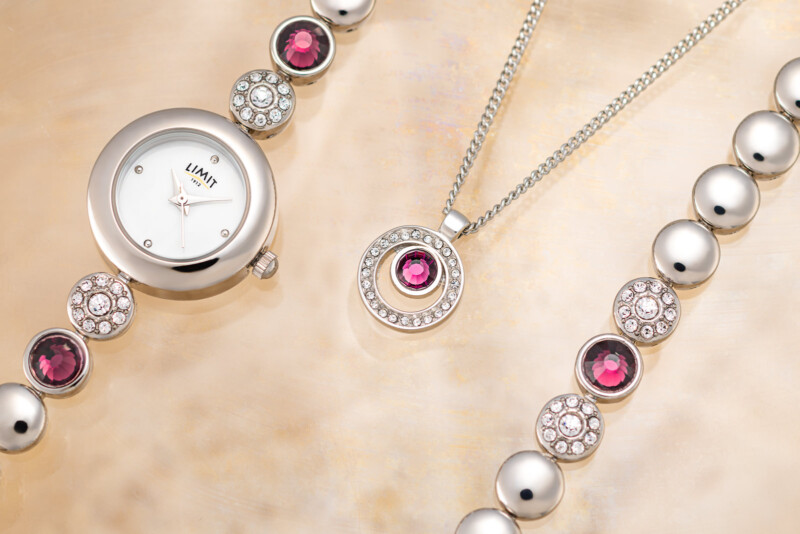
One way in which I use this technique is for jewelry and watches. I position a diffusion panel over the item and use snooted lights to create gradients.

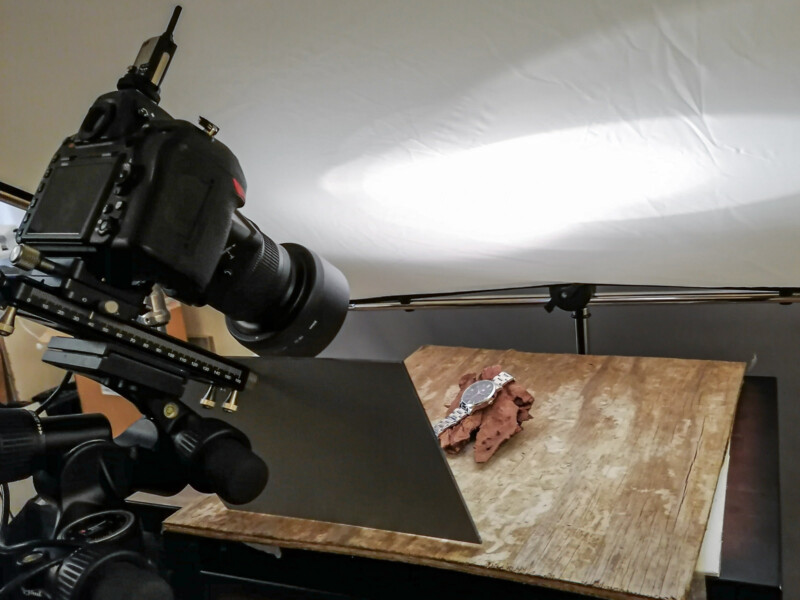
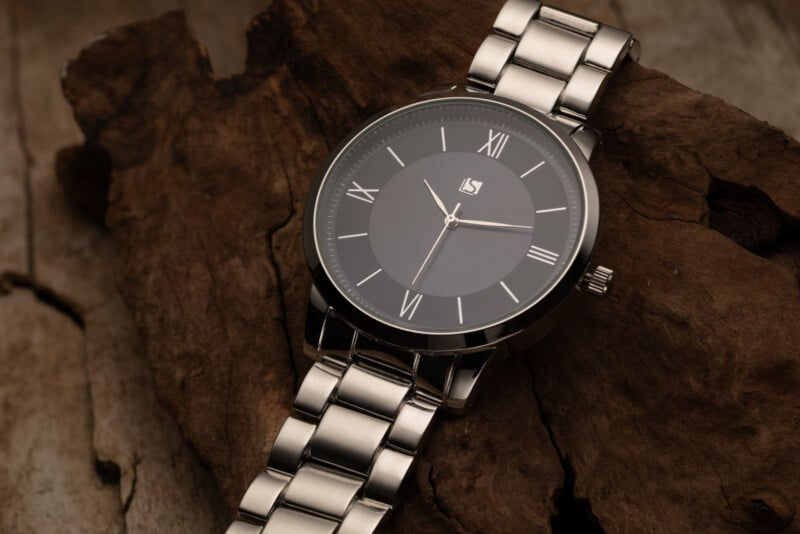
The watch image is straight out of camera – it’s just a JPG conversion from the RAW with no adjustments made. As you can see from the behind-the-scenes image, I added a mirror just under the camera to bounce some light back into the dark areas at the front.
Essential for Product Photography
If you are going to work as a professional product photographer, then you really need to be able to create various types of gradients. Lighting is one key way that a professional differentiates themselves. If you can make their products look sexier than they can, then they are more likely to hire you! Gradients are a fantastic tool for glossy metal and other shiny surfaces to add a more interesting and high-end look.
Image creditsAll images © Joe Lenton, used here with permission. Not to be reproduced without permission from the author.