A Guide to Digital Camera Modes
Have you just gotten a more advanced camera and are looking to get better at photography? Having a good understanding of digital camera modes is an essential step in that process. If you are just starting out and are confused about all the different icons on your camera’s mode dial, then this comprehensive guide to digital camera modes is just for you.
Table of Contents
An Introduction to Camera Modes
In earlier days of photography, before the digital era, cameras were much simpler pieces of machinery. Instead of an LCD screen filled with countless menus, options, and settings, film cameras of the time usually required the photographer to manually set dials to adjust the aperture and shutter speed for each shot. These were adjusted based on information gathered from a standalone light meter.
As technology advanced, light meters became incorporated into the camera bodies themselves and allowed for the cameras to assist in setting some of these parameters. Cameras began featuring shooting modes, which offer pre-programmed settings that control certain parts of the exposure triangle and allow the photographer to quickly set the camera up for shooting in specific situations.
Learning the purposes of these modes and mastering their usage can not only bolster your understanding of how proper exposures are created, but can better prepare you for a wider array of shooting scenarios. We will now delve into each mode, explain what parameters of the exposure it controls, and discuss the situations the mode would be best suited for.
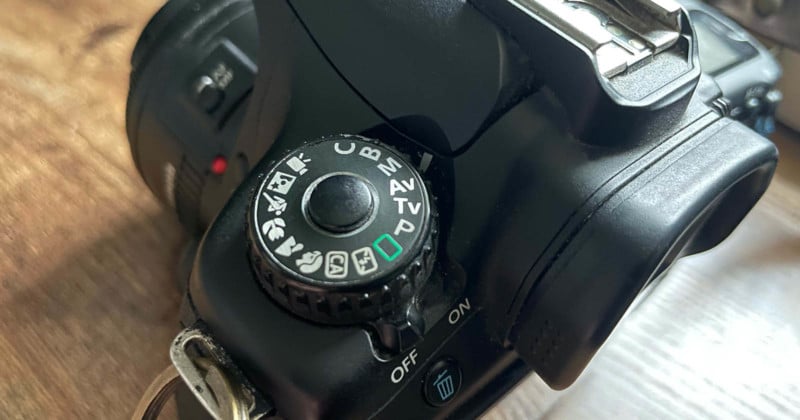
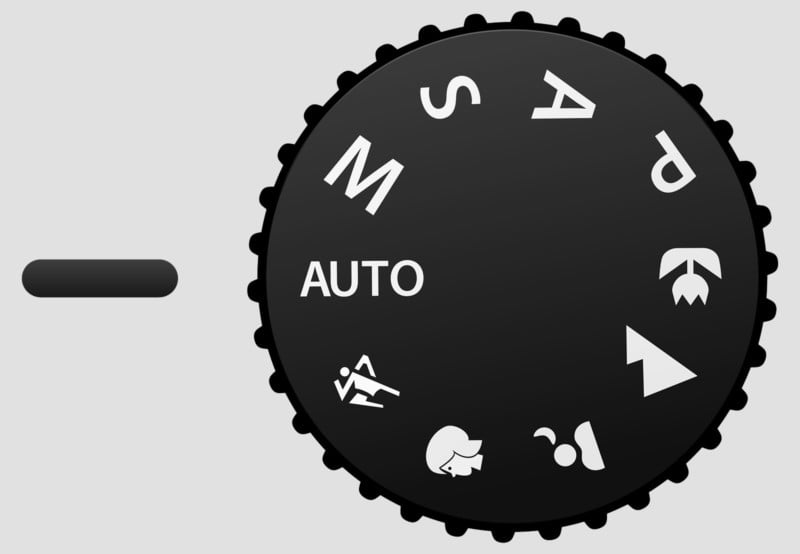
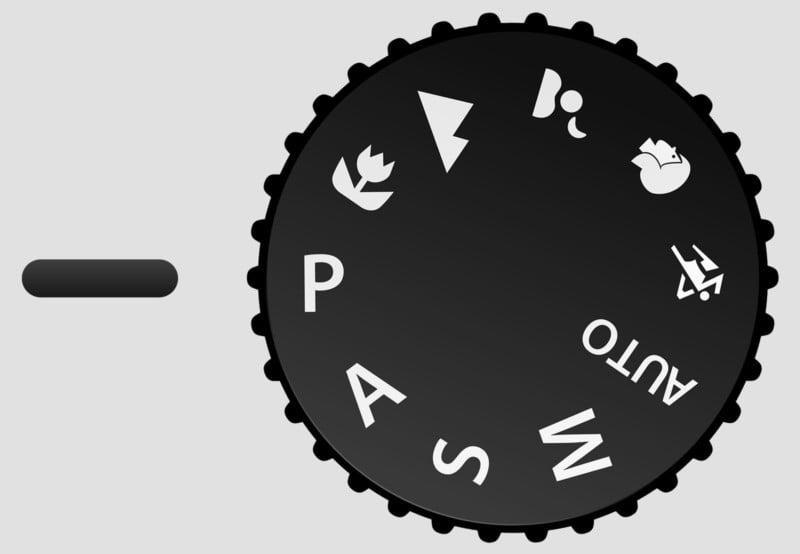
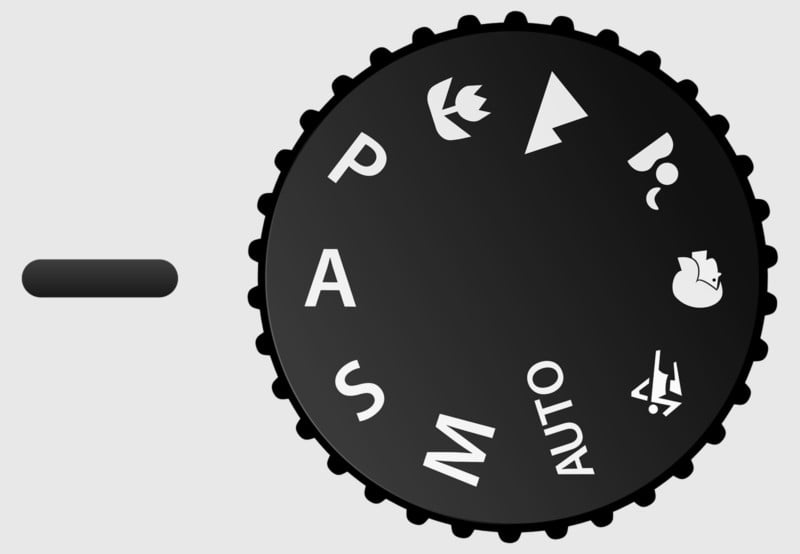
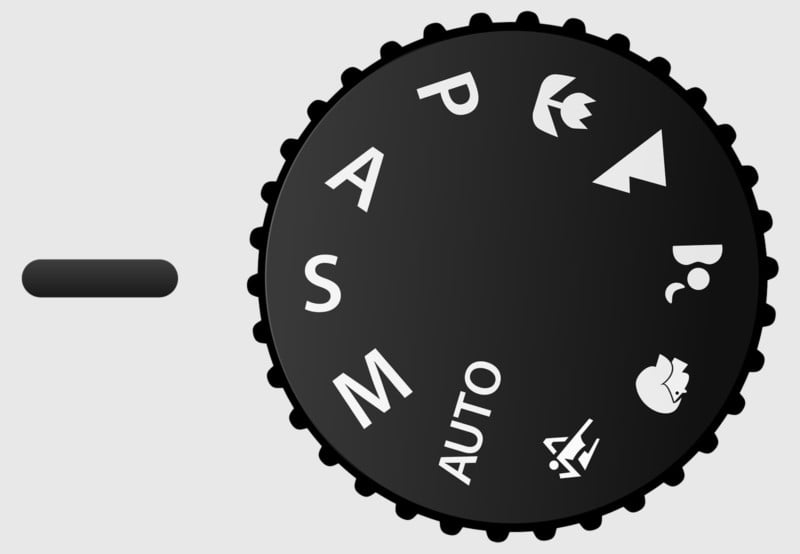
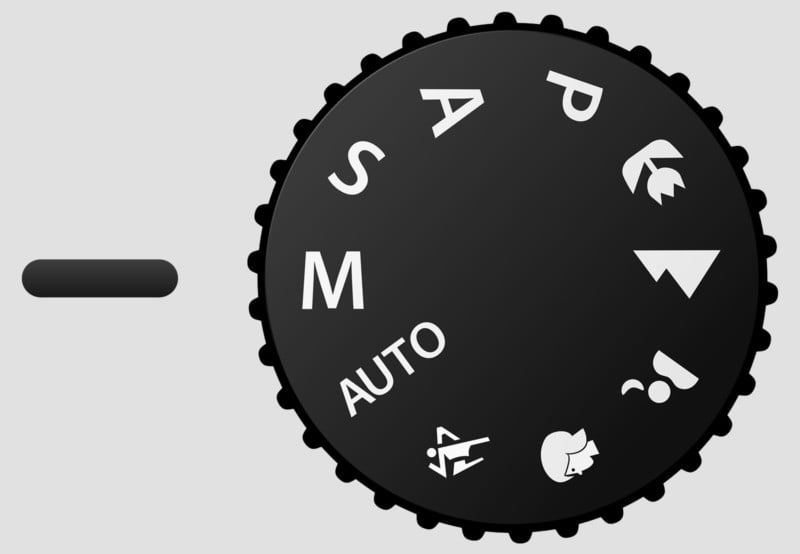
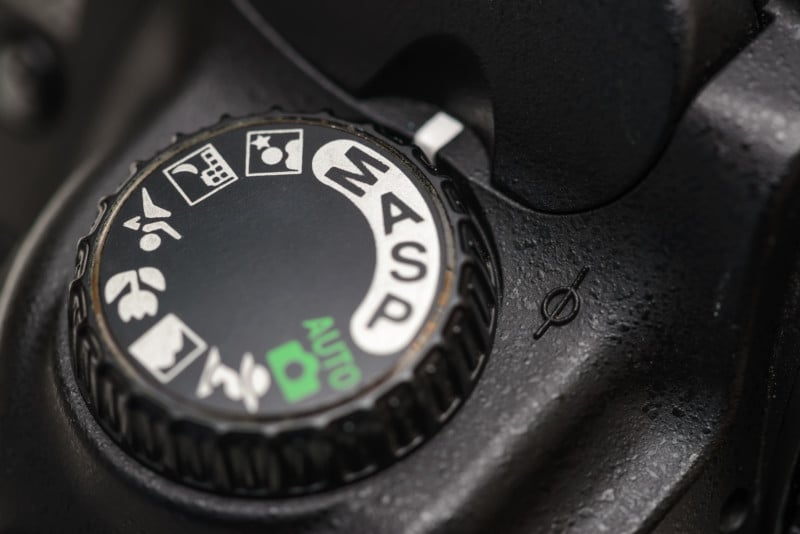
Shooting modes are usually found on the top dials of most DSLR cameras and are denoted by abbreviations, which can differ depending on the manufacturer.
Auto Mode (Green Box/AUTO)
Let’s begin with the most basic shooting mode available on most cameras, Auto Mode. Auto Mode is usually the first mode a beginner photographer will use, as it provides the most assistance. While other modes on the camera attempt to share some of the decision-making with the photographer, Auto Mode controls every aspect of the exposure, including the aperture, shutter speed, ISO, white balance, and it even controls whether the built-in flash fires (if the camera is equipped with one).
This can be a detriment as harsh or dark lighting scenarios can easily trick the camera and produce unacceptable results. This mode, unlike Program and the others, usually doesn’t allow for adjusting the capture with exposure compensation.
This mode is often decried as a hindrance that should never be used, as it does all the thinking for you and it is ineffective in unusual lighting situations. However, this mode has potential as a teaching tool for those who have no experience with cameras. While Program Mode has a much better ratio between allowing control and providing assistance, Auto Mode can be used when you essentially need a point-and-shoot camera and require capturing images quickly in standard lighting situations.
Once the photographer has learned the basics of the exposure triangle and how the camera adjusts settings to produce a properly exposed image, they can move on to one of the other modes.
Summary: In Auto mode, the camera automatically selects all settings (including flash) for optimal exposure and the photographer has no manual control.
Program Mode (P)
Program Mode is the next step up in the shooting mode chain and is a great stepping stone between Auto Mode and the Aperture and Shutter Priority modes. By setting the mode to Program, the camera will control the shutter speed and aperture settings. As the light meter is exposed to various levels of light, the camera will balance the shutter and aperture to provide the correct exposure.
The advantages of this are less interaction from the photographer to quickly determine the correct exposure and fire off a shot without much forethought. The photographer is still in control of the ISO and white balance settings, and as with all of the shooting modes, can modify the exposure by using the exposure compensation control.
Like Auto, this mode is also great for learning, as the camera will “guess” at the correct settings, and give a good starting point. The user can then tweak the exposure settings through exposure compensation to fine-tune the final shot. More experienced photographers may use the Program mode occasionally when they need to fire off a few quick shots and are aware of the effect light is having on the scene.
The drawbacks of the mode are that because the camera is guessing, the settings may not be ideal for every situation. Light meters in digital cameras can be fooled fairly easily, especially in bright and low-light scenarios. It is usually recommended that beginning photographers migrate fairly quickly to another mode so that they will have more control over their final photo.
Summary: In Program mode, the camera automatically selects aperture and shutter speed for optimal exposure and the photographer can select ISO, flash, and exposure adjustments such as exposure compensation.
Aperture Priority Mode (Av or A)
Aperture Priority Mode is one of the most popular shooting modes available on modern cameras. When shooting in Aperture Priority, the photographer selects the aperture they’d like to use, and the camera dynamically adjusts the shutter speed to that aperture to expose the scene properly.
If there is more light than necessary in the scene, the camera will increase the shutter speed to compensate. Likewise, a low-light scene will decrease the shutter speed, all the while keeping the aperture set to the photographer’s liking.

As with the other creative shooting modes, exposure compensation is available when using Aperture Priority, and allows the camera operator to make incremental adjustments to the exposure after the camera has set the shutter speed. This is important as it is not difficult to allow the shutter speed to dip too low to expose a steady hand-held shot.
In regards to creative photography, aperture control is generally regarded as one of the most important settings, as increasing or decreasing the aperture size contributes to the depth of field of the image. To render a sharp subject against a softer, more separated background, the photographer would want to use a larger aperture such as f/4 or f/5.6. Aperture Priority mode makes this an easy process.
This mode would be less useful in situations that don’t require a specific aperture size and call for using an explicit shutter speed. Those scenarios would be better suited for the next mode we’ll discuss, Shutter Priority.
Summary: In Aperture Priority mode, the photographer selects the desired aperture and the camera automatically selects the shutter speed for optimal exposure.
Shutter Priority Mode (Tv or S)
Shutter Priority mode is the sister mode to Aperture Priority, as it also controls only one of the exposure triangle parameters. In this case, the photographer selects the shutter speed they wish to use, and the camera measures the available light in the scene and sets the lens aperture appropriately to generate a correct exposure.
This creative mode is useful when a situation requires a particular shutter speed, such as freezing action or softening movement within the frame. If a higher shutter speed is selected, the camera will dynamically open the aperture to a higher stop, whereas a lower shutter speed will enable a smaller aperture opening.

Traditionally this mode could be used for photographing waterfalls, clouds, waves, or other subjects where capturing the essence of the movement is important to the photo, or any other situation where a slower shutter speed is required. Similarly, Shutter Priority is handy when a finite amount of light is available and the photographer doesn’t want to risk a blurry photo due to low shutter speeds. A rule of thumb is to ensure the shutter speed for a hand-held shot is equivalent to the focal length of the lens being used; so a shot with a 50mm lens would generally require a shutter speed of 1/50.
This mode becomes less relevant in situations with plenty of available light or no subject movement. Those scenarios would benefit from the ability to select a particular aperture instead by using Aperture Priority mode.
Summary: In Shutter Priority mode, the photographer selects the desired shutter speed and the camera automatically selects the aperture for optimal exposure.
Manual Mode (M)
In Manual Mode, you have complete control over all settings of the camera. In addition to setting ISO and white balance, you can set the aperture and shutter speed independently to any values you desire to expose the shot how you see fit.
Although many photographers end up adopting one of the priority modes for the majority of their work, almost all are familiar with working in manual mode, as having full control over the exposure triangle allows them to work in more difficult lighting situations. Being experienced using manual camera controls also contributes to a photographer’s knowledge of how cameras work to expose an image.
The light meters on digital cameras tend to become less accurate in extreme lighting situations, such as harsh bright light or very dark environments. A scene involving poor lighting may trick the meter into drastically overexposing the shot. Shooting in Manual Mode allows for compensating the exposure dynamically to avoid an overexposed or underexposed image.
Most situations can be covered by using Aperture or Shutter Priority, and Manual Mode is less effective when capturing exposures quickly is required, but for many special lighting situations, it is very useful.
Summary: In Manual mode, the photographer selects the desired aperture and shutter speed and the camera does not automatically adjust anything.
Additional Modes
In addition to the four primary shooting modes, many cameras have additional modes that usually cater to very specific scenarios. These are simply combinations of the main shooting modes, with additional settings intended to simplify settings for the user. Generally, most photographers don’t use these additional modes and stick to the four primary modes.
For beginning photographers using entry-level cameras, however, these specialized modes could be a entry-point for dipping their toes in some popular photography genres.
These additional modes, which may be represented by different icons on different cameras, may include:
- Portrait Mode: Chooses settings that are geared toward capturing portraits of a human subject. The goal may be to have a shallow depth of field to make the subject stand out against a blurry background. The camera may also try to enhance skin tones and hair texture.
- Landscape Mode: Aims to maximize depth of field in order to capture sharp details in a landscape, from relatively close to the camera to very far away in the distance. The camera may apply processing for vivid colors and sharpness.
- Macro Mode: Selects optimal settings for capturing small things from a very close range. Some cameras will opt for a tiny aperture to maximize depth of field while others will use a large aperture to blur the background.
- Sports Mode: For capturing fast-moving subjects. The camera will use a faster shutter speed in order to capture sharp photos with as little motion blur as possible and may open up the aperture to allow for the fast shutter speed and to blur the background.
- Night Portrait Mode: Aims to capture natural-looking portraits of human subjects in dimly-lit environments. The camera will generally fire a flash while using a slower shutter speed to properly illuminate the subject while at the same time properly exposing any light sources that may be in the background.
Setting a Shooting Mode
In most DSLR and mirrorless systems, shooting modes reside on a dial situated on top of the camera. This dial will be marked with abbreviations indicating the different modes. Nikon systems use P (Program), A (Aperture Priority), S (Shutter Priority), and M (Manual). Canon cameras use slightly different nomenclature: P (Program), Av (Aperture Priority), Tv (Shutter Priority), and M (Manual).
Other cameras, including many point-and-shoot systems, might require you to set the shooting mode via a digital menu on an LCD instead of a physical dial.
Keep in mind, setting a shooting mode only determines if the camera controls the aperture, shutter speed, both, or neither. ISO, white balance, and other settings are set independently by the user or controlled by the camera’s Auto ISO feature (if it has one).
Master Camera Modes to Grow
Photography is a very individualized hobby. You can devote as much time and energy to it as you like, depending on what you want to get out of it. Many photographers are content to just learn how to turn the camera on, set it to full auto, and go out and shoot.
Others want to learn every bit about the art form they can, and mastering the shooting modes available on modern digital cameras are great ways to bolster knowledge of the exposure triangle and light, the foundations of photography itself.
Image credits: Header photo licensed from Depositphotos, and mode dial images by Althepal and licensed under CC BY-SA 2.5.