Shutter Speed in Photography: A Complete Guide
As perhaps the most important parameter to understand in photography, shutter speed should be one of your first considerations when making a photograph. It’s one of the biggest reasons that photographers might find themselves unhappy with their shots, and having a great understanding of it is crucial to making great images.
Table of Contents
What is Shutter Speed?
Shutter speed is also known as exposure time, and the term starts to define itself. Shutter speed is the time, in seconds, that the sensor or film inside a camera is exposed to light in order to capture a photograph.
On some mirrorless cameras, it is the time that the sensor is turned “on” to record light information. Each time you press the shutter button (especially on a DSLR camera), you will hear the shutter curtains open and close.
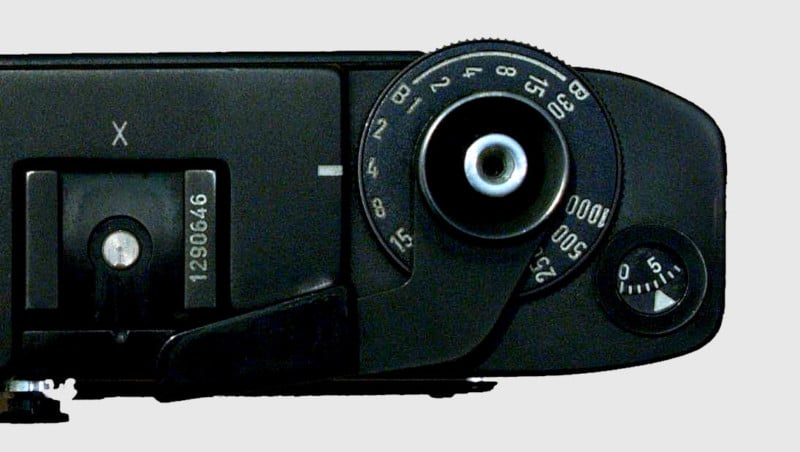
Shutter speed on cameras can typically be adjusted either in the camera’s settings and/or by manually turning a shutter speed dial on the top of the camera body.
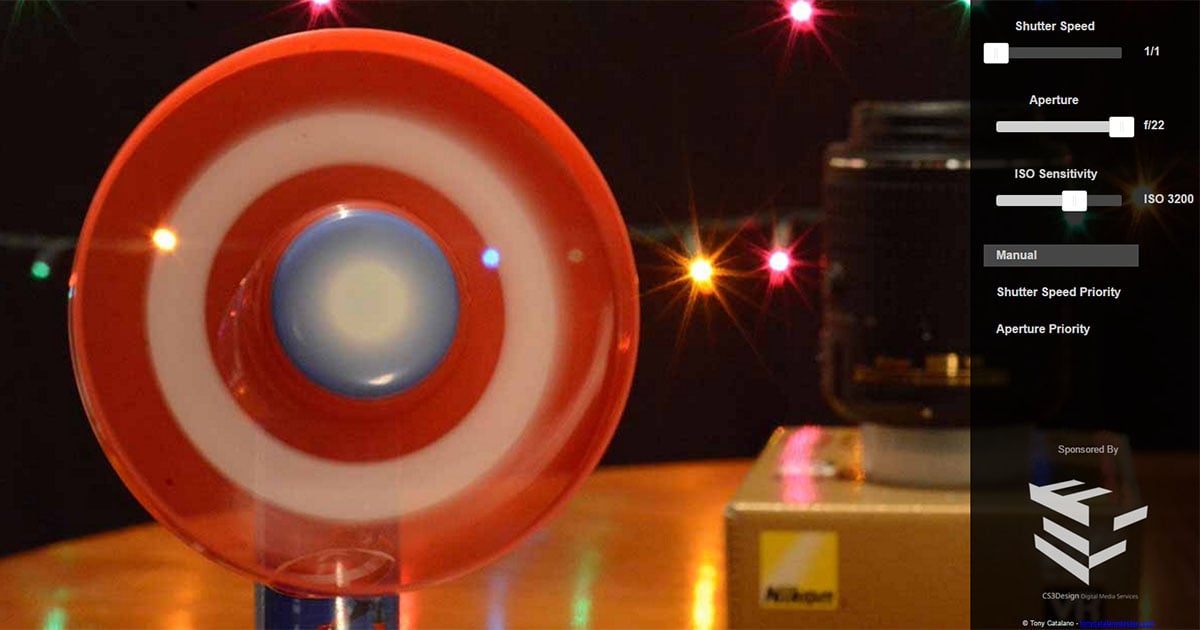
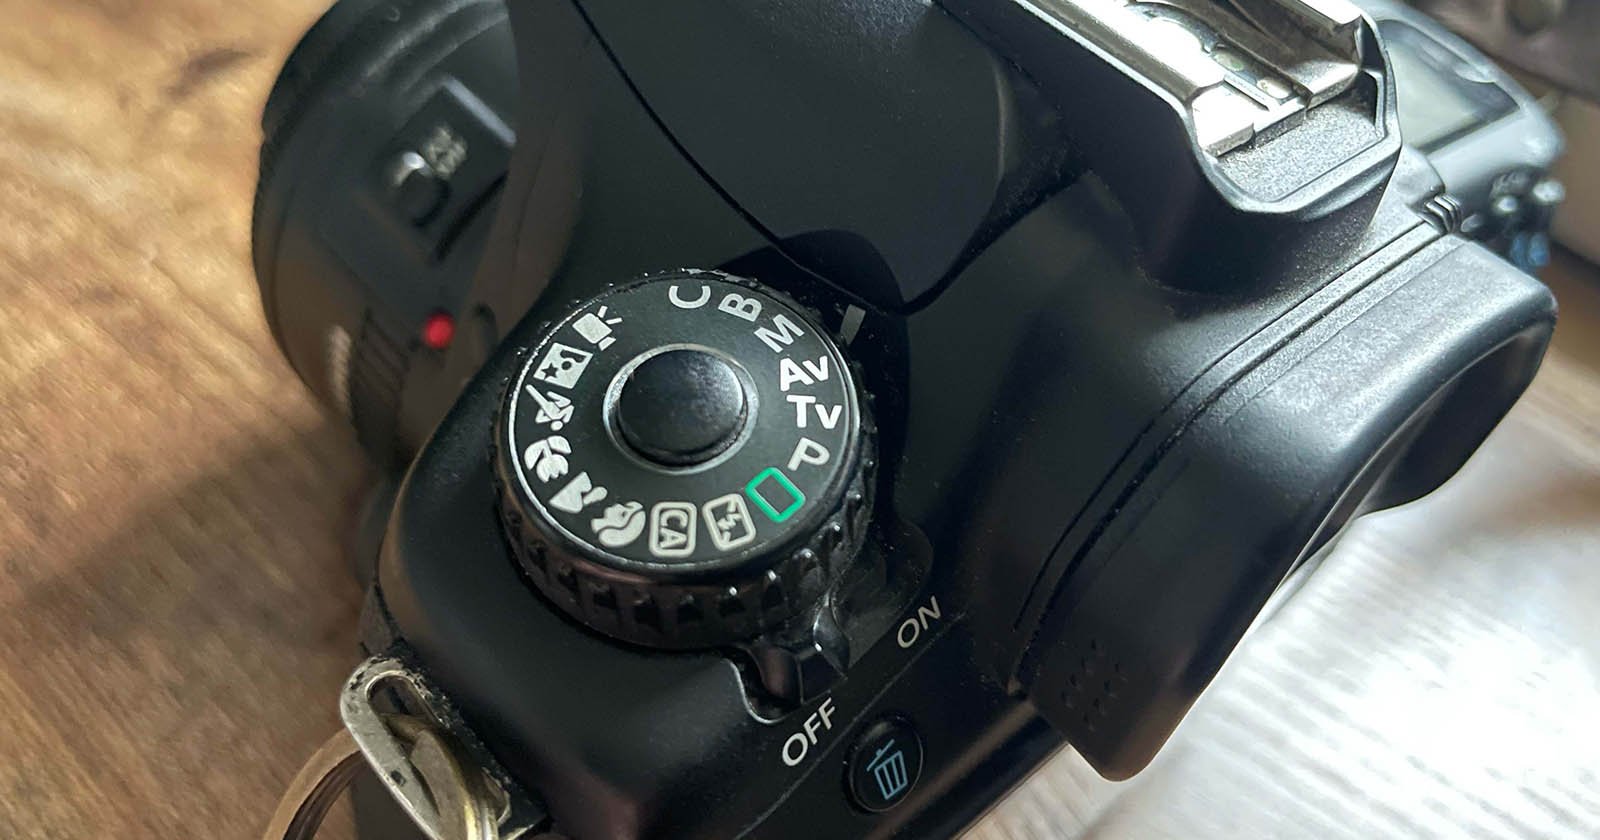
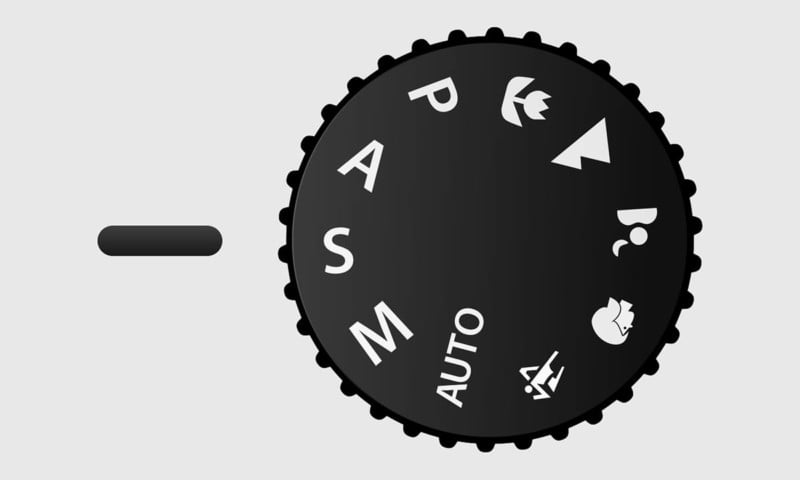
On a camera that offers autoexposure, photographers can usually choose shutter priority mode by turning the mode dial to S (for shutter speed) or Tv (for time value). In this mode, the photographer chooses the desired shutter speed and the camera will adjust other settings to produce an “optimal” exposure.
On most cameras, preset shutter speeds range from 1/8000 of a second for the fastest to 30 seconds for the slowest speed. There is often some variation in this range depending on your camera model.
The standard shutter speeds available on most cameras are 1/1000s, 1/500s, 1/250s, 1/125s, 1/60s, 1/30s, 1/15s, 1/8s, 1/4s, 1/2s, and 1s. It is important to understand that the amount of light falling on the camera sensor or film is proportional to the exposure time — halving the shutter speed (e.g. going from 1/30s to 1/60s will cut in half the amount of light exposing the resulting photo).
It’s also important to note that most cameras can achieve even slower shutter speeds in bulb mode, which essentially keeps the shutter open as long as the shutter button is pressed.
Using bulb mode is an example of a manual route for determining the exposure time of a photo instead of using the automatic, precise, camera-controlled shutter speeds. Another example would be manually uncovering and covering the lens of the camera to allow light in for a particular amount of time — this is how photographs were typically exposed in the early days of photography.
What is a Shutter?
Something that is often overlooked when learning shutter speed is the mechanical component itself: the shutter. The camera shutter opens when the shutter button is pressed to reveal the sensor or film, which captures light information.
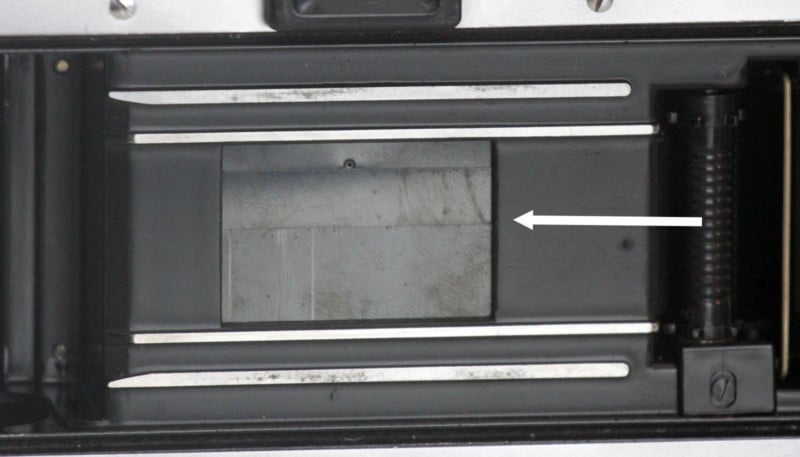
On a DSLR, the mirror also moves out of the way when the button is pressed, because the mirror is typically in place to reflect the scene through the viewfinder. Light information is captured as long as the shutter is open.
Mirrorless cameras can often capture more images per second (they have a higher frame rate) than DSLR cameras because they lack a mirror and therefore the exposure process requires fewer moving parts. Some mirrorless cameras have an electronic shutter, which essentially turns the sensor on and off instead of opening and closing physical curtains. There has been a continuous change in shutter technology that has led to more efficient shutters with fewer moving parts.
In bright conditions (for example, you’re outside on a sunny day), the sensor only needs a brief exposure to the light in order to capture enough information. This exposure time is determined by the shutter speed, and as you’ll learn in the next section, a faster speed will result in a darker image (less time exposed to the light), and a slower speed will result in a brighter image.
How Shutter Speed Affects Exposure
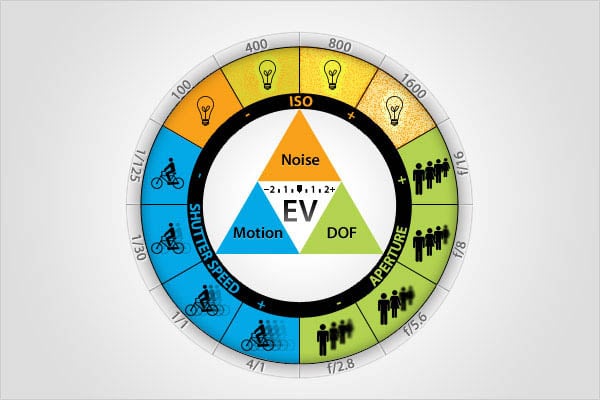
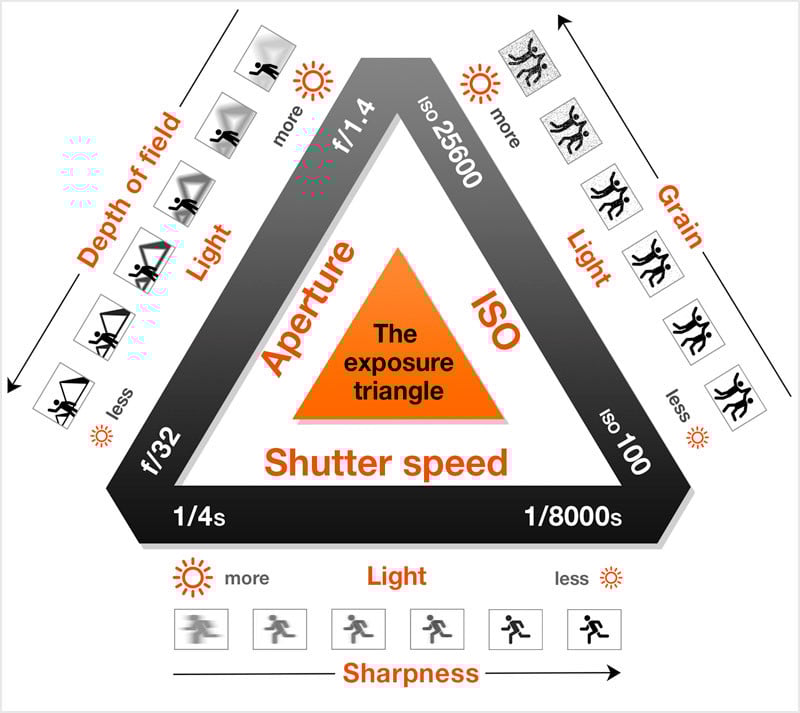
Shutter speed, along with aperture and ISO, is one of the three components of the exposure triangle, which is often used to teach the basics of exposure in photography.
Exposure time can be thought of as a somewhat additive process. The longer that your camera’s sensor is exposed to light, the more light data is captured, and therefore the brighter your image will be. The opposite is also true: faster shutter speeds (shorter exposure times) will capture less light data, and your image will be darker.
It’s not a perfect analogy, but you can think of shutter speed and exposure as the time that you set your oven for when baking cookies. If you bake them for too long, the cookies will burn and eventually won’t taste like cookies. Similarly, if you expose an image for too long, your image will be too bright and you won’t be able to recover any data. If you bake your cookies for too short of a time, they will still be cookie dough. If you expose your image for too short of a time, you won’t capture enough light data and your image will be too dark.
How Shutter Speed Affects Motion Blur
In addition to affecting exposure, shutter speed has a big impact on the level of motion blur in an image, which is important to be aware of. Think of it this way: motion that happens when the sensor is exposed to the scene (while the shutter is open) will be present in the final image.
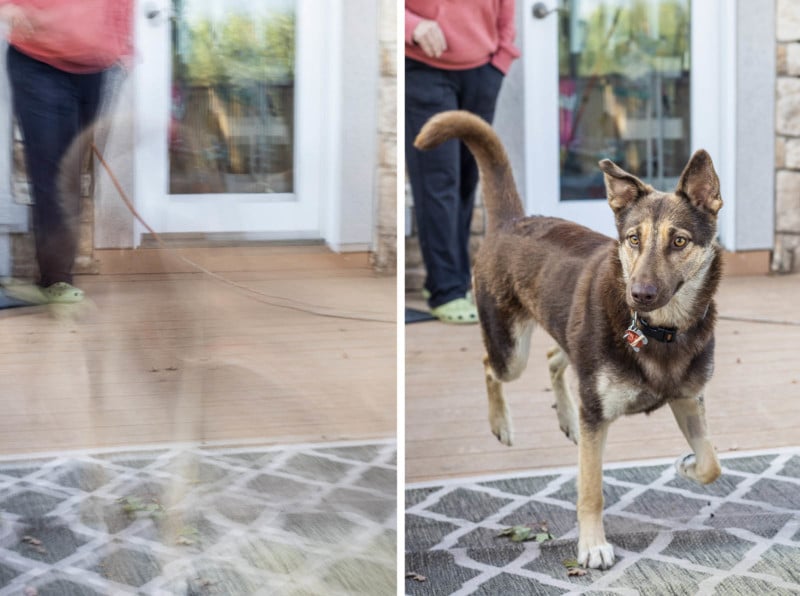
Here’s an example: if a dog is running around and your exposure time is 0.6 seconds, then the dog will be a blur in your image because it moves significantly in 0.6 seconds. On the other hand, if your shutter speed is set to 1/500 of a second, the dog will be much more frozen (its motion will probably be imperceptible) because it doesn’t move very much at all in such a short amount of time.
There are many considerations to be had regarding motion blur. One that is always relevant is your ability to keep your camera entirely stable during an exposure. As stable as you may think you are, there is inevitably some amount of camera shake when you press the shutter button and hold the camera. This is why tripods are important for long exposures, because they can hold your camera much more stable than you can.
Another motion blur consideration is your subject. Motion blur is very hard to correct via post-processing, so shutter speed should probably be one of your first decisions when setting your exposure. However, let’s say you want to make sure to freeze motion using a shutter speed of 1/1000 of a second. This won’t let much light hit your sensor, so you’ll need to have fairly bright conditions, a high ISO, and/or a wide aperture. It’s a balancing act between motion blur and how much light you have to work with.
In summary:
Faster shutter speed (shorter time, in seconds): Less light captured, motion (including handheld camera shake) is more frozen. Examples of relatively fast shutter speeds might be 1/8000, 1/1000, 1/500, or similar depending on your situation.
Slower shutter speed (longer time, in seconds): More light captured, motion (including handheld camera shake) is less frozen. Examples of relatively slow shutter speeds might be 30”, 5”, 1/20, or similar depending on your situation.
A Rule of Thumb for Handheld Shutter Speeds
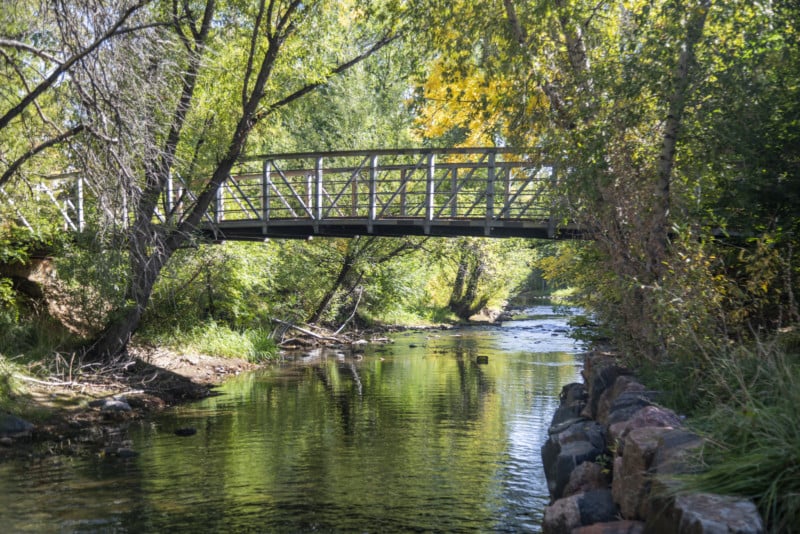
Here’s a handy tip for your mental toolbox: as a general rule of thumb, camera shake will likely become a factor when hand-holding your camera at shutter speeds slower than the reciprocal of your focal length. In other words, to avoid introducing blur in your photos from shaky hands, you should try to ensure the following:

For example, anything slower than 1/24s of a second when using a 24mm wide-angle lens might require a tripod. Shooting wildlife with a 500mm lens? You’ll want to use a shutter speed of 1/500s or faster to ensure a sharp shot.
As with every “rule” in photography, there are exceptions, especially if your camera or lens has stabilization built-in. This suggestion is a good place to start.
Choosing a Shutter Speed
A thought process for how to set your shutter speed using what you’ve learned so far Shutter speeds are relative, and something like 1/100 of a second might be considered way too fast for star photography but way too slow for sports photography.
Here are a few questions you may want to consider when setting your shutter speed, and you may want to use these as a guide to come up with your own thought process.
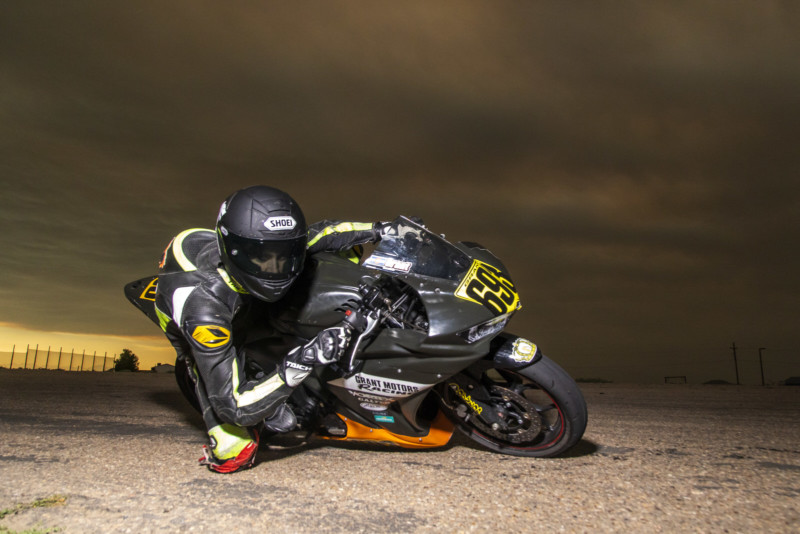
1. Do you need to freeze your subject? If you know you need to freeze its motion, you’ll need to keep your shutter speed fast. For really fast subjects, something like 1/500, 1/1000, 1/4000, or 1/8000 might suffice. Other subjects might be frozen with something like 1/250. Keep in mind that a faster shutter speed will let less light hit your sensor, so you’ll need to compensate with a higher ISO or wider aperture.

Is it really dark or really bright where you’re shooting? If it’s really dark, you’ll need a longer shutter speed to gather enough light data. Keep in mind that longer shutter speeds will blur any motion that occurs, so your subject will have to stay still if you’re trying to freeze it. If it’s really bright, you can use fast shutter speeds, and keep in mind that too slow of a shutter speed will probably make your image too bright.
Are you outside during a decently bright day and you just want a place to start? You can start with a shutter speed of 1/200 of a second depending on your subject and other settings. This is a fairly common starting place for basic lighting conditions. Then, try speeding up or slowing down this speed to test out the effects.
Are you planning to shoot at a slower shutter speed than 1/(focal length of your lens)? If so, camera shake might be captured and make your image blurry. Consider using a tripod.
Are you using a flash? If so, does it have high-speed sync? If not, you’ll need to keep your shutter speed slower than your camera’s sync speed. See below for more information on this.
ND Filters and Shutter Speed
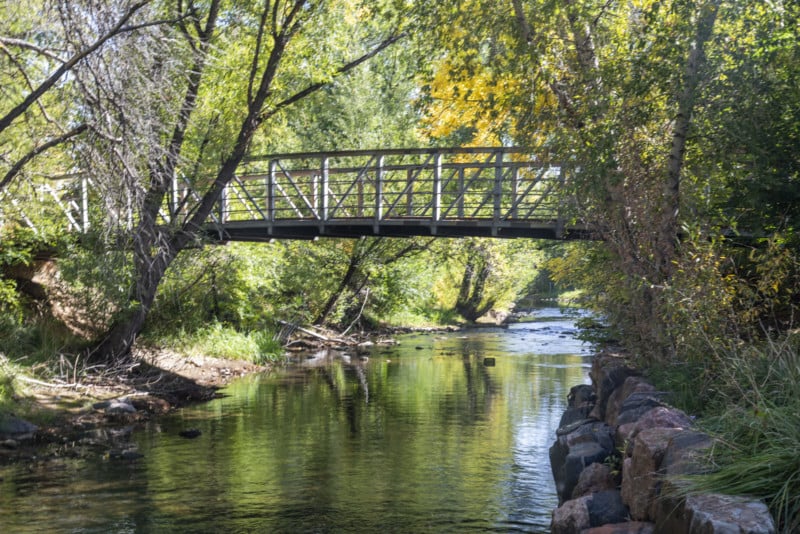
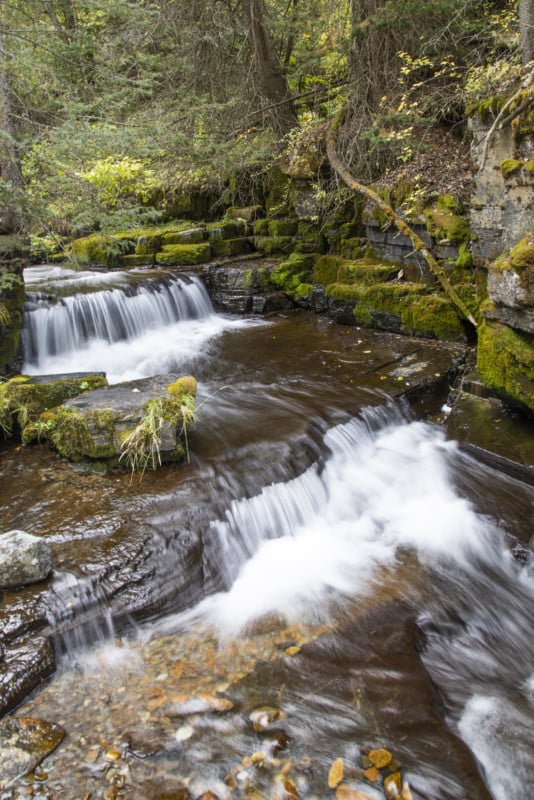
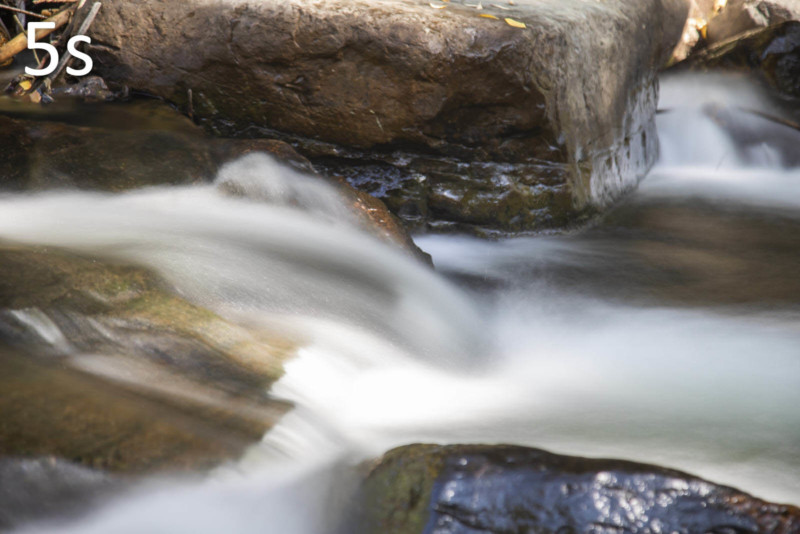
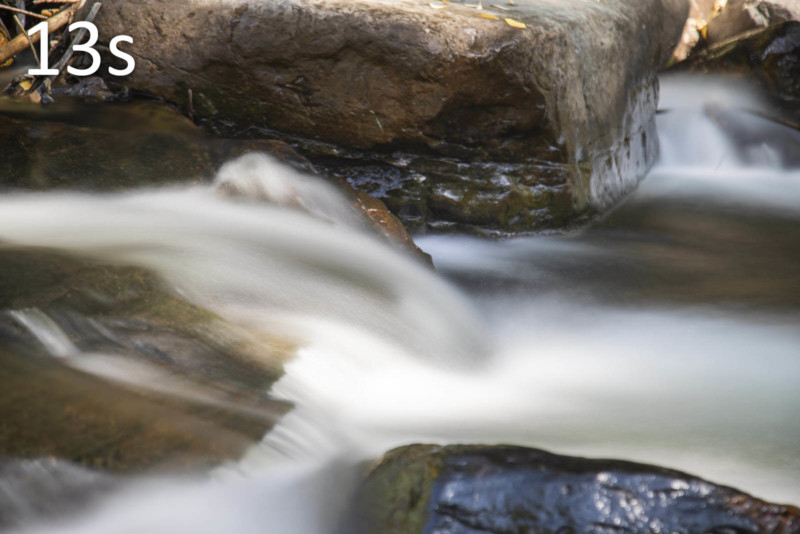
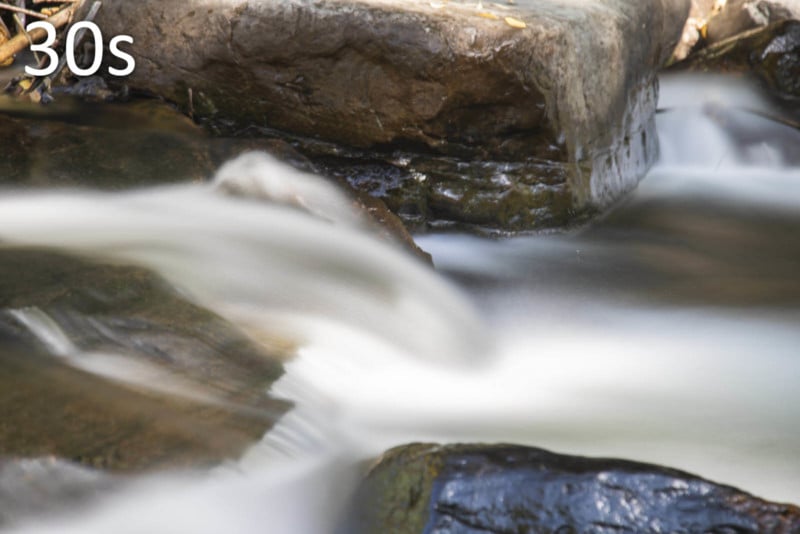
If you want to use a slow shutter speed outside during the day, chances are good your images will be too bright. One common example of where this is relevant is when you attempt to achieve a silky water effect by choosing a long exposure with running water.
Here is a sequence of a series of photos of a fast-moving stream captured at shutter speeds ranging from 1/1000s to 1 second:
Even if your aperture is as narrow as possible and your ISO is as low as it will go, longer exposure times will produce images that are too bright because the shutter is open for too long. The most common solution is a filter that acts as sunglasses for your lens, which is called a neutral density (ND) filter. It attaches to the end of your lens and has a dark tint that lets less light pass through than without the filter. As a result, you can use longer exposures without capturing too much light.
ND filters are also commonly used in videography to allow for longer shutter speeds, which helps create a more cinematic rather than choppy look.
Flash Sync Speed
This topic could have an article of its own, so here it is very briefly. Your shutter is basically made up of two curtains that move to let light hit your sensor. They move at different times, and if you’re using a flash, the flash has to fire exactly when the curtains are both open. The problem is that, with really fast shutter speeds, it’s hard (and often impossible) for the flash to fire at the right time because the shutter curtains aren’t ever fully open together.
This is where your camera’s flash sync speed is very important to know when using an off-camera flash. This is the fastest shutter speed at which your camera and flash can sync correctly, producing an image that doesn’t show the shutter curtain in the shot. If you’re shooting with your camera and flash in their most basic modes and your shutter speed is faster than the sync speed, your images will have dark shutter curtain bands in them because the flash and camera couldn’t line up their timing correctly.
Your camera’s manual or manufacturer’s website should have your camera’s sync speed listed. It’s usually something around 1/200 of a second.
The way around the flash sync speed issue is called high-speed sync (HSS) and involves a flash mode that makes the flash fire repeatedly throughout the very fast shutter speed, which guarantees that one of the activations will be the correct one. Not all flashes have this capability.
Using Shutter Speed Creatively
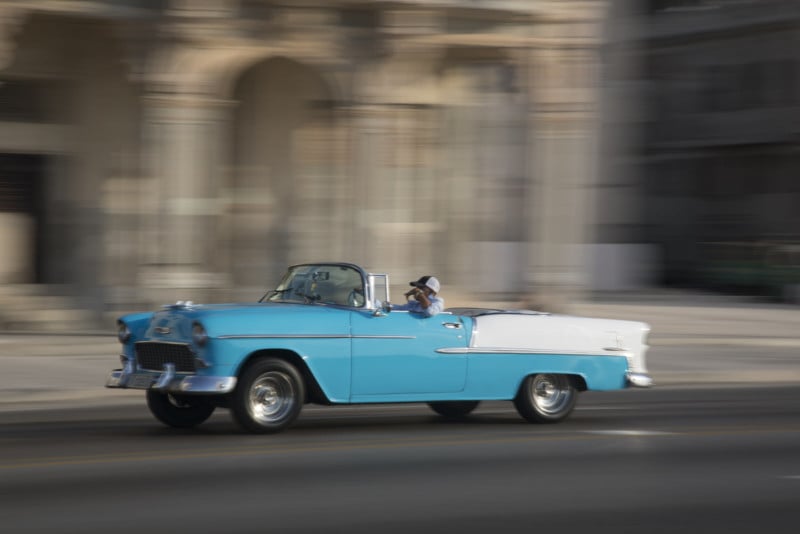
Motion blur can be your worst enemy, or in some cases, your best friend. In one example, panning is a technique where a moving object is “followed” by the camera (think panning along the subject’s direction of movement) while taking a moderately long exposure. Something like 1/10 of a second will create motion blur in the background of the shot, but if you keep the subject steady in the frame, most of the subject should be sharp. This can produce the effect that something is moving really fast, or at least show motion.
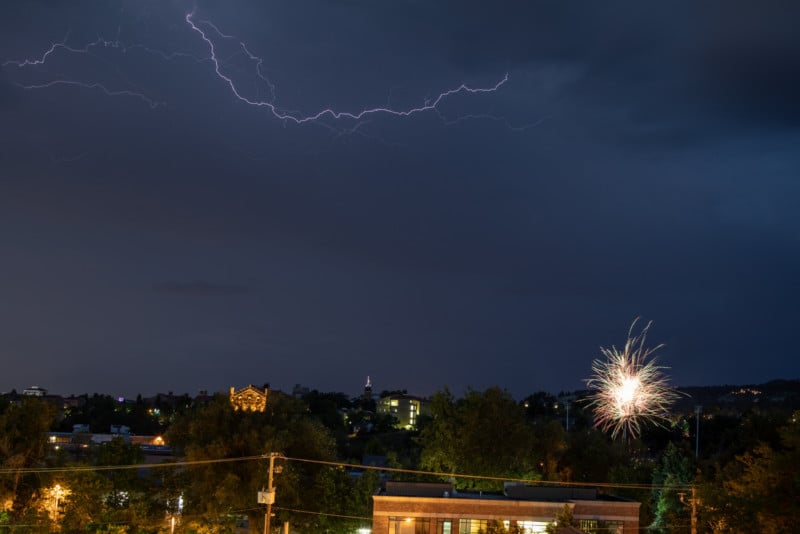
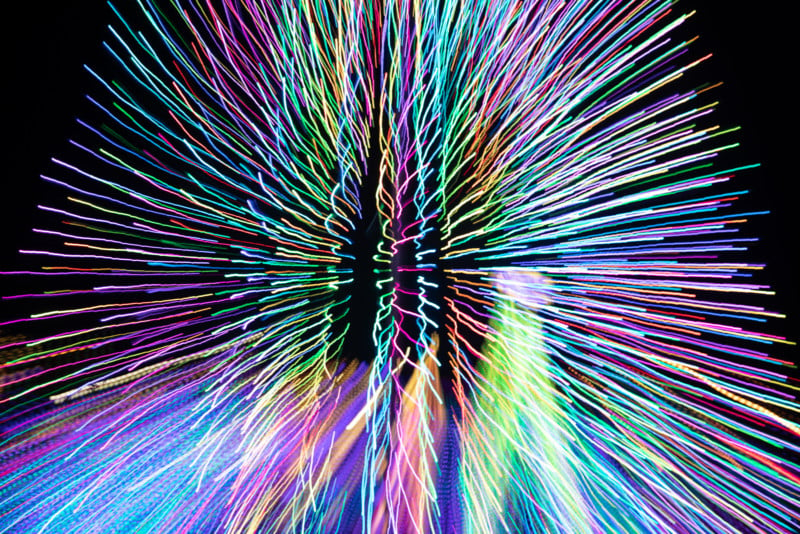
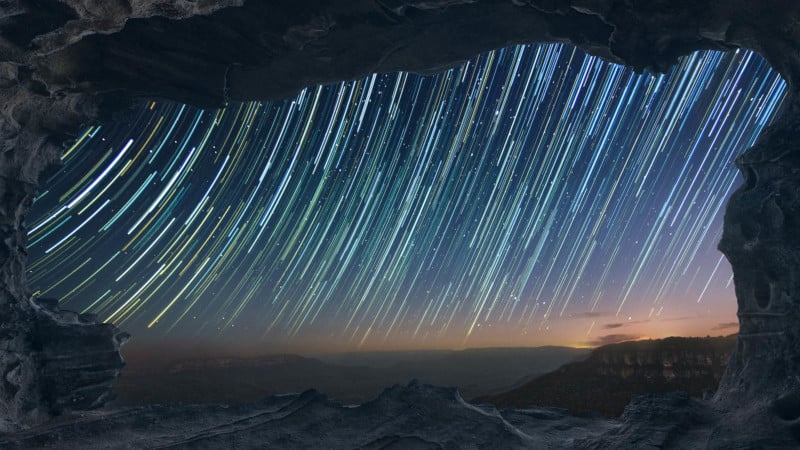
Another creative way to use motion blur is by zooming in or out with your lens during a longer exposure. If done correctly, anything producing light will create a trail, and it can produce some other really interesting effects. This technique can be a fun way to capture unusual photos of things like exploding fireworks and holiday lights.
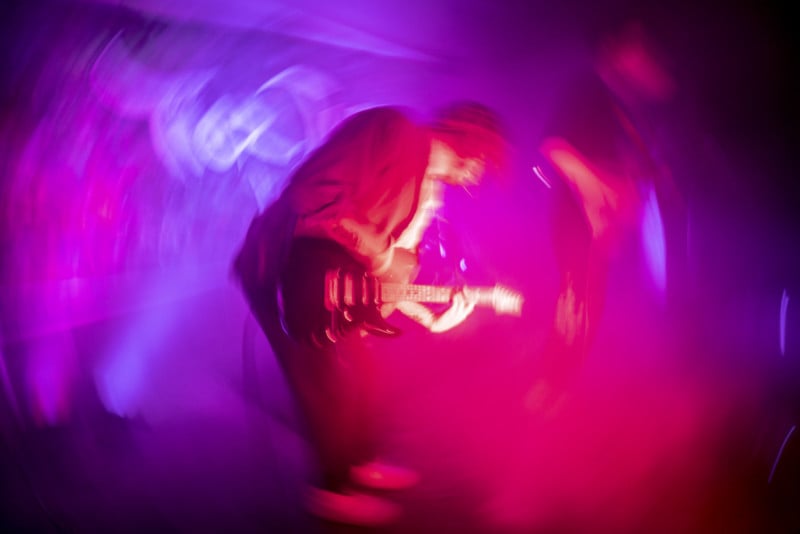
You can also rotate your camera during a longer exposure as well for a creative shot. It’s certainly not to everyone’s taste, but it can be cool for something unique.
In addition to capturing single exposures with a long shutter speed, ultra-long exposure times can be achieved by stacking multiple long-exposure photos in software — the total exposure time will be the sum of the individual exposures.
Conclusion
Shutter speed can have arguably one of the biggest impacts on the quality of your photos, so it’s important to understand how it affects motion blur, how it factors into exposure, and how you should think about it in photography. Once you understand it, practice is key to making the best decisions about shutter speed in different situations.
There’s no definitive answer to what shutter speed you should be using in every scenario, so it’s up to you to know as much as you can about it and make the best educated decisions possible. Ultimately, shutter speed can be a tool to add creativity to your shots, and it can be a lot of fun to experiment with.
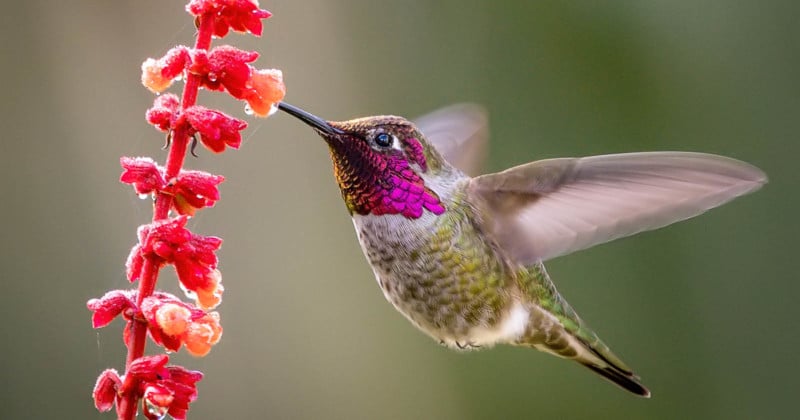
Image credits: Header photo by Becky Matsubara and licensed under CC BY 2.0. All other photos, unless otherwise noted, by Justin Hein.