8 Editing Problems Nik Collection 9 Actually Solves
Over the last few decades, most photographers have believed that the more powerful the editing tool, the longer they need to spend behind a screen. Selection tools, color grading, and creative effects require layers of manual work and patience. A major update to one of photography’s oldest plug-in suites broke that pattern by taking the editing problems most photographers have accepted as unavoidable and building tools that solve them.
Full disclosureThis article was brought to you by DxO. Use the code PetaPixel at check out to get 15% off of any DxO product, including Nik Collection 9 and PureRAW 6
.Read The Ultimate Beginner’s Guide to Color Efex.
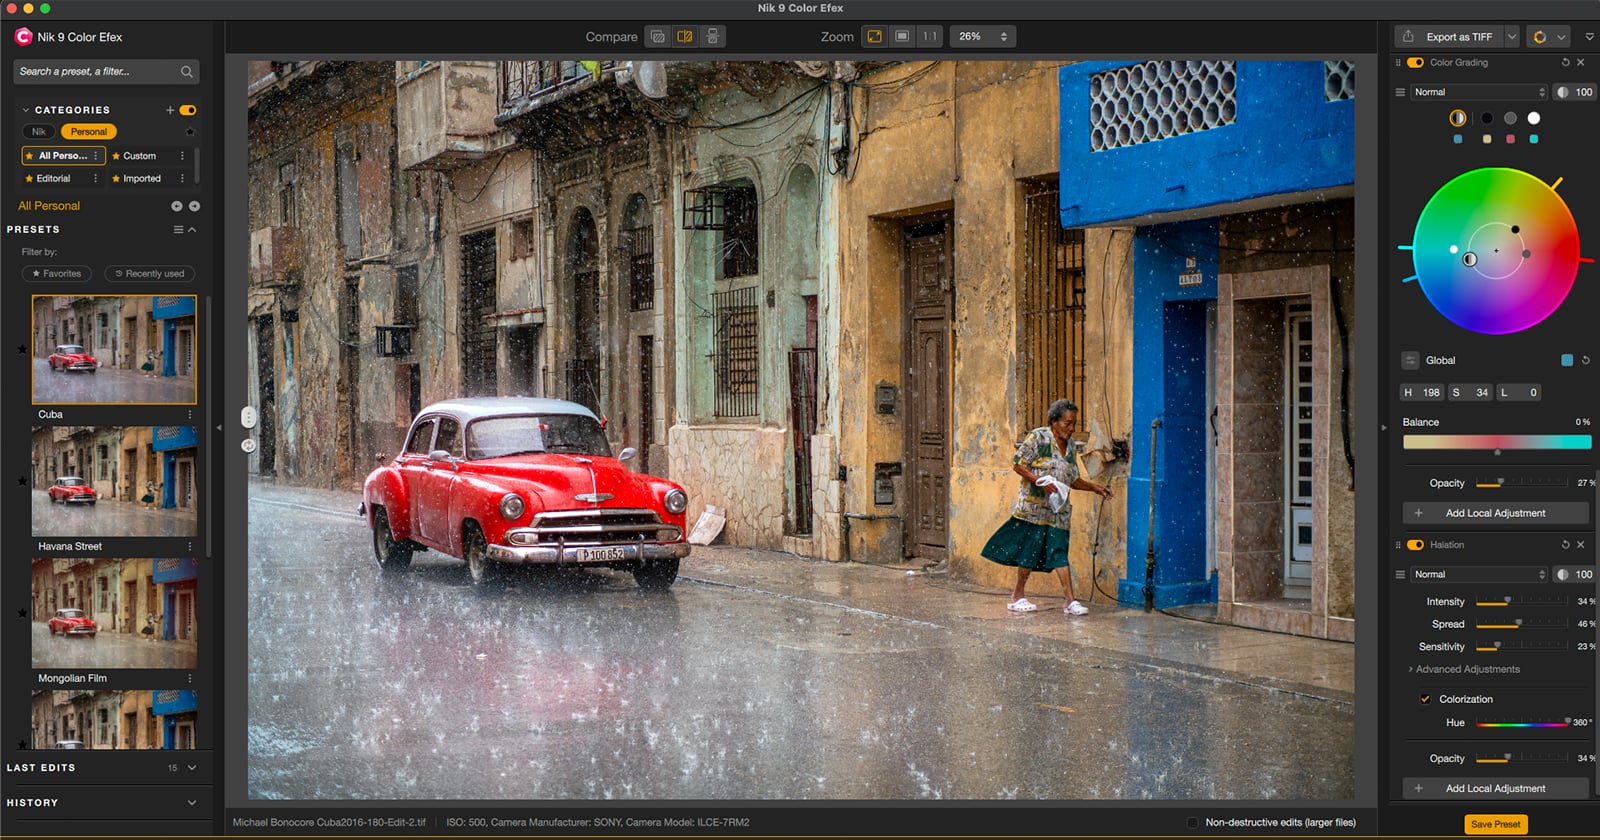
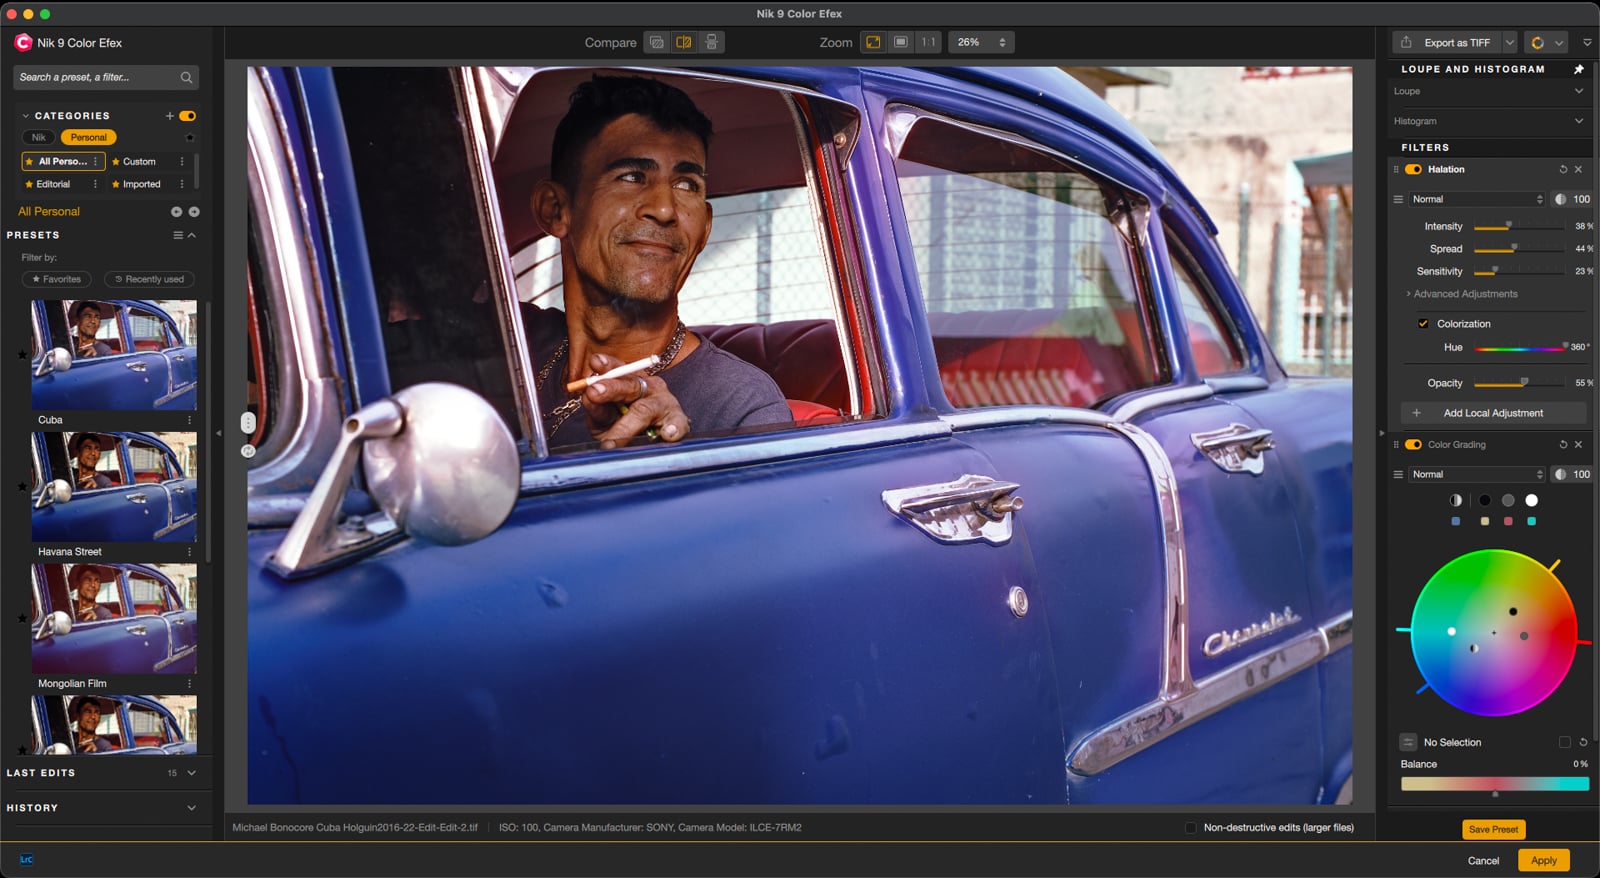
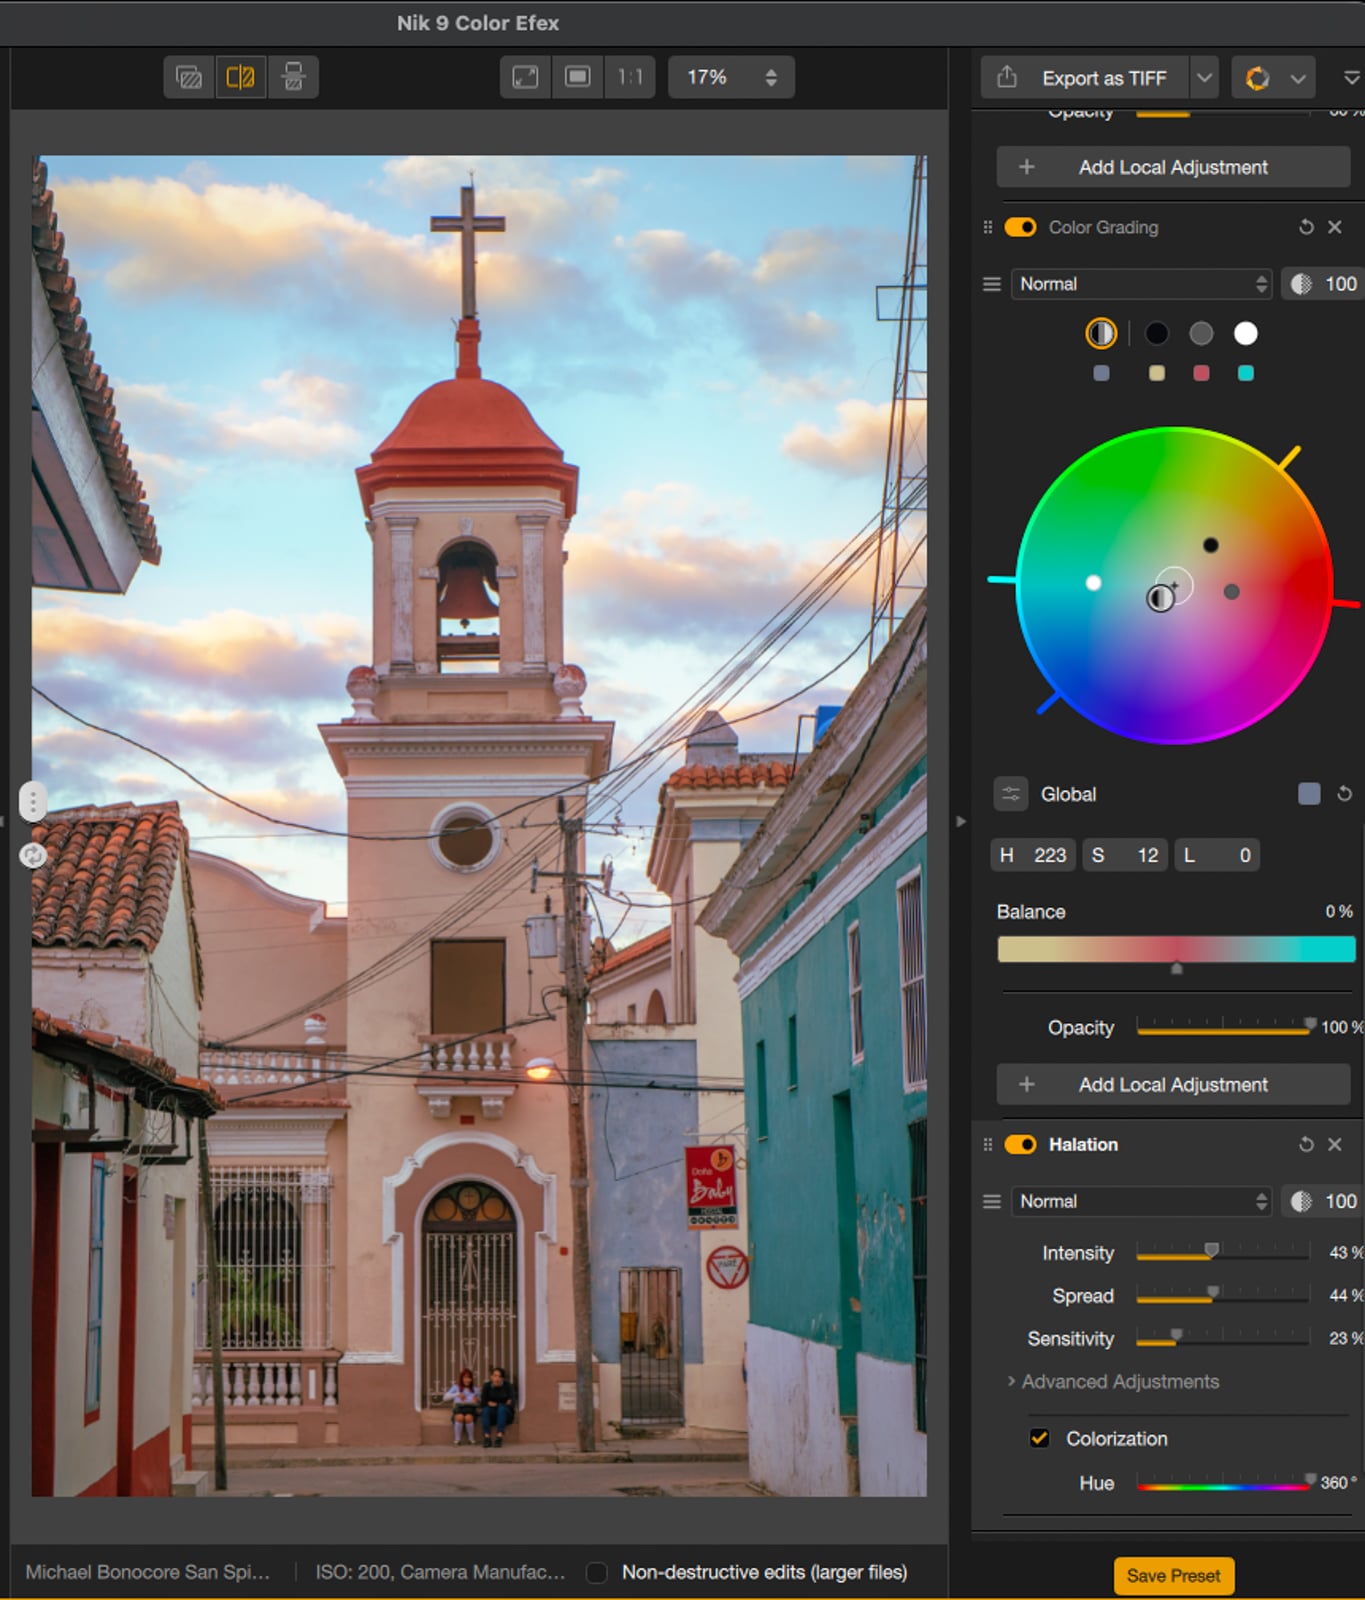
All photos taken in 2016 in Cuba by Michael Bonocore.
At a Glance
Nik Collection 9, the latest version of DxO’s eight-plug-in editing suite for photographers, adds a set of tools aimed at specific friction points in the photo editing process.
“A professional who needs a specific grain type or film look applied consistently across an entire shoot can get that without stacking layers in Photoshop,” says Cyril Duchene, product marketing manager at DxO.
Nik Collection 8 was a leap forward for the plug-in editing suite, but some common editing headaches remained, and Nik Collection 9 aims to solve them.
Stop Losing Time to Masks
Local adjustments in photo editing are only as useful as the selections behind them. If you want to darken just the sky or brighten just a face, you need to tell the software exactly which pixels to change. That area of the image where your edit takes effect is called a mask, and in most plug-in workflows, building a mask has meant painting it by hand with a brush, then going back to erase the edges that spilled over. Hair against a textured background means zooming to 100% and tracing edges one stroke at a time. Complex subjects like tree branches or a person standing in a crowd can turn a creative idea into boring work.
Nik Collection 9 replaces that process with AI Object Masks.
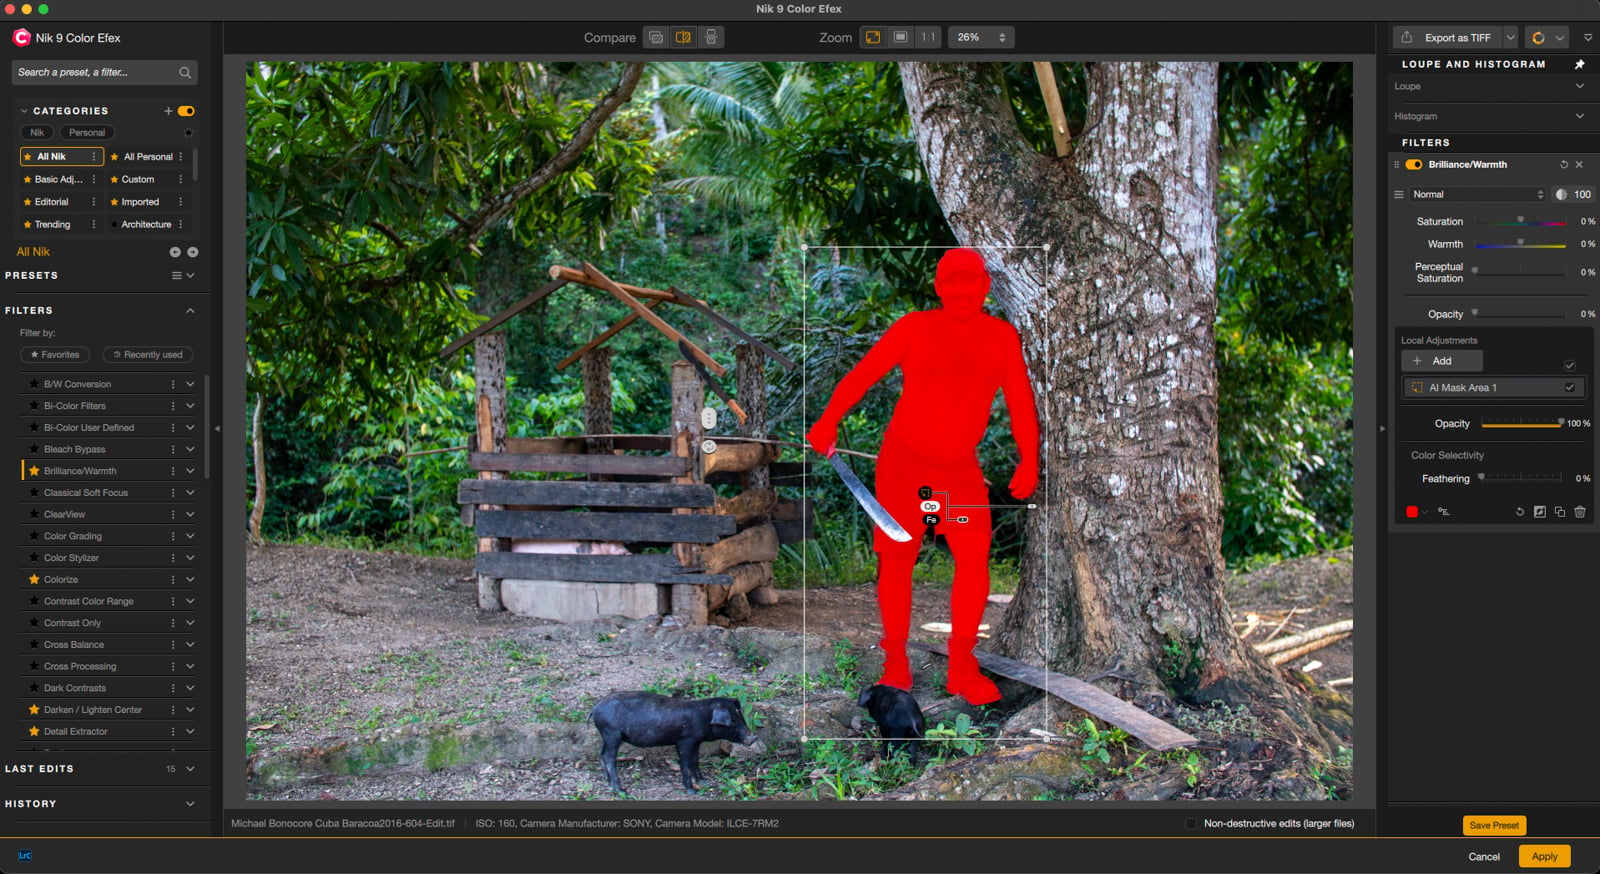
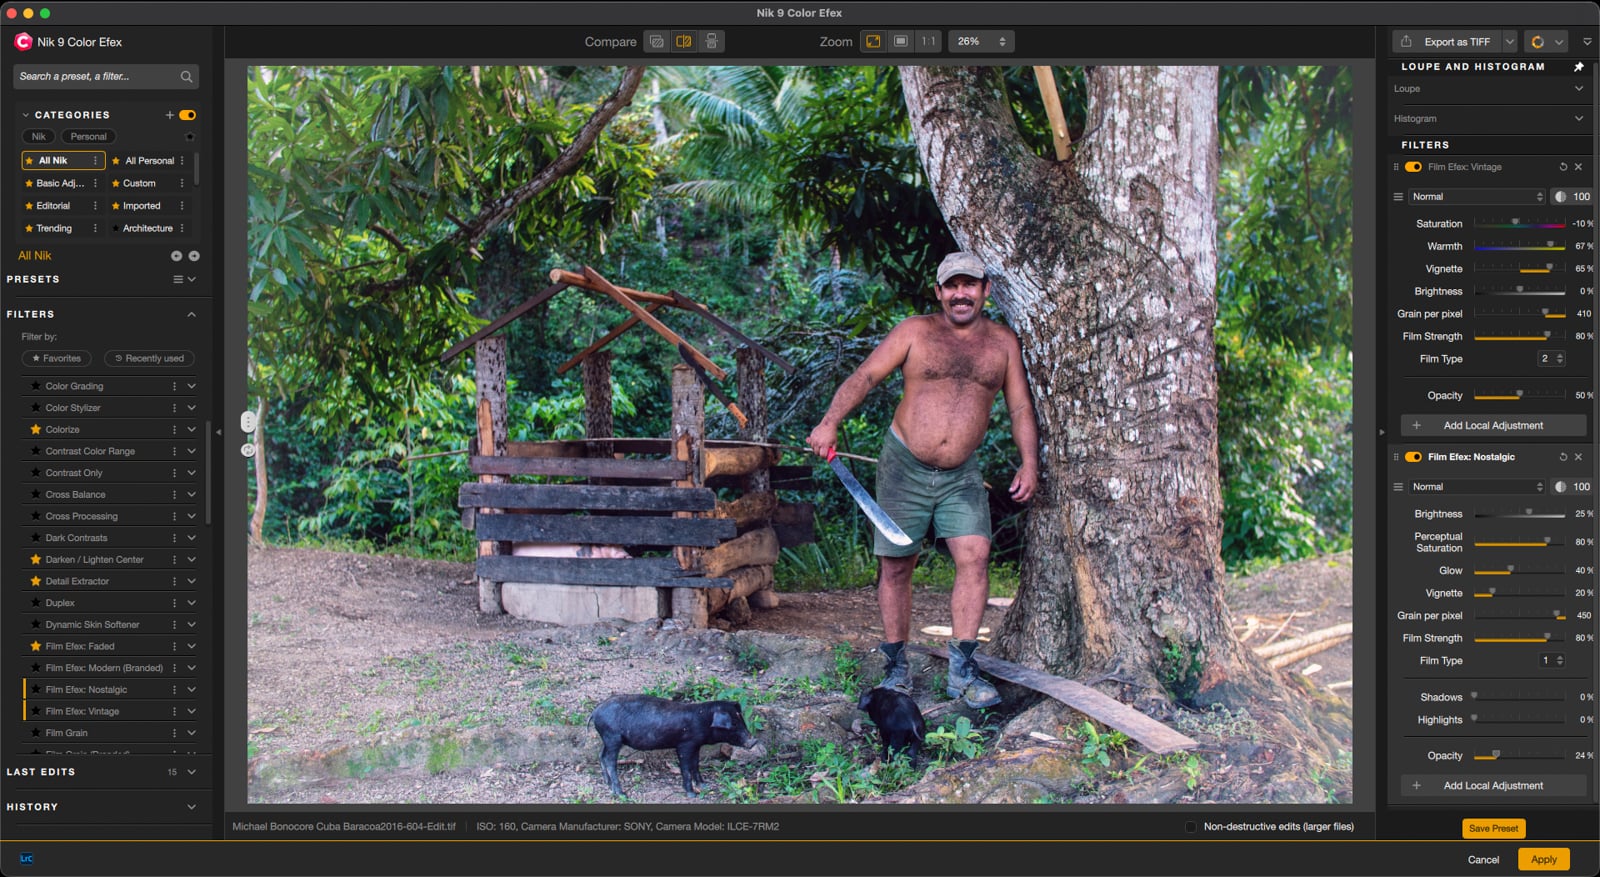
“You can point at your subject or draw a box around it,” Duchene explains. “If you draw a box in a portrait photo, the AI selects only the subject, not the background inside the box. It replaces brushing and unbrushing, which is a time-consuming way to work.”
Once the mask exists, the creative part starts. Select a person in a street scene, invert the mask (flip it so the edit applies to everything except the person), and run a desaturation filter to pull color from the background. Stack a second object selection on a different filter to build layered effects. The selection takes seconds instead of the minutes you would spend with a brush.
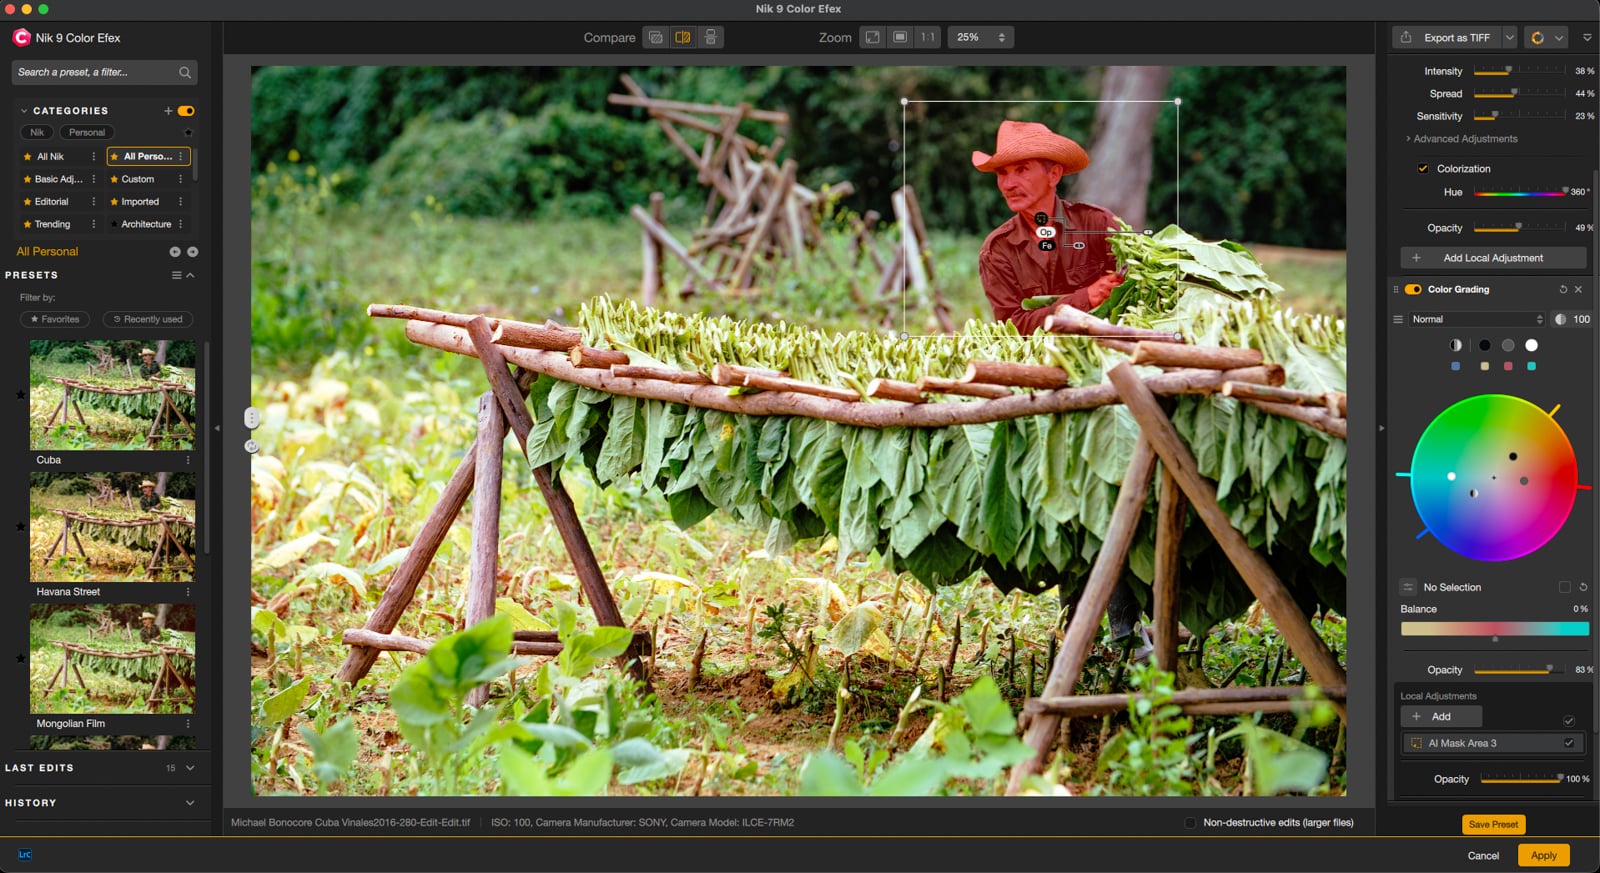
That speed holds across filters, too. In earlier versions of Nik Collection, a mask built for one filter stayed locked to that filter. Apply a color effect to the background using an AI object mask, then realize the same area needs a glow or grain, and the only option was to rebuild the mask from scratch. Nik Collection 9 adds copy and paste shortcuts for masks: build an AI object mask on a portrait subject for one filter, then duplicate it to a second filter in two keystrokes without any reselection.
The mask itself is also easier to see. Nik Collection 9 lets users change the color of the mask overlay, which until now was always red. “When I’m working on a monochromatic series, the default red mask overlay on a red image makes it hard to see where the mask applies,” Duchene notes. “Now I can shift the overlay to blue or any other color for precision.”
Mask by Distance, Not by Hand
Some edits have nothing to do with individual objects. Fog, haze, contrast, and warmth often need to follow depth: what is close to the camera versus what is far away. Usually, a photographer would use a gradient filter, which applies an effect that fades gradually across the frame. But a gradient does not know that a tree in the foreground extends into the upper third of the frame. It treats depth as a flat line when depth in a photograph is rarely flat.
“The depth mask works like the depth of field inside your camera,” Duchene describes. “You use AI to select parts of your image based on distance, from foreground to background. It applies diffusion along the mask edges so the transition feels natural when you layer another filter on top.”
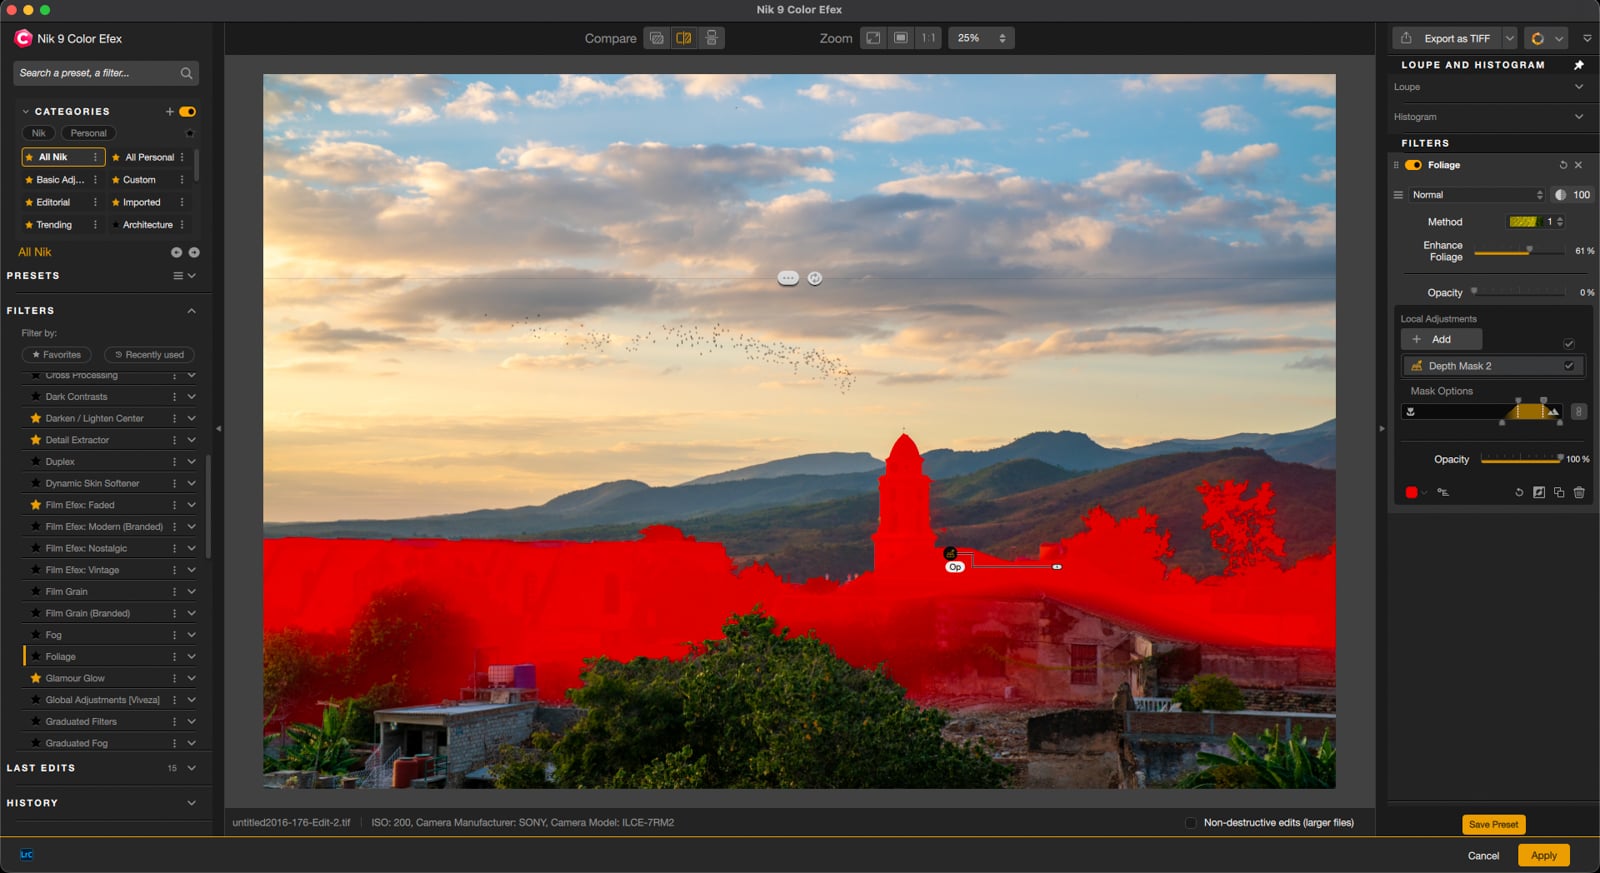
That selection tool is the AI Depth Mask in Nik Collection 9. It analyzes the image and builds a rough model of what is closer to the camera and what is farther away. Instead of drawing a line, the user selects a distance range. Using the created depth map, the mask follows the actual spatial layout of the scene, with natural feathering along the edges where foreground meets background.
Open a landscape with a foreground subject and distant mountains. Create a depth mask selecting only the background, then apply a haze or cool-tone filter to separate the mountains from the foreground. The foreground stays untouched, and the mask took less time to build and edit than the trial and error required with the gradient it replaced.
Get the Film Glow That Digital Cameras Lost
Digital camera sensors render bright highlights with clean, hard edges. Film did something different. When bright light hit film, some of it passed straight through the light-sensitive layers, bounced off the back, and leaked back in. That double exposure created a soft glow around highlights, often with a subtle reddish halo. This halation effect made street lights bleed and softened candle flames. Photographers came to love the accident.
Recreating halation in Photoshop means duplicating the image, blurring the duplicate, masking the highlights, and blending layers together. Most photographers skip it because the effort rarely justifies the result. The new Halation filter in Nik Color Efex does the same thing in one step, with controls for intensity, spread, and sensitivity, plus a colorization option with hue and opacity. The Halation filter can be applied globally or masked to specific highlights.
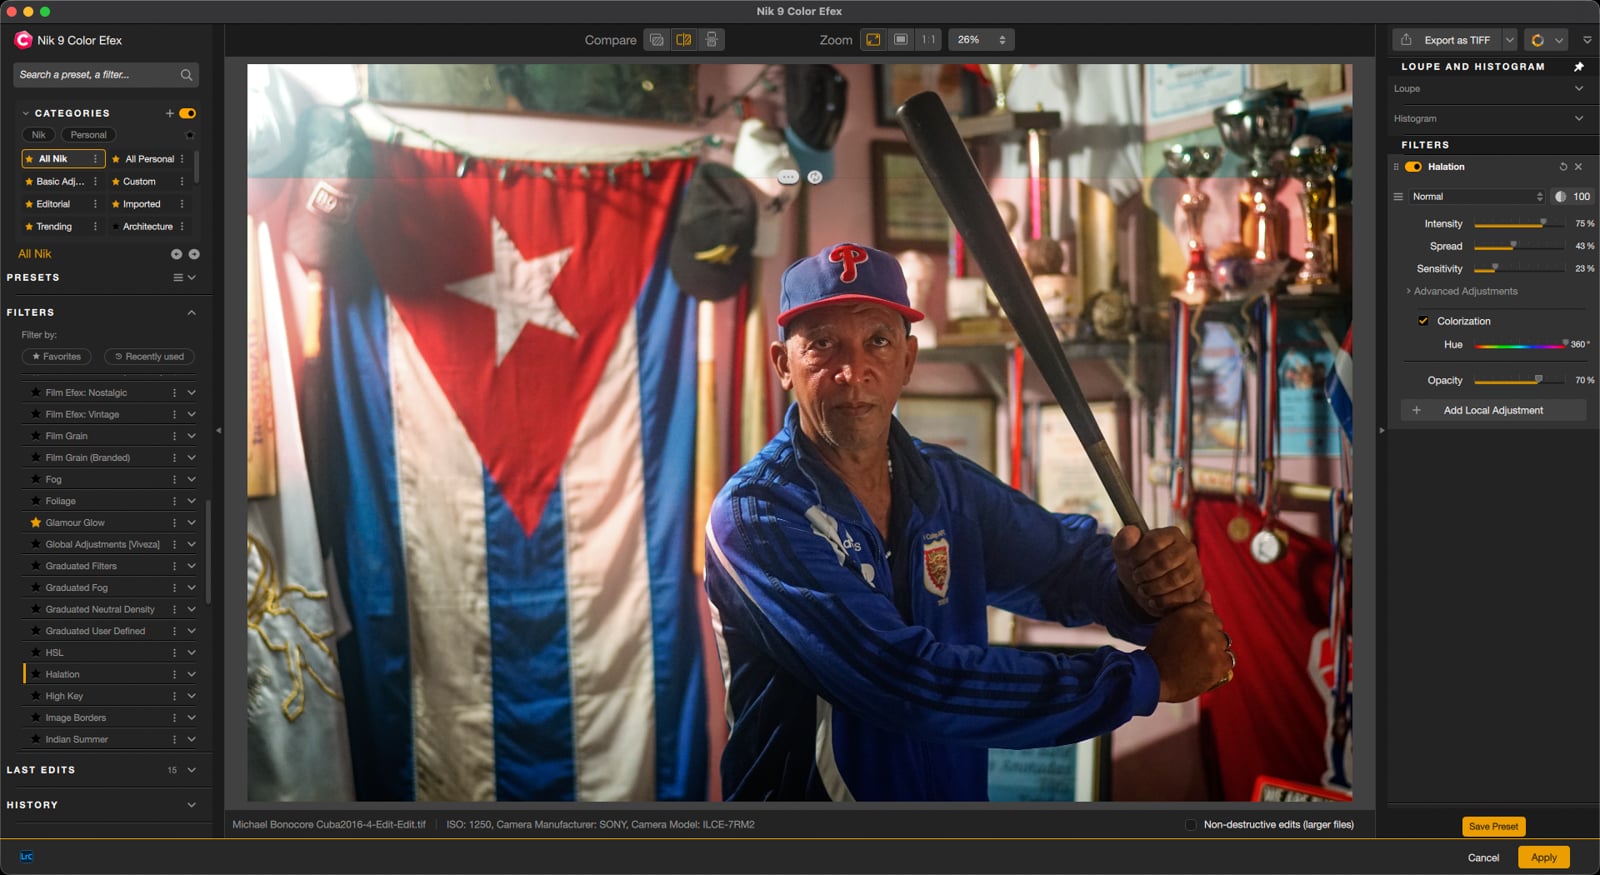
“The Halation filter creates a halo around bright highlights, the kind of glow you see in night photography from Tokyo or Seoul,” Duchene describes. “You control how bright the halo is and you can add color into it to set a mood, like the movies Sin City or Blade Runner.”
Halation can turn a night cityscape into something cinematic with a warm amber tint in the glow. A backlit portrait with the AI depth mask limiting the halation effect to background lights keeps the foreground subject crisp while the street lamps bleed. Halation is not a filter you apply to everything. It works best when the image already has strong highlights worth softening.
Color Grade Three Tonal Zones Without Breaking the Others
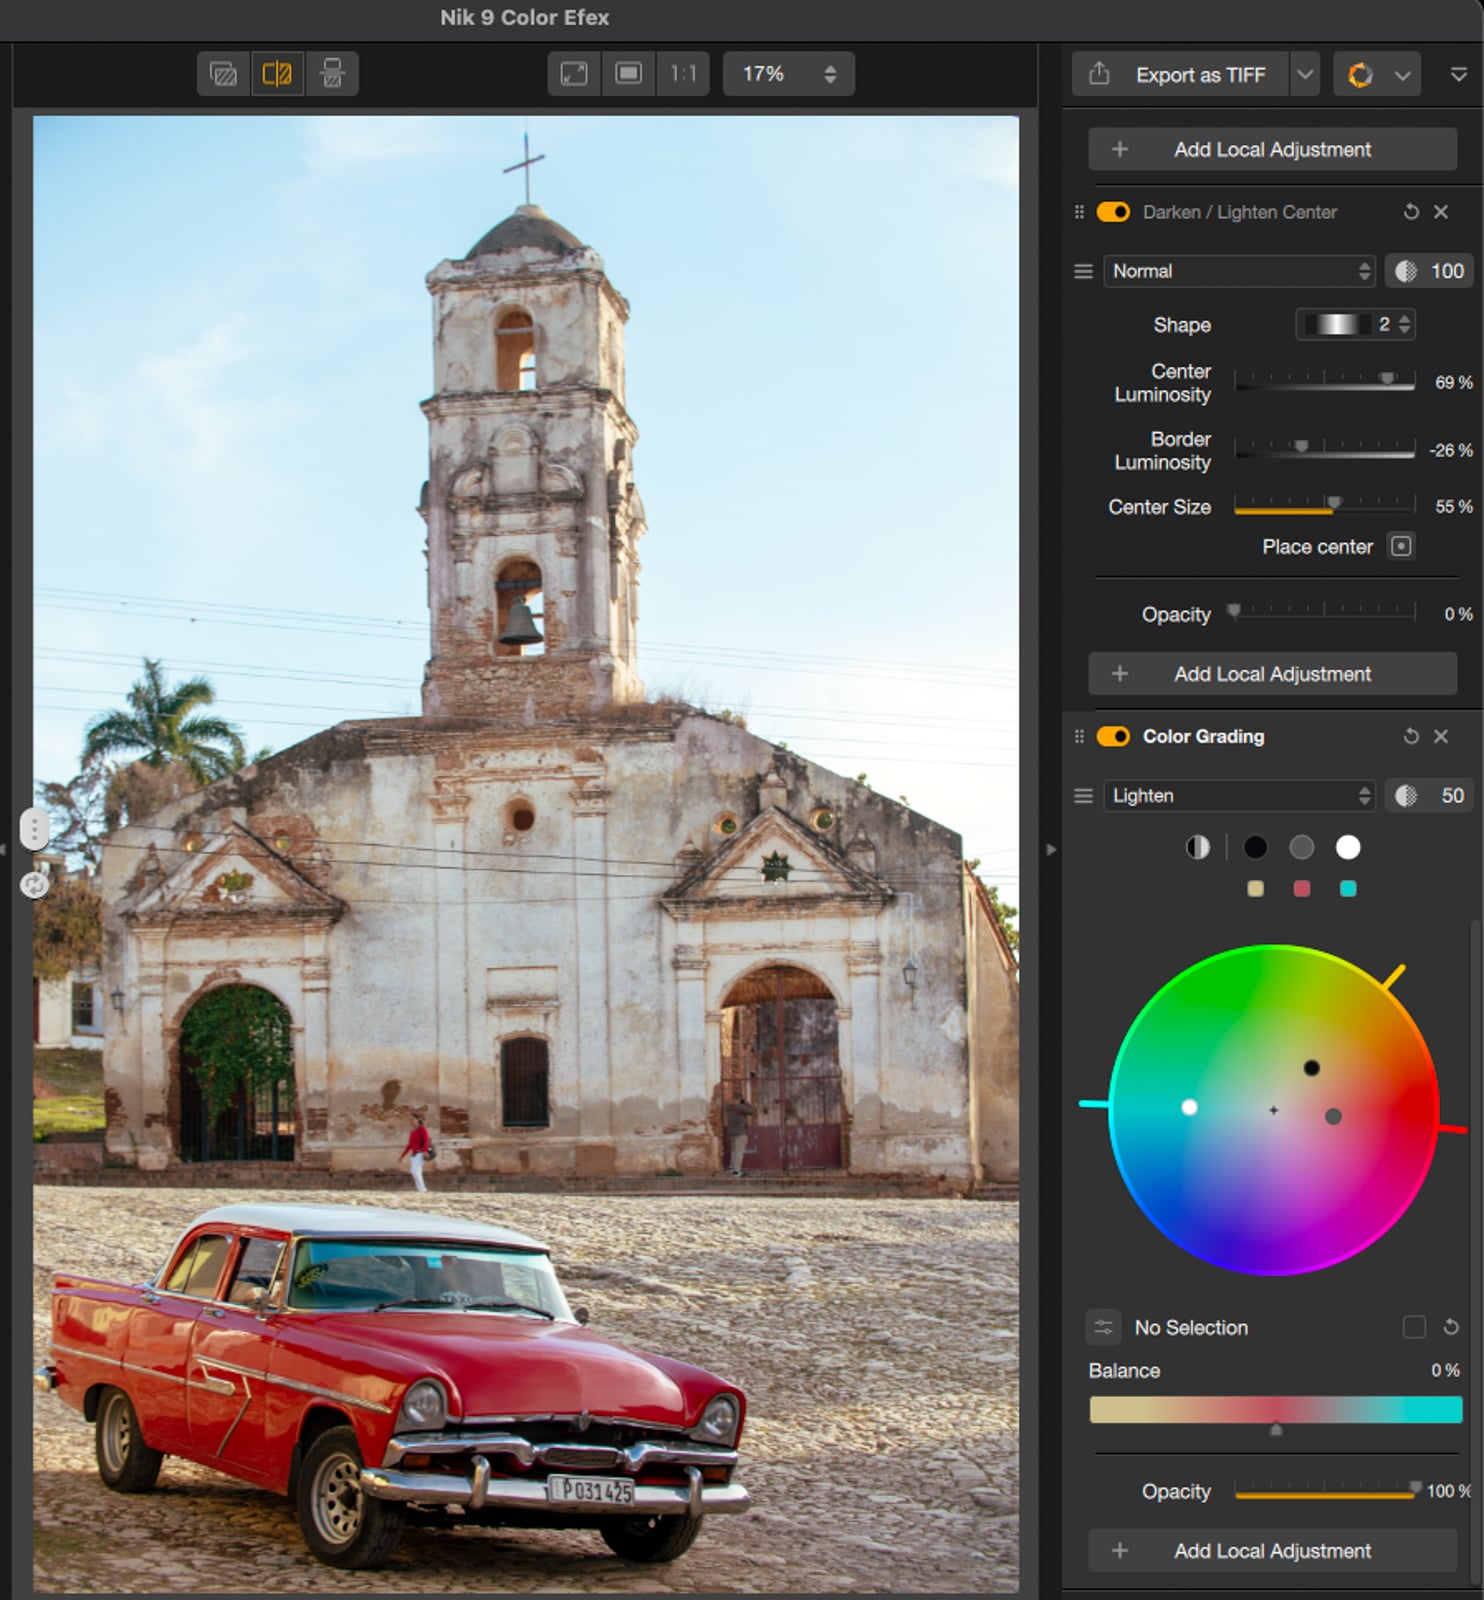
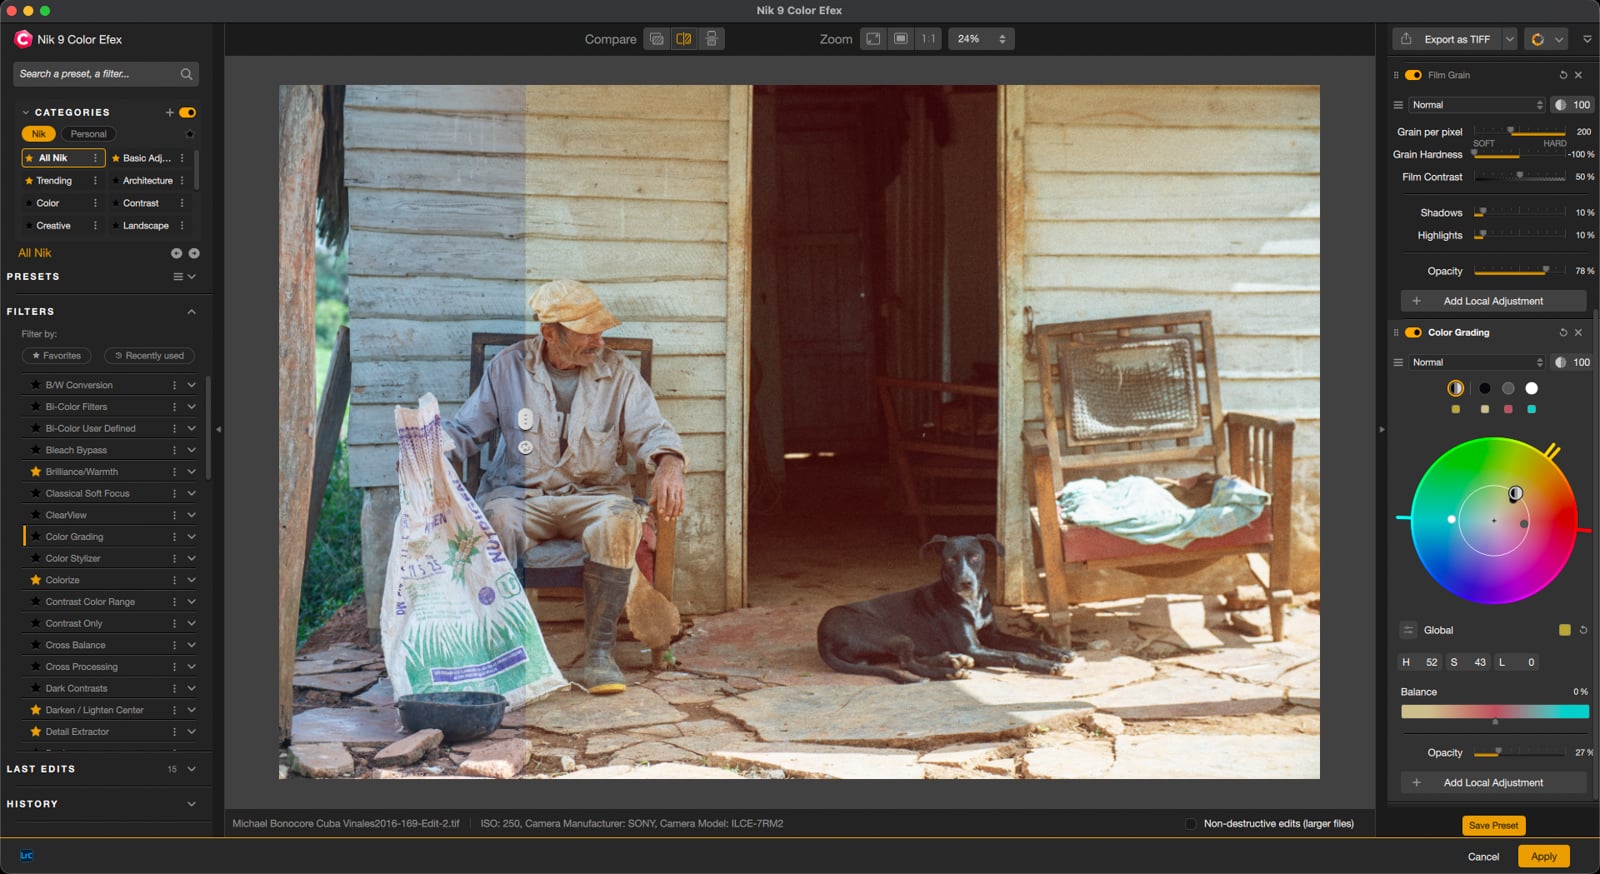
The icy blue palette in The Girl with the Dragon Tattoo and the warm skin against teal shadows in Mad Max: Fury Road got that look through the same editing process. Color grading shifts the color of an image’s shadows, midtones, and highlights independently. Cool the shadows toward blue, warm the highlights toward amber, and a flat photograph starts to look cinematic. The problem is that most color grading tools treat these three zones as independent controls. Push the shadows cooler and the midtones drift. Fix the midtones and the highlights shift. The pain of adjusting one zone, checking the others, and readjusting is where most photographers either waste time or give up on color grading entirely.
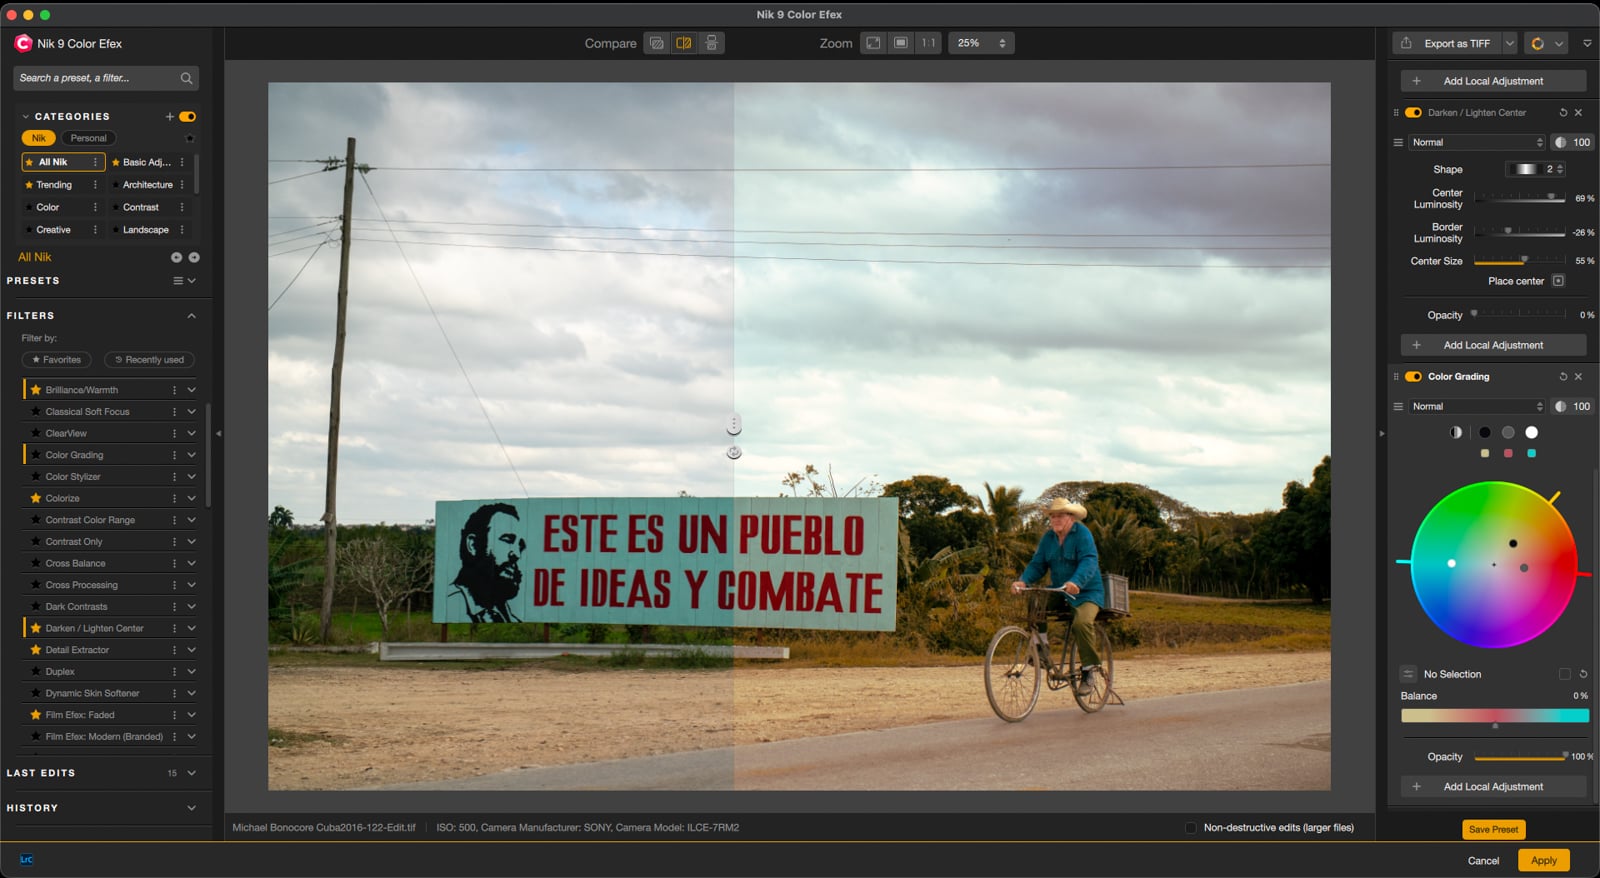
The new Color Grading filter in Nik Color Efex puts all three tonal zones on one wheel with three control points and two balance shortcuts that let all three move together. One shortcut shifts hue, which is what color the tones lean toward (blue, amber, teal). The other shifts saturation, how vivid or muted the color is, without touching hue.
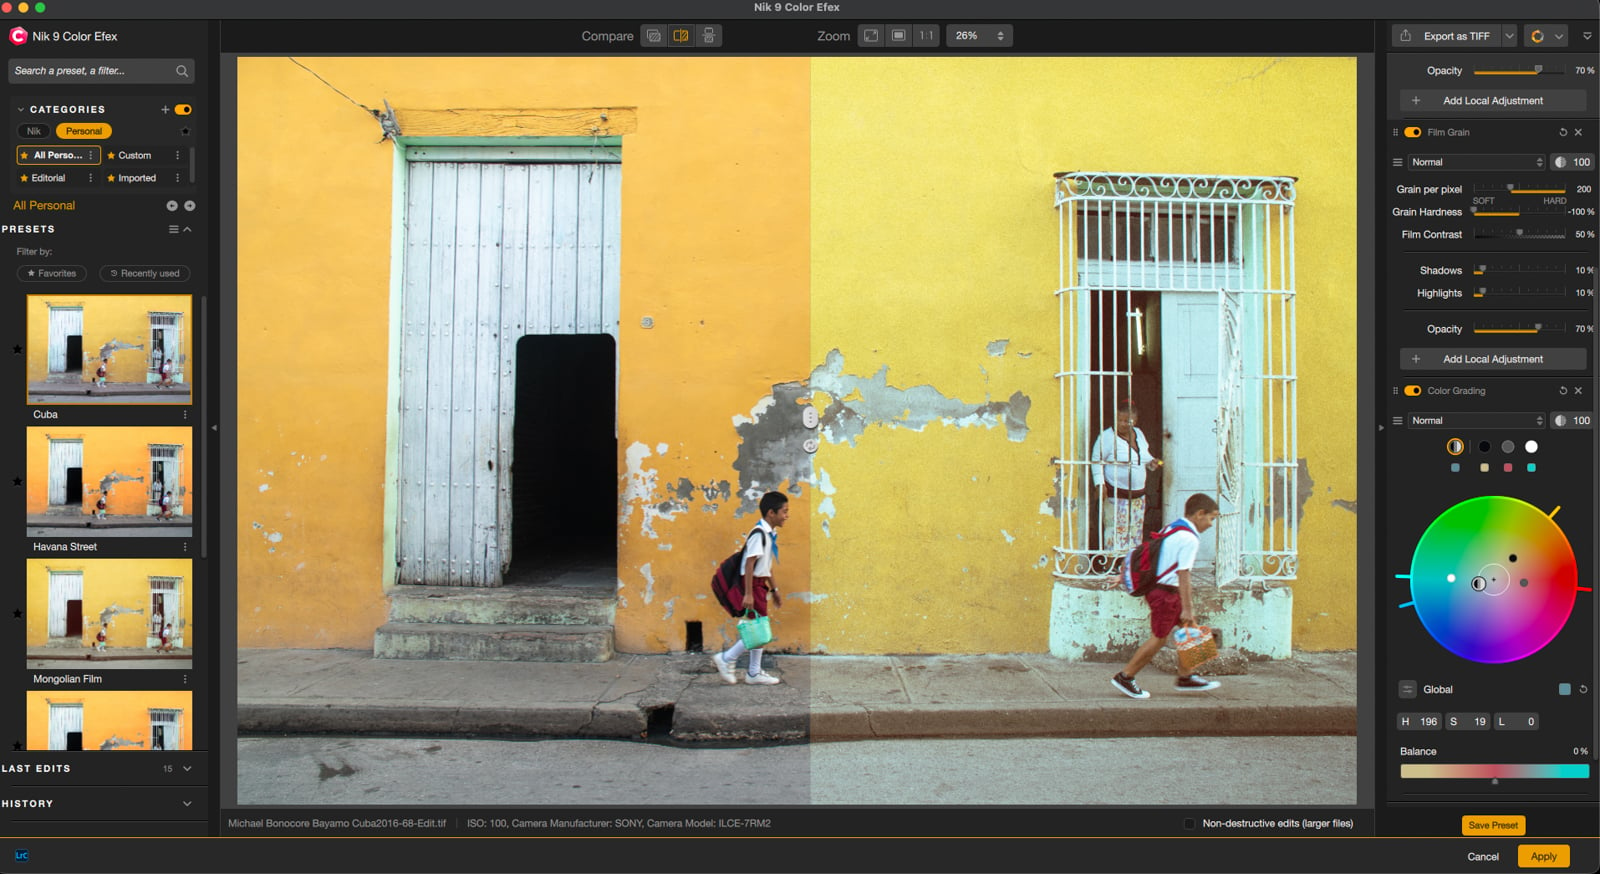
“You set your three points for shadows, midtones, and highlights, and the two shortcuts let you move all three at once while keeping the relationship between them,” Duchene notes. “You’re not going back and retouching every point individually.”
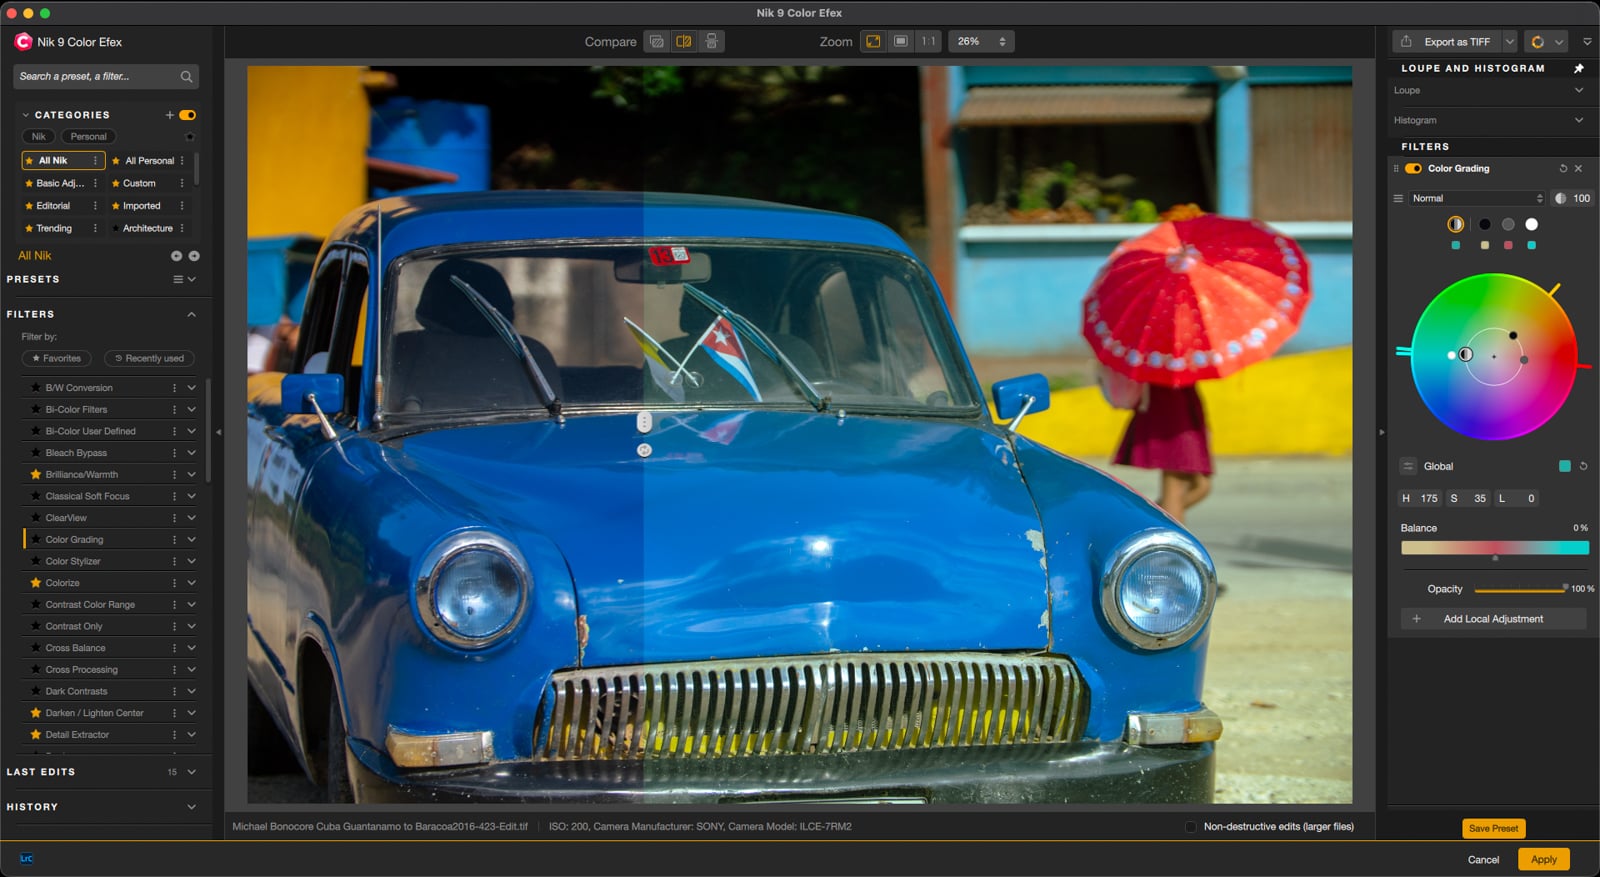
Photographers can set a cinematic teal-and-orange grade by cooling the shadows toward blue, warming the highlights toward amber, and leaving midtones neutral. Then, using the hue balance shortcut, push the entire grade warmer or cooler without rebuilding the three-zone relationship. Try a cold, desaturated grade on a rainy street scene. If it doesn’t work, shift the whole thing warmer in one move and see if that fits the desired cinematic style.
Recreate a Printing Press Mistake on Purpose
Album covers, fashion editorials, and DIY print photography share a look built on making mistakes on purpose. One of the most recognizable looks comes from old printing presses. Color printing works by layering separate ink passes on the same page, and when those passes didn’t line up perfectly, the colors shifted. You’d see a red edge on one side of a face and a blue-green shadow on the other. Digital images are too clean to produce it naturally, and recreating it manually in Photoshop means separating the color layers and shifting them one at a time.
“Chromatic shift comes from offset printing, that slight color mistake you see in old magazines when the press wasn’t aligned right,” Duchene says. “We took that analog accident and gave you controls for it. You pick the angle, the color channel, and then you can scale up the shifted image if you want a bolder effect.”
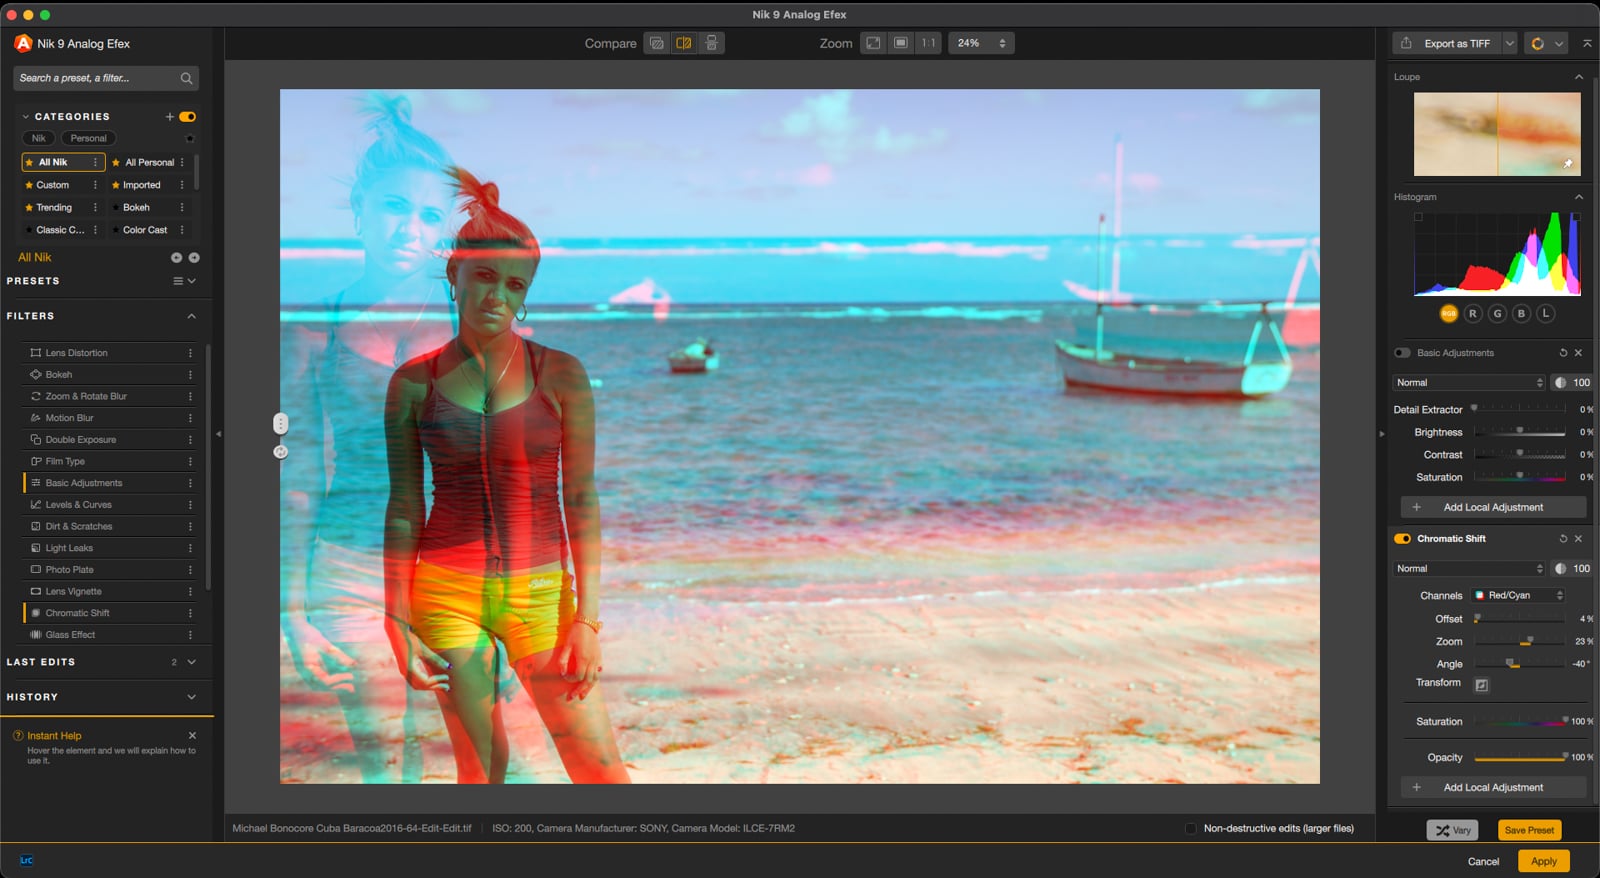
Those controls live in the Chromatic Shift filter in Nik Analog Efex: shift angle (the direction the color shifts), color channel (red/cyan, green/magenta, or blue/yellow), and scale (how far the shifted image zooms). Photographers can combine it with local adjustment masks to apply the shift selectively.
To create a retro, editorial feel, apply a subtle red/cyan shift to a portrait. Use a local adjustment mask to keep the shift off the eyes and lips. For something bolder, increase the scale and layer a film grain preset on top. The photographers who will reach for it most are the ones already inspired by old magazine editorials and concert posters.
Stop Going Back to Photoshop Just to Blend
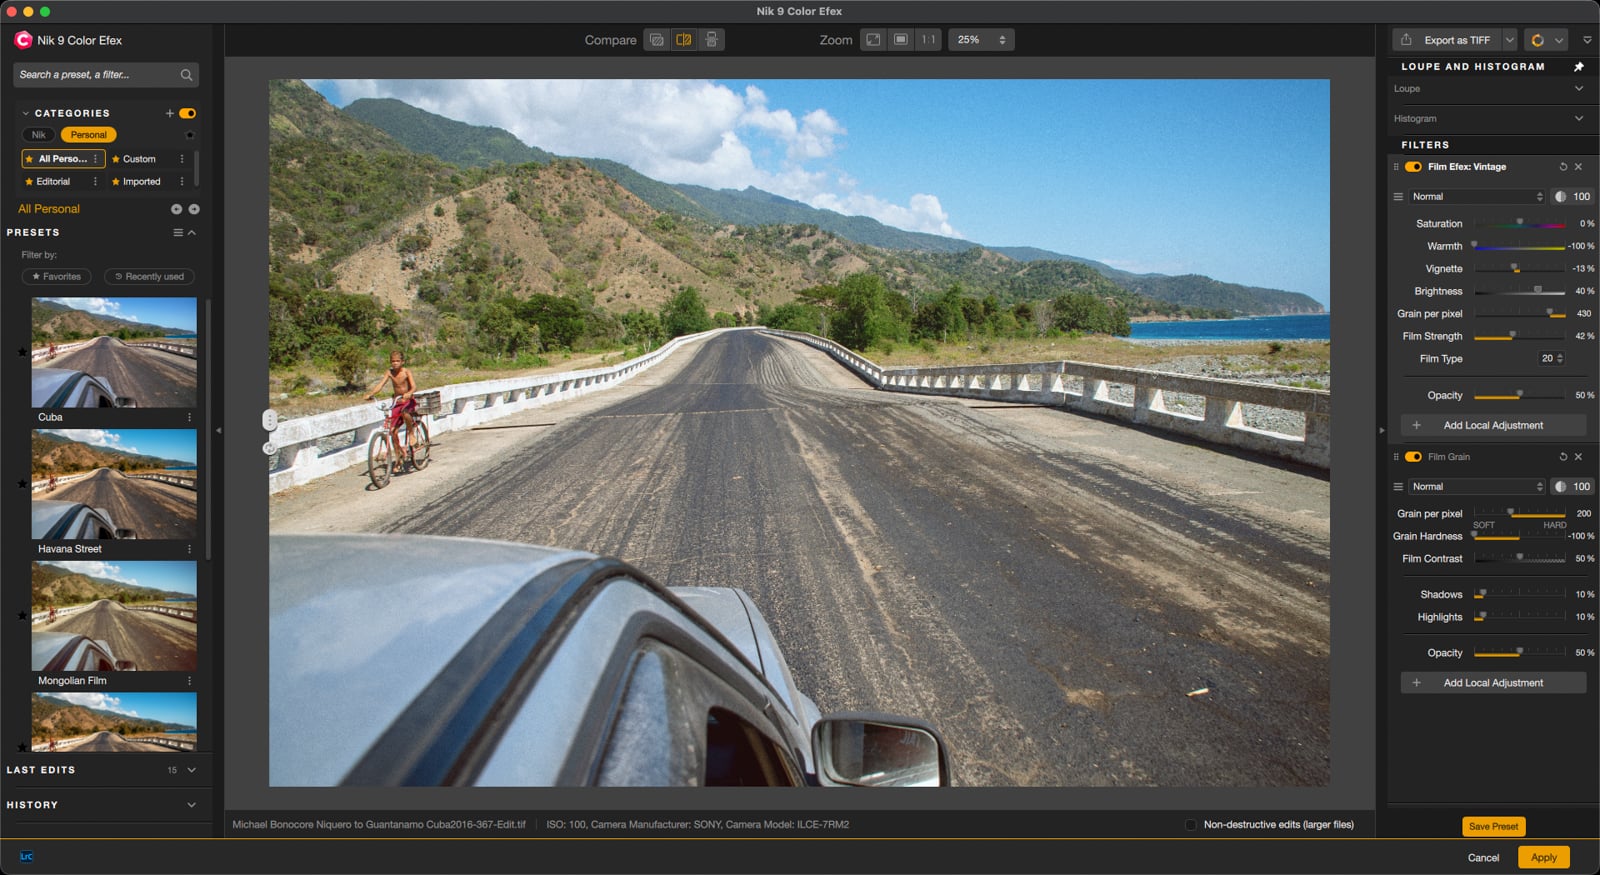
Apply the Halation filter to a portrait shot under city street lights. In its default Normal mode, the glow washes out the highlights and lightens the background into a warm haze. Switch to Multiply and the image darkens: the glow sinks into the shadows, the background deepens, and the portrait turns heavier and moodier. Switch to Soft Light and the glow stays but the image holds more of its original contrast and color. One filter produces three completely different images depending on the mode.
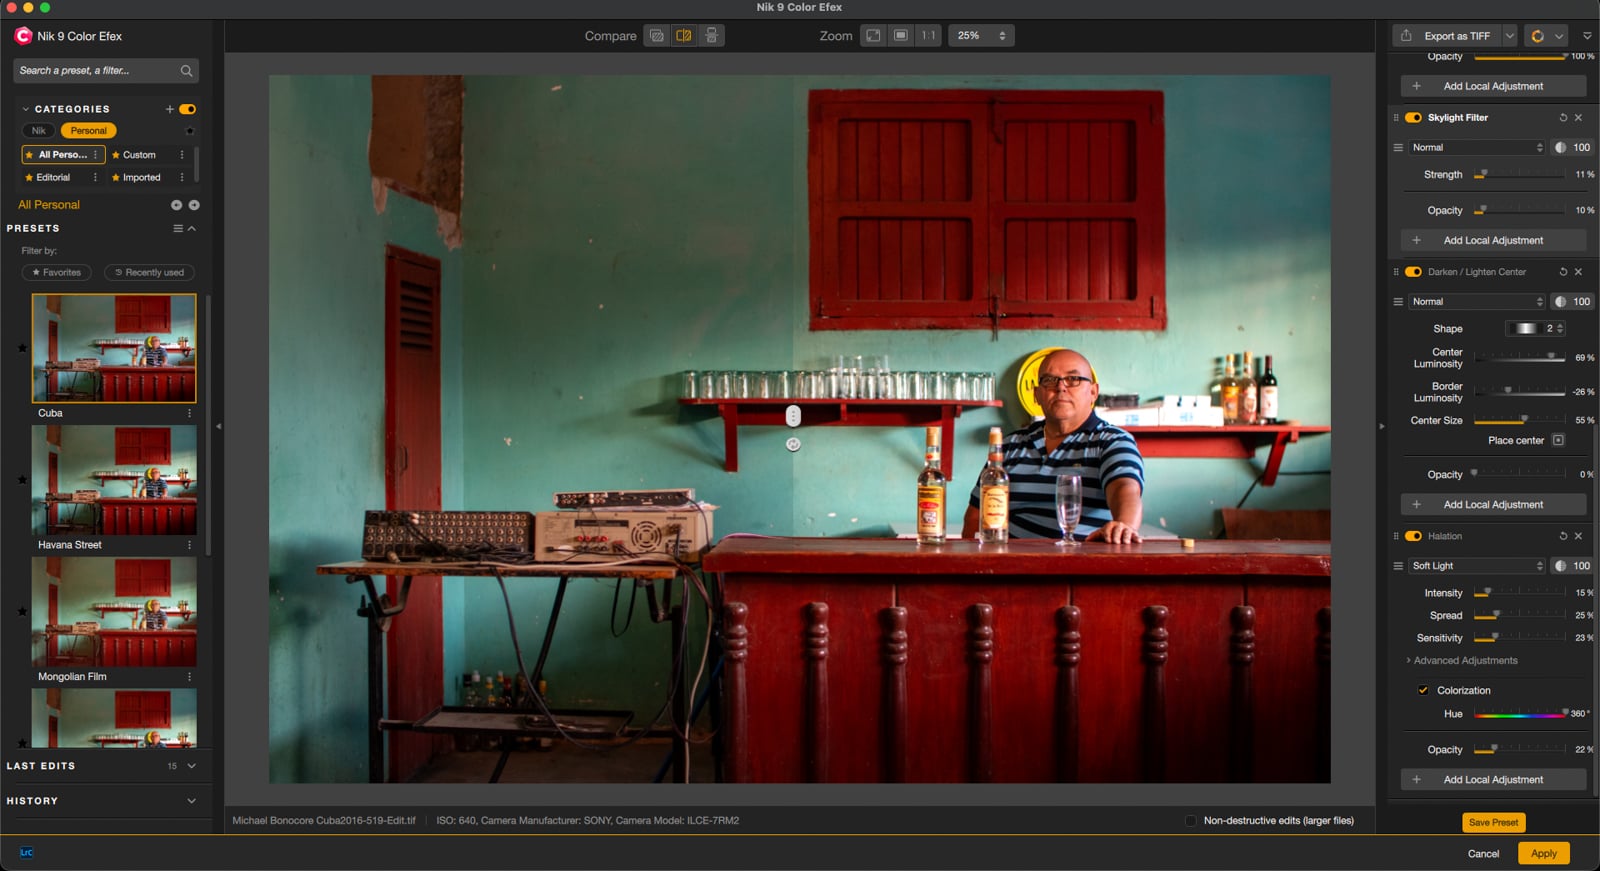
A blending mode controls how an effect combines with the image underneath it. Photoshop has offered blending modes for decades, but using them with Nik filters meant applying your filter, flattening the result, opening Photoshop, duplicating the layer, changing the blend mode, and adjusting opacity before flattening again. The creative payoff was there. The workflow to get it was not.
Nik Collection 9 brings blending modes inside the filter stack in Nik Color Efex and Nik Analog Efex. “Each filter now has 18 blending modes,” Duchene points out. “You stay inside the plug-in and try different looks without going back to Photoshop.” The same paper texture in Analog Efex looks aged and dark in Multiply, luminous and faded in Soft Light, and punchy in Overlay.
Photographers who already use Photoshop blending modes will feel at home. Photographers who don’t will find that one afternoon of experimenting with Multiply, Soft Light, and Overlay on a single filter teaches the concept faster than any tutorial.
Shoot Through Glass You Never Had
“We all remember looking through our grandmother’s textured glass as kids and seeing the world distort,” Duchene explains. “We put that into a new filter called Glass Effect in Nik Analog Efex. There are more than 50 glass textures, and unlike a simple social media filter, you can combine them with local adjustment tools. For a portrait, you might apply the glass everywhere except the subject’s eyes.”
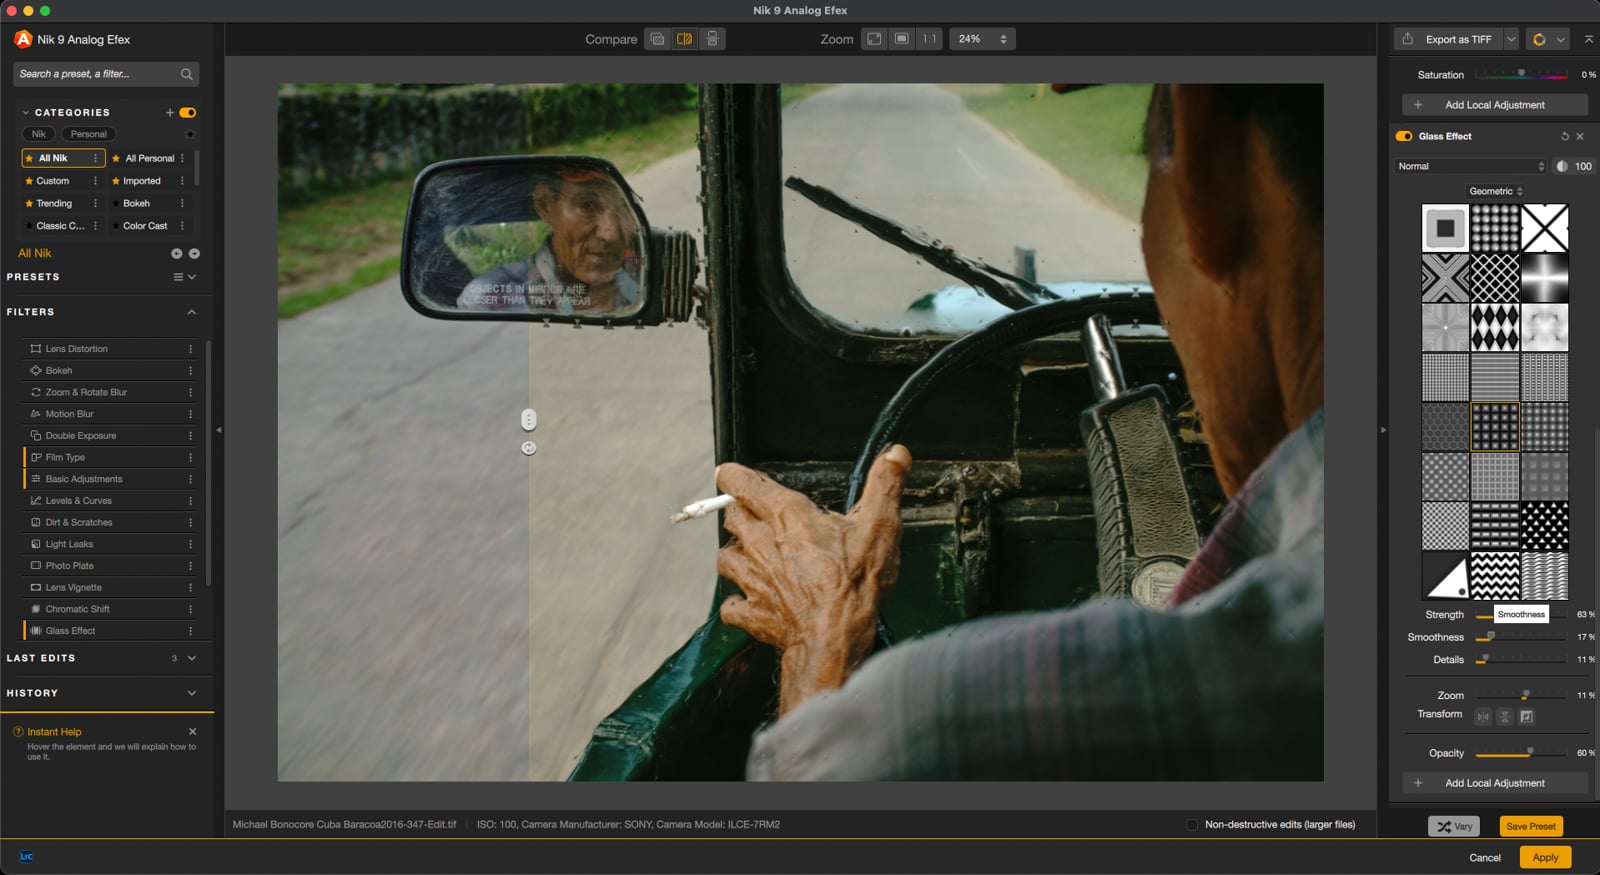
Shooting through textured glass has long been a popular technique in portrait and editorial photography. The distortion softens reality, creates visual tension, and gives the image a quality that clean glass or open air cannot. The problem is that a photographer would need to find the right glass, position it at the right angle, and light through it without catching reflections or unwanted artifacts. Most try it once, fight with the physics, and go back to clean compositions.
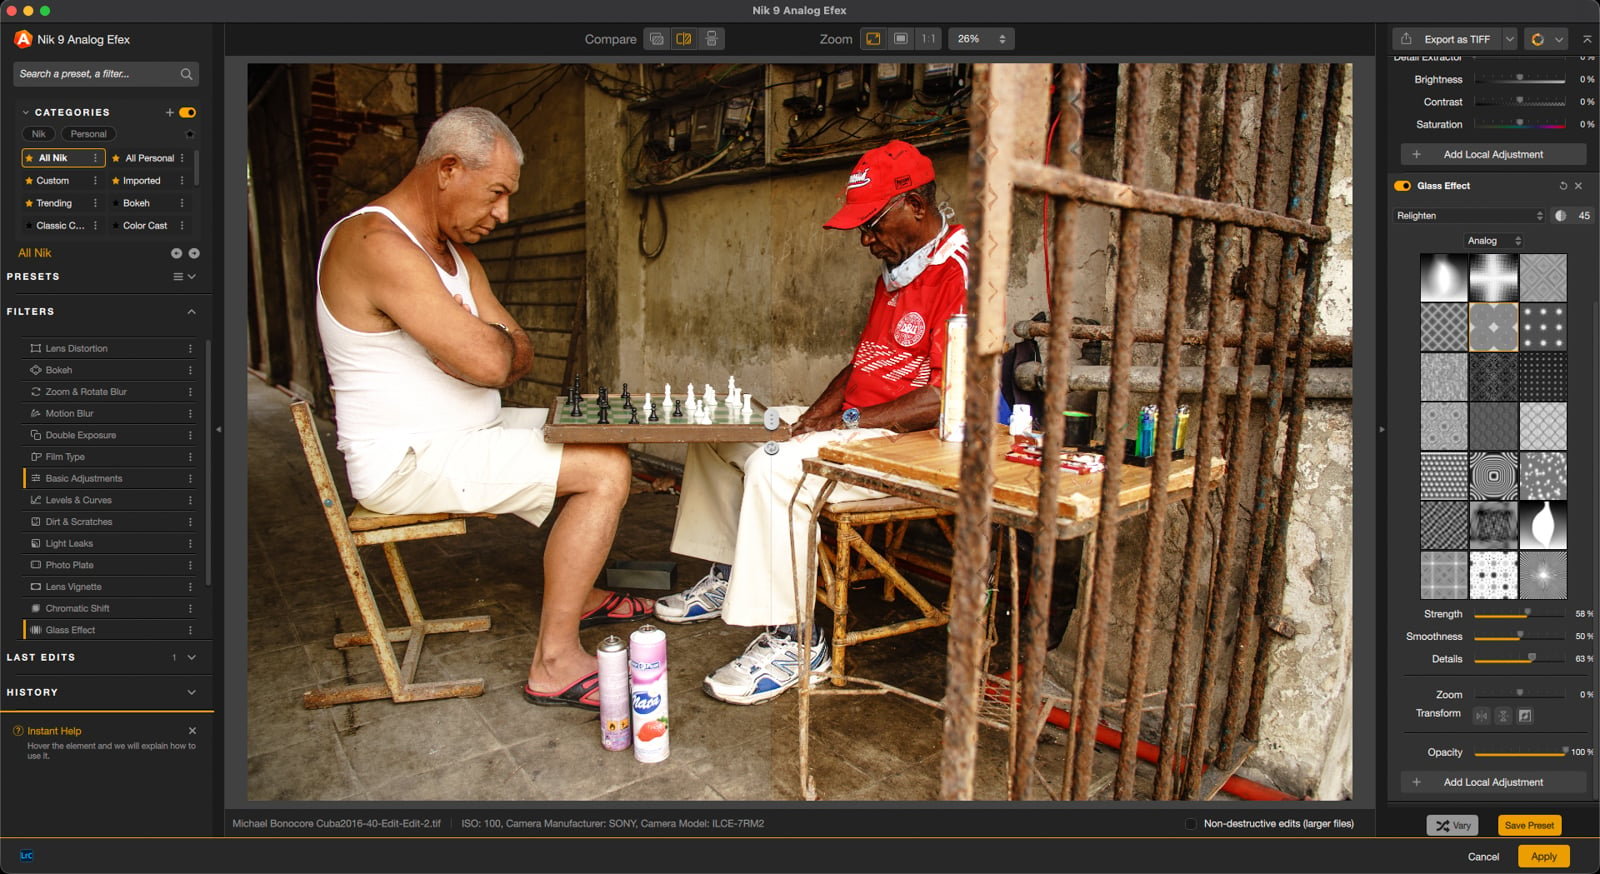
That portrait example is the key difference between the Glass Effect filter and a phone filter. On a band portrait or fashion shot, the distortion wraps the frame while the AI object mask keeps the subject’s face sharp. The strength, smoothness, and details of the glass are all adjustable. Stack the Glass Effect filter with one of the 18 blending modes and the same texture interacts with the image in a completely different way.
Because the effect lives in post-production, there is no glass to buy, no angle to negotiate, and no reflections to fight. What used to require a bag of props and a little luck now works on any image already on the hard drive.
Keep Your Images on Your Machine
Many AI-powered editing tools send files to cloud servers for processing. For most personal work, that trade-off is fine. For photographers working under NDAs, handling unreleased commercial images, or shooting private events, it puts the best AI masking tools off limits.
All AI features in Nik Collection 9 run entirely on the user’s local hardware. No images leave the computer. It works on an airplane, in a hotel with unreliable Wi-Fi, or on a computer with no internet connection.
For photographers whose work involves confidentiality, that changes which tools they can actually use. A wedding photographer editing images under a venue’s exclusivity agreement can run AI masking on every shot without checking a privacy policy first. A commercial shooter handling unreleased product photos for a brand under NDA gets the same selection tools that cloud-based editors offer, without the compliance conversation. The processing stays on the machine where the files already live.
“The AI selection runs locally on your computer,” Duchene explains. “We’re not sending your images anywhere.”
Nik Collection 9 is solving the most common editing problems that photographers experience by going after the specific steps that eat the most time: building masks by hand, recreating analog looks through stacked Photoshop layers, and starting from scratch every time you want a second effect on the same selection. Each of those problems now has a shorter path.
“Something that used to take hours of layer work in Photoshop, you can get to in a few minutes with the right filter and a blending mode,” Duchene concludes.

Full disclosureThis article was brought to you by DxO. Use the code PetaPixel at check out to get 15% off of any DxO product, including Nik Collection 9 and PureRAW 6
Read The Ultimate Beginner’s Guide to Color Efex.
All photos taken in 2016 in Cuba by Michael Bonocore.
Affiliate Disclosure PetaPixel articles may include affiliate links; we may earn a commission if you buy through one.