Step-by-Step Guide to Capturing Great Milky Way Photographs
Photographers wanting to capture beautiful Milky Way photos need the right plans, the appropriate gear, and some basic knowledge of optimal camera settings.
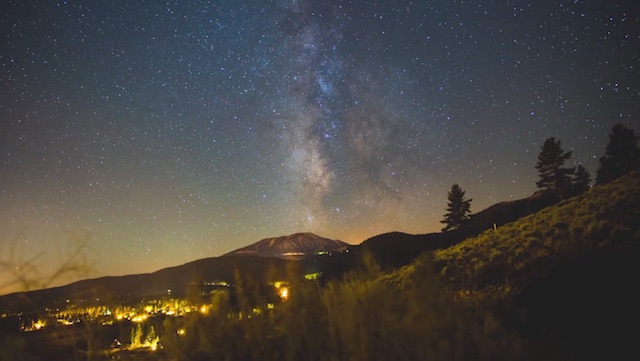
In beautiful (and dark) Zion National Park, Matt Zefi from B&H demonstrates how to photograph the Milky Way, one step at a time.
The first step to any good landscape image, whether shot during the day or night, is an exciting location and a compelling composition. One of the most challenging aspects of night sky photography is that the same darkness that allows the stars to shine makes it very hard to see. Therefore, scouting locations before sunset is ideal.
“By scouting a location during the day, I can see where foot traffic is going to be so I can avoid it because people tend to walk with headlamps at night,” Zefi explains. He uses PhotoPills to determine where the Milky Way will appear at a set time, allowing him to find a good composition and plan his photo.
The right gear matters too. Canon sponsors the “Outdoors with B&H” video, so Zefi shoots with a Canon EOS R5 with Canon RF 15-35mm f/2.8 L IS USM and Canon RF 28-70mm f/2 L USM lenses. However, while these are excellent choices, there are suitable lenses for Milky Way photography for every camera system.
An ideal night sky camera performs well at high ISO settings. The perfect night sky lens will be wide-angle and fast. The faster, the better. A slower lens like an f/4 zoom will work but require a higher ISO setting. Longer lenses can work too but will require star trackers for the best results.
No matter how good a photographer’s camera and lens are, night sky photography requires a stable tripod. It can be tempting, especially for beginners, to skimp on their tripod. Fortunately, good tripods do not necessarily break the bank.
With scouting done, a composition picked, and the gear ready to go, Zefi must wait for the sky to darken and the Milky Way to appear. Once that happens, what are the best settings to ensure a good photo?
Photographers should use their lens’s fastest aperture and adjust the ISO accordingly. With an f/2.8 lens, ISO 2000 to 3200 can work, although the scene may require a higher ISO than that.
Shutter speed is more complicated. The longer the lens, the more stars smear at a given shutter speed. “If you start to see any trailing in your stars, then you know that your shutter speed is too long,” Zefi says.
While experimentation is a good way to dial in the perfect settings, PhotoPills also helps. Within the app, users can select their camera, focal length, and aperture to see recommended shutter speeds based on the NPF Rule and the 500 Rule.
Zefi also recommends shooting in RAW, using manual focus, and using the camera’s self-timer function if a remote release is unavailable. It is essential to eliminate the risk of any camera shake when pressing the shutter.
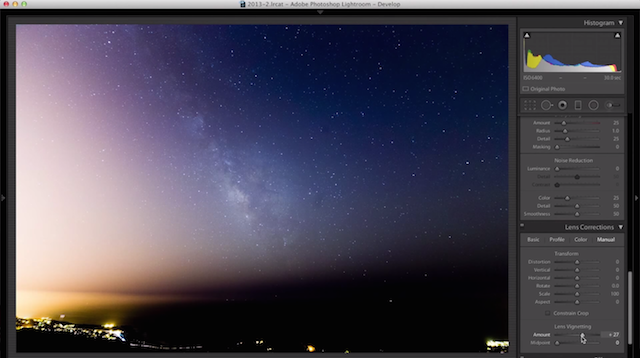
After capturing a beautiful Milky Way image, it will require editing to bring out the best details. Using Select Sky in Lightroom, Zefi creates a mask of the sky. Once selected, he brightens the night sky, adds contrast, and performs a bit of dehazing. From there, it is easy to adjust colors to taste.
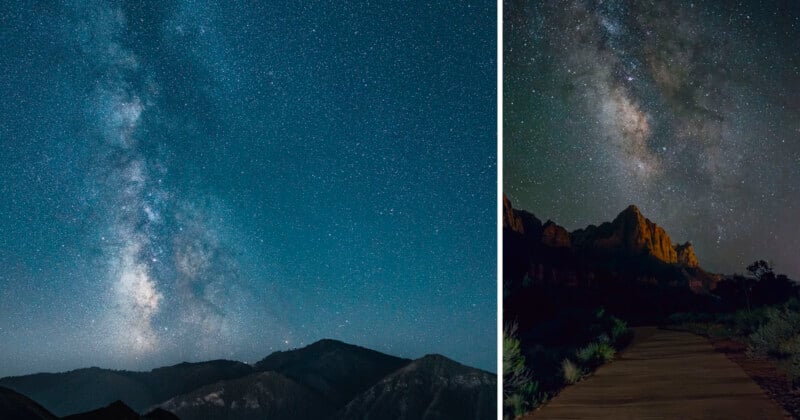
Zefi also captured a separate image for his foreground shot at a longer shutter speed, which allowed him to bring out additional shadow detail from the mountain and walkway in his frame. While optional for a great Milky Way photo, blending exposures is an excellent way to create even better pictures.
Photographers may also want to perform noise reduction, especially if they use a camera that is not quite as good at high ISO settings or shot with a relatively slow lens. PetaPixel has a detailed comparison of all the available noise reduction apps for astrophotography.
While Milky Way photography may seem overly complex or daunting, it is very approachable for photographers of all skill levels when taken one step at a time.