How to Convert a Polaroid Big Shot Camera to Shoot Instax Instant Film
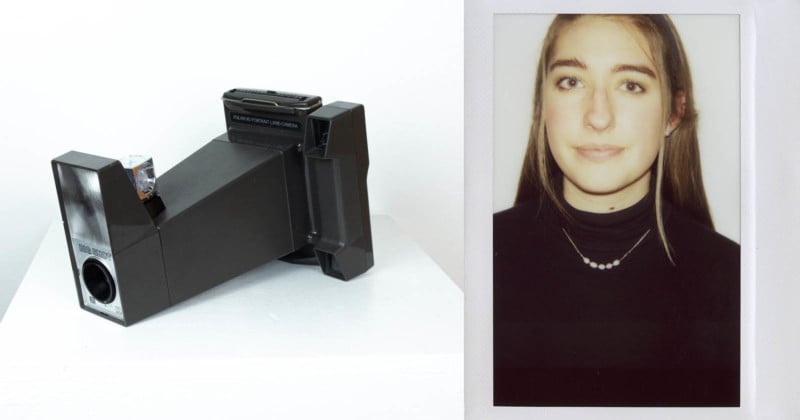
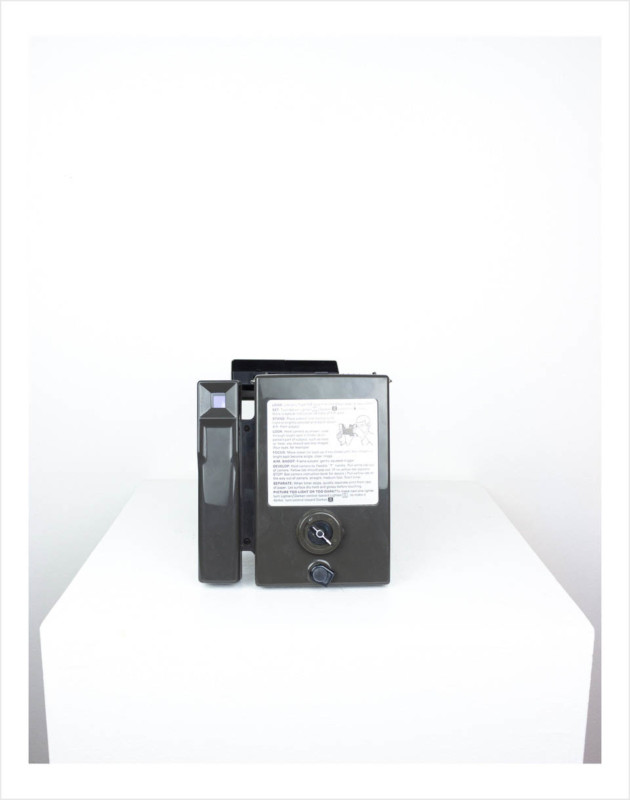
Released in 1971, the Polaroid Big Shot was a funky, green plastic camera that was built for one thing: portraits. The plastic behemoth is simply designed, using a fixed focus 200mm, single-element plastic meniscus lens.
The shutter speed is a static 1/52 second, combined with an adjustable aperture of f/56, f/36, or f/24. A small aperture and a rather slow shutter speed meant most “normally” lit photos would be underexposed, especially indoors, so most photos would require the use of a flash.
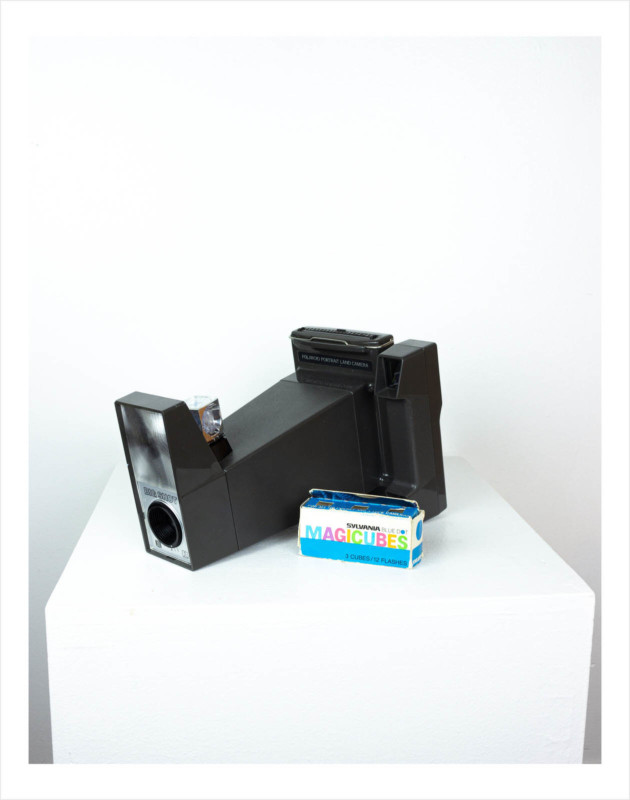
For the flash, the Big Shot uses Magicubes, which are explosive, four-use, disposable flash cubes. There is a large Fresnel diffuser for the flash that is built into the front of the camera, which softens shadows and makes the flash much less harsh. A favorite of Warhol, he used the camera to shoot dozens of portraits, often using the resulting Polaroids as the basis for his screen-printing art.
The Film and the Problem
The Big Shot consumes Type 100 Pack Film: a ten-shot, peel-apart instant film produced by Polaroid from the early 1960s until the mid-2000s. Fujifilm also produced a version called Fuji 100C, which was discontinued in 2016. This discontinuation marked the death of pack film and consequently, the cameras that used it.
Prices of the now-expired Fuji 100C are incredibly high, often fetching over $100 for a single pack. There is an effort by SuperSense, a small Austrian company, to produce and sell a Type 100 film called One Instant. Offered in color and black and white, this peel-apart film is priced at $50 for three single shot packs: a great product but still quite costly.
As mentioned earlier, the Big Shot uses disposable Magicubes for its flash. New old stock Magicubes can easily be found on eBay for cheap, but a reusable option would be preferred, as it’s likely to be less expensive.
So, to conclude, you can shoot expensive, expired Fuji 100c or new, similarly priced One Instant in your Big Shot, both averaging over $10 per shot. And when using a flash (most of the time shooting), new old stock Magicubes found on eBay, garage sales, your grandparent’s closet, etc. will have to suffice, potentially adding to the cost. This is all a little discouraging for someone who wants to experiment with the Big Shot, rather than have it collect dust on a display shelf.
All hope is not lost. Well, not for this at least.
An Idea
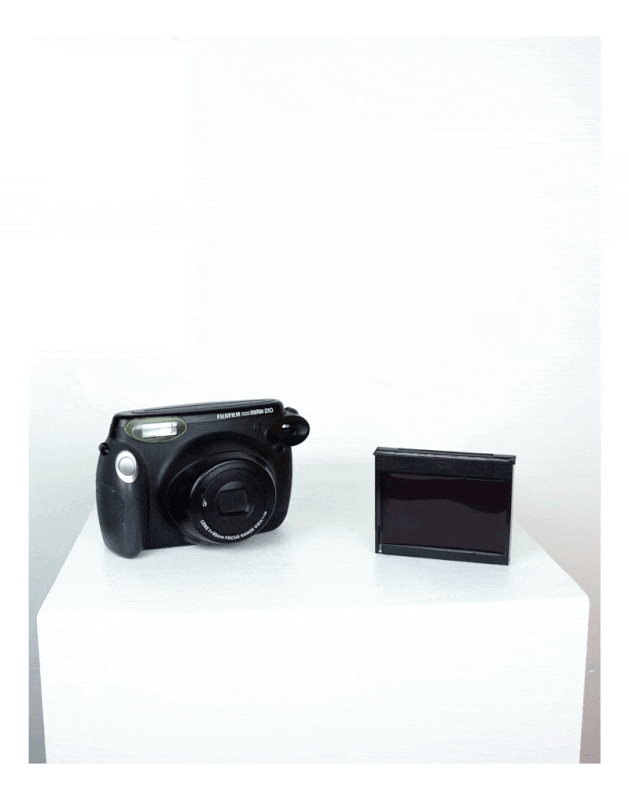
There are still many affordable and available instant films being manufactured currently. One of these films is Fuji Instax 210, used in Fuji’s popular Wide series cameras. It can be found for around $10 a pack containing 10 shots, relatively cheap… and encouraging!
Type 100 Pack Film has a size of 108mm x 83mm, while Fuji Instax 210 is 108mm x 86mm. See what I see? A measly three millimeters is all that’s stopping us from cramming our Instax 210 into the Big Shot! However, there are a few other things to consider before we cram our Big Shot full of Instax.
To start, film size just refers to the dimensions of the piece of film; it includes the dimensions for the chem pack and film border, not just the size of the exposure. Nor does this dimension include the size of the plastic housing the film is held in. Moreover, Instax is 800 ISO, much faster than typical Type 100 packfilm, which was commonly 100 ISO.
Unfortunately, unlike Type 100 packfilm, Instax doesn’t produce a negative, only a positive. There are plenty of other differences like color, chemistry, etc. but those are inconsequential for our purposes.
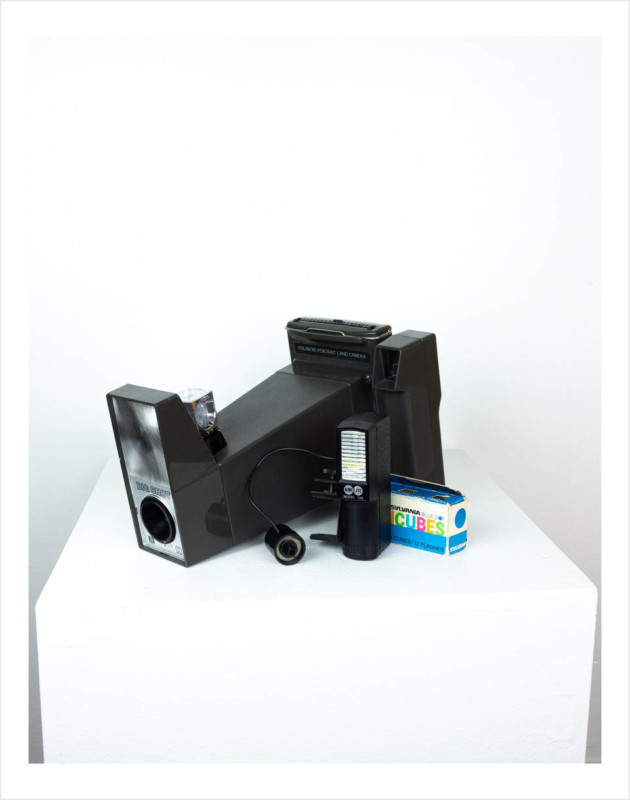
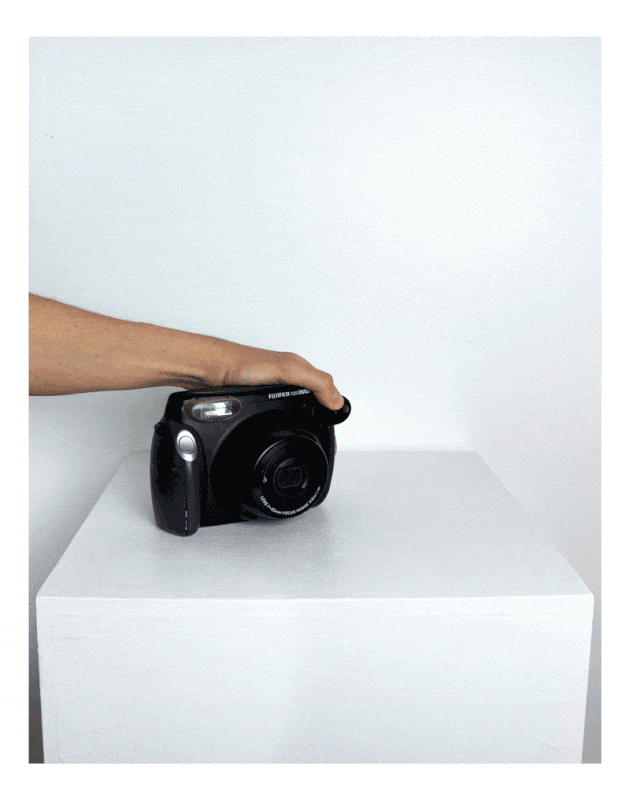
Regarding the Magicubes/flash, various electronic flash conversions were sold at the same time as Magicubes. These are just like any other basic camera flash; however, their trigger is designed to fit a Magicube mount. One of these conversions is called the Acme-Lite 138, which uses standard AA batteries, which are much cheaper and easier to find than Magicubes. I purchased one on eBay for $15, but there are many other models that accomplish the same thing, all of which can be found online for not very much money.
Potential Solutions and Design
So, we’ve found a current, inexpensive, instant film and a reusable flash, now what? Can we just stuff a pack of Instax 210 in the back of the Big Shot and call it a day? Well, although a bit brutish, it does work.
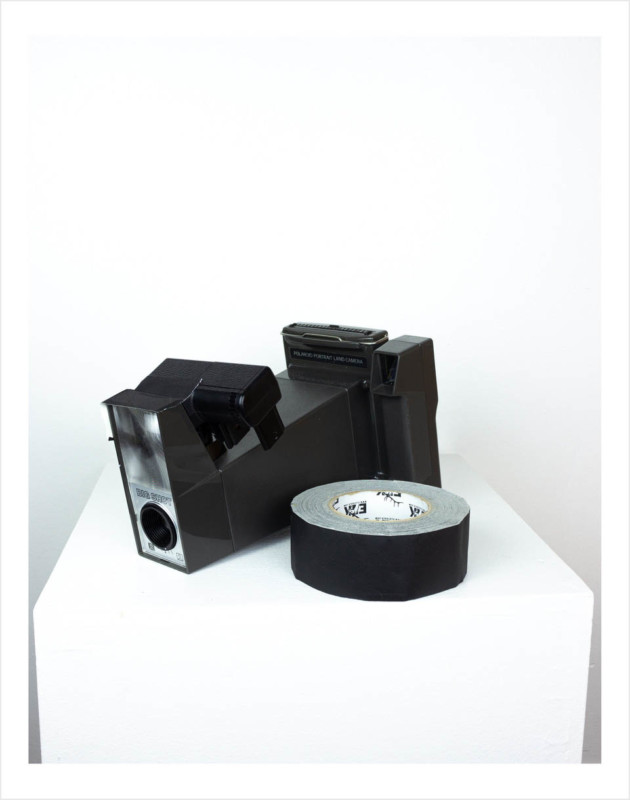
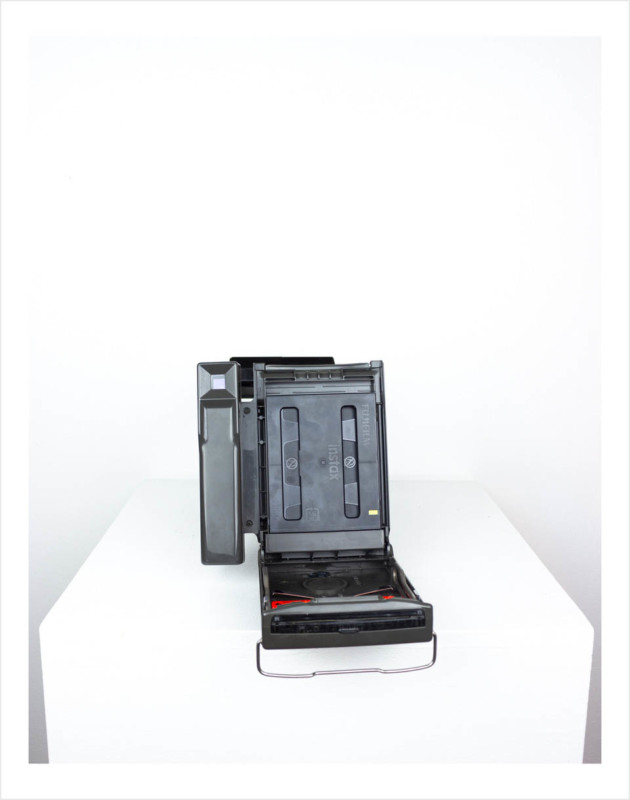
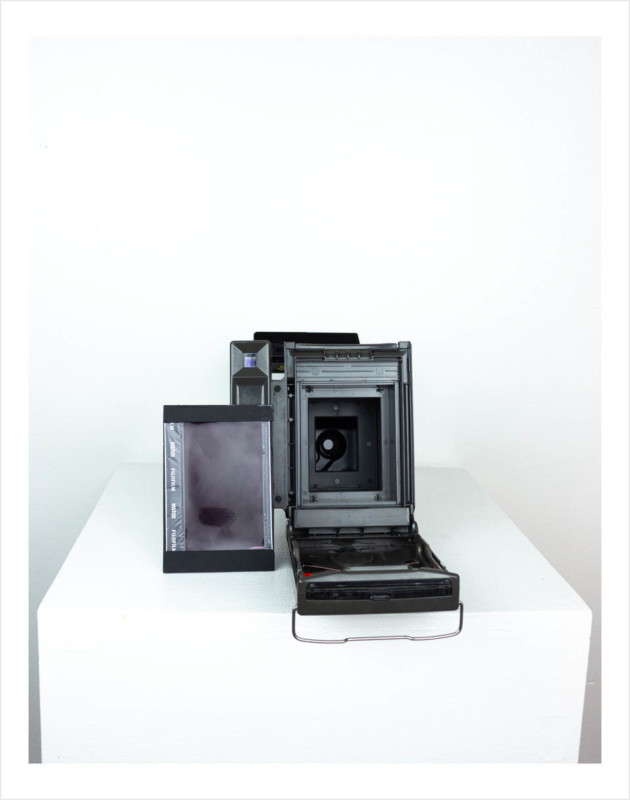
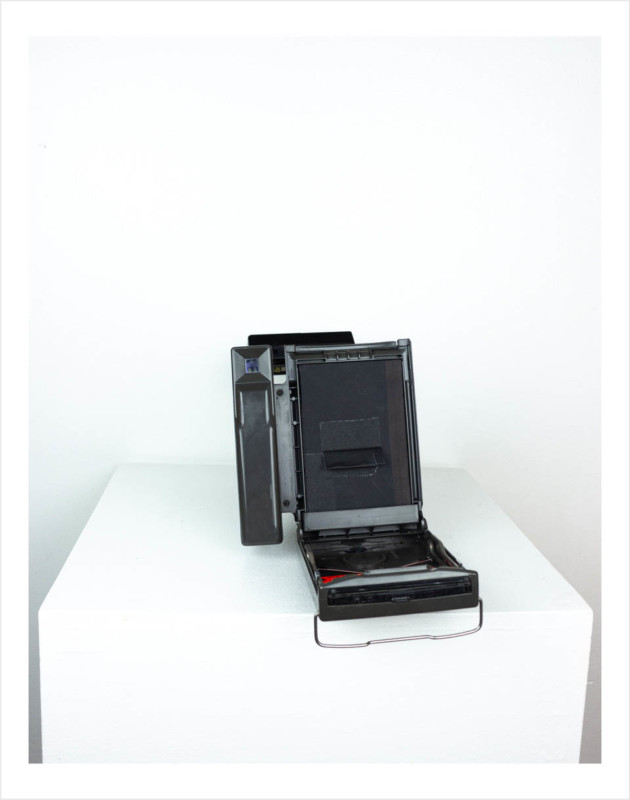
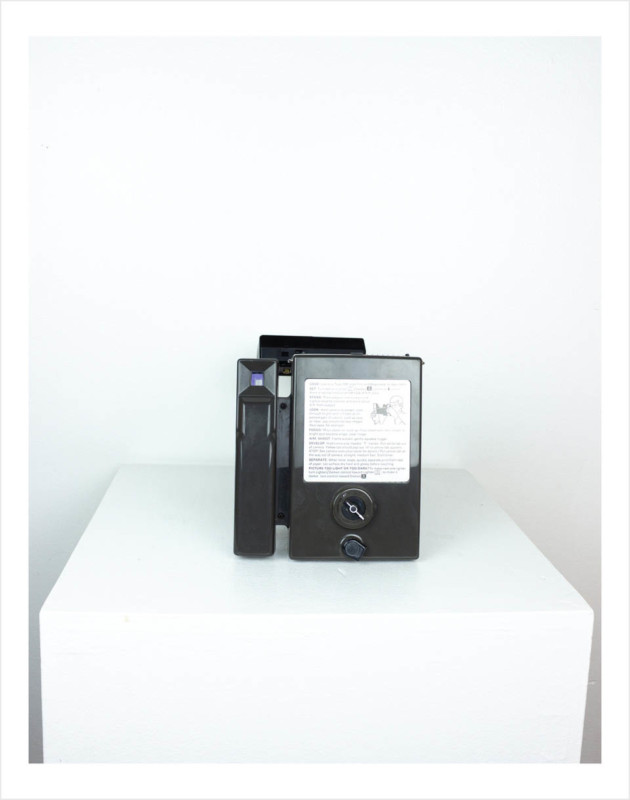
A pack of Instax with its plastic housing is just slightly larger than a pack of Type 100, so it won’t sit perfectly, making closing the back cover a challenge. I did manage to take a few photos using the following method: The Big Shot and Instax are brought into a darkroom or a darkroom bag. Removing the Instax from its protective baggie, the sheet of plastic in front of the first slide of film is then removed.
The Instax is then loaded into the Big Shot, with the film facing the exposure area and centering it as much as possible. The rear door is closed, but it requires a bit of force since the Instax pack is a bit larger than Type 100. Once closed and removed from the darkroom/darkroom bag the Big Shot is ready to take a photo!
After the photo is taken, the Big Shot is brought back into the darkroom/darkroom bag to remove the Instax film pack. The Instax can now be loaded into any Fuji Wide instant camera. Once the Fuji Wide is loaded it can be removed from the darkroom/darkroom bag, the lens covered, and then a photo is taken. Covering the lens makes sure the film will not be re-exposed, but it does send it through the rollers of the camera, bursting the chem pack, thus developing the shot.
This sounds like a long process, but I was able to transfer film between the Big Shot and Fuji Wide in under a minute. The results I obtained using this method were good, but I noticed a black bar on the top of the photos. This is from the film not being lined up exactly with the exposure area.
Although this method works, if I continued to do this, likely the rear hinge on the rear door of the Big Shot would break from the stress of the larger Instax pack pushing on it. Also, I couldn’t remedy the black bar caused by the Instax film not being perfectly lined up with the exposure area.
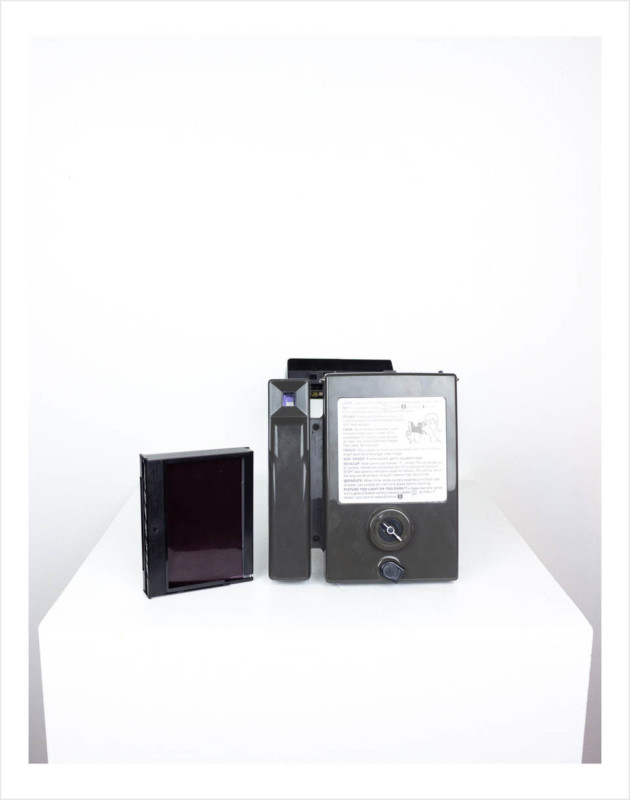
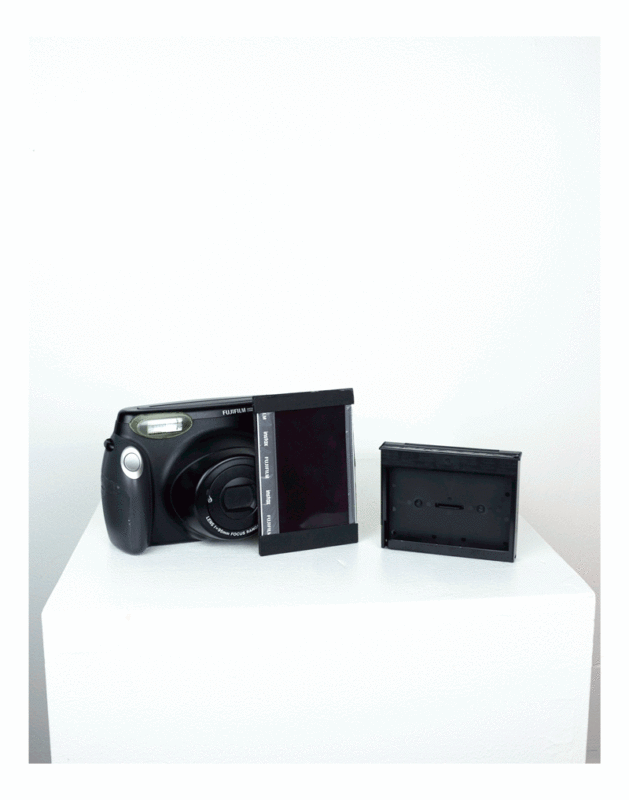
Building the Film Mount
Because of these issues listed previously, I thought shooting a single piece of Instax film instead of placing the entire pack of Instax into the Big Shot would work much better. However, if a single piece of Instax film is placed in the exposure area, it’s bound to move and fall out of place, as there is nothing holding it. What’s needed is a film holder, so let’s make one.
Tools and Supplies
- Printed film holder template
- Chipboard/thin cardboard
- Scissors/Exacto knife
- Glue/glue stick
- (Optional) Black permanent marker
The film holder is rather simple, and it can be made from a variety of materials. I used black chipboard that’s approximately 1/16” (1.5mm) thick but any thin cardboard with a similar thickness will do (think cereal box). The template provided can be printed on standard 8.5 x 11 paper, pasted/attached to the cardboard, then the pieces cut out and glued accordingly.
When printing out the template, make sure to print with no margins, so the dimensions are accurate. The black permanent marker can be used to color the cardboard/film holder black so it absorbs light, not necessary but it may improve results.

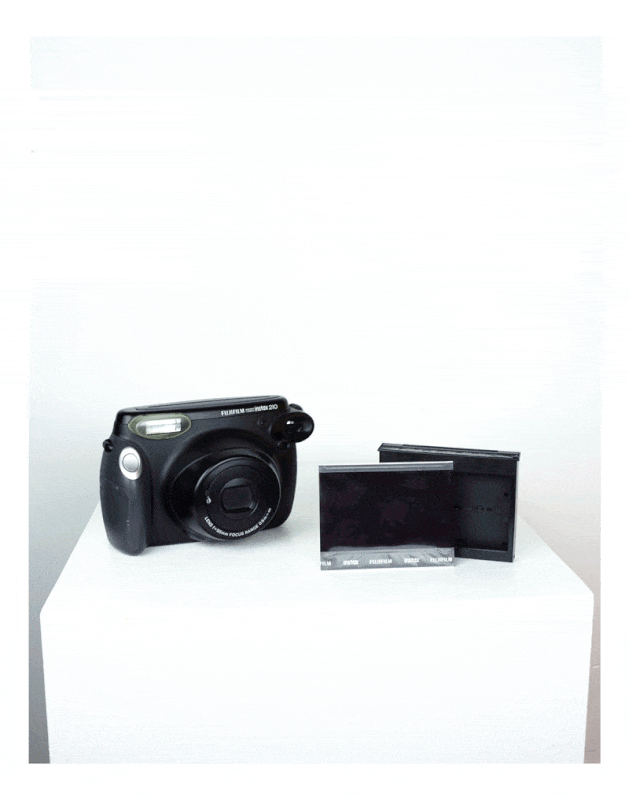
Using the Film Holder
So, we’ve made our film holder, now to use it! Forgive me to those who thought this would be as simple as loading, shooting, and voila, a nice instant photo. The process is much more of, well, a process and unfortunately requires a few more steps than the previous method but is very similar, so apologies for the restatements.
Like before, the Big Shot, Fuji Wide, Instax, and film holder are brought into a darkroom or a darkroom bag. If using a new pack of Instax, it is removed from its protective baggie, the sheet of plastic in front of the first slide of film is then removed and a slide of film is then withdrawn. Although tricky, withdrawing the film by gently pressing on it with both thumbs and sliding it up and out of the slot at the top seems to be the best method (make sure your hands are clean!).
The piece of film is then placed in the film holder, making sure the exposure is facing out. The holder is then placed into the Big Shot and then closed. The pack of Instax can be loaded in the Fuji Wide for safekeeping, so as to not expose the film. Once closed and removed from the darkroom/darkroom bag the Big Shot is ready to take a photo.
After the photo is taken, the Big Shot is brought back into the darkroom/darkroom bag to remove the film holder. The film is then removed from the film holder and slid back into the original pack of Instax, making sure the chem pack is facing up. The Instax can now be loaded into any Fuji Wide instant camera. Once the Fuji Wide is loaded it can be removed from the darkroom/darkroom bag, the lens covered, and then a photo is taken.
Phew! As I said a lot of repetition and many a step. However, the included images should hopefully illustrate this better than my word salad can.

Tips For Shooting
The use of a dedicated light meter or meter app is handy when shooting with the Big Shot, although you don’t have much control. As stated previously, Instax is 800 ISO, the camera’s shutter speed is a fixed 1/52 second, and the aperture is only adjustable to f/56, f/36, or f/24.
When shooting indoors, a flash is almost always necessary. Daylight shots with no flash are certainly possible, and I’ve included some below. Speaking of flash, since the Acmelite is much larger than a Magicube, I had to adhere it to the camera using gaffers’ tape, not elegant, but very functional.
Finale (Finally…)
I’ve included some photos taken using both “techniques” described. Although a little involved, once you’ve got the hang of it, the process isn’t too bad, and the results are quite unique, especially for instant photography.
I’m sure this process can be applied to other cameras that use Type 100, although I haven’t tried it on anything other than the Big Shot. Hopefully this encourages some out there to experiment with these methods and get some interesting photos on a Big Shot or other “obsolete” cameras.
Created using the film holder and Acme-Lite 138 (no black bars):


Created without the film holder and with Magicubes (visible black bars):


Created in daylight and without the film holder (semi-visible black bars):


About the author: Nicholas Morganti is a photographer based in Buffalo who specializes in landscape, architectural, portrait, and product photography. You can find more of his work on his website and Instagram. This article was also published here.