What is Split Color Lighting, and How Do You Use It?

After I published a story on sunglasses for photographers, I got a ton of emails asking how I lit the series. So, while on the road for a recent photo shoot, I took some time at my AirBNB and wrote out how I approach what is called “split color lighting.”
What is Split Color Lighting?
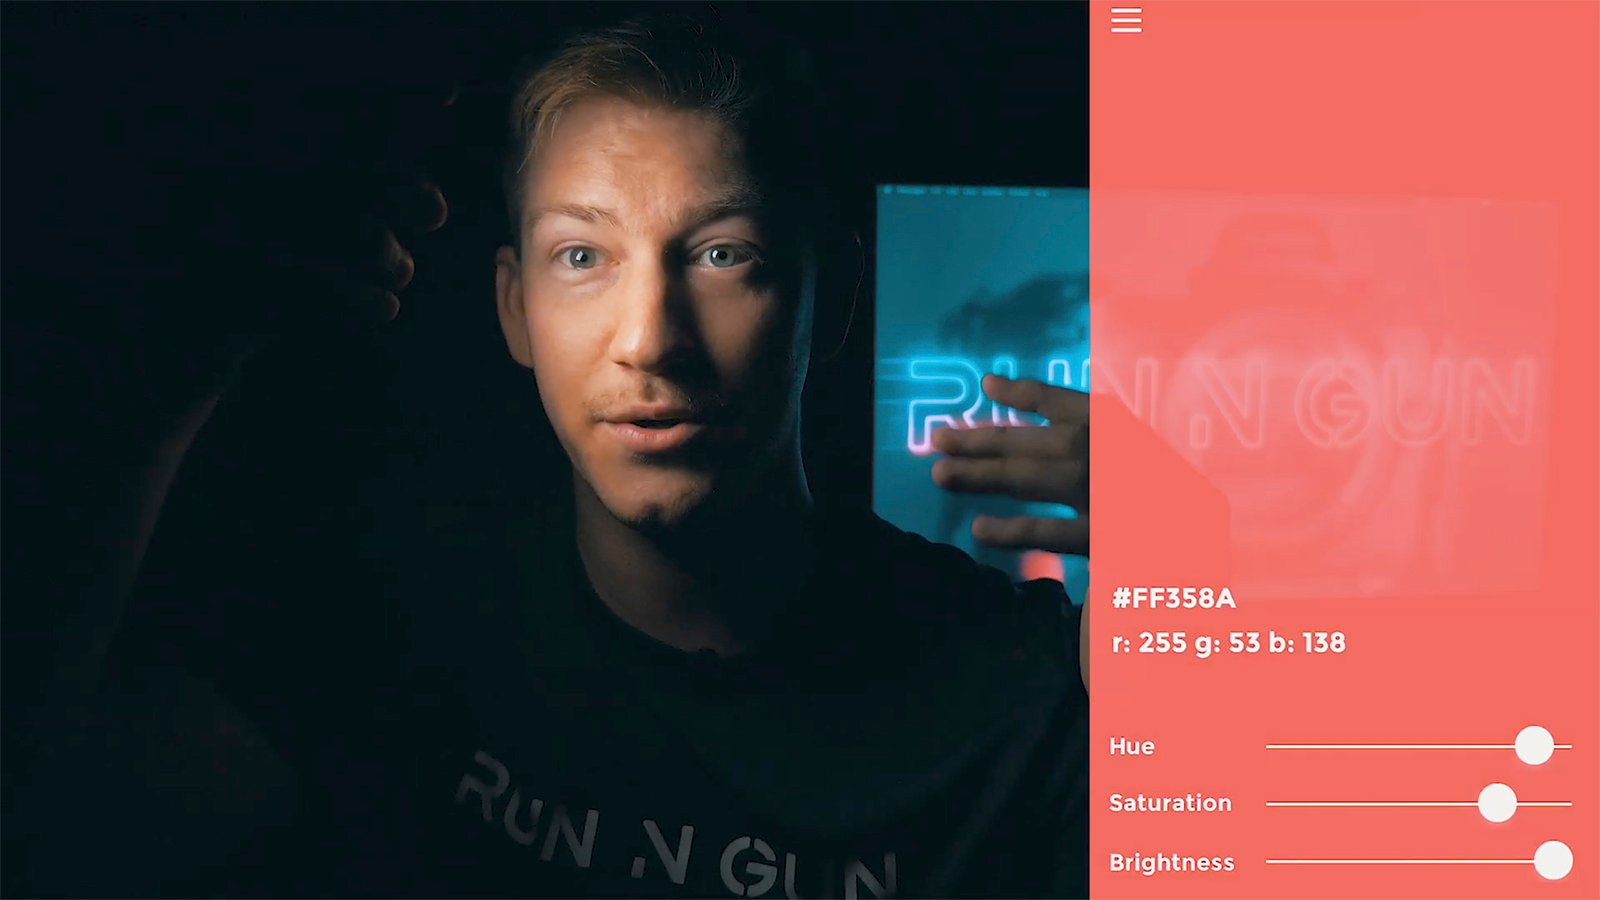
Split color lighting is a lighting technique where you approach a subject’s form with color in your tonal ranges. For some subjects, you will determine your baseline color temperature on the key light, while with other shots you might use complementary colors and wouldn’t have to worry about the skin tone at all.
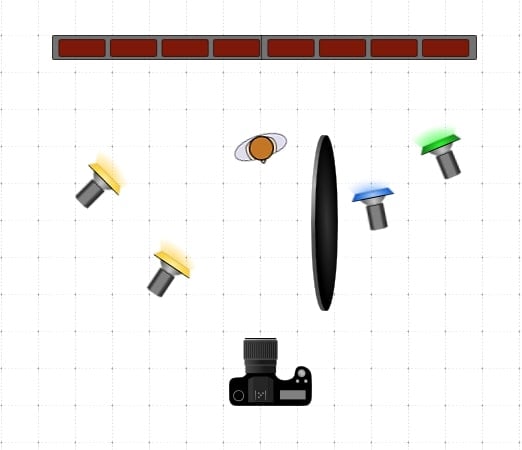
The easiest split color lighting setup I recommend uses three lights: one key (or main) light and two kickers (a term used to define sidelights, or a complimenting light to the key light) that are outfitted with color gels. If your key light stays neutral, you can essentially go with any color you want for the other two lights to achieve the split color effect.
How to Use Split Color Lighting
As the depth of your lighting grows, you will want to go with more lights and gels to create the same feeling for the shot. However, you will need to make sure that the overall color palette remains balanced. The way that I approach this is easier to describe in steps:
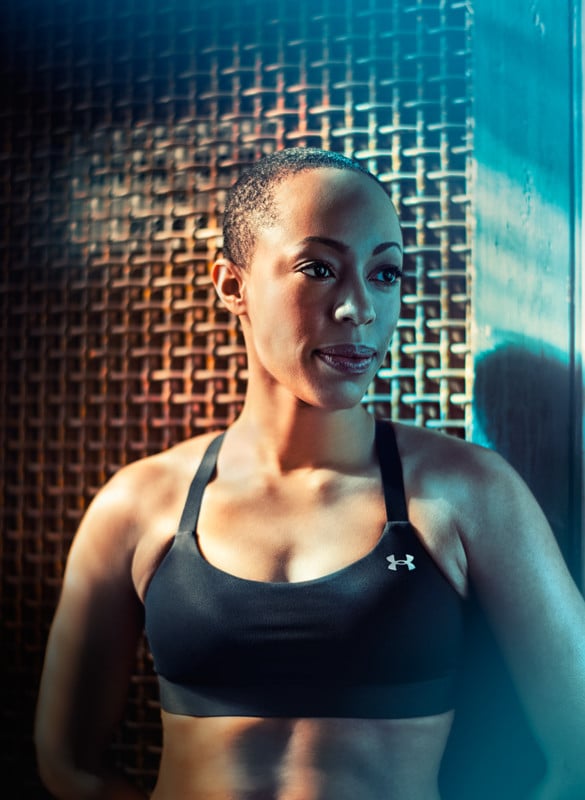
Step 1: Dial in the skin tone of your subject with reference to your key light. Keep in mind that all skin reflects light differently. I find darker skin is a lot easier to light since the dynamic range (especially if the subject is sweating) is wider and creates more data that can be captured by a camera’s sensor.
Step 2: Determine what parts of their body will be hit by the lights that will have gels on them. You can do this by taking a few test shots. Make sure that where there is crossover in lights, there are no distracting color combinations. The place where this is usually trickiest is from lights that are behind the subject and pointed slightly towards the camera. You may find that one of the lights tries to sneak its way onto your subject’s nose. A good way to mitigate this is to flag (or block off) the lights so that they do not hit that portion of the subject’s face.

Step 3: Determine what, if any, of your background will be impacted by the color cast from the kicker lights. When shooting portraits, this usually isn’t too difficult, but for automotive photography it can get tricky. Getting chrome to be color neutral and look natural at the same time is very difficult.
Step 4: Get your camera’s exposure and lights’ power coordinated and properly set by using a light meter. Yes, a light meter is still extremely important in order to get the overall ratio of lights in your scene to fit within the sweet spot of your sensor.
Step 5: Finally, set your camera’s white balance manually, set to the color balance of the key light. Split color lighting with Auto White Balance on is a recipe for disaster and frustration.
Go Slow and Practice
Like everything in photography, dialing in a split color lighting scheme takes practice. Also, know that not every cool light and color ratio will fit a particular subject. In order to get to a level where you can produce an ad campaign with it, you will need to make sure you and whatever crew you have on set knows your approach. For example, with the proper communication and planning, you won’t have a problem where your wardrobe stylist dresses the subject in conflicting colors or patterns that will make life hard for you in post-production.
Another detail to think about is how you will approach your subject’s hair for the piece you are creating. If there is no plan for text to appear with the final photo or you don’t have a lot of post-production editing in the works, you can be pretty loose with the movement and hair. If those things are in play, however, you’re going to want to pay special attention and minimize the motion or you’re going to end up with a lot more work in editing.
In many ways, it helps to approach a split lighting photo shoot similar to how a filmmaker looks at video production, even though we as photographers have a little more of a safety net to catch us if our lighting isn’t dialed-in perfectly.
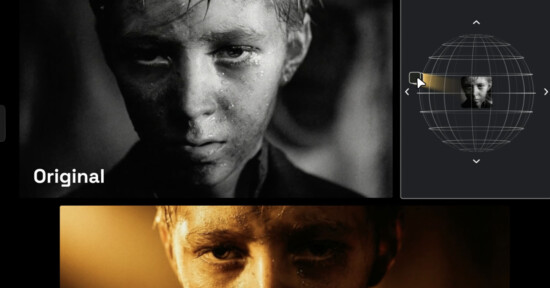
With boldly saturated color on your subject, if you do decide to change a final look of a split color lit photo dramatically, you will have to go into Photoshop and repaint the skin color by hand (a task not for the faint of heart). If you were to get the request from a client or want to try this approach on a paid campaign and haven’t yet gotten comfortable with the process, I recommend not going with more than one gel, and keep it low in density. By doing this, you will have a look that can be punched up with a saturation slider in editing, but also dialed with a hue correction if the color doesn’t compliment perfectly.
When it comes to equipment and finding the right gels, you’re in luck, as there are many cheap options on Amazon to teach yourself. I personally think that the packs with more colors and less tonal range of a specific color will help you experiment more, as it is exciting to see a subject differ when lit by a red gel versus a green one. On a real production, tonal range will be important in the orange gels. You can set the color tone for skin with the key light and a 1/8 CTO, and then contrast it with a 3/4 CTO and full CTB for the color split. Most studios will have Rosco Cinegels to rent along with grip equipment, so think of this practice as helping you to be more comfortable with your environment on set.
Whether you’re a commercial photographer or just a hobbyist who wants to see what adding gels to lights can do to a photograph, there is some good fun to be had in trying it out. Like the great Bob Ross said, “We don’t make mistakes. We just have happy accidents.” Go out and have some happy accidents in your photos, who knows, you may find your new favorite thing about photography.
About the author: Blair Bunting is a Phoenix commercial photographer. You can see more of his work on his website, blog, Facebook, and Instagram. This story was also published here.