How Infrared Photography Can Create Stunning Sci-Fi Night Photos
Infrared photography is mostly used to create alternative and dreamy landscape pictures during bright days, giving nature specific hues from clear white to vivid yellow or red. But this technique has also a high potential in urban photography too, moreover at night.
In this article, I will show you how to create stunning futuristic pictures of cityscape at night, revealing colors from science fiction movies like The Matrix and TRON: Legacy.
Step 1: Use the Right Gear
Infrared photography requires specific gear such as a full spectrum camera (which sensor has been modified to bring back its initial sensitivity from ultraviolet to infrared light), an infrared filter, and a compatible lens. When it comes to shooting cityscape at night, a tripod is also required to deal with long exposure.
Read more: An Introduction to Digital Infrared Photography
At this step, my advice is to choose an infrared filter with a low cut-off wavelength, like 550nm or 595nm. This way, the exposure time will not be too long (at night, infrared emission is only due to urban light and is far less important than IR sun emission) and you will observe a large range of colors in the different lights caught.
Personally, I use a full spectrum Canon RP, a Laowa 15mm f/4.5 shift, and a Kolari Vision 550nm filter in a drop-in mount. This association allows me to create large panoramas without any hotspot and with a reduced amount of flare.
Step 2: Find the Right Spots
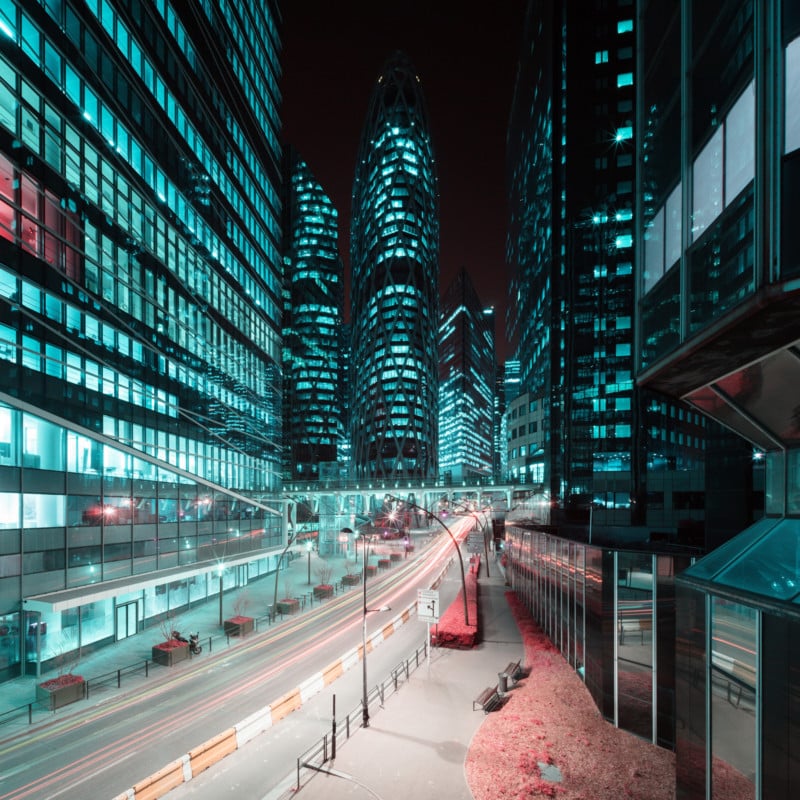
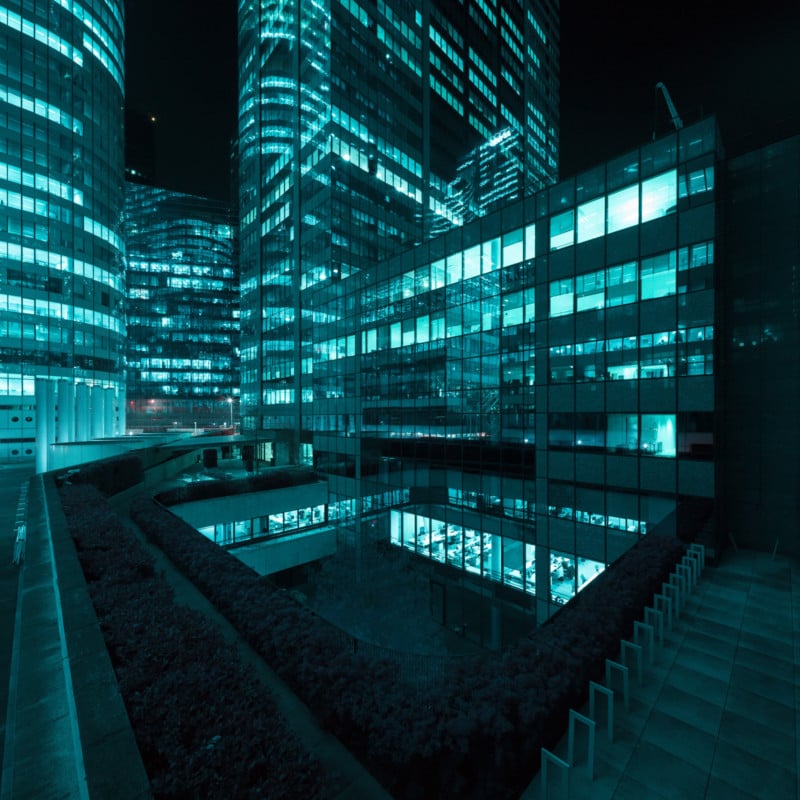
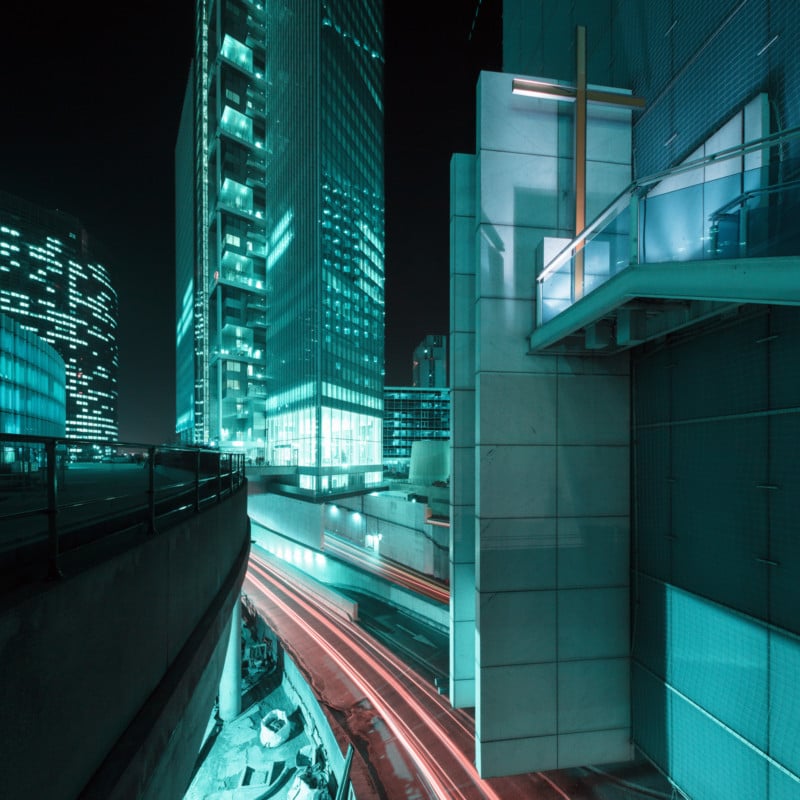
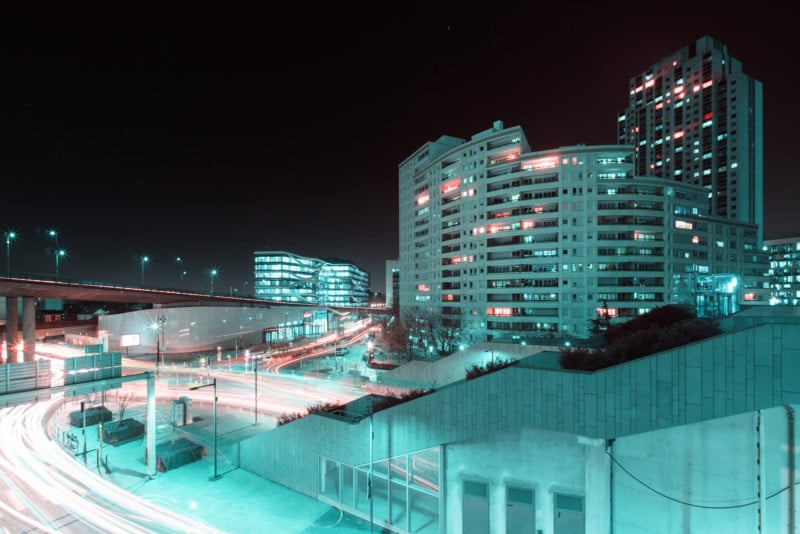
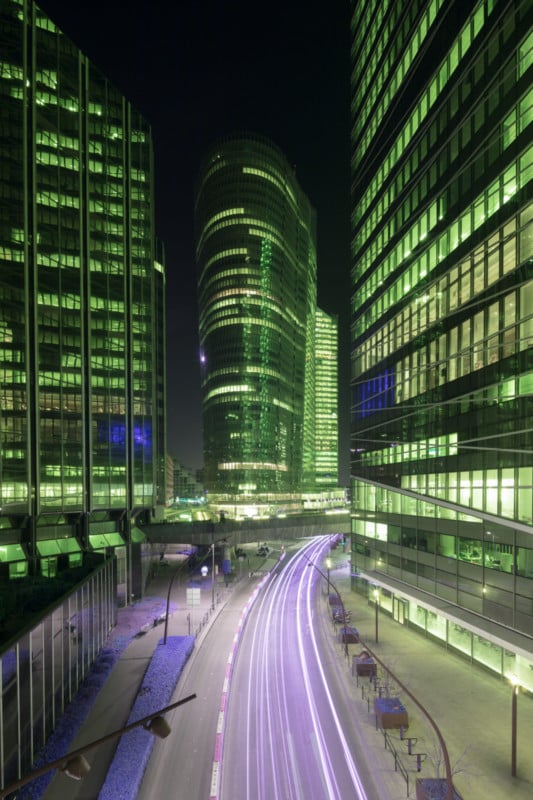
This step is not specific to infrared photography, but if you are looking for futuristic pictures, you will need futuristic places. Modern financial hubs are full of buildings, headquarters, and offices made of glass and steel with impressive design. At night, they emit a lot of light and their look totally changes.

Do not hesitate to visit these places during the day: it will be easier for you to find interesting points of view and to test compositions that you will reproduce at night.
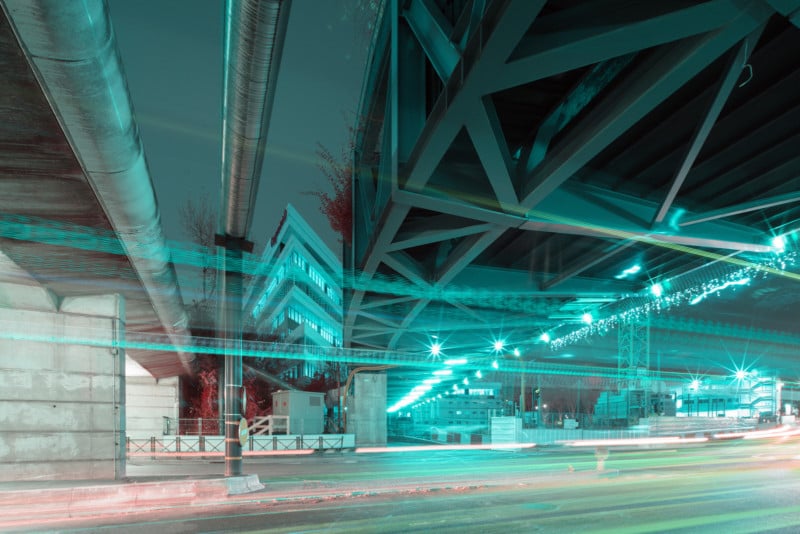
As infrared light will come from urban lights, road and subway networks are also great subjects to integrate into your compositions: at night, long exposures will create colored light lines in them.
Step 3: Apply the Right Post-Processing
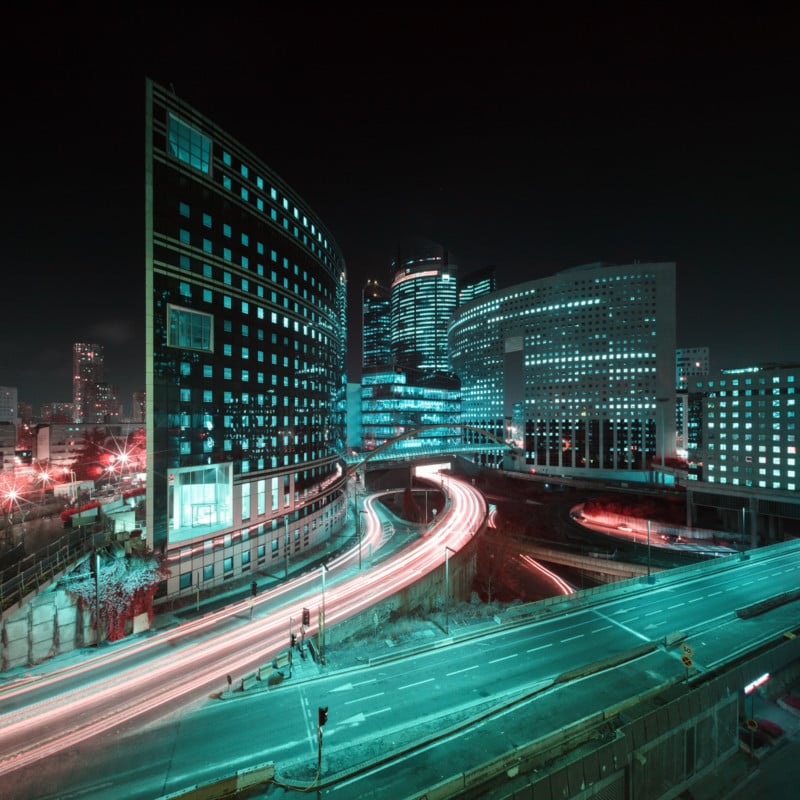
Magic comes at this step. Once you have fixed the white balance of your camera with a gray chart, RAW files out of the camera will look like that (again, with a 550nm IR filter):
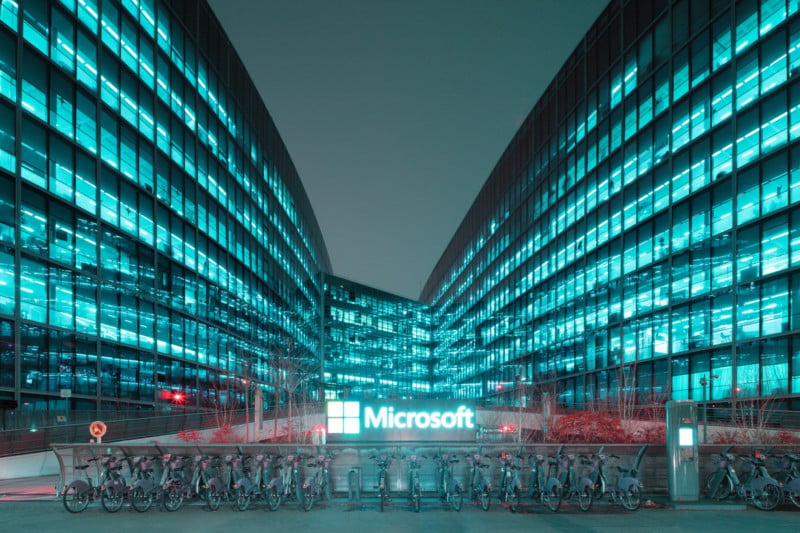
As for any other infrared files, a channel mixer is necessary to put colors back in their right places. With a 550nm filter, the channel mixer goes from R-G-B to B-R-G. You will then obtain the following colors:

Now you are in TRON!
Conclusion: Time to Enter the Matrix
If you are already aware of infrared photography and want to extend its potential, it’s time to go out at night to enjoy urban light. Long winter nights are the perfect moment to practice infrared night photography. Here is the result of my last photo walk.