Fuji GFX 100S: I Found the Landscape Photography Camera of My Dreams
I have to say that I absolutely love when Fujifilm gives me a project. I tend to make some of my best work when I am under a deadline. And of course, I’m incredibly honored that I am one of the few that they trusted with this beast pre-launch.
Full disclosure: I am an Official Fujifilm X-Photographer. I pretty much bleed Fujifilm so this is as biased as they come. But you know what? I found Fujifilm before they ever found me, and I’ll be shooting them long after they kick me out of the cool kids club.
I actually had more time to plan exactly what I wanted to do for this, because I got word that the Fujifilm GFX 100S (or “Bob” as we called it) would be coming way back in October. Knowing that winter isn’t the most reliable season here in Michigan, I figured that I was going to have to “go” somewhere. But even amidst the 2.5 weeks of permacloud we experienced, the sun peeked out a couple of times and I was able to grab a few shots with the beast to get acclimated to it.
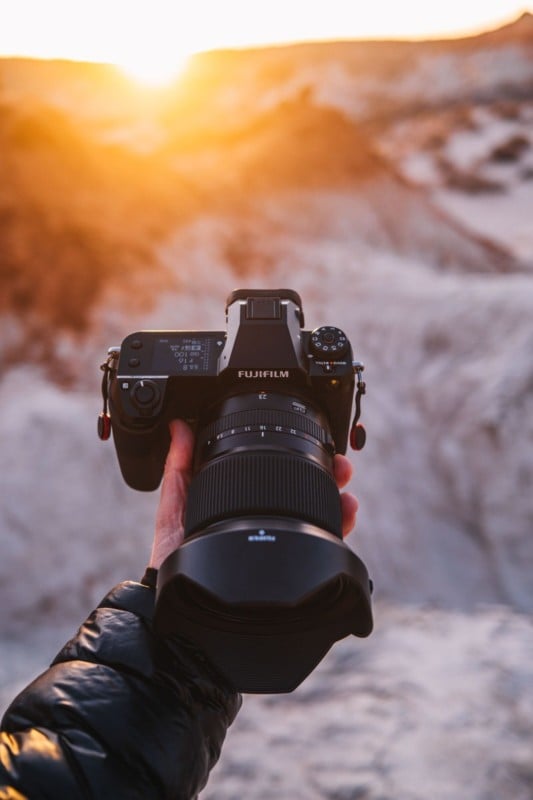
One of the first things I noticed when dealing with this camera was the new PASM dial. I will admit, I was hesitant at first because it does away with the ISO and SS dials I have grown to love so much, much like the bigger GFX100. But after having time to shoot with both cameras, it’s still got that traditional FUJIFILM feel and ergonomics. You can even throw the digital dials up onto the top display to make you feel more at home.
What I am MOST excited about is the expansion of the Custom Modes on this camera. No longer are you only tied to JPEG settings. You can program literally anything – Drive mode, metering, selfie-timer, exposure settings – to a custom setting and give it a name. This is a HUGE benefit for the way that I shoot. Any time that I can save from having to dig through menus to turn settings on and off is a big win. A couple of examples of how I set this camera up:
C1 – “Run and gun”: ISO100 / Aperture Priority / Multi Metering / Provia Film Simulation -2S -2H +2 Sharpness
C2 – Astrophotography: ISO800 / Manual Mode / 10″ Shutter Speed / Multi Metering / Velvia Film Simulation -2S +1H / Long exposure NR & IBIS – Off / 2 sec selfie timer- On
C3 – Pixel Shift: ISO100 / Drive – Pixel Shift / Manual Mode / Multi Metering / Provia Film Simulation -2S -2H +2 Sharpness / 2 sec selfie timer- On
C4 – Bracketing: ISO100 / Drive – Exposure Bracket 3 Frames, 2 Steps / Spot Metering / Manual Mode / Classic Chrome Film Simulation -2S -2H +2 Sharpness
C5 – Ansel: ISO100 / Manual Mode / Multi Metering / Acros + R Film Simulation +3S +1H +2 Sharpness
This is extremely awesome for photographers who shoot a lot of different kinds of things and want to be able to switch quickly between their favorite settings. I imagine if I was still shooting with strobes a lot, I would have a custom setting dedicated to strobes where Preview Exposure and White Balance are switched off, amongst other things.
One of the biggest reasons I love the Fujifilm cameras so much is that they get out of your way when you are shooting, and this is further proof that they are dedicated to the continued evolution of how their cameras are used to further benefit us in the field.

Now back to the fact that I needed to travel somewhere but I was nervous about getting on a plane. I talked with a couple of friends who have had to travel for work and that gave me the reassurance that I needed. After thinking about it and looking at the different Covid restrictions in place for different states, I settled on Arizona – because well obviously when you need somewhere to go during the winter, you pick the desert. So I cleared a 4-day trip with my wife and got to planning.
As far as gear was concerned, I knew that I wanted to take at least 2 X Series cameras to use to shoot video, and photos of the GFX100S itself. I was assigned 3 GF lenses for this trip: the Fujifilm GF 23mm f/4 R LM WR, the Fujifilm GF 30mm f/3.5 R WR Lens, and the Fujifilm GF 120mm f/4 Macro R Lm OIS WR which was a pretty good assortment from a focal length standpoint.
Of the 3 I had the least amount of experience with the GF120, but as much as I love to shoot telephoto, I knew that I would grow to love it quite quickly being my only option of any significant length.
Day 1: Watson Lake
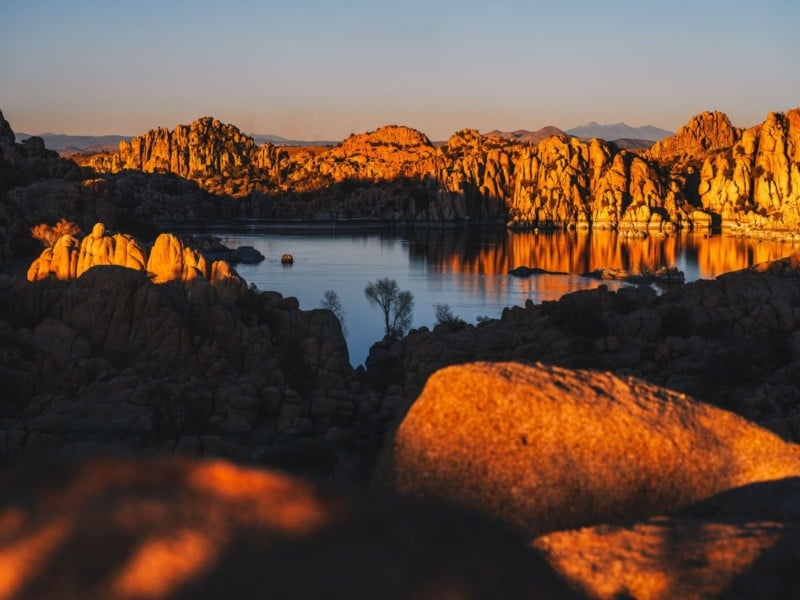
After a direct flight from DTW to PHX I hopped in my Subaru Outback rental car and started north toward Prescott. Destination #1 of the trip was going to be Watson Lake, a place I found in my research that looked pretty incredible and unique. I was due to arrive pretty early in the afternoon so I could shoot a little bit and decide whether or not that was going to be my sunset spot for the day.
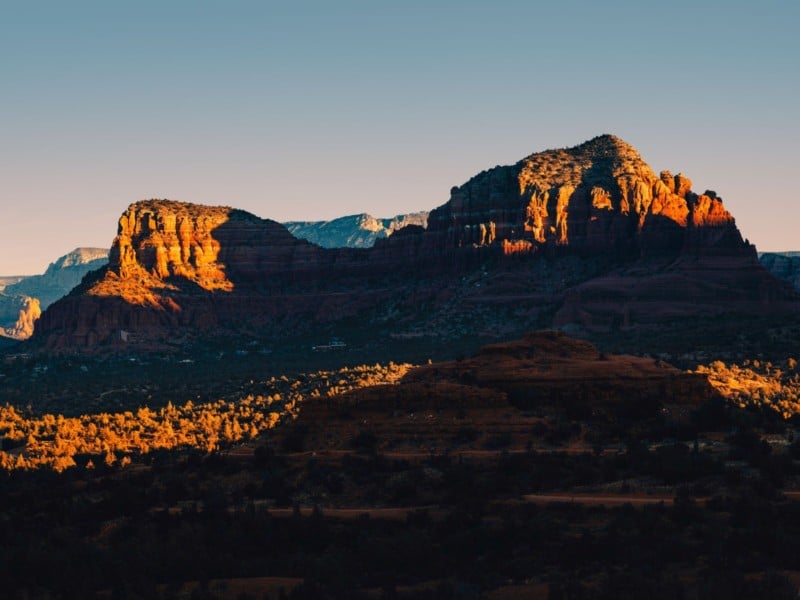
Sedona was only about an hour and a half from the lake, so I was giving myself plenty of options. But upon my arrival, it was abundantly clear just how vast and unique this place was, and I decided pretty quickly to stick around for the sunset. I spent about 2 hours walking around, climbing on rocks deciding on a spot to shoot the sunset.
I took to the GF120mm lens about as quickly as I expected to. I love shooting vast landscapes like this and compressing layers together. I feel like it gives you this massive sense of scale that you don’t quite always get when shooting wide.

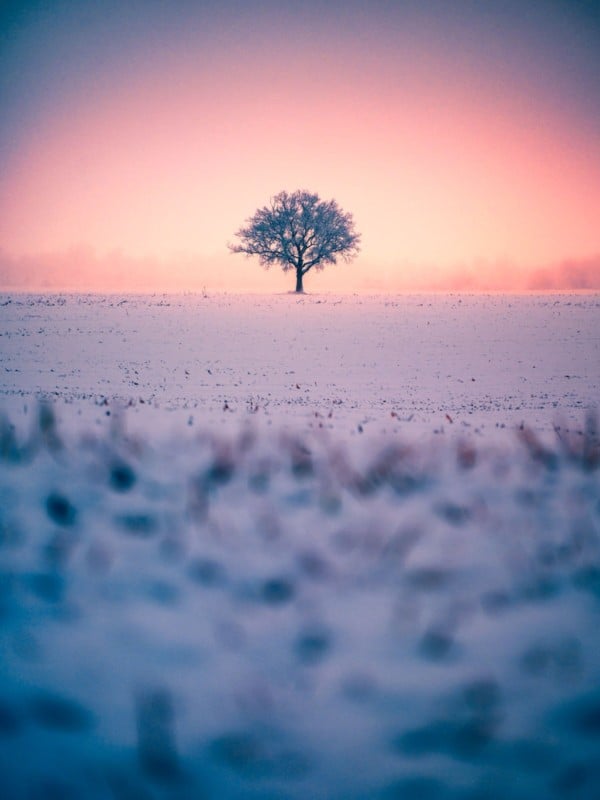
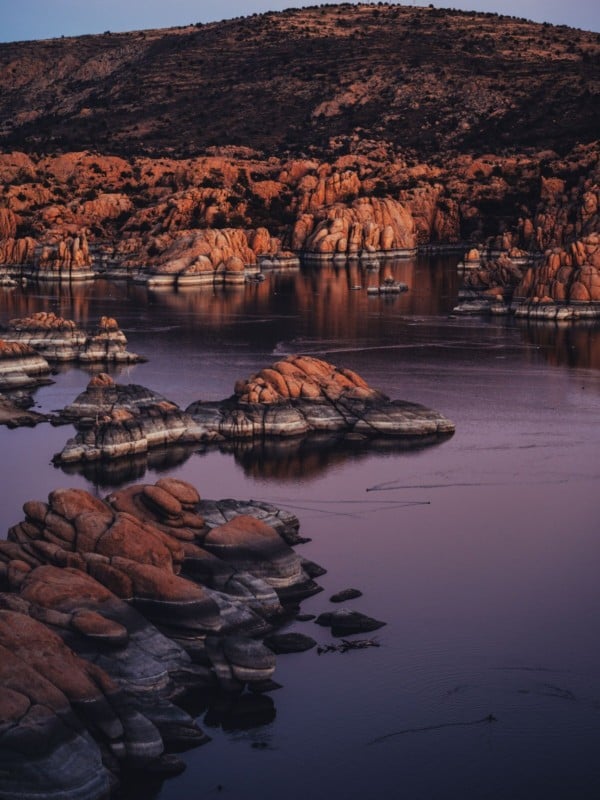
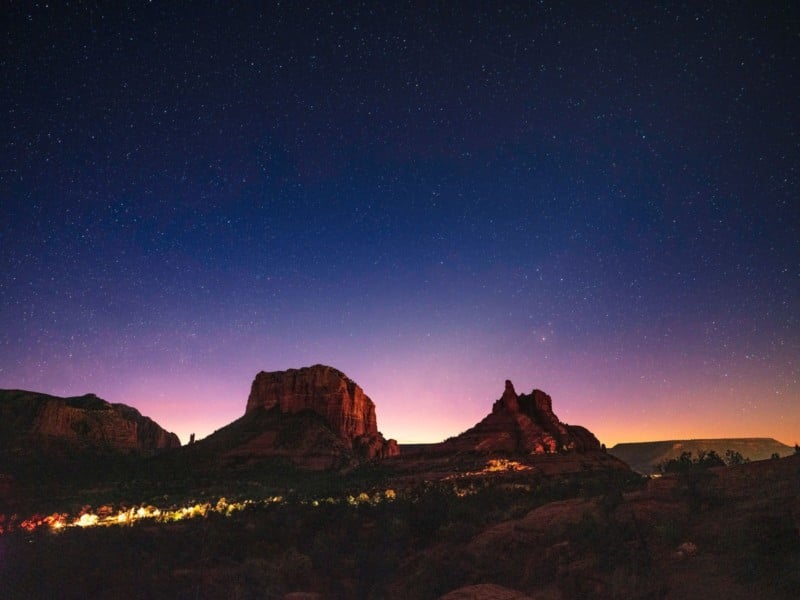
Once the amazing light ended, and the sun had set, I got this amazing pink glow from the horizon in the final moments of light, and it was just breathtaking to sit and experience. I knew that as long as there was no one that was going to kick me out of the park, I wanted to stay until after dark and attempt shooting some astro.
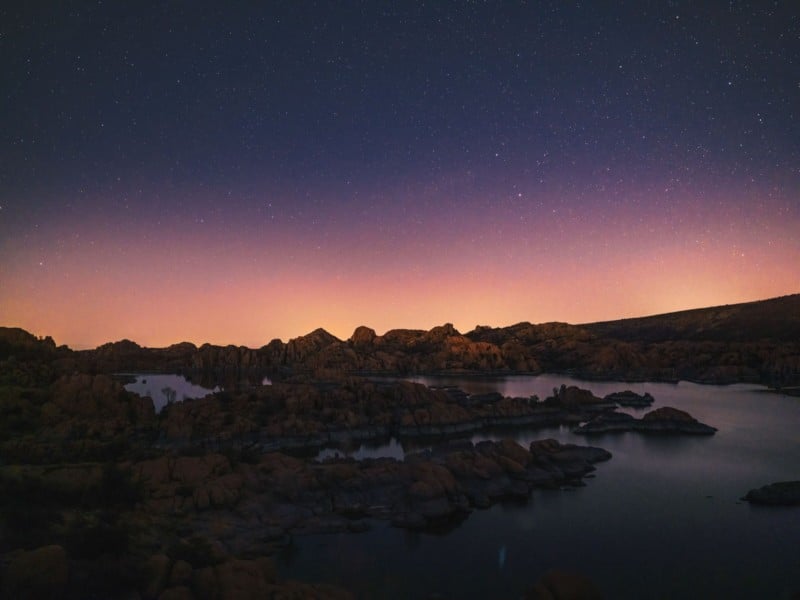
There was a fair amount of light pollution on the horizon, but overall I came away with a shot that I was happy with. The large sensor of the GFX100S makes shooting astro pretty interesting. The maximum time I could have my shutter open before the stars started to blur was 8-10 seconds on the GF30mm lens at f/3.5. That’s not really a huge amount of time, so I ended up having to bump the ISO a fair amount.
That particular shot was ISO8000. All things considered, I think it worked out pretty well. At this point, I decided I wanted to attempt at least one astro shot at almost every location that I visited. I packed up the car and headed to my hotel in Sedona for the night… stopping along the way to grab a $5 Hot-N-Ready from Little Caesars that ended up feeding me 3 out of the 4 days of this trip.
I had a really early 4am alarm, so I dumped my cards to my GNARBOX 2.0, charged batteries, and got as much sleep as I could.
Day 2: Sedona to White Pocket
4am comes really early. But I have had my fair amount of oversleeping on trips like these and you just end up really mad when you screw up your plan. Sacrificing sleep for a few days is doable in the grand scheme of life.
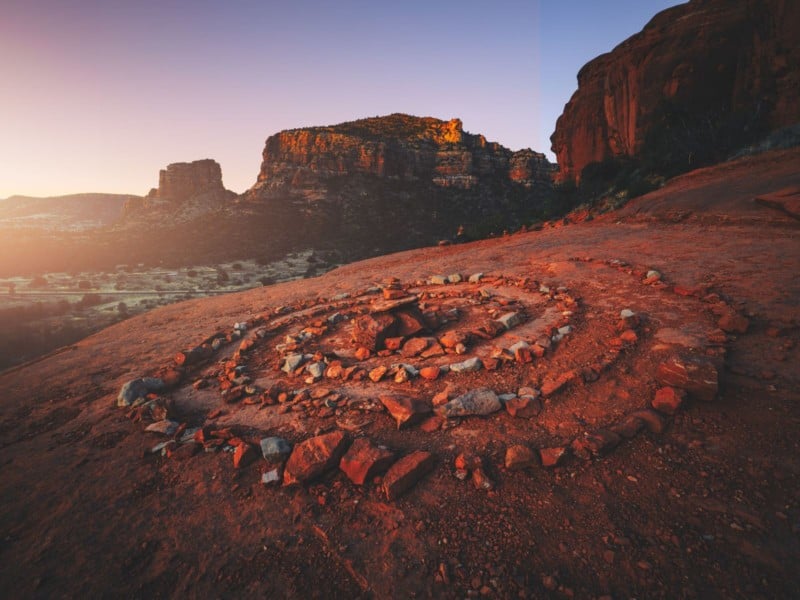
I decided that I was going to climb Bell Rock for sunrise so I could have a decent view of the surrounding Red Rocks of Sedona as the sun rose, but on my way there I noticed how clear it was and pulled off at nearby Yavapai Point in an attempt to shoot some stars before the sun was to rise. After some night scrambling in the dark by headlamp, I arrived at the top to an incredible view.
For this shot, I ended up shooting with the GF23mmF/4 lens. Knowing that even though I was losing a little bit of light gathering with the smaller max aperture, because I was shooting wider, I could increase my shutter speed to 15″. I just decided to play around and see what options yielded the best results.
The end result you see above is a 2 exposure stacked image. The foreground of the rocks was shot for 25″ and the stars were shot at 15″ and merged together in post. After a few shots, I didn’t have a ton of time before the sunrise, so I ran back to the car and headed to the Bell Rock parking area to begin my hike.
I have to admit, even though I am a self-confessed cloud junkie, seeing the light and the way the colors lit up with the sun was pretty incredible, and a really solid start to my second day of the trip. I headed back to the car looking at a 4.5-hour drive ahead of me and decided to take the scenic Highway 89A from Sedona up to Flagstaff.
I wasn’t planning on stopping at all, I just wanted to enjoy the beautiful scenery, but once I got close to Slide Rock State Park I realized how beautiful the light coming into the valley was. So I ponied up a $10 admission and went waterfall hunting.
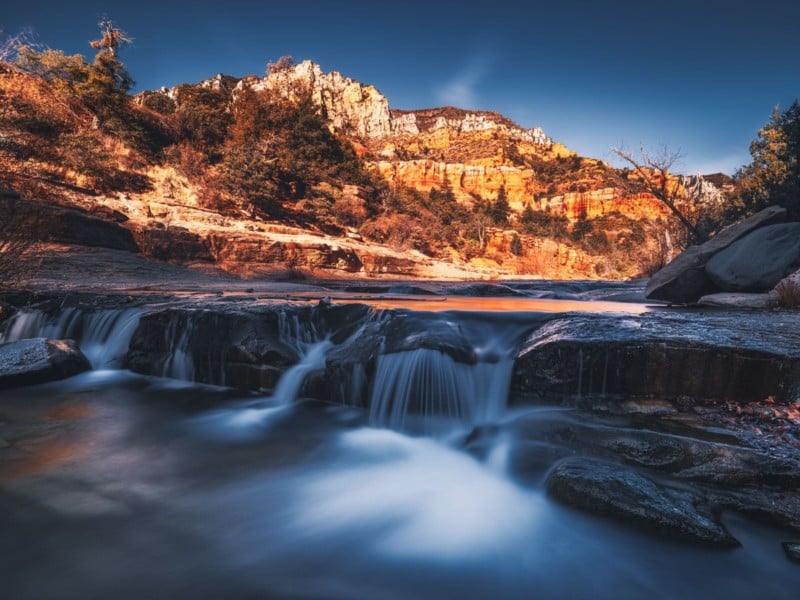
This definitely wasn’t in the original plan, but I have to admit that I really enjoyed getting to stop for about a half-hour to grab such a cool shot when the light was nice. It was about now when I began to realize just how awesome the size of this camera truly is.
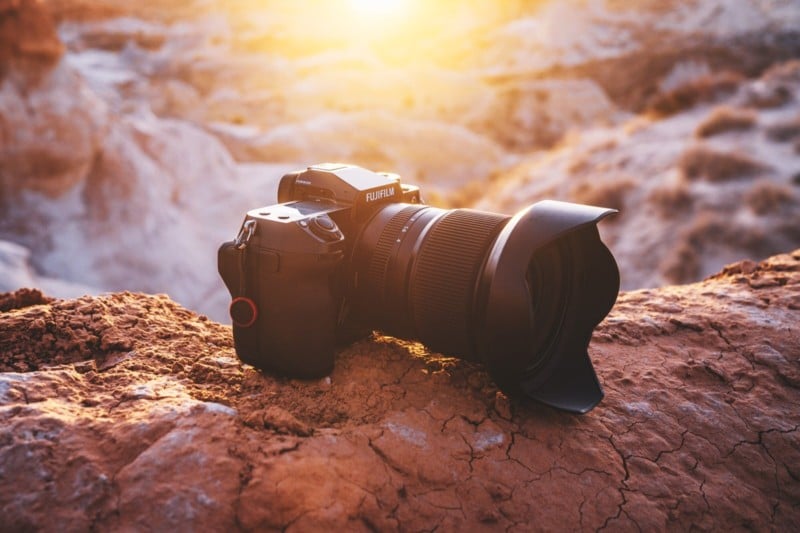
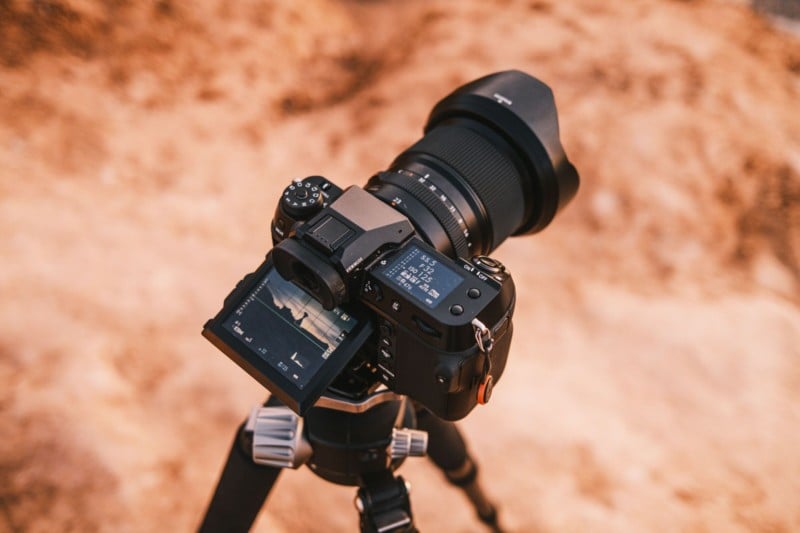
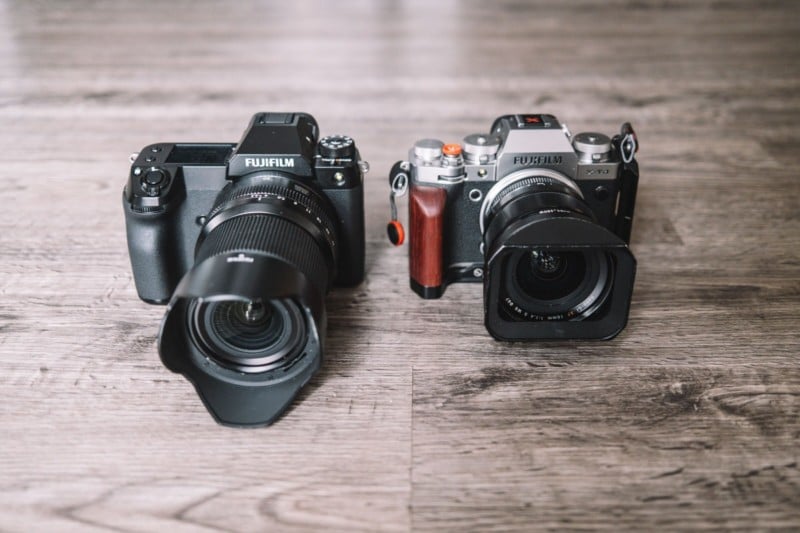
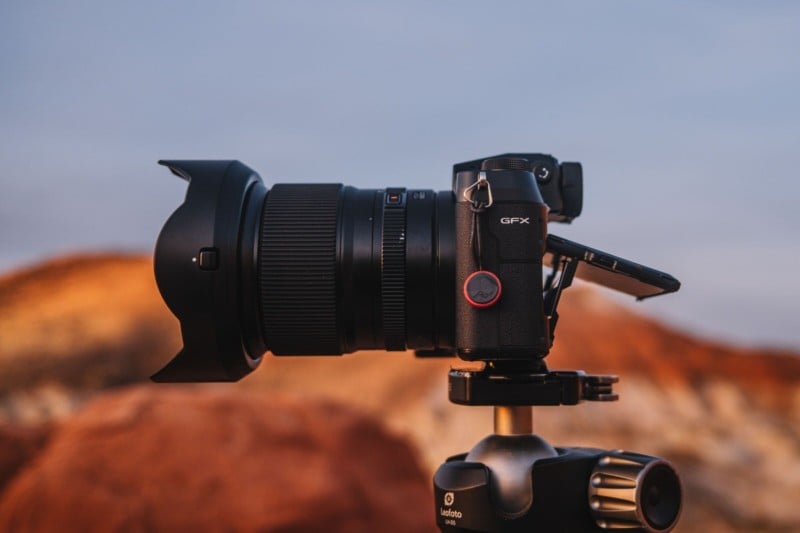
Personally, I have had a love affair with the GFX50S since I first held it at the launch event in New York. I could FEEL the time and effort that was put into finessing that camera, and it’s the same when holding the GFX100S. It really feels like a streamlined version of the 50S. It’s MUCH thinner and smaller overall despite packing sensor stabilization which the 50S lacks.
This IBIS system is 20% smaller and 10% lighter than the version found in the original GFX100. And somehow, despite this reduction in size and weight, it is still able to provide up to six stops of stabilization, which is right on par with the GFX100.
All of that while weighing in at just under 2 lbs is remarkable and massively beneficial for the way that I like to shoot. I’ve taken the GFX100 (big brother) with me on a trip before, and I was always forced to throw it over my shoulder because it didn’t fit in any of my camera bags. It’s an amazing camera and I truly loved my time shooting with it, but the GFX100S is a way better fit for someone who travels.
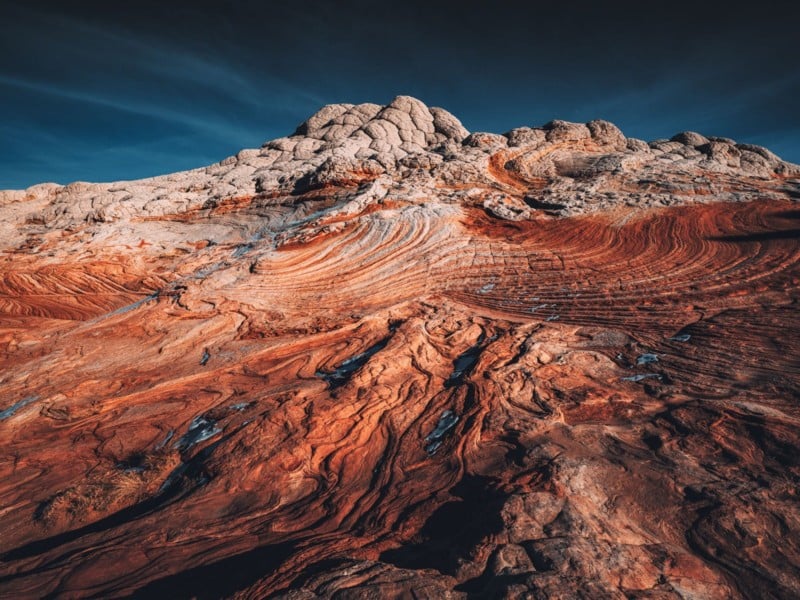
As nice as the waterfall stop was, I knew that the coup de grâce for me was going to be today’s sunset. I have wanted to visit White Pocket for such a long time because of the uniqueness of the terrain. It was a very last-minute addition to this trip.
After deciding that it was probably against my best interests to take my rental car out the very rough and sandy road to get back to White Pocket, I began to look into tour companies that take people out. I ended up finding Dreamland Safari Tours and reached out within less than a week before I wanted to go out there. Somehow, against all odds, they made it happen.
I met Sunni, who co-owns the company with her husband Paul, in Southern Utah about 30 minutes west of Page, Arizona, hopped into her truck and we set off. Because of the road, it took almost 2 hours to get out to the parking area, and we arrived around 2:30pm, which was 3 hours before the sun was scheduled to set.
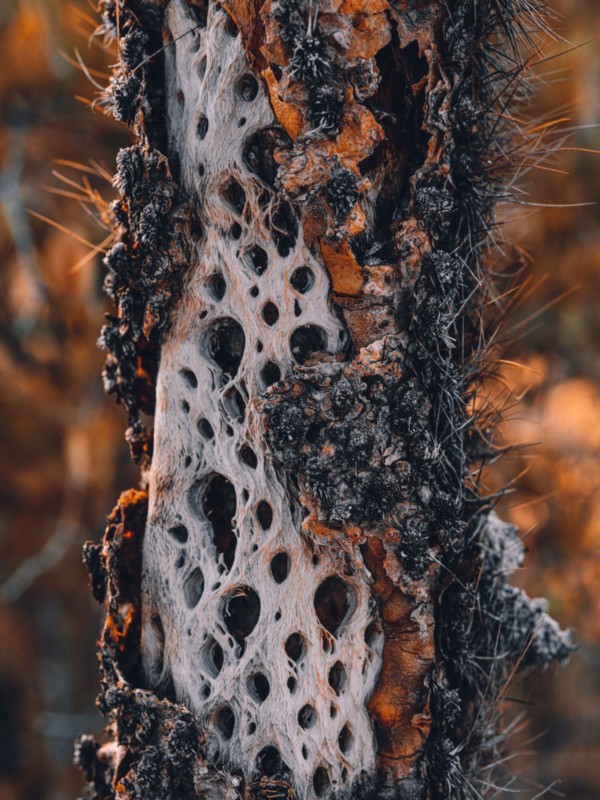
Sunni walked me around all of the hotspots for about an hour and a half educating me on the geology and history of the area. Even though the light was harsh I couldn’t help but snap photos of the amazing colors and textures all around me.
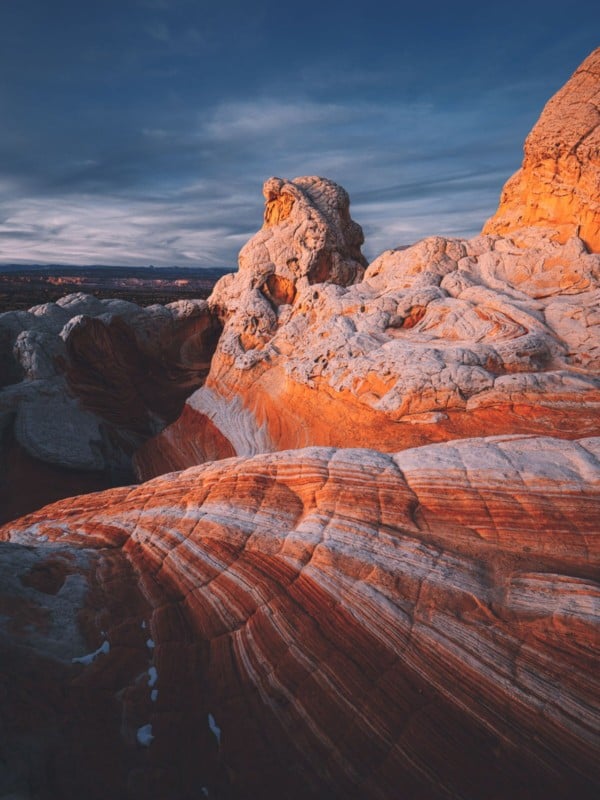

There were all kinds of wispy clouds in the sky and we had about a 50/50 shot of the whole thing giving us an amazing sunset burn, but the longer we waited the more it looked like it wasn’t going to happen. And then, at the last possible moment, the sun hit the clouds WAY back in the background of the scene, right over top Grand Staircase Escalante, I took a wide shot with the GF30mm lens and then switched over to the GF120 for what I had a feeling was going to be my trophy image of the entire trip.

And just like that, I felt like I could call it a trip, get an early flight home, and get an early start on this blog post… NOT likely. Being that this was my first real trip since before the pandemic started, I was dialed in and completely excited to see what was coming the next day, which brings me to an interesting point.
My original plan had me driving back to the South Rim of the Grand Canyon after the sunset, but once I got back into the Dreamland truck the exhaustion set in. Not only that, but because of COVID, the eastern entrance to the Grand Canyon is closed, tacking on another 1.5 hours to the total time it would take to get there. Thankfully on the drive back to my rental car Sunni was giving me a huge list of places that she thought I should check out when I come back to the area.
One of them ended up being just 5 minutes from where I parked to meet her called the “Toadstools”. So I shifted into improvisation mode and decided to find a cheap hotel in Page, and shoot the sunrise locally before driving all the way back to the South Rim.
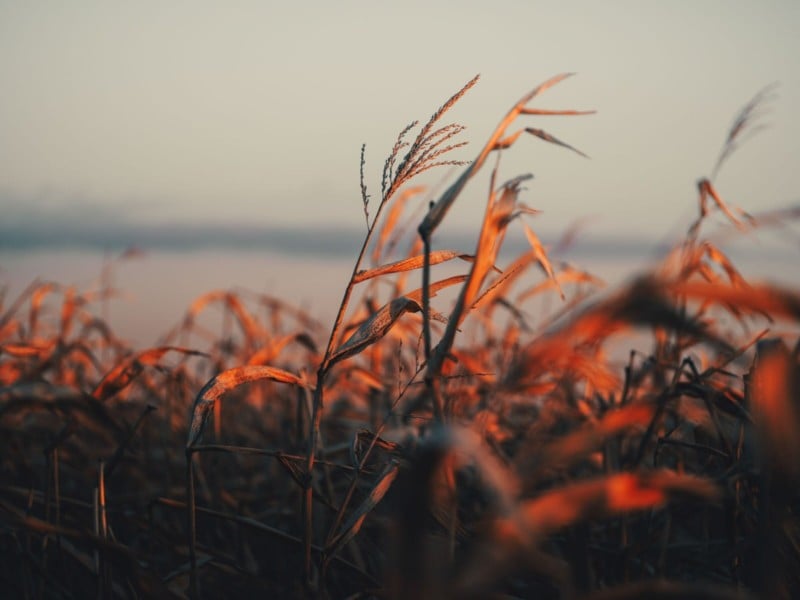
Once I got back to my hotel I dumped my cards and researched where I could be for the following sunrise. It’s at this point that I took some time to dig into some of the photos of the trip, and it hits me just how amazing these files are. I was shooting 16-Bit Lossless Compressed RAW files for the majority of the trip, and the resolution and dynamic range is nothing short of incredible.
For example, I bracket a lot with the X series cameras just to maximize the dynamic range and limit the amount of noise that I get, but with the GFX system, I just don’t have to do that. The dynamic range from a single file is amazing. That paired with the tonality and depth of color from the 16-bit files is completely perfect for landscape photography.
I don’t ever see myself going with a full GFX system for the way that I shoot, but I absolutely love the flexibility of the X Series paired with the GFX.
I want to address one more thing. Some people might think that 100mp is overkill for what they do, and they may be right. I’m not one to judge, but from a backup perspective, when you shoot 14-bit losslessly compressed RAW files, they only come in at about 60-70MB per file on average. Of course that is going to vary based on what you are shooting, but that’s pretty incredible for a 100mp RAW file.
So for those who don’t even want to consider this camera solely based on backing up the massive files, this should put you a bit at ease.
After researching locations around Page, I decided to take it easy and just drive over to a spot called Wahweap lookout that gives you a view of the south end of Lake Powell and the marina. That way I didn’t have another 3:30am alarm.
Day 3: Wahweap to Grand Canyon
I always wake up early enough that I can shoot into blue hour. Any upon a quite chilly arrival at Wahweap lookout, I realized that I might be in for the best conditions of the entire trip. After snagging the shot below, I decided that it would probably be way better to high-tail it 25 minutes to the Toadstools and hope that I could run the trail fast enough to beat the rising sun.

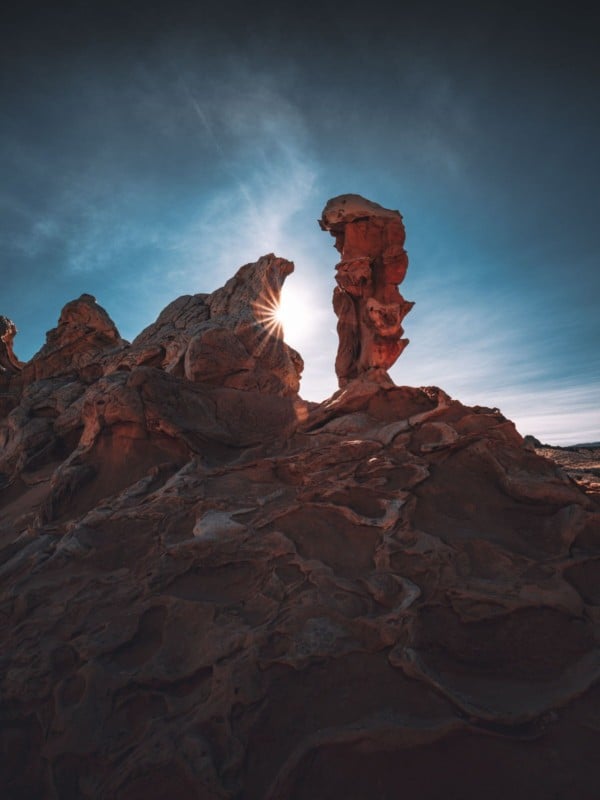
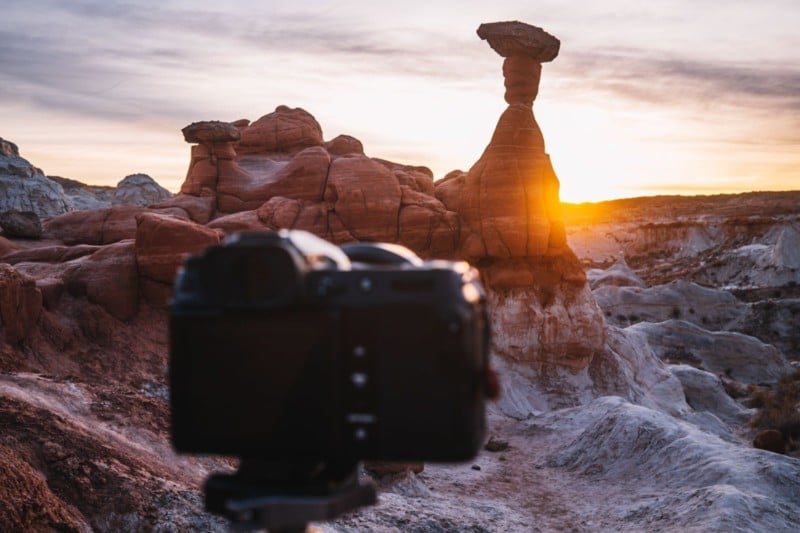
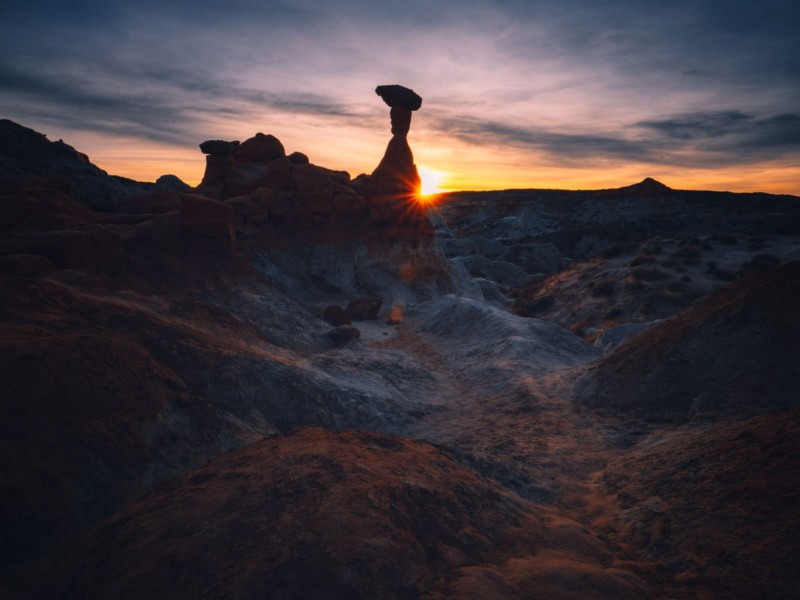
After a very brisk jog/run I made it to the Toadstool formation just in time for the colors in the sky to light up for me as I hunted around for my composition.
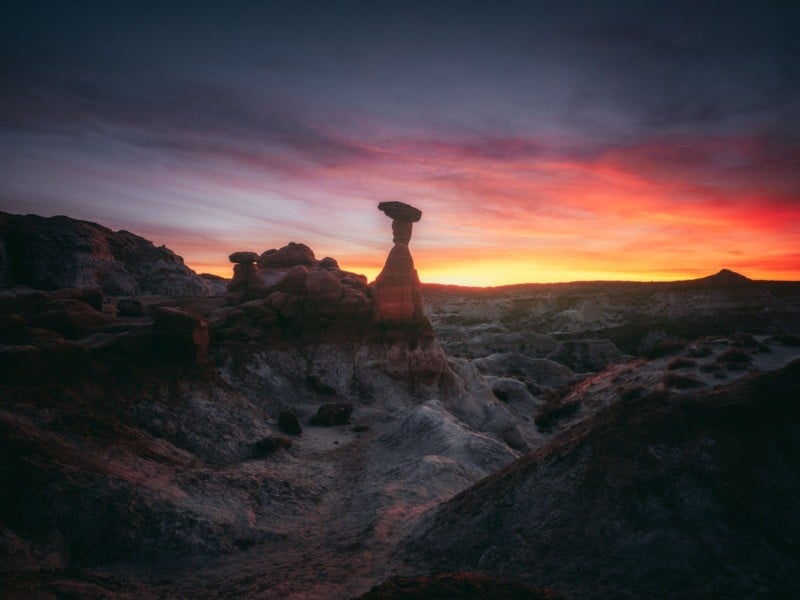
Like I said before, this might have absolutely been the best conditions that I got on the entire trip, and it was totally lucky that I was in the right position to be there. I love being flexible on a photo trip like this. Knowing the areas that you are visiting well enough to call an audible in the middle of the plan when the weather changes.
I waited around a bit for the sun to actually pop up over the ridge in the background to try and snag an f/32 image with a sunstar popping right beside the main Toadstool. It had warmed up decently at this point so I was no longer relying on my adrenaline to keep me warm. I took this opportunity to pull out my X100V with a Moment 10% Cinebloom filter to take some product images of the GFX100S as the gorgeous light made its way into the frame.

After I got my sunstar shot, I made my way back to the car and prepped myself for a 4.5-hour drive to the South Rim. I really do love to drive. Over the course of this 4-day trip, I put 1,049 miles on the rental car. It’s quite a bit, but I don’t think a single location let me down. I came away with at least 1 good shot from each stop, which is something I can’t say ALWAYS happens when I travel.
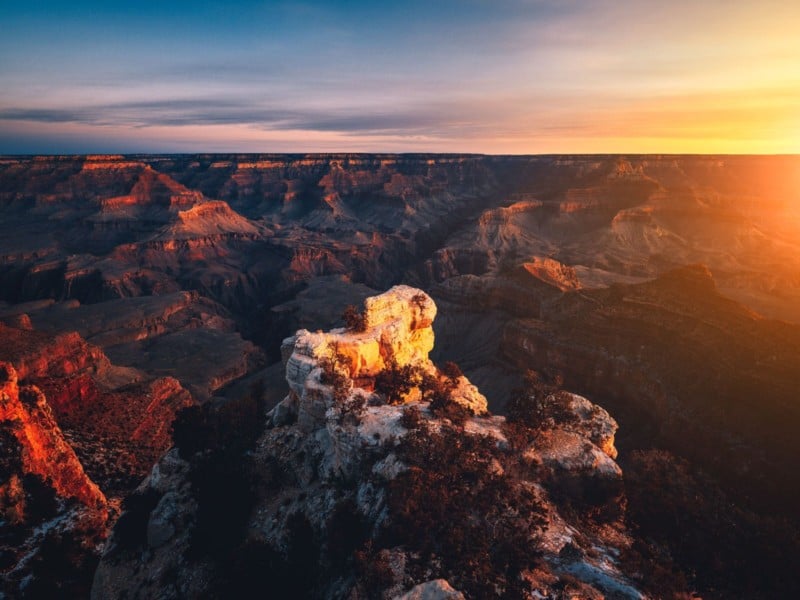
I arrived at the South Rim around 2pm which gave me plenty of time to scout where I wanted to be for the sunset. This time of year Hermit road which is normally only accessible by shuttle bus is open to all cars. So I had direct access to every single lookout point that the South Rim has to offer. I just needed to pick one. I made my way all the way to the very end of the road (Hermit’s Rest) before deciding that Mohave Point was going to be my choice.
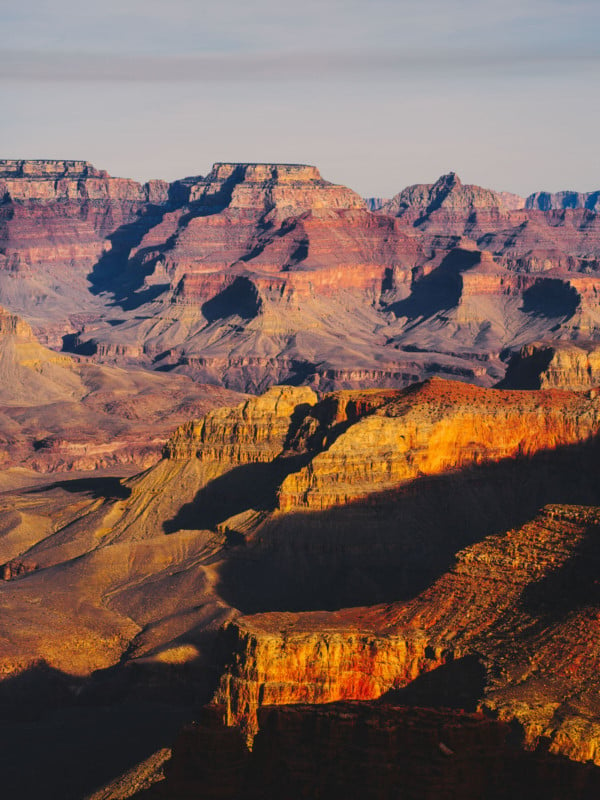
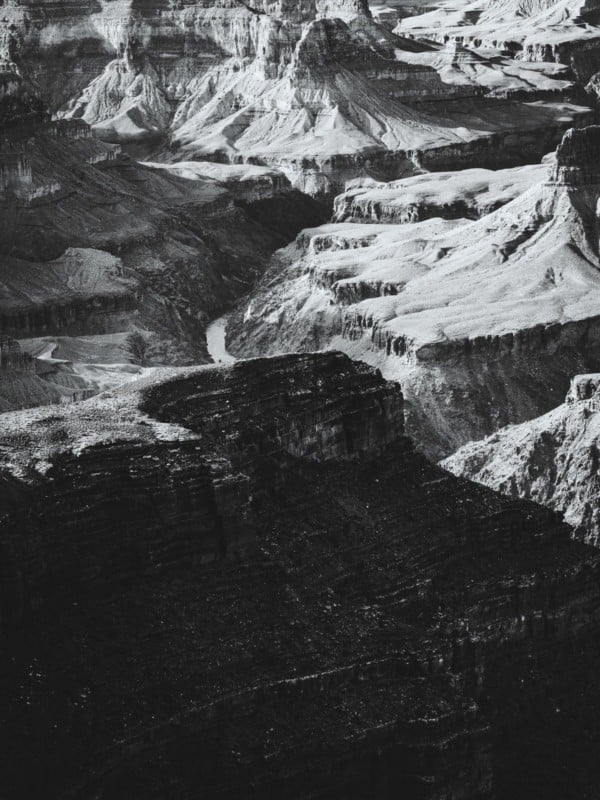
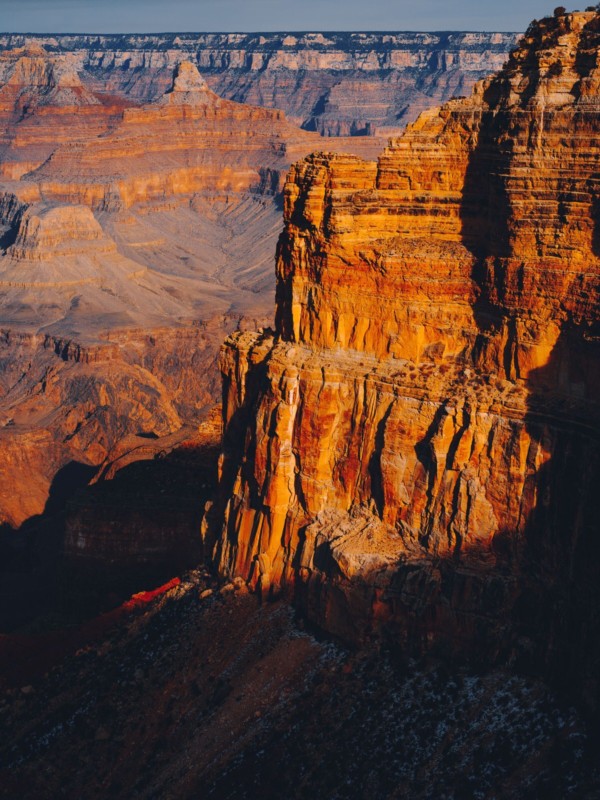
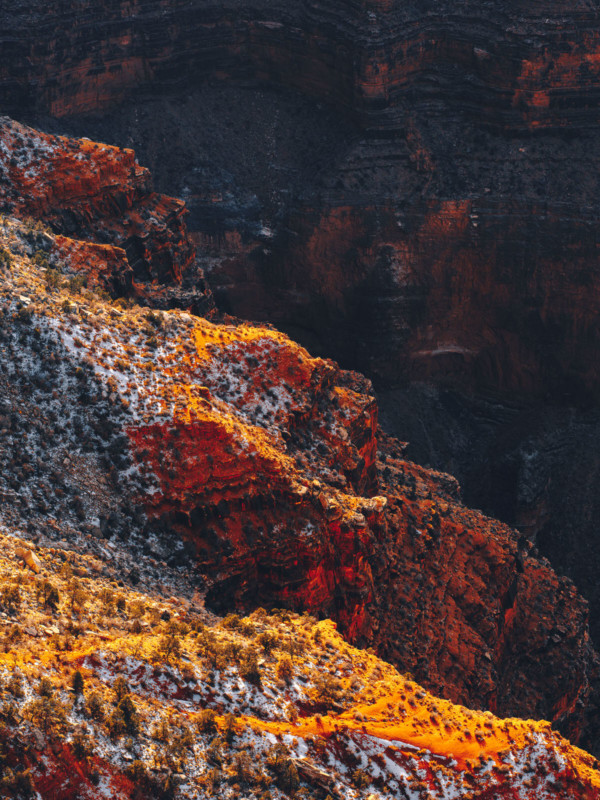
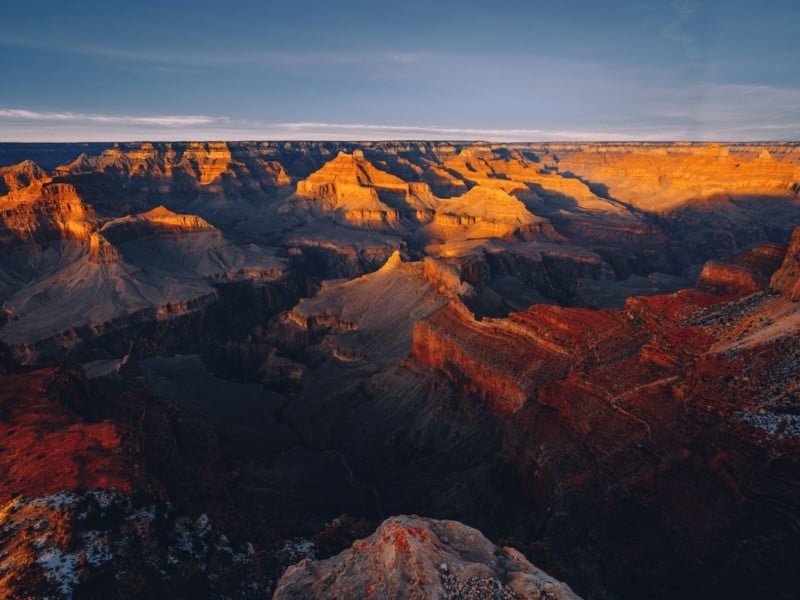
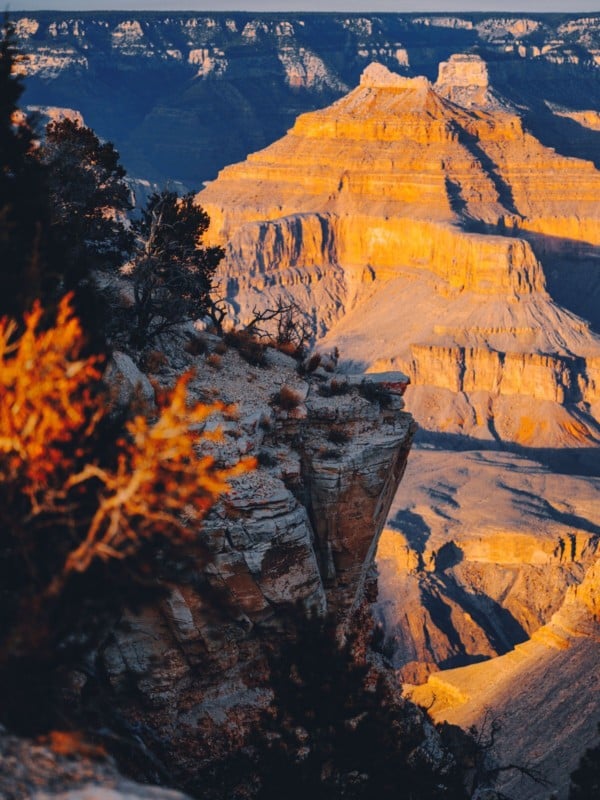
What more can I say that those images don’t already? I could spend a lifetime documenting these walls. The Grand Canyon is a wonder no matter how many times you have seen it. This makes twice now that I have seen it with a dusting of snow, and I have to say the amount of texture and color always amazes me.
There is nothing more fun than sitting with a telephoto lens and picking out little compositions everywhere. Needless to say, the GF120 really shined for me here. I put my cameras away at this point and stole about 15 minutes just to sit and take it in. I then headed back to the car to watch some Clone Wars on Disney+ and wait for the stars to come up.
I know that winter is really the “wrong” time of year to be shooting astro, but I’m not your typical astrophotography. I don’t pine after the Milky Way as some do. All it takes are stars in the sky for me and I’m completely enamored.
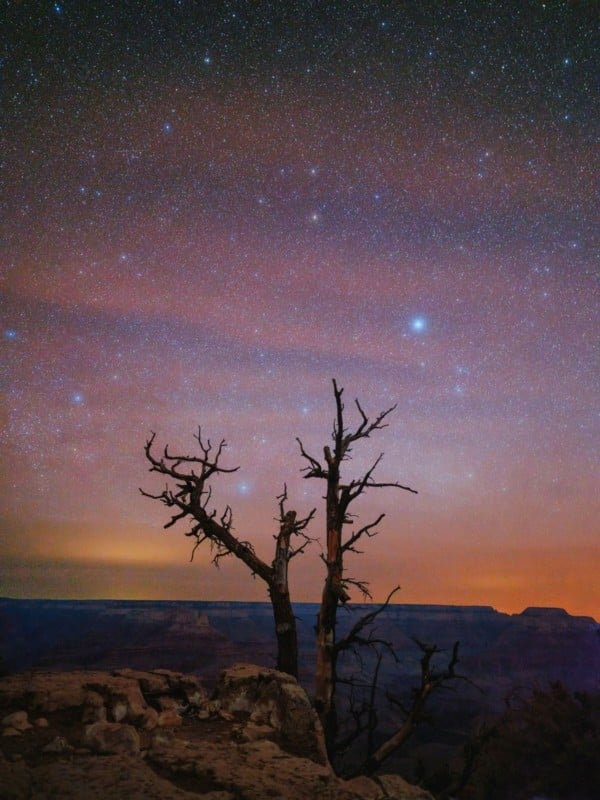
Day 4: Grand Canyon to Lost Dutchman State Park
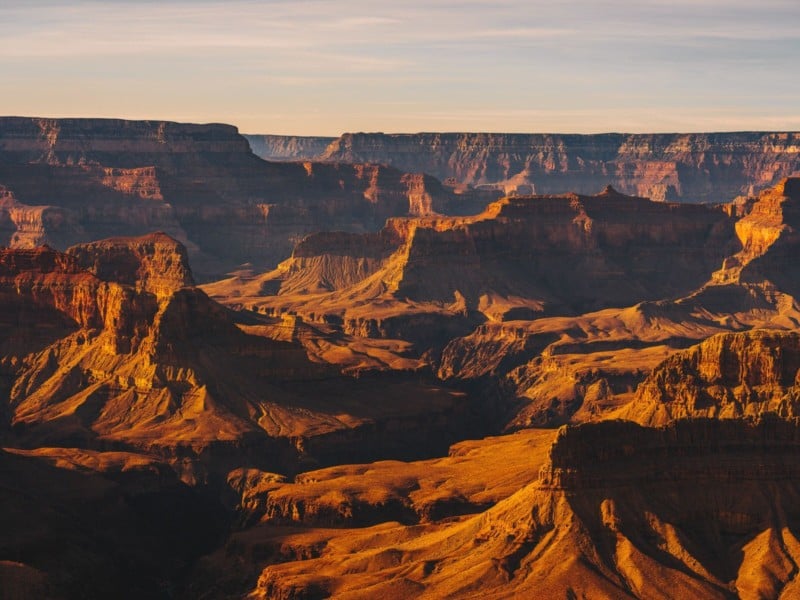
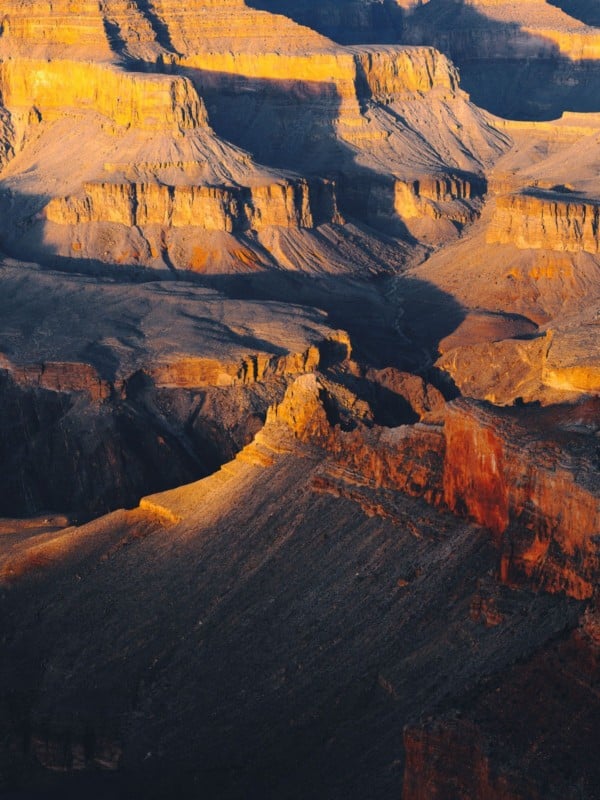
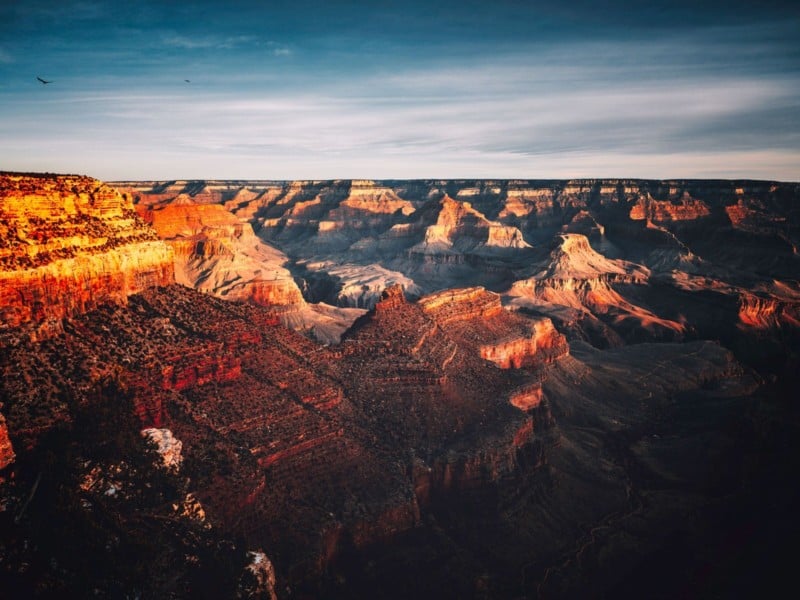
The following sunrise wasn’t everything I had hoped for. We had more of a soft glowing light because of the hazy clouds along the horizon which led to nice soft colors, but not the painterly effect of a strong beaming sun. But I got to spend it sitting out on a ledge overlooking nature’s great beauty, so I wasn’t complaining. And later on, as I walked along the rim trail to pack the rest of my gear into the car, I got some better shots when the sun rose above the clouds and streamed into the canyon. I felt like it was a beautiful goodbye.
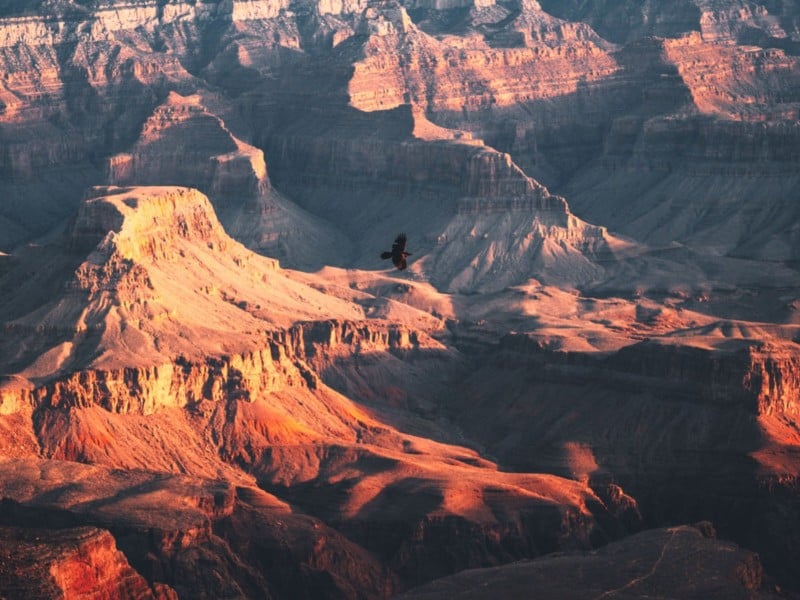
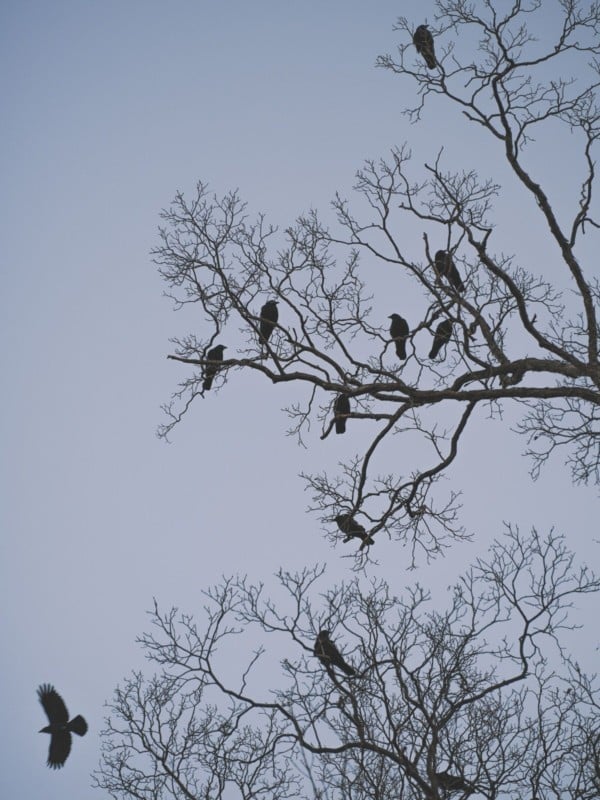
Here is a decent look at 100mp gives you. Also, note that the autofocus on these cameras is no slouch!

My original plan had me experiencing the final sunset of my trip way back at Lost Dutchman State Park overlooking the Superstition Mountain range. I wanted to be closer to Phoenix considering that my flight home was at 6am the next morning. As was par for the course of this trip, I arrived around 2pm giving me ample time to scout around, hike a few of the trails and see if I could find “my spot” for the sunset.
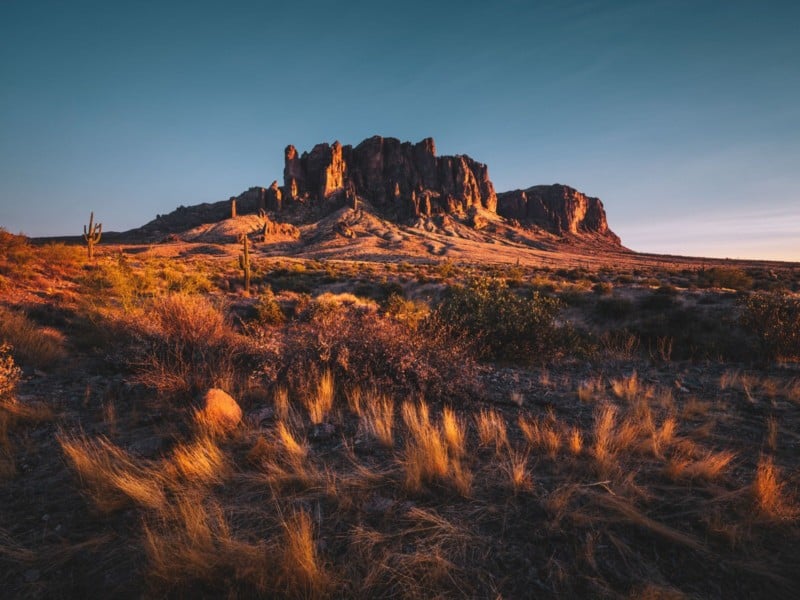
Considering how scenic the entire park is, I really couldn’t go wrong no matter where I ended up. It was a gorgeous 70 degrees and sunny. A considerable difference from the 22-degree sunrise I experienced just a day before. But I guess that’s the real magic of Arizona with so much elevation gained in certain parts of the state.
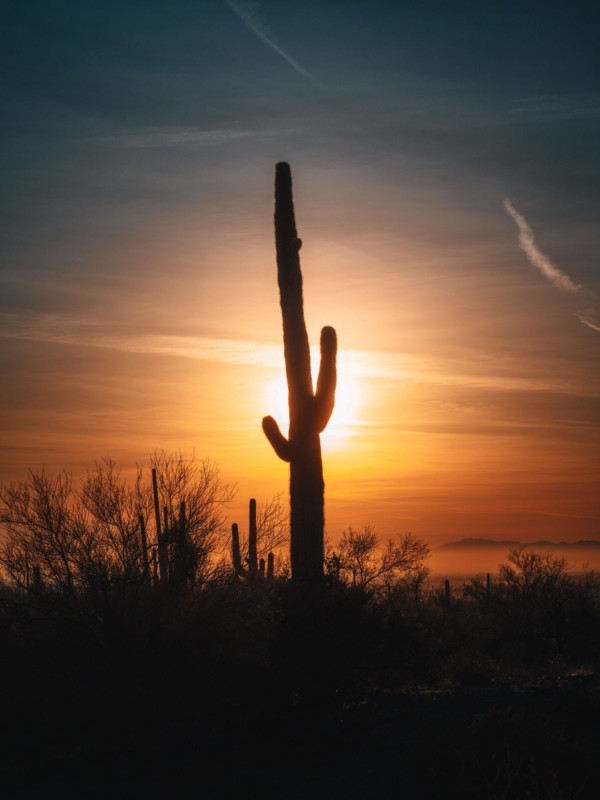
And I’ll be honest, I have an obsession with cactuses, or cacti, or whatever the plural form is. Especially cactuses of the saguaro persuasion. It’s just something that is so incredibly foreign to me being from the midwest. I like to think that cactuses have the same effect on me that palm trees do for “beach people”. I can honestly say that I’ve never photographed a palm tree in my life. One day I fully intend on doing a project that is a tribute to the American Southwest.
One of the most remarkable things about this camera is the new battery. It takes the NP-W235 battery which is the same as the X-T4. I brought 4 batteries with me on the trip. Effectively 2 batteries for mt X-T4 and 2 for the GFX100S. I was shooting early mornings through late nights every day, and never had to swap batteries once. I’m not sure how many exposures the new battery is rated for versus what the GFX100 does with the larger NP-T125 batteries, but I can say that it was never an issue for me.
Obviously, the smaller battery is a huge contributor to the overall small size of the camera, and I would MUCH rather have a smaller camera than a larger battery capacity. I will say that this is a preproduction camera running a beta firmware, so I fully expect the battery life to be even more optimized by the time the camera is available for purchase.

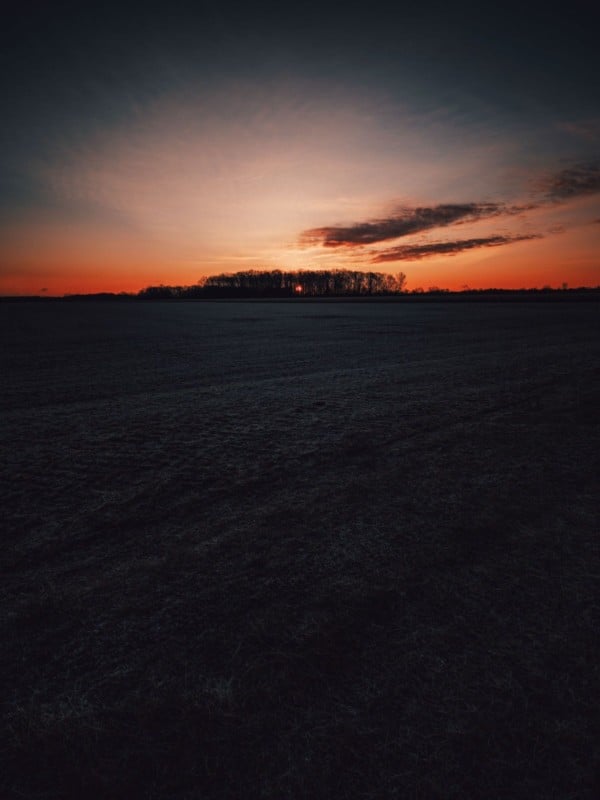
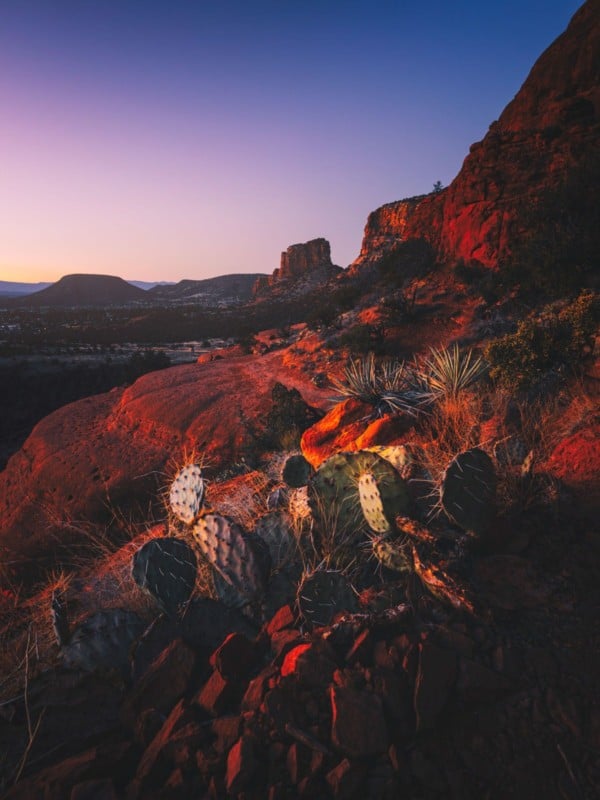
As the sun crept lower and lower into the sky, it was clear that Arizona was giving me a fitting send-off. I swear the sunset lasted for another hour after the sun had officially left the sky. The intense reds and purples made my trip, and it was then that I noticed the rising crescent moon in the sky.
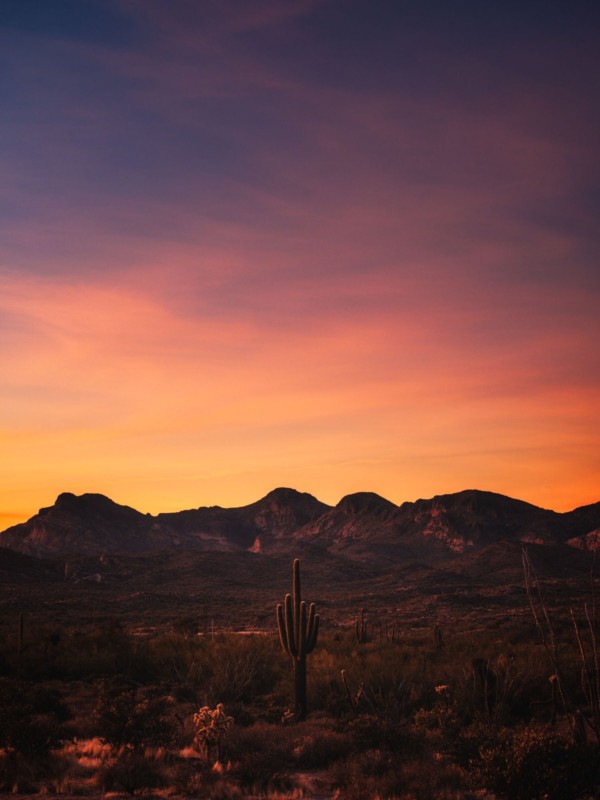
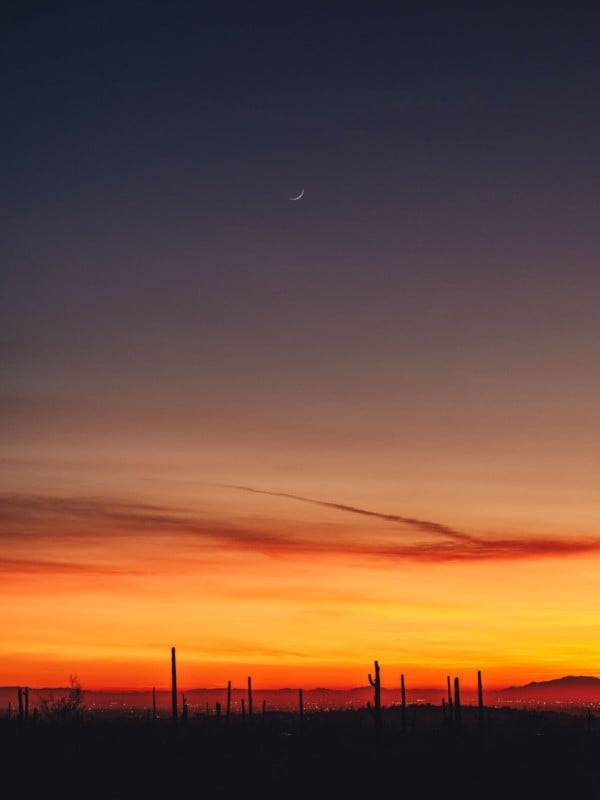
It was at this point where I appreciated the camera’s IBIS the most. Running around like a child in a candy store snapping photo after photo and not having to worry about pulling out my tripod was truly awesome. And with that, I concluded my trip.
You don’t need to hear about how Delta ALMOST made me miss my connection to Detroit from LAX. But here we are not even 2 weeks removed and I feel like I’m still buzzing. I feel like I made a year’s worth of images in a few days and I couldn’t be happier. I hope you enjoyed my words and shared images.
If you feel like watching the story you just read, I have a full VLOG available on YouTube documenting my trip. Though it was my first attempt at doing something like this and I feel that I really missed out on some of the story and visuals. It’s a tough thing to document a trip like that when all you really want to do is make photographs.
About the author: Bryan Minear is an Official Fujifilm X-Photographer based in Michigan. The opinions expressed in this article are solely those of the author. You can find more of Minear’s work on his website, Facebook, Twitter, and Instagram. This article was also published here.