Shooting a Creative Album Cover Photo with a Delorean
In late 2018 my buddy RJ (AKA RJD2) approached me about shooting the cover art for an upcoming album he was working on. He didn’t have a concrete idea about what he wanted to do but suggested possibly involving his Delorean.
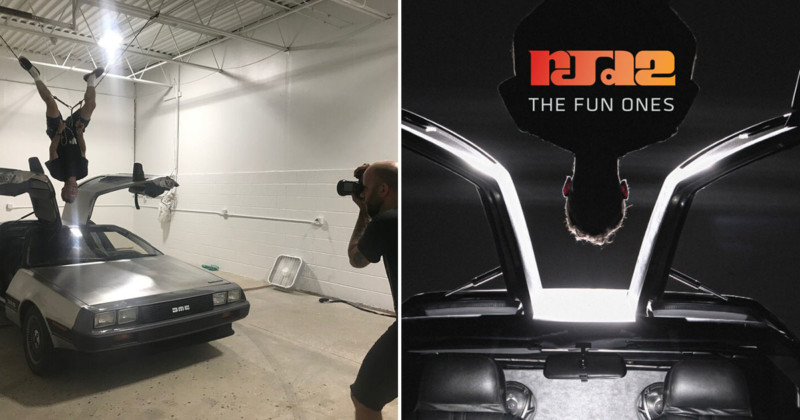
Eight months later, he hit me up and told me he was ready to shoot. He said that he had a garage that he’d just painted white that had a 14-foot ceiling with trusses. His plan was to suspend himself upside down above the open doors of his Delorean, and he seemed confident that he could rig himself adequately with a climbing harness and some ropes.
When I suggested that it may be easier to just shoot him and the car separately and composite them, he was aghast. Ok, we’ll do it the hard way.
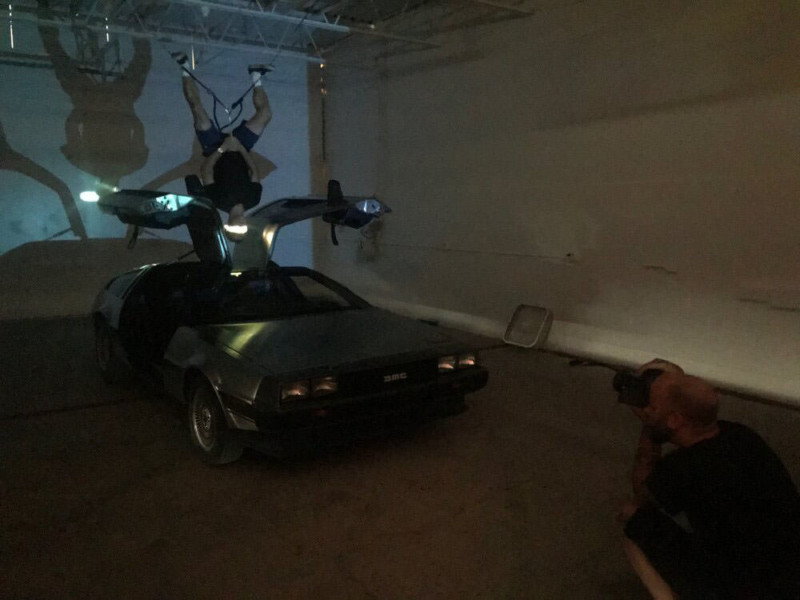
I met my assistant Seth at RJ’s garage on a particularly hot day in August. The windowless space was hovering right around 100 degrees. It was also filled with a bunch of clutter, including a broken two-ton scissor lift.
The space was small enough that there was no way I could get the depth I needed to make the shot work with the lift in the space, so it would need to be moved. With three of us pushing on it, the lift wouldn’t even wiggle. Thinking on his feet, RJ grabbed an industrial-sized car jack and jacked up one side of the lift, sliding a cart underneath. Then he jacked up the other side and did the same. With the lift on castors, the three of us were able to get it out of the space.
Now to figure out the rope situation.
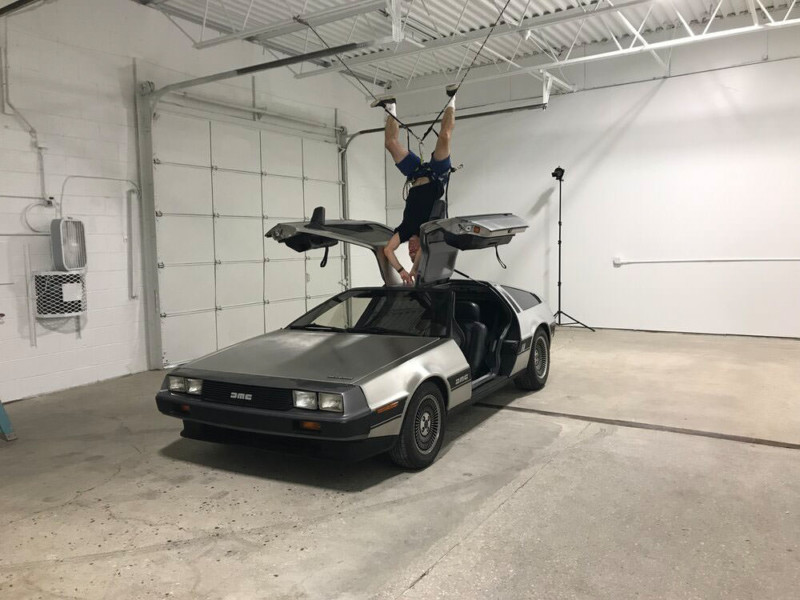
RJ began rigging up a couple of ropes, trying to gauge the right distance and height so that he could hang upside down with his head centered a foot above the car roof. Once he got the ropes right he would climb up and flip upside down only to find that the car needed to move an inch to the left. Then he’d climb down, we’d roll the car forward six feet, adjust the steering wheel, and roll it back into place, hopefully in exactly the right spot. It took three or four attempts.
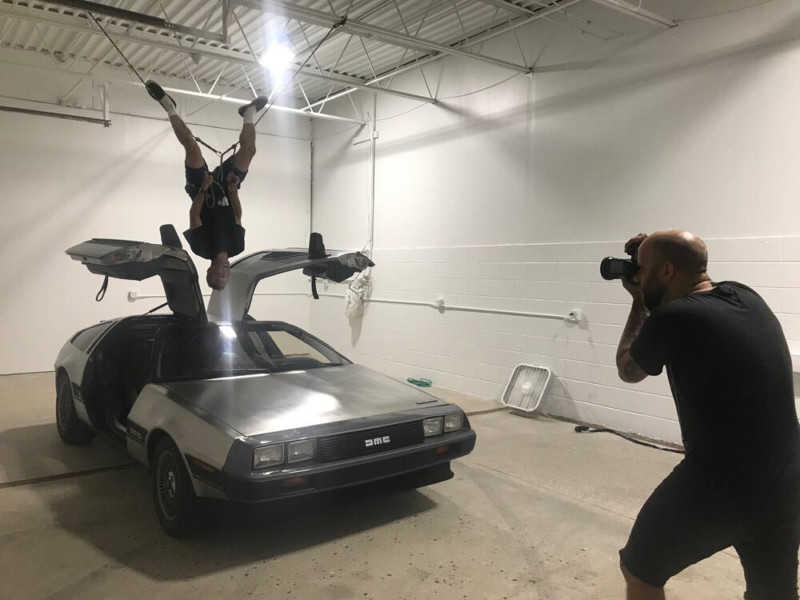
Once the car position and rope rig was sorted out, we were ready to shoot, although RJ was now red, sweaty, and disheveled (we all were). As RJ got himself correct I started placing lights and dialing in my settings. My plan was to shoot the setup in a couple of different ways. The first version was against a white background and the second against a dark background.
Even with the space emptied, I didn’t have much depth to place lights. Ideally, I would’ve had twenty feet behind the car to blow out the background to keep light from spilling onto RJ, but there just wasn’t enough room. I also would’ve preferred to use a longer focal length lens to compress the car and RJ, but the space dictated that I use my 16-35mm lens.
RJ got into position over the car, sitting upright until my lighting was ready. I used two Godox AD200s to blow out the background, which I placed on the trunk, aiming into the back wall (small flashes FTW). Next, I hooked up a projector to my laptop and created a white line in Photoshop, which I then cast across RJs eyes (in order to get a good exposure on the projector I had to cut the room lights).
Once the lighting was set, RJ inverted himself and I snapped about ten frames and then had him flip back up and rest. Any longer and his face would’ve been too red. I quickly reviewed my images, had him flip upside down once more, snapped ten more frames and got the shot.
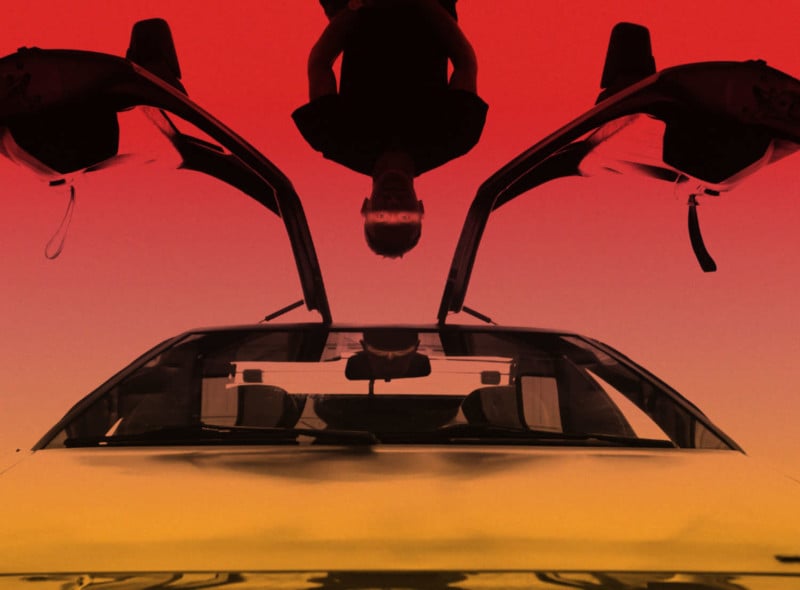
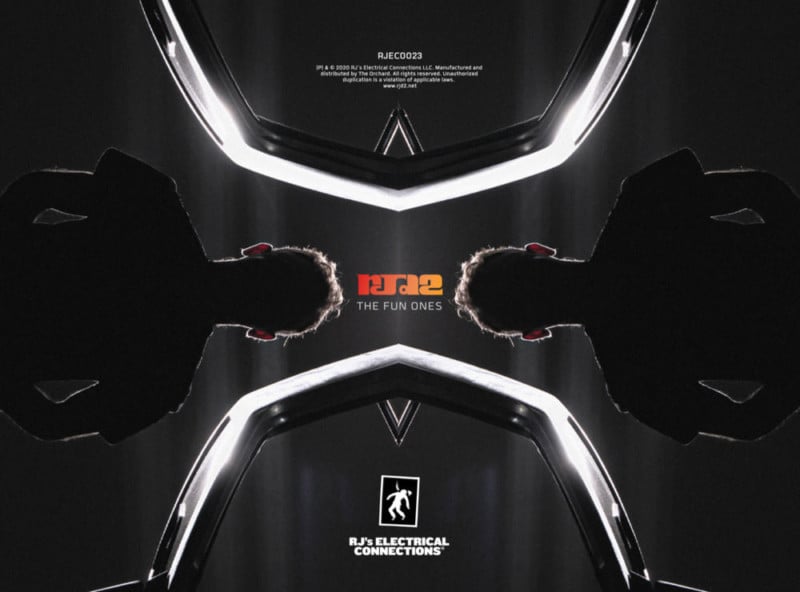
With the bright shot out of the way, I repositioned once of background lights to aim back toward the camera, leaving RJ silhouetted.
Such a simple change of the lights angle completely transformed the shot into a dramatic teaser image, which ended up making the cover of the album.
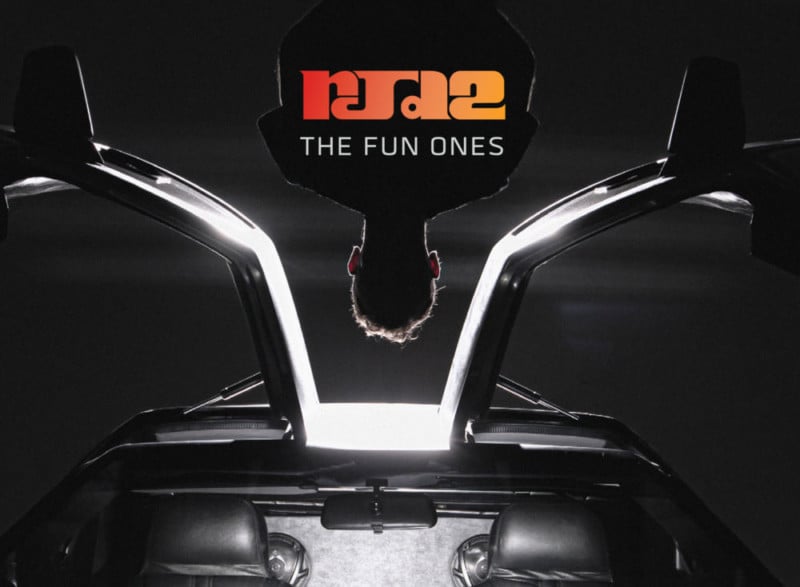
Had we instead decided to composited the image, one thing I wouldn’t have thought to Photoshop was his inverted reflection that you can see at the top of the windshield. It always pays to get the shot in-camera.
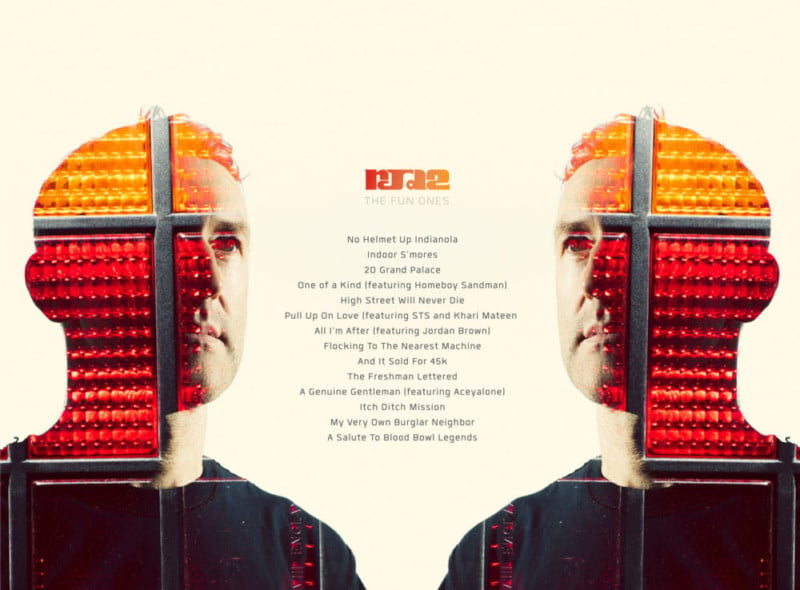
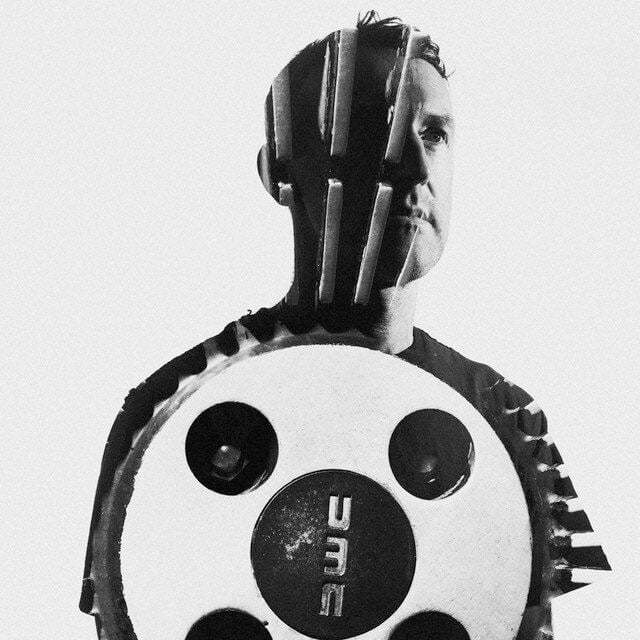
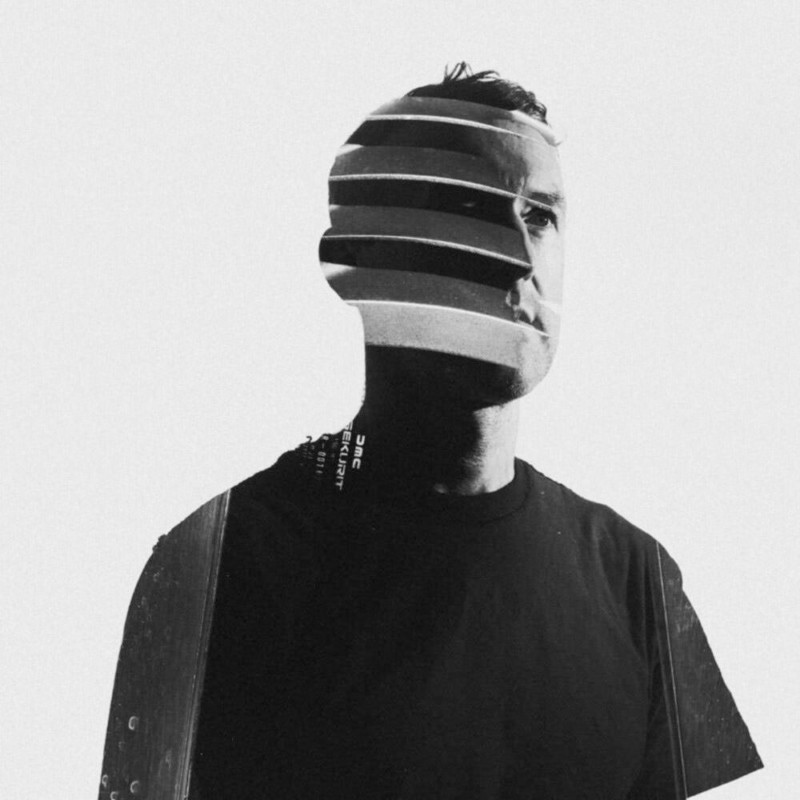
With the main shots out of the way, RJ climbed down and I set up to take a simple portrait of him. My plan was to get one good portrait of him with a lot of dark shadows and bright whites against a white background. This type of shot is ideal for making multiple exposures, which my Canon 5D Mark IV can easily do in-camera.
I set the portrait I had just taken as my base image. I turned on the multiple exposure feature and set the overlay mode to “bright”. I turned on the camera’s live view, which displayed the portrait of RJ overlaid over the viewfinder. Then I moved around the car, selectively shooting graphic elements, each merging seamlessly into the shadow areas of the portrait. RJ ended up using these images as album single covers.
Not counting the time it took to clear the space, the whole shoot was over in just over an hour.
Thank you to RJ for including me in your insanity. Thank you, Seth, for helping make it happen. Thank you, readers, for staying with me to the end of this account.
About the author: Nick Fancher is an editorial and music photographer who specializes in dramatic lighting, often employing the use of bold colors and experimental camera techniques. The opinions expressed in this article are solely those of the author. You can also find more of his work and writing on his website. His popular books can be purchased on Amazon. This article was also published here.