Making My Own DIY Super-Wide-Angle Macro Lens
As we know, wide angle lenses show a larger field of view and therefore make things appear smaller and further away than they are. Which contradicts the concept of macro photography, where we want our subject to be projected onto the sensor at a magnification ratio of at least 1.0x. So how can we combine a wide angle perspective and macro macro-capabilities?
In this article I share my quest of creating a DIY super-wide macro lens and my experience with wide angle macro photography. These are the criteria I set for the project:
- A viewing angle of less than 20mm.
- Full frame cover.
- Acceptably good image quality.
- 1.0x in the center of the image.
And after a long journey of trial and error I eventually managed to create a lens that met all the criteria above.
Basically there are two different ways to combine close-focusing capabilities with a wide-angle look:
1. Extension Tubes
The easy way, and probably the one that comes to mind first, is to mount a wide-angle lens on some extension tubes. This can work, but only to a limited degree.
If the tube is too short, the desired magnification won’t be achieved; if the tube is too long, the image circle gets cropped and the wide angle captivities of the lens will be offset. Plus, if the a lens is too wide in relation to the length of the tube, the focusing plane shifts into the front element and the aerial image can no longer be focused on.
So we are balancing three corners of a triangle and, much like with the well-known exposure triangle, you simply cannot have everything. The factors are: viewing angle, the lens’ size, and its working distance. Keep this triangle in mind, as it will play an important role in this article…
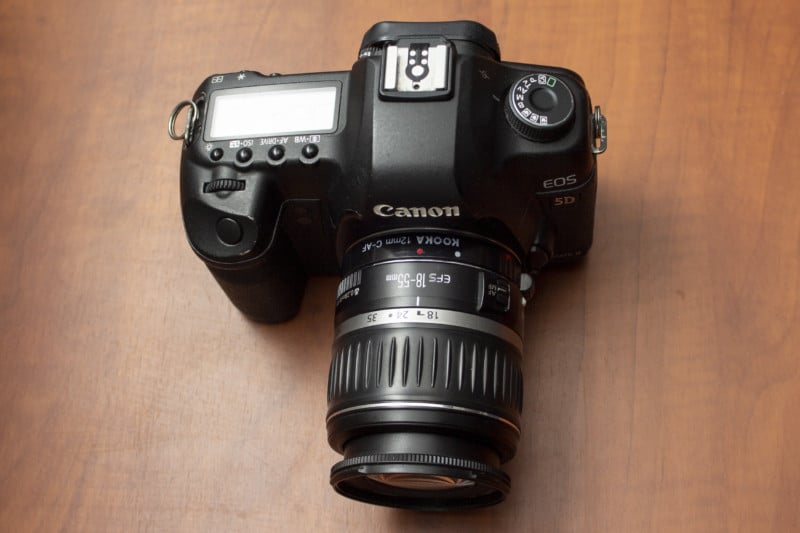
One combination that I found to work particularly well was the Canon EF-S 18-55 kit lens on a short extension tube, mounted to a full-frame camera.
The short-back focusing of the EF-S lens makes it penetrate further into the APS-C body that it’s meant for, prohibiting the use of EF-S lenses on full-frame cameras. The image circle would be too small and the rear element of the lens would likely damage the mirror and shutter mechanism. A short extension tube can solve that problem, extend the image circle enough to cover a 35mm sensor, and allow the lens to focus much closer.
Not close enough for true macro photography, but certainly close enough to capture eye-catching close-ups of larger critters, such as flowers, butterflies or small amphibians. The beauty of this set-up is its zoom range, which allows to adjust viewing angle and working distance.
This set-up is not only versatile but also likely to be the cheapest and easiest solution for wide-angle close-ups. And the results are incredibly sharp considering that I used a 10-year-old crop-sensor lens on a full-frame camera. There is some minor vignetting between 18-21mm, which is usually easy to correct in post. Zoom in to 22mm to remove vignetting completely.
However, if this is just not enough magnification for you, there is another way…
2. Adding Wide-Angle Elements
After extension tubes did not really provide the desired result, I tried a different tactic: adding wide-angle elements to lenses with close-focusing capabilities.
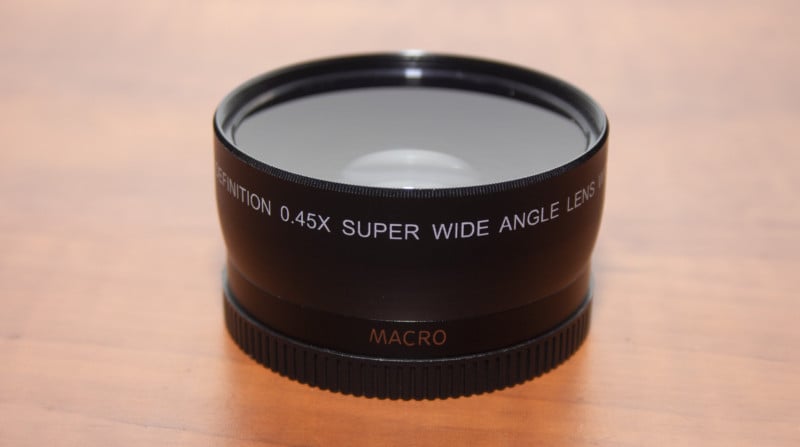
Fish-eye/macro converters were the first thing that came to mind. Such converters usually consist of two parts: A macro lens, which is basically a close-up filter (the rear element of the converter) and a fish-eye/wide-angle lens that sits on top of it.
The “macro” element allows for a compact lens design; without it, the wide-angle element would have to be much further away from the lens for the aerial image to line up with the focusing plane.

Unfortunately, such converters don’t allow you to get quite close enough with the full ensemble attached to your lens, and the macro lens by itself alone doesn’t provide the desired viewing angle.
It is, however, possible to use such conversion lenses to create a super-wide macro lens. In order to gain 1.0x magnification we need to be able to focus incredibly close. By moving our new front element further away from the lens and closer to the subject, we can shift the focusing plane, similar to the effect of an extension tube.
But since we are making adjustments to the front of the lens and not to its rear, instead of extending the image circle, we shrink the image of the wide-angle element as we move it further out. This can be corrected with extension tubes and brings us to the previously mentioned triangle-of-balance—improving one of the factors requires sacrifices in the other corners of the triangle.
The Triangle of Balance
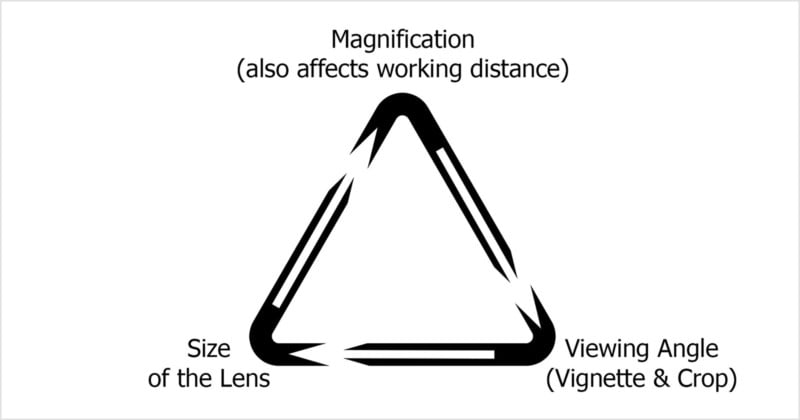
- To achieve enough magnification, we will have to sacrifice some of the viewing angle by cropping the image circle with extension tubes and/or using a front element that isn’t as wide.
- For a wider viewing angle, we have to move the wide angle element out further (and likely compensate for the shrunken image circle this produces by using extension tubes) and sacrifice working distance; the wider the lens, the further away things seem. Or, we find a wider piece of glass, which in return will result in a shorter working distance.
- To reduce the size of the lens, we will have to trade off either some of the magnification ratio or accept an image circle that won’t fill the sensor… or a combination of both.
Of course, those converters aren’t the only candidate for this task. Wide-angle elements of all kinds can be used for this purpose, as long as their optical quality is satisfying. The triangle applies to all combinations of wide-angle font elements and base lenses (as long as they are compatible). However, the variables of the trade will shift between different combinations…
Building a Lens
The process of configuring a lens this way is somewhat tedious but the steps are simple:
- Mount a base lens with close-focusing capabilities to your camera (you can use extension tubes, reverse lenses, macro lenses, etc.. Ideally no close-up filters, as they will decrease the image quality in addition to the decrease that the new front element inevitably causes to some extend)
- Choose a wide-angle front element and place it in front of the base lens.
- Determine the distance it needs to the base lens to produce sharp close-up images.
- If the image circle is to small, increase the distance between base lens and sensor (extension tubes).
If the image circle is cropped, decrease the distance between base lens and sensor or try a different (wider) lens. - Re-adjust the distance between base lens and the wide-angle front element.
- Repeat step 4 and 5 if needed.
The wide angle adapters worked well, given the circumstances of the triangle above—I was able to achieve a magnification ratio of almost 1.0x at a 20mm viewing angle and fill the sensor with the image, but the optical quality was not quite there yet with most converters I tried. Chromatic aberration was much too strong and sharpness was somewhat less than perfect.
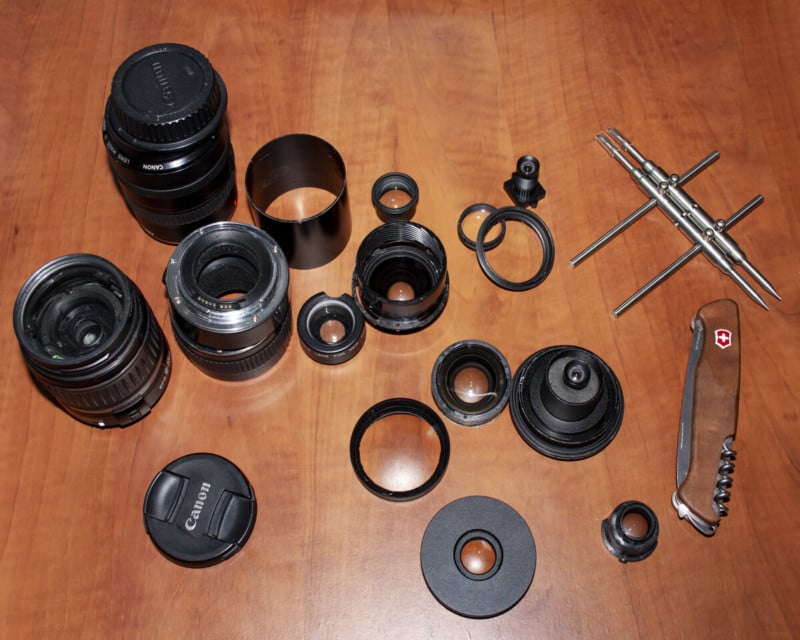
So I gathered a bunch of potential base lenses, wide angle elements and adapters, converters, extension tubes, etc. and started experimenting…
My first choice here was a fish-eye CCTV lens, as its super-wide field of view and its small diameter would make it the ideal lens for photographing insects in the field (the small size would be much less intimidating to potential subjects).
I got the best results in combination with a reversed 24mm lens, but unfortunately its image circle was far too small to even fill an APS-C or even a Micro 4/3 camera sensor. Naturally, the image can be enlarged by adding extension tubes and that’s what I did; to a certain extend. The problem is that, with super-wide lenses like this, the working distance will eventually turn negative, which means that the aerial image moves into the actual lens and can no longer be focused on.
Unfortunately, that effect came into play before I could fill the (APS-C) sensor of my camera, and it occurred with all base lenses I tried. In addition to that, the excessive use of extension tubes can decrease the image quality, as the enlargement amplifies flaws of the optics such as chromatic aberrations or limitations in sharpness. Alternatively a tele-converter could be used to “zoom in” without affecting the working distance, but adding another block of glass (especially a tele-converter!) would decrease the image quality too much.
The following images where taken with a 5MP CCTV lens that I mounted to a reversed 28mm lens on a couple extension tubes. Both images have been sharpened, flipped and retouched in Camera Raw. Trying to extend the image circle beyond this point would result in a working distance of less than 2mm.
Such CCTV lenses are also difficult to use, as they project the image inverted, which makes it extremely difficult to coordinate and focus the camera. This could be worked around (by using live-view and Magic Lantern firmware to flip the image digitally, for example), but to me the rather poor image quality and the restrictions of this lens were too much of a trade-off.
Lenses like the one above can potentially yield great results on APS-C or smaller sized sensors, but image quality seems to vary heavily between models; the Swedish macro photographer John Hallmen built an effective set-up based on a CCTV fish-eye lens and a Canon T6s. You can find his article here.
Personally, I don’t consider this branch of the project a dead-end yet; the extreme fish-eye effect of these lenses and their small size would make them the ideal front element and maybe I’ll be able to make them work in the future…
Moving on.
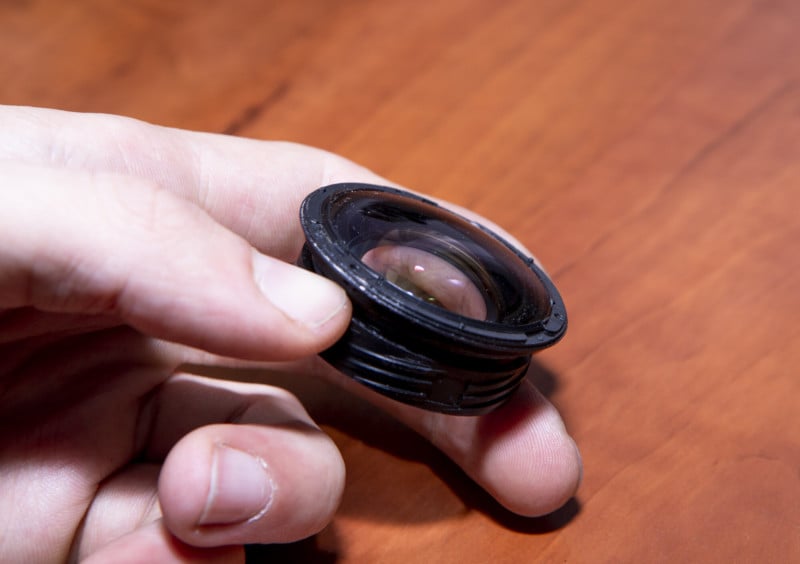
My next choice of glass was the former front element of a Canon EF-S 18-55 kit lens, which I modified for extreme macro photography last year. Most standard zooms can be modified for macro photography beyond 2.0x magnification simply by removing their front element. I did a few of these conversions over the past year and so I had some wide angle front elements at hand.
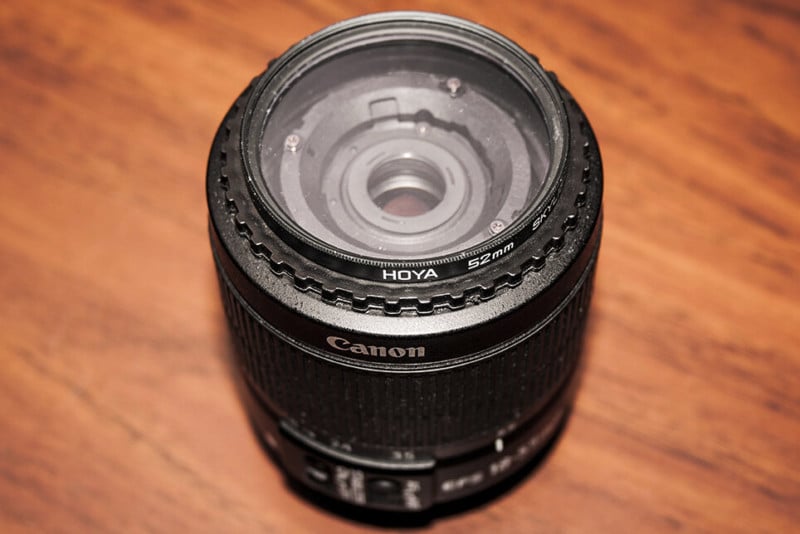
The front element of this lens performed great in terms of image quality and was able to cover the entire sensor at 0.8x magnification with very minor vignetting. After inserting an additional (convex) wide angle element (from an Opteka 0.35 fish-eye converter), the vignetting disappeared and the magnification ratio reached 1.0x in the center of the frame with very good sharpness.

This lens met almost all the conditions I had set for this project. The only downsides where the missing focus mechanism and the lens’ requirement to sit on a full stack of extension tubes, which makes it impractical to use and carry. A focusing mechanism could easily be installed by replacing one of the tubes with a helicoid, but the problem of its length seemed to lie with the base lens…
So what would the ideal base lens look like? It would obviously have close-focusing capabilities, a wide angle perspective, and a fairly small front element to avoid vignetting. So If I used a wide-angle base lens and mount it, facing frontwards, on just one slim extension tube, that should solve all my problems.
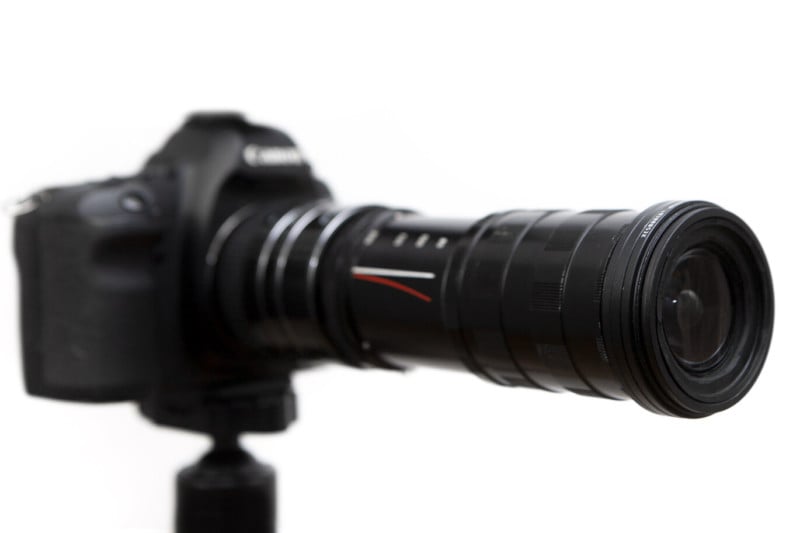
The lens I picked was a 28mm Albinar lens, which offered a perfect compromise between a wide perspective and only minor vignetting. I mounted it on an EF-adapter and some step-rings that function as a short extension tube.
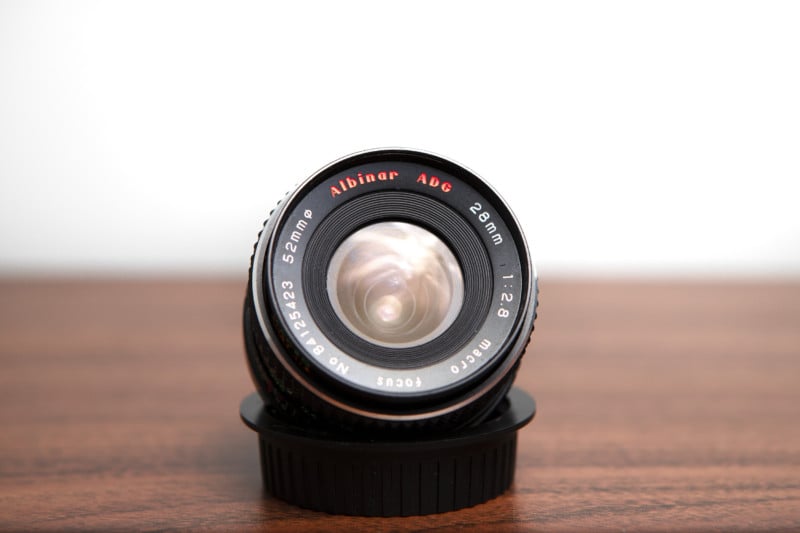
Next I tried to combine it with the Canon front lens, and it worked incredibly well! No vignetting, good contrast, and the best part: no need for extension tubes needed and the new front element needs to be just about an inch in front of the base lens.
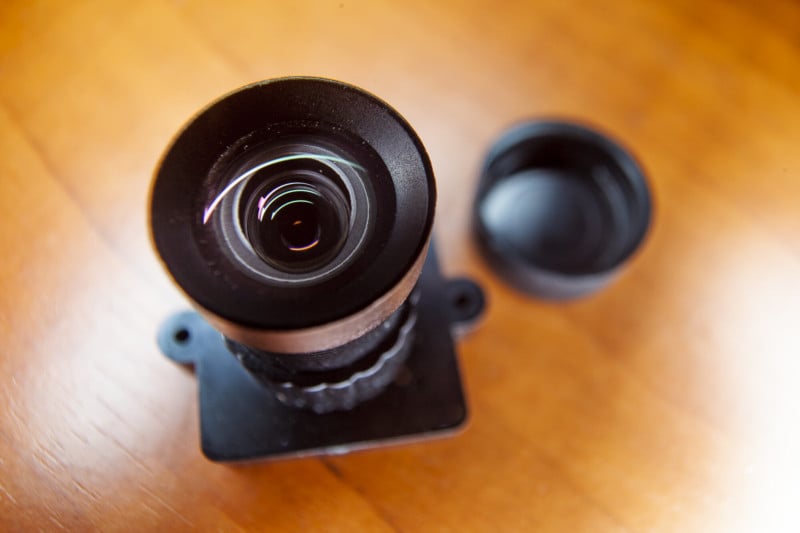
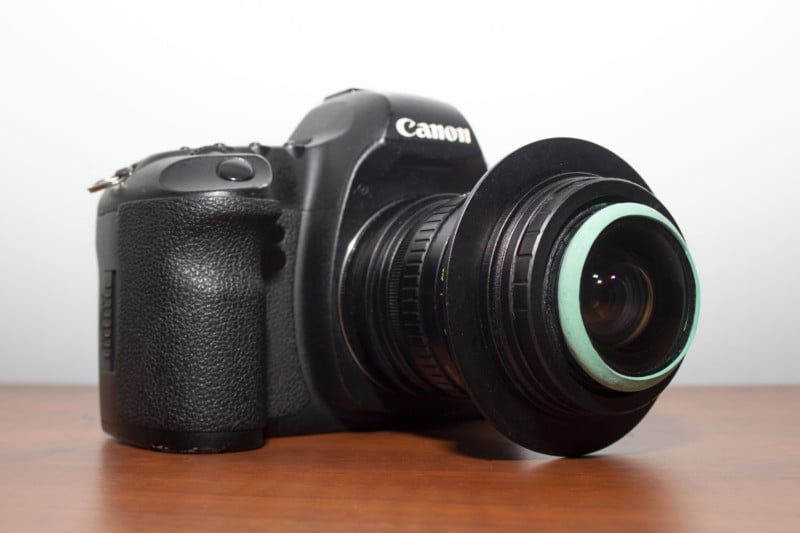
The Final Lens
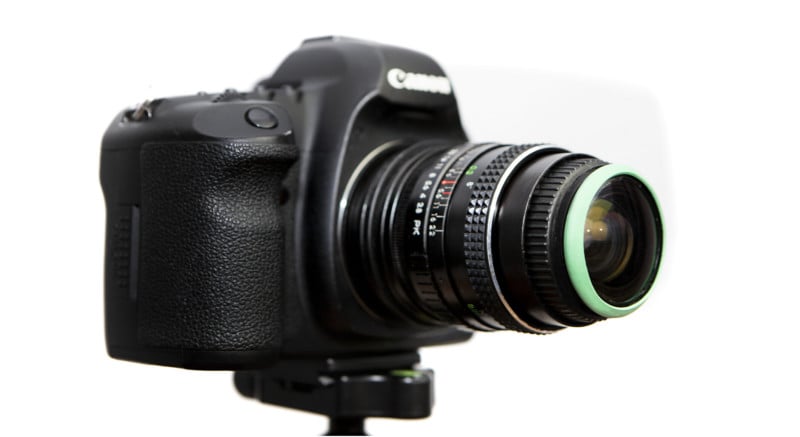
The front element of the Canon 28-80mm was a perfect fit in terms of size and viewing angle. It yielded better results than the front element that I tried previously and was easier to adapt and smaller in size as well, which is an important factor when photographing insects in nature (especially when the working distance only measures a few millimeters).
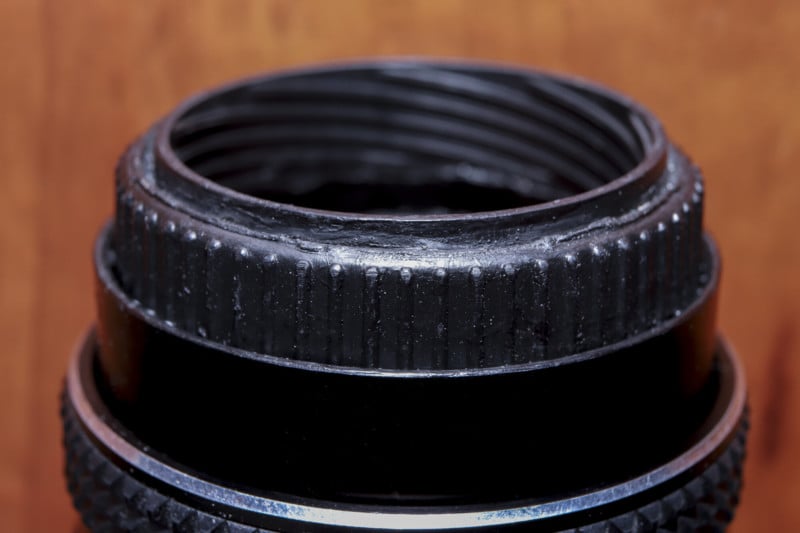
All I had to do now was to build an adapter to combine the two lenses. An old lens cap and the original thread of the Canon lens were sufficient material:
This combination worked beautifully. The magnification ratio and the focal length seemed about right with good sharpness. Plus, unlike its predecessor, it fits into any camera bag. So I took it out for some test shots:
And I was happy—the lens had a super-wide focal length of 17mm with some minor vignetting. But the best part was the image quality, which was the best I had seen since I started this project.
Its aperture ranges from f/2.8 – f/22 and it focuses from 21mm all the way down to 0mm. This is quite a short range and the lens’ major downside: it can’t focus on infinity. In the future I might add a helicoid to this lens to enable infinity focus…
Measuring the magnification factor
To measure the magnification factor of the lens, I photographed a ruler while focused at 2mm (closest workable distance). Next, I selected the center three millimeters in the photo in Photoshop; the selection measured 532 pixels.
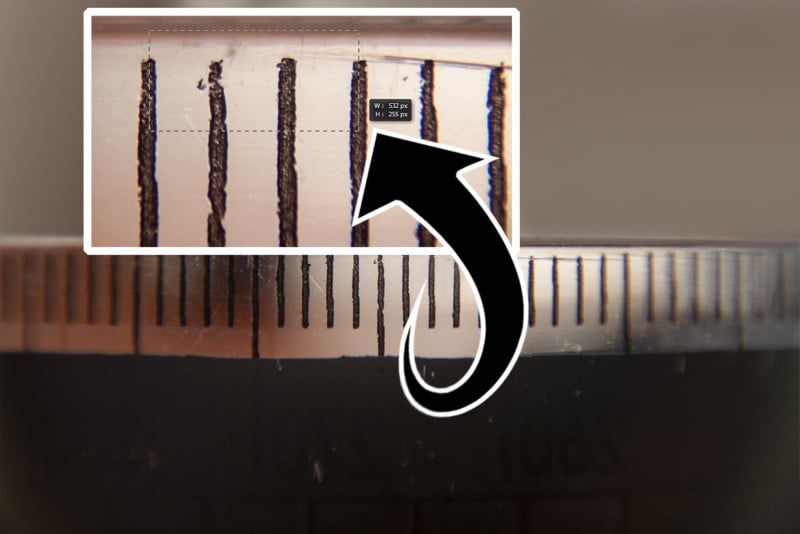
This means, that one millimeter measures 144px in my photograph. Dividing the 5616px width of the camera sensor by 35mm shows that one millimeter of the sensor holds 147px.
Finally we need to determine the ratio between photograph and life size: 144/147 = 0.98 ≈ 1x
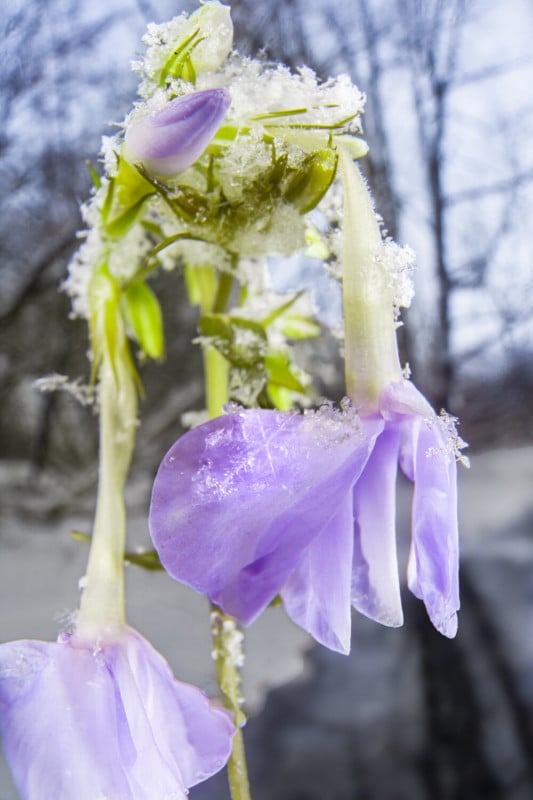
The following two images illustrate the lens’ furthest and closest focusing distances as of this article.

Measuring the viewing angle
Next I needed to measure the viewing angle—a simple task at last. All I had to do was to fill the frame with a background, mark the background at the edge of the frame and then measure the angle between the marking and the orientation of the lens (measuring from its very center).
I used a closet for the background and filled the frame with 4 of its panels—this way I didn’t have to use markings, I could measure straight from the center of the lens to the edges of the closet:
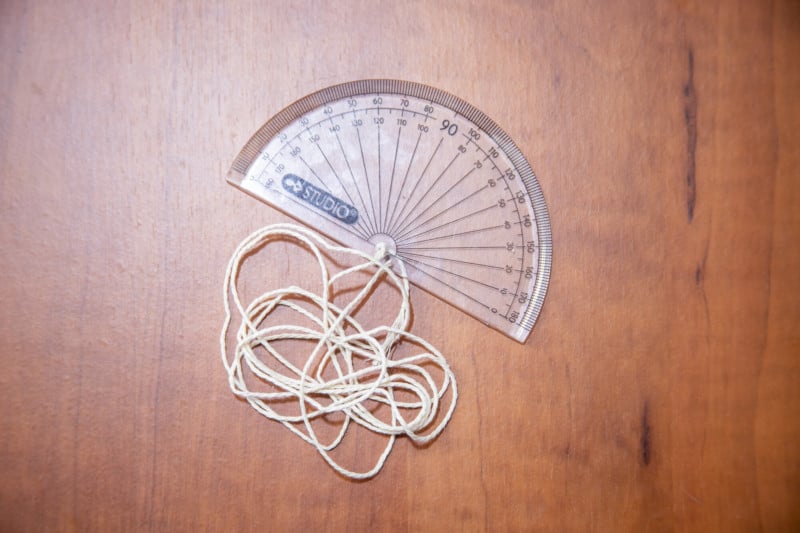
To measure the angle, I used the homemade device in the image above. By holding the plastic disc right to the front of the lens (perfectly parallel to the sensor plane) and the other end of the string to the corner of the closet, I can determine the viewing angle.
In this example, the scale showed and angle of 43° on the one side and 137° on the other. To finally determine the angle of view we have to calculate the difference between these numbers. The result is 94, which equals a focal length on 17mm.
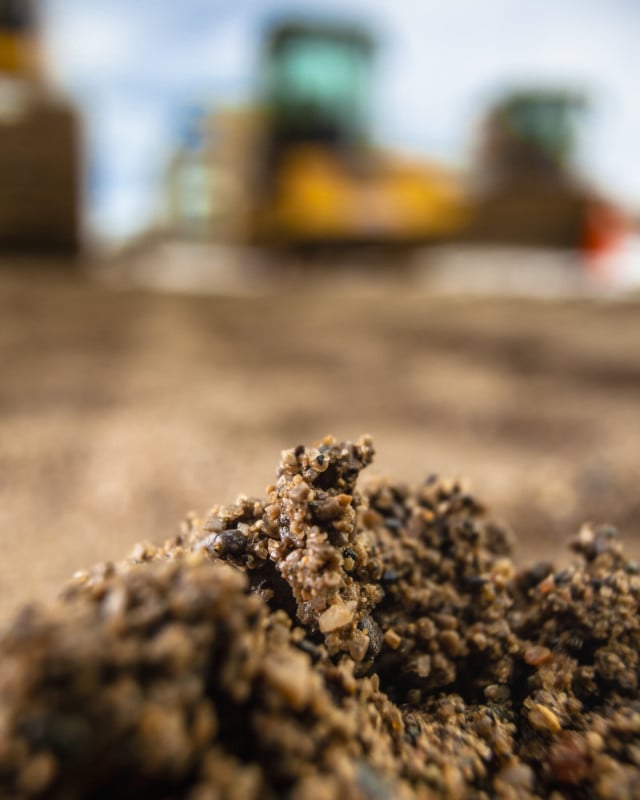
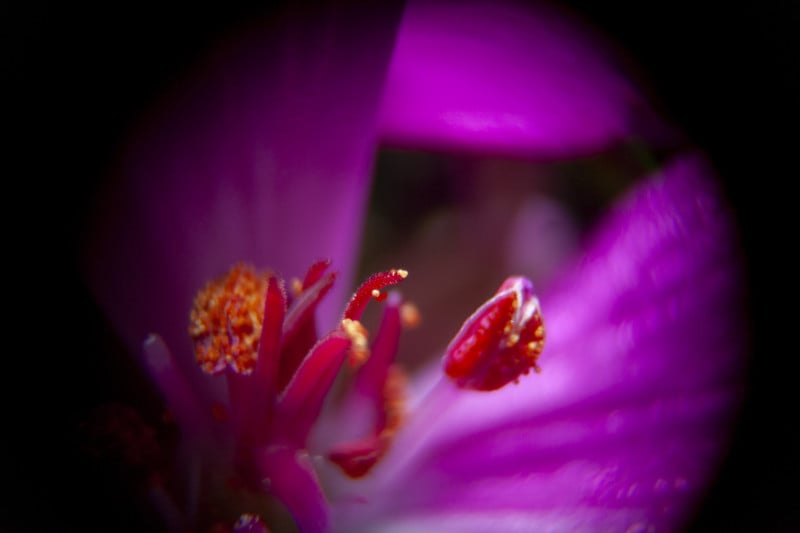
Shooting Wide-Angle Macro
After using this lens for a while now, I have to say that I absolutely love it! As with any other macro lens, it takes some time to get used to it, especially its incredibly short working distance. But the images it delivers look fantastic and are definitely make up for that challenge.
Working Distance
As mentioned before, handling this lens is not as “easy” as a 60 or 100mm macro lens, mostly due to its abnormally short working distance measuring only about 2.5mm at a magnification ratio of 1X in the center of the frame. The lens also creates a slightly distorted image—as super-wide angle lenses tend to—and therefore the magnification falls off towards the edges of the shot.
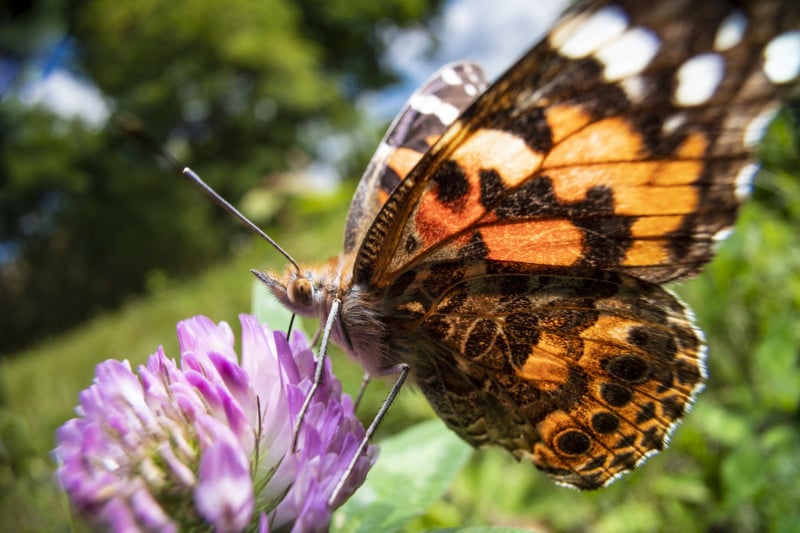
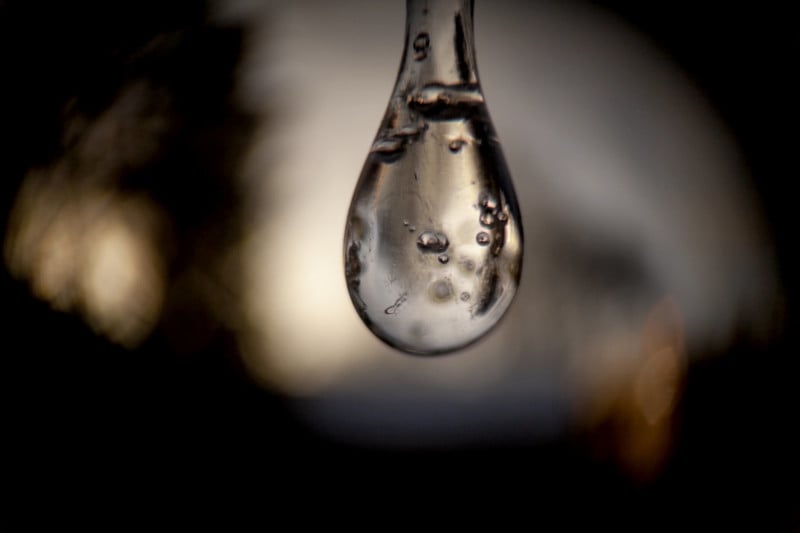
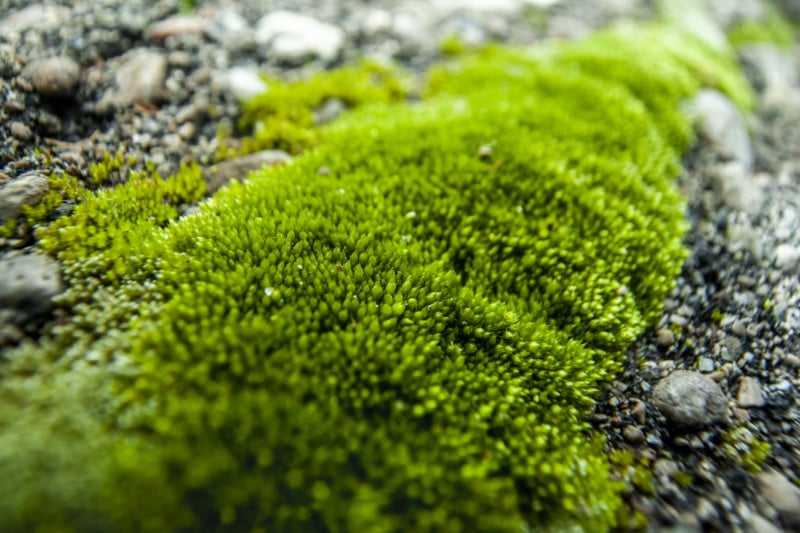
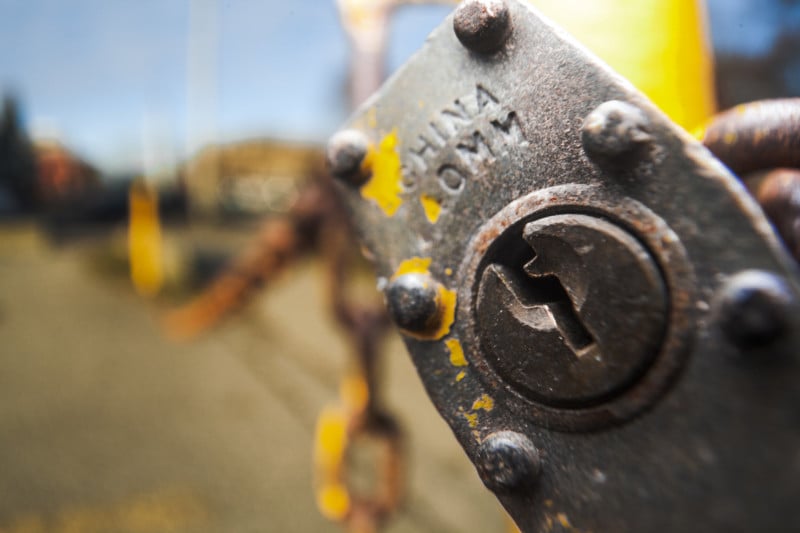
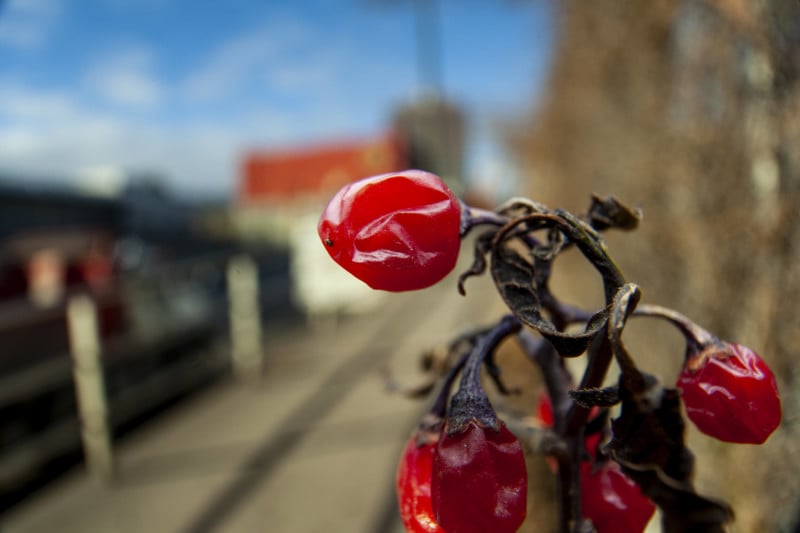
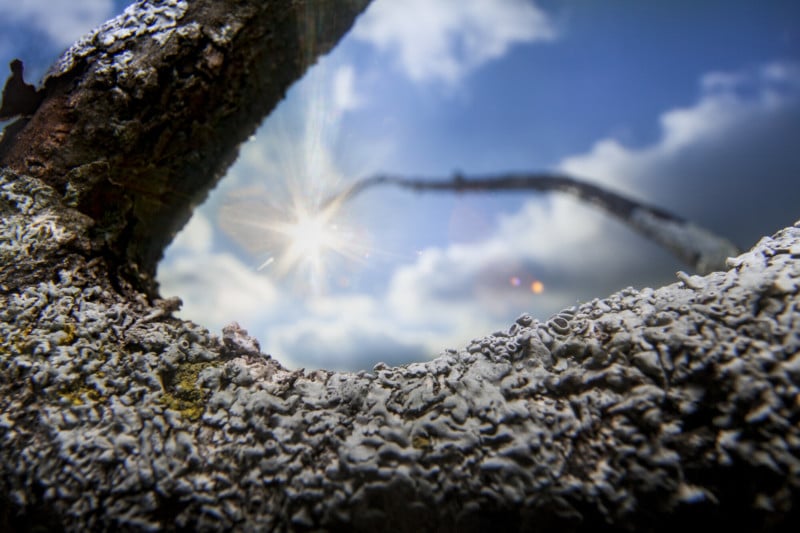
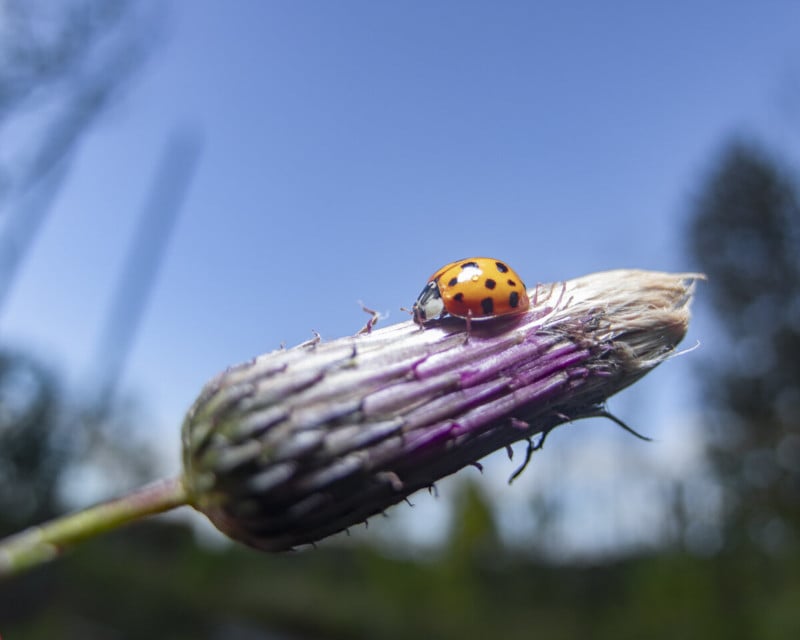
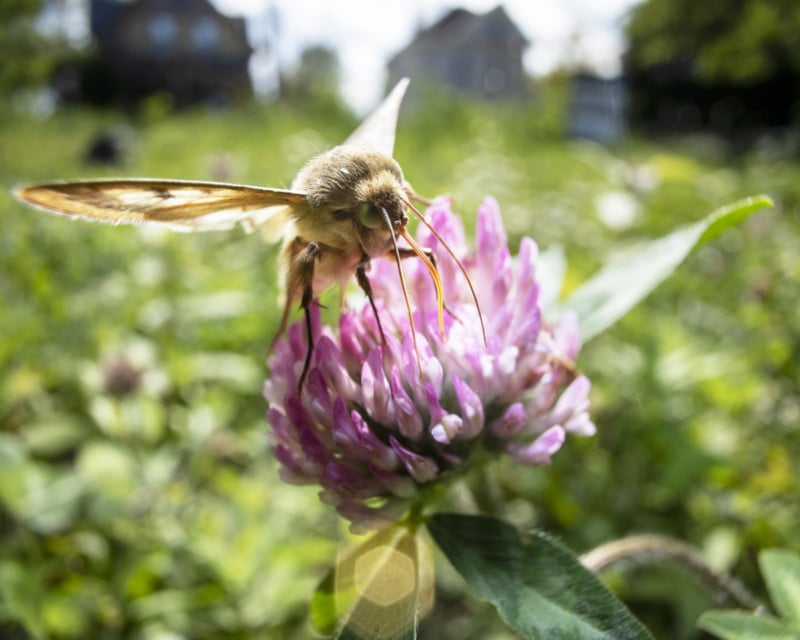
This short working distance makes it difficult to arrange shots in the field; in some situations the lens simply can’t fit where you need it to be to get the shot. In terms of photographing insects I have only little experience so far, as I started this project in early fall and I only got to use the first prototype for taking photos of live subjects (images below).
It’s possible, but challenging, and definitely takes practice. The right circumstances help, too. Early in the morning, when the sun just rises, insects are slow and don’t move around as much as they do during warmer hours of the day. There will definitely be a lot of running and gunning involved with this lens, but I am also very excited to use this lens in the field once it gets warm again!
Author’s note: Sample images below where shot with the first, longer, prototype.
Lighting
Shooting with this lens is challenging, not only because of the intensely short focusing distance, but also because of the lack of light that this introduces. The lens is bound to cast a shadow on the subject, no matter where the light is coming from.
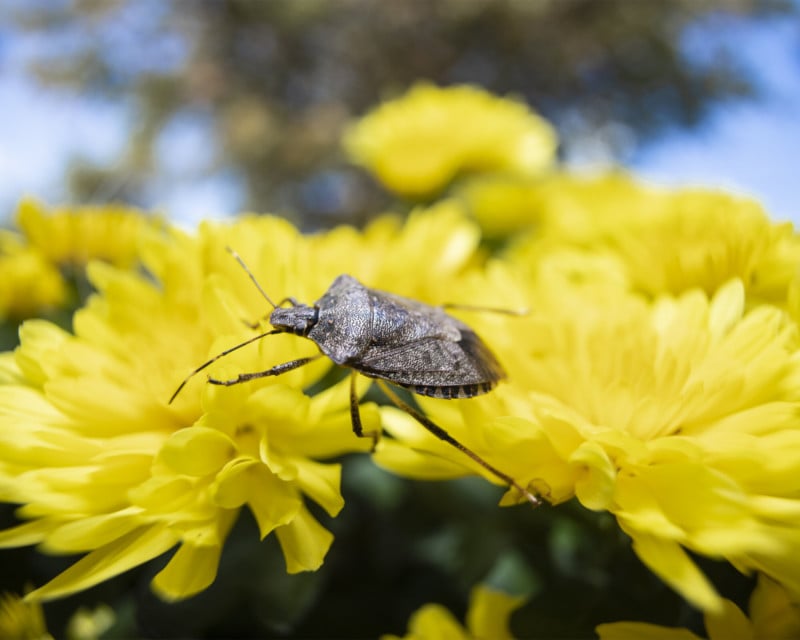
This image was shot at a working distance of about 5-6mm with a traditional shoot-through diffuser. Even though already optimized in orientation and position, it doesn’t yield a lot of light on the right side of the frame, where lens was just too close to the subject.
Another lighting solution that can work well (given the right circumstances) is a simple DIY diffuser made from a can of chips. You find more information on DIY diffusers and how to build one here.
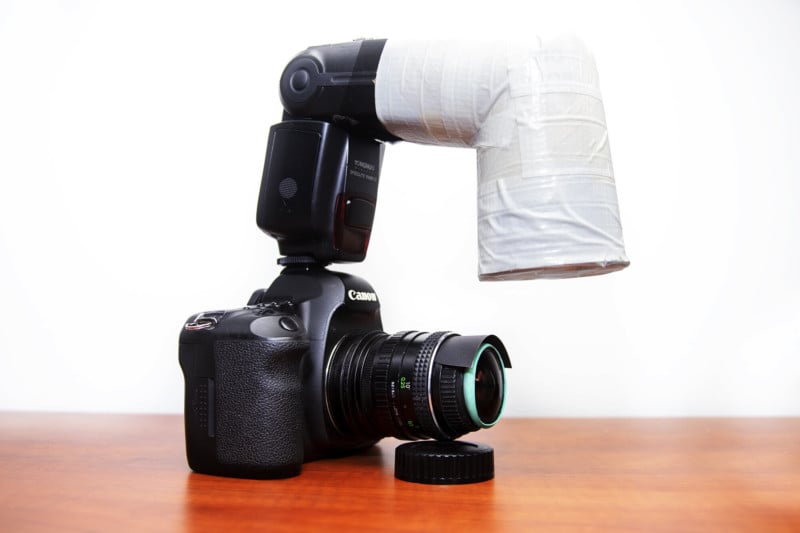
This modifier creates the good lighting for most subjects. In many scenarios fill light will be reflected back up from surfaces underneath, such as leaves or the ground. Notice the little piece of black paper: that is my lens hood. Without this, the flash would cause too much flaring in the images.
The “ideal” light source to choose really depends a lot on the specific situation, but generally a ring flash will be the best and most universal solution.
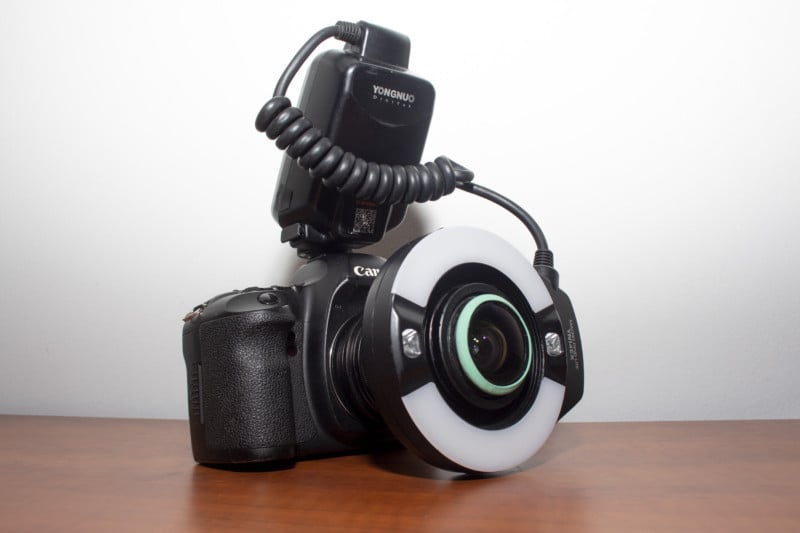
A dedicated macro ring-flash fits around the the front element of the lens and supplies light from all directions. This definitely helps with the lack of light, but also adds to the size of the lens. At short working distances this can get in the way when there is limited room.
Fortunately this lens gathers a good amount of light and can be shot with ambient light at working distances above 5mm or so.
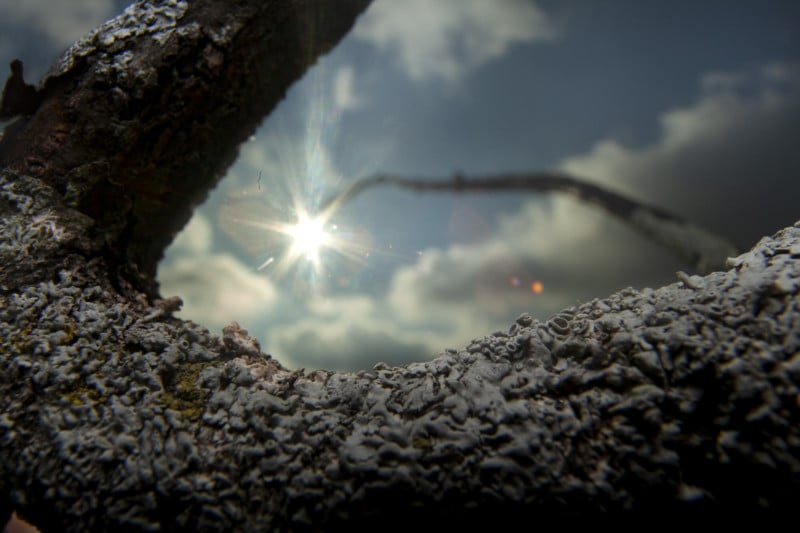
But light does not only affect our image in regards to the exposure, it also plays a roll in terms of image quality. So how does this lens do with bright lights? Even though back-lighting is not exactly the strength of many wide-angle lenses, this one performs quite alright. Flares are present, but pleasing, and the lens produces sunbursts from apertures of f/8 and higher.
When shooting directly into the sun, however, the contrast suffers and chromatic aberration increases drastically. The sharpness/contrast remains good as long is the sun is partially hidden behind a subject and/or off-center.
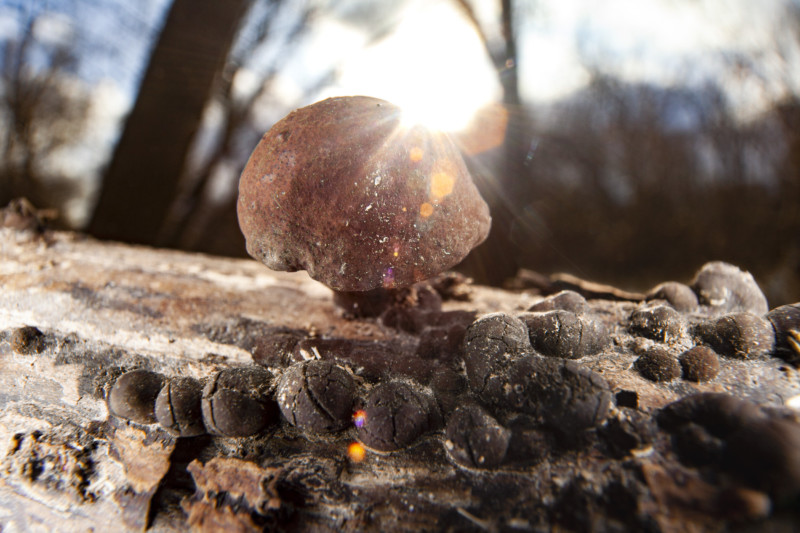
1/80th sec, f/9.0, ISO 400, macro-ring-flash (underexposed)
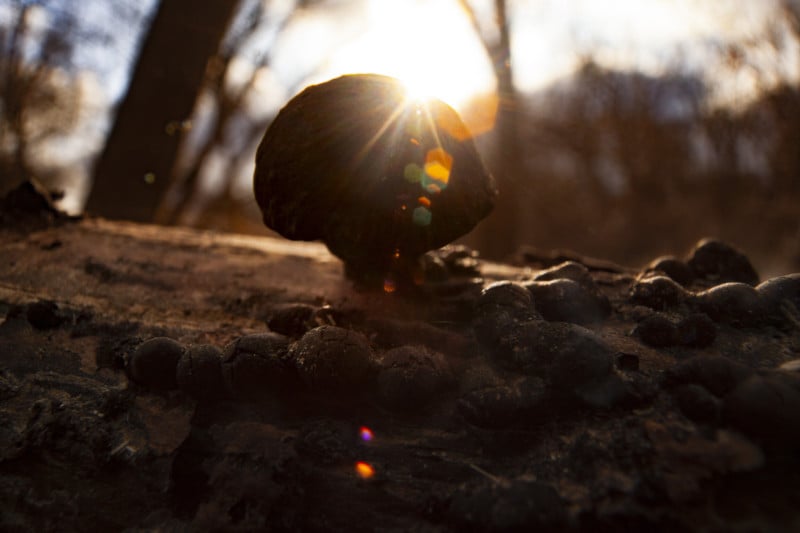
1/80th sec, f/9.0, ISO 400, ambient light
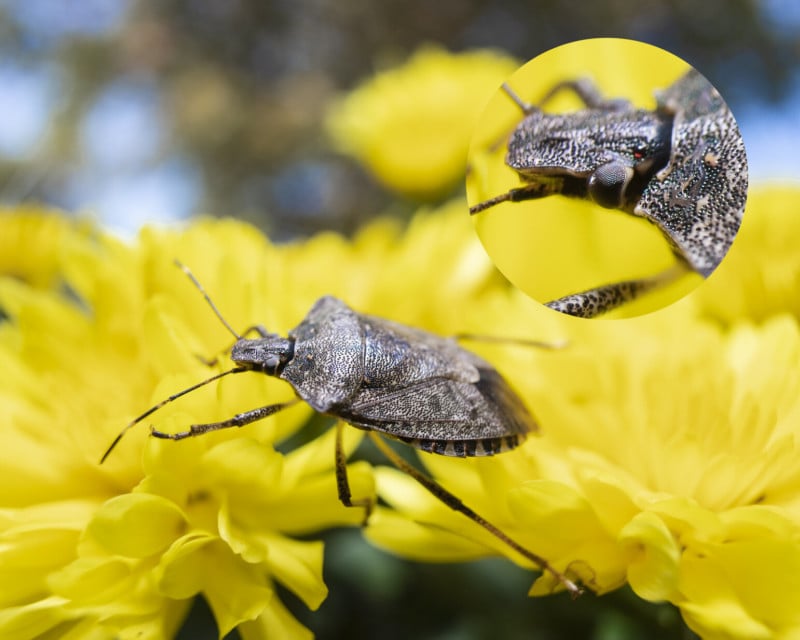
Because of its short focusing distance and the relatively large depth of field, this lens is very susceptible to dust and dirt and even slight haze on the front element. Especially when stopping the lens down, every spec of dust on the glass will become visible and exaggerated by chromatic aberration.
In the set of images below you can compare the RAW file to the processed image. The specs might not stand out a lot at this viewing size, but they do stand out when viewing the image at full size. Note the relatively large piece of fiber to the top left of the sunburst: this illustrates how sharp dirt on the actual lens shows up in the photograph.
They are almost inevitable with any kind of wide angle macro lens—it’s just the nature of optics. When shooting the lens wide open this is not as problematic, however.

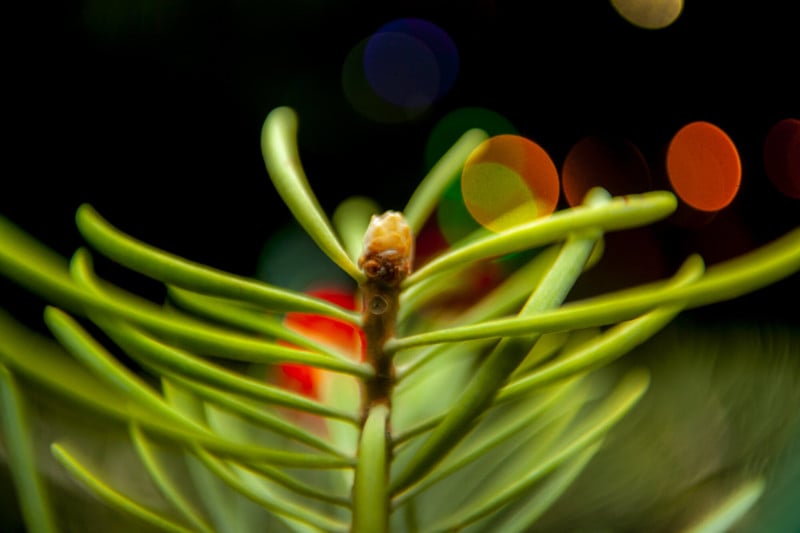
Bokeh
The background blur of the lens, or its bokeh, is soft and soapy when wide open. It renders specular highlights nicely and with a bit of a swirl, a look many old Russian lenses are known for.
Conclusion
After using it for a few weeks now, I have gotten used to it and to the fact that you always need to have a lens cloth on you with this one. Ultimately I’m very pleased with the lens and with the way this project worked out; I used two old lenses with a combined value of less than $100 and transformed them into capable macro lenses.
The conversion is reversible, meaning that I could still use the Albinar lens as a 24mm prime or as a super-macro lens (reverse mounting) and put the front element back into the canon EF 28-20 anytime.
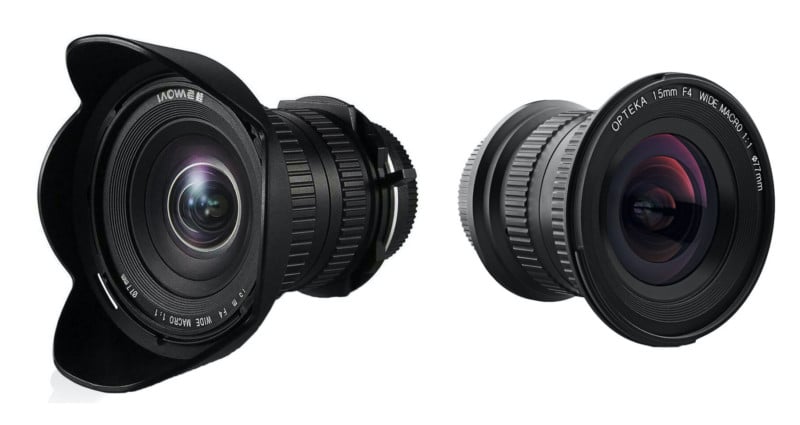
If I were to review the fish-eye lens that I put together here, I would point out its noticeable chromatic aberration and its insanely short working distance, which is less than the 5mm of the Laowa lens. It’s working distance ranges from about 2mm to 20mm, depending on the magnification ratio. The magnification comes to a maximum of 1.0x when focused on a distance of about 2-3mm.
As far as pros, I’d have to mention its viewing angle of super-wide 17mm, the fact that it is a true macro lens and, last but not least, the way it renders images and especially out of focus areas.
For a DIY project, I think the results are quite alright. Most of its flaws are due to the nature of physics and will be found with most super-wide lenses—focusing this close will inevitably augment these flaws (susceptibility to flares, haze, dirt and aberrations). Besides the fact that I now have an awesome and unique lens, which a special value to me, this has also been a very insightful learning experiences and I hope you found some bits of new knowledge or inspiration along the lines, too.
Author’s Note: All sample images in this article have been taken with full frame cameras and post processed unless stated differently.
Lenses I used for this project where either cheap, faulty or only used in a reversible manner. I do not recommend using new / expensive lenses for projects such as this.