Making an Exact, Working Replica of the Apollo 11 Moon Camera
Four years ago, I set what seemed like an impossible goal: to make a functional Apollo 11 camera by the 50th anniversary of the moon landing. It was a crazy idea, especially with how inexperienced I was with nearly every process that would be required to do so.
I would need to build a workshop and learn how to operate machines that can precisely remove metal as easily as they can imprecisely remove your arm. I would need to learn how to 3D model parts, create accurate technical drawings, repair and reassemble rare camera bodies and intricate lenses that have very little documentation. It would take many thousands of hours of research, practice and learning, and it wouldn’t be cheap.
So, why do it?
The answer is quick for any photographer or space nut: It’s a MOON camera! But for the perplexed majority, the answer went a bit like this: some people like to resurrect classic cars, I wanted to resurrect a classic camera, and the camera we sent to and left on the lunar surface on Apollo 11 is one of the most important photographic tools ever made, capturing a historic milestone for our species.
The images we brought back were iconic. They changed culture, inspired generations of inventors, scientists, and entrepreneurs to do great things.
I could write a book all the nerdy details that went into the making this thing (we’re currently working on a documentary) but for the sake of this article, here are the highlights.
Finding Accurate Reference Material
First, it’s slightly surprising how little information there is on the moon cameras and how many inaccuracies there are in what little comes up in a simple search, starting with what one actually looks like.
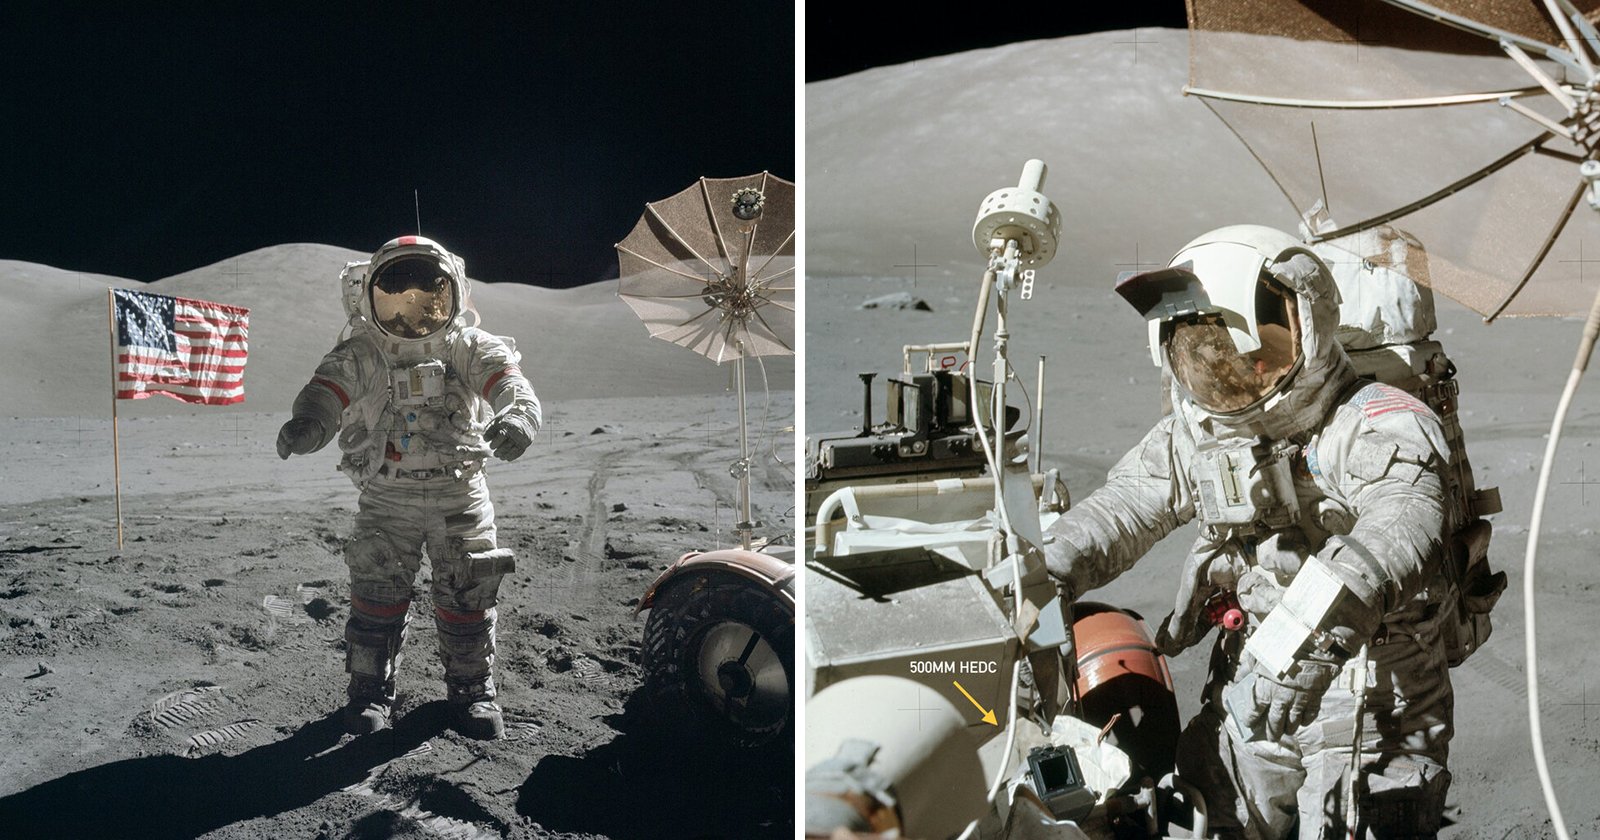
We left most them on the moon to save weight for moon rocks, returning only with the exposed 70mm film. Auction photos of “the only camera to come back from the moon” show it with an early shuttle-era film magazine, the wrong lens, all while another camera that came back on Apollo 14 is sitting at the Smithsonian with less contested documentation. The camera also subtly evolved over the seven Apollo missions. Where do you start?
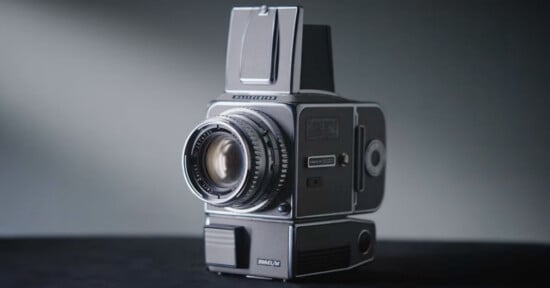
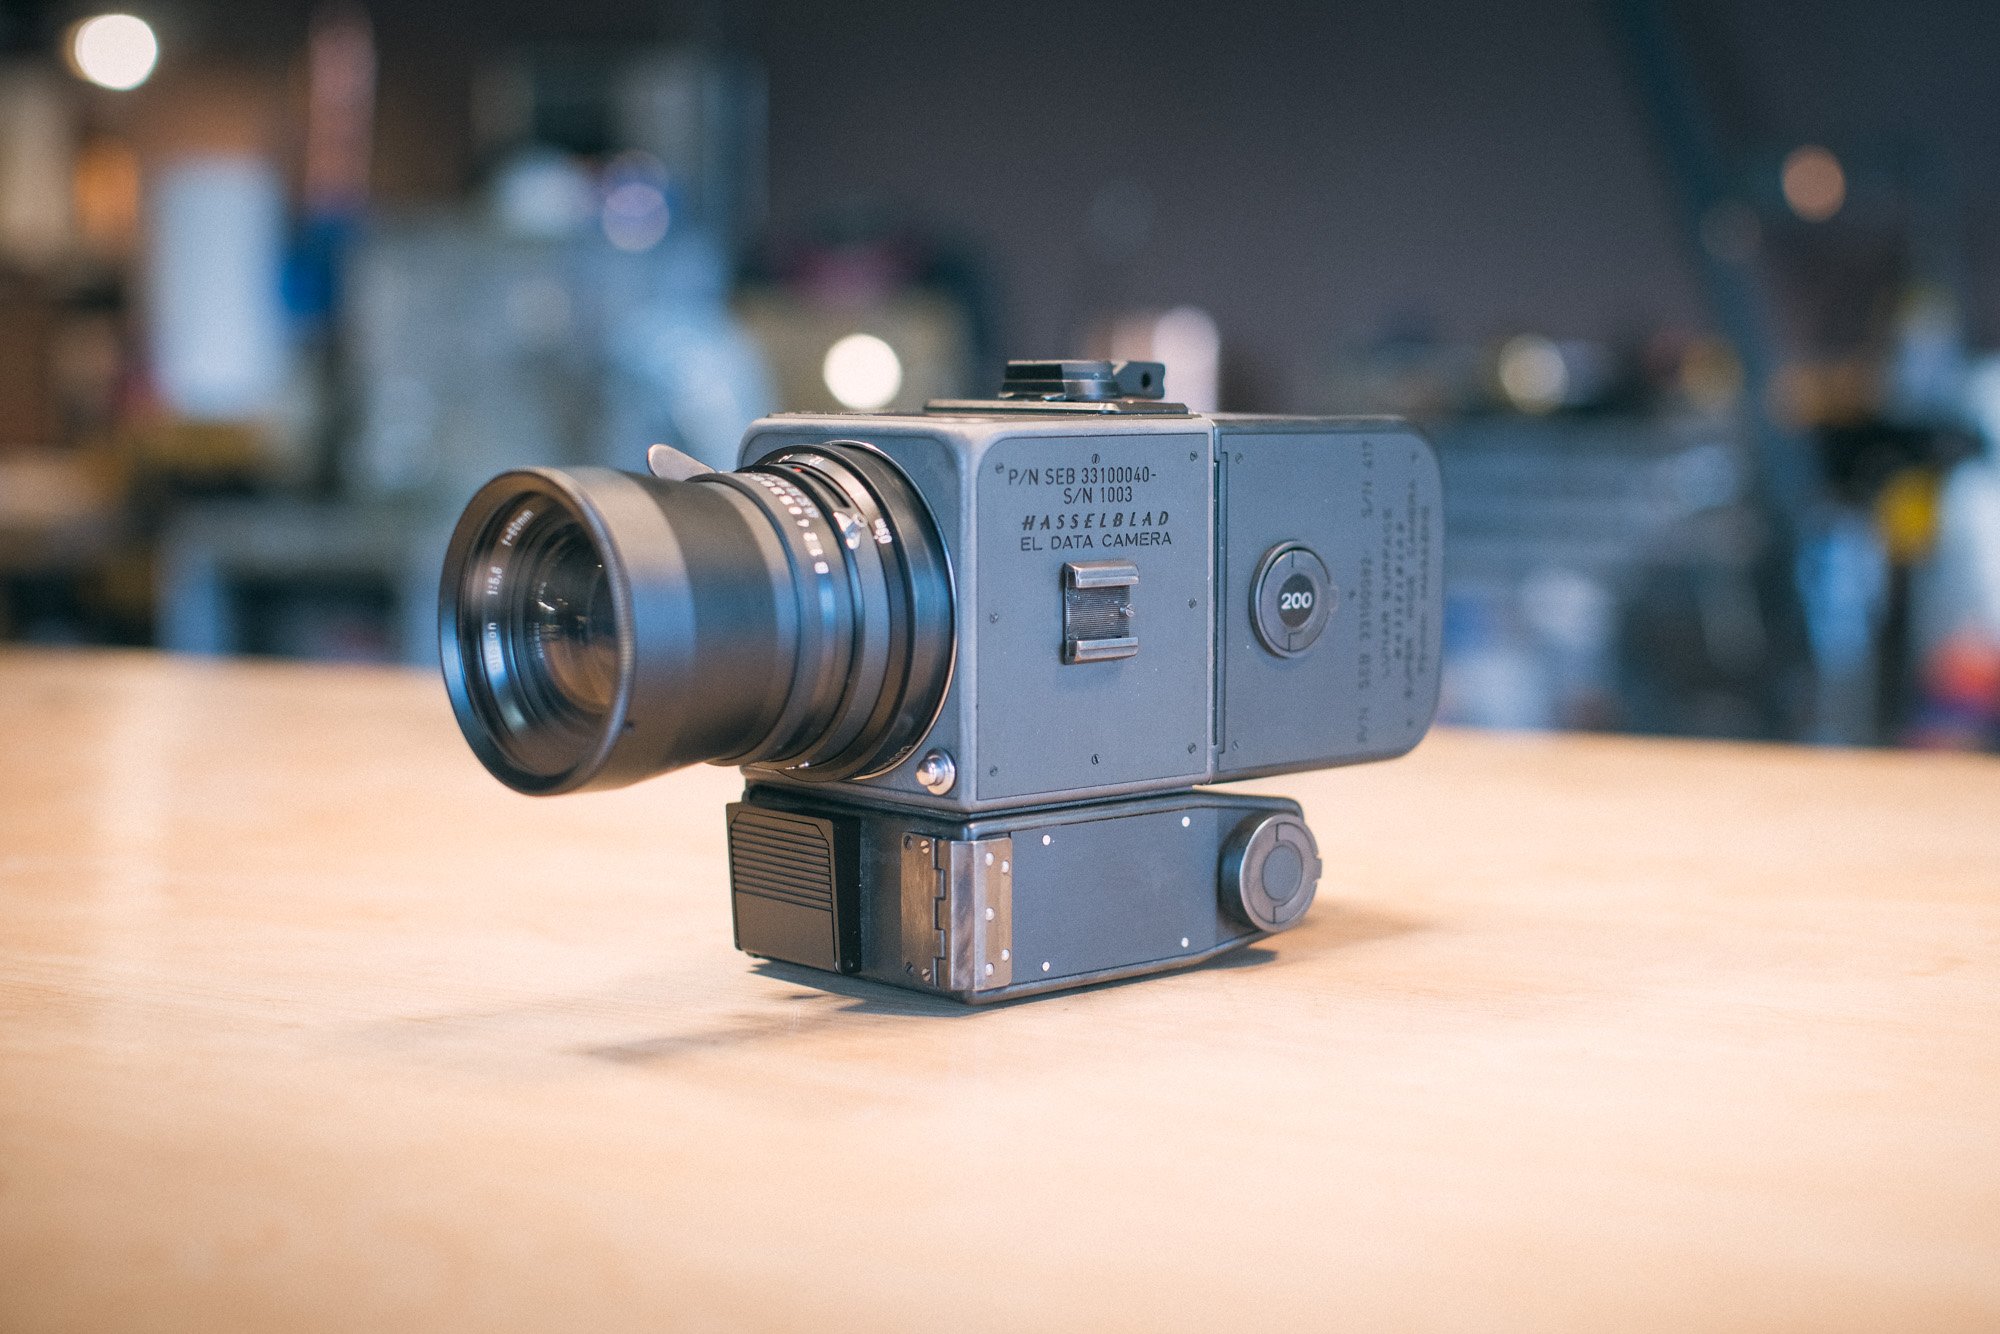
Luckily, I had access to the most critical resource—one of the few, early Hasselblad Electric Data Cameras made for NASA in 1968—that I could carefully measure and examine. As it turns out, it takes a moon camera to make a moon camera.
Next, I had to locate high-resolution press photos of Neil and Buzz training, which showed the first iteration of the camera that flew with them to the lunar surface. The Smithsonian had a lot of material, including great photos of the film magazine they brought back.

Collecting original repair manuals and notes from Hasselblad technicians was also critical in understanding the fundamentals of how the cameras functioned, down to the purpose of every screw.
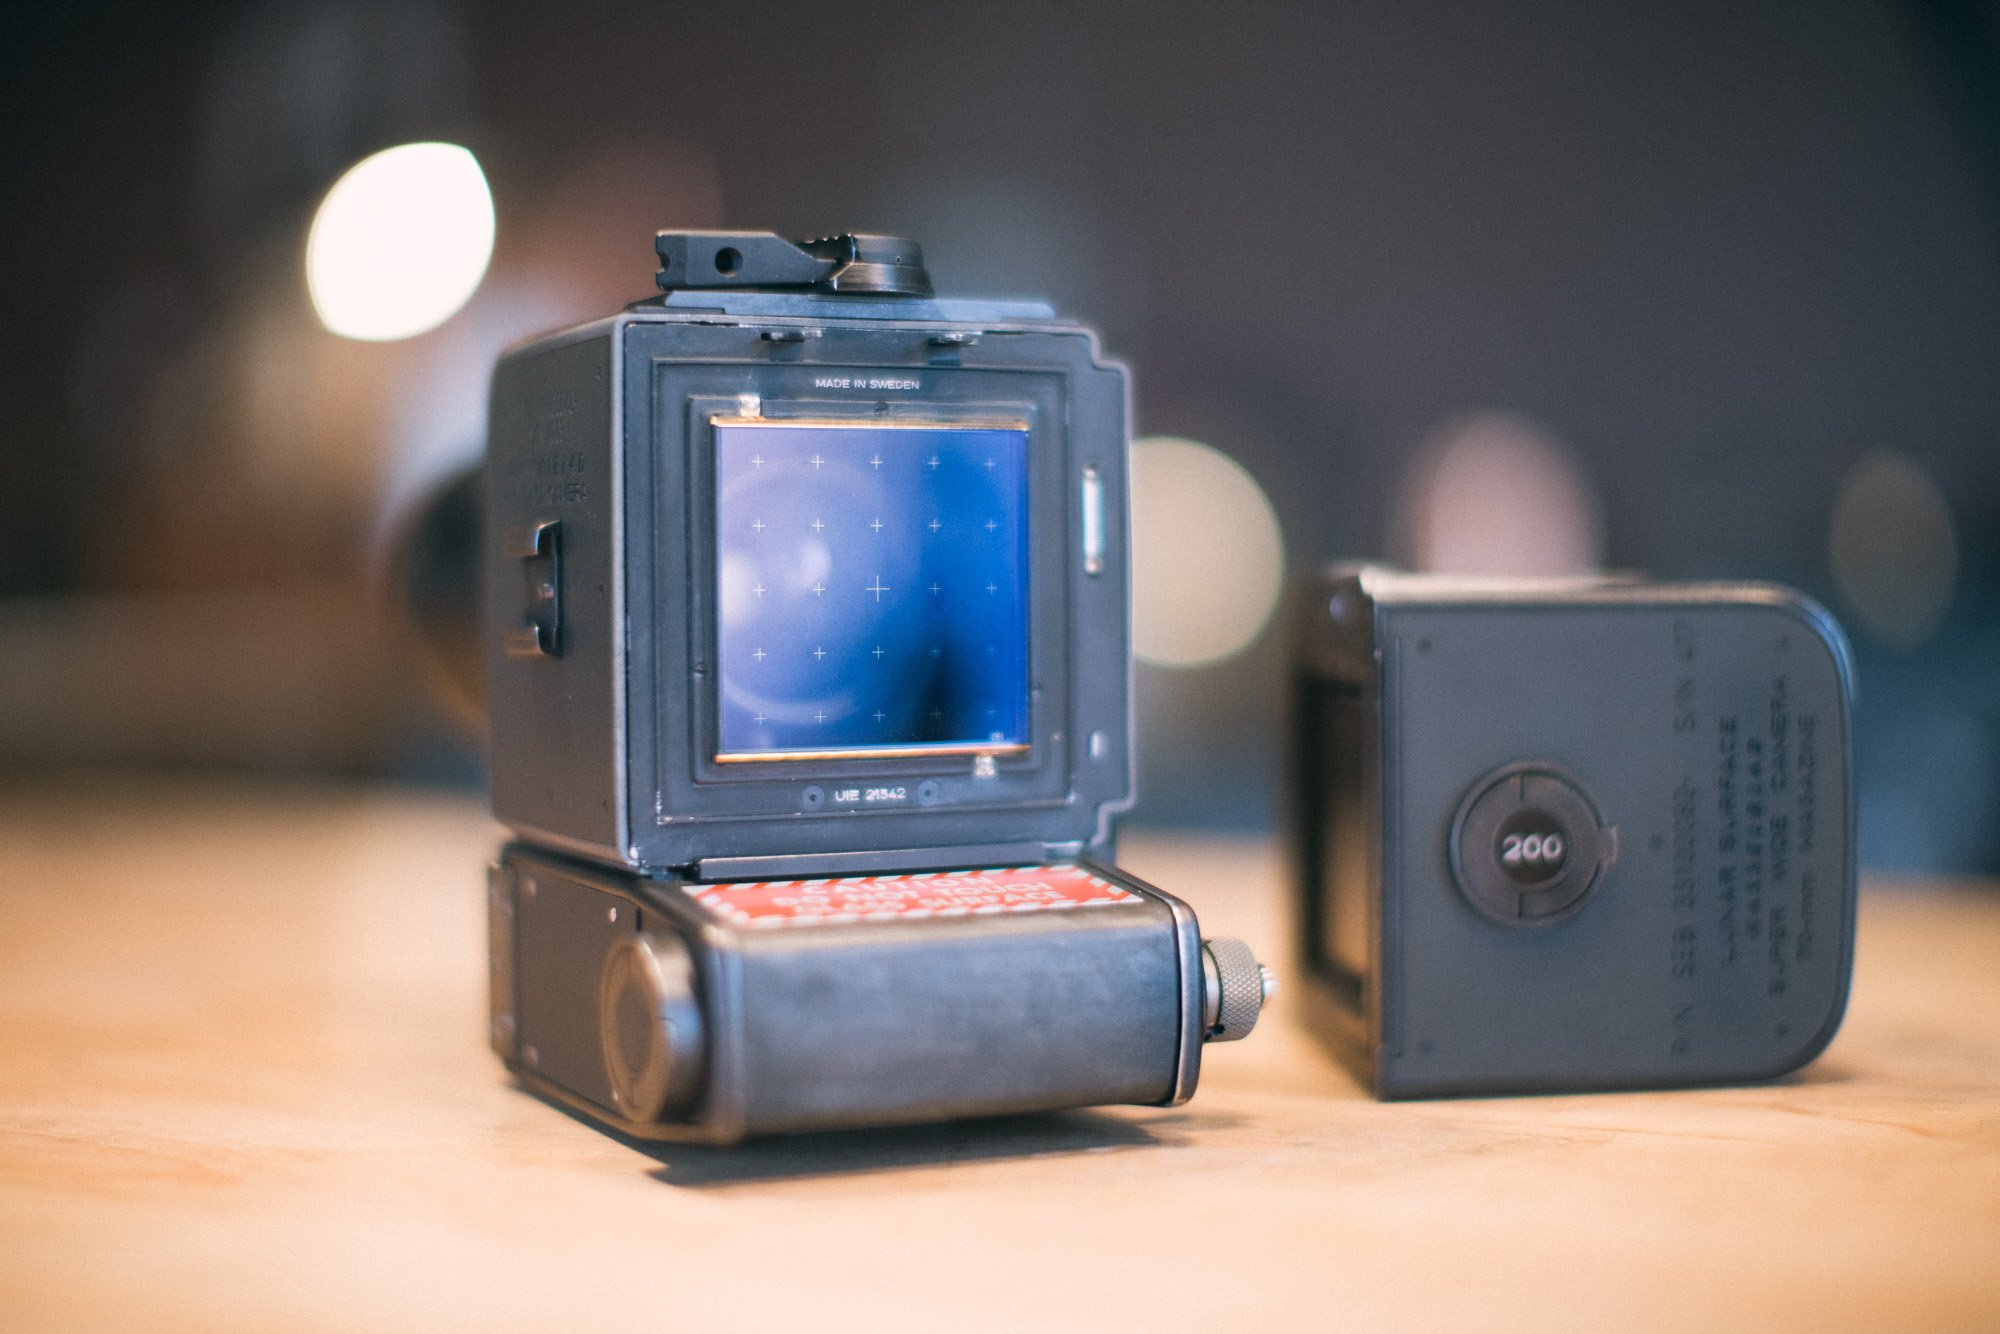
The Réseau Plate
The defining feature of the lunar surface camera was the Réseau plate, a thin sheet of glass with a grid of crosshairs that pressed against the film plane. When you took a photo of, say, a crater on the lunar surface, these little crosshairs would show up in the image to help scientists measure the scale and distance of that particular lunar geography. We call that process photogrammetry, and it’s much like how Face ID measures the craters on my face to unlock my iPhone.
Hasselblad, the Swedish manufacturer responsible for first miniaturizing this technology for NASA, had spent so much time and effort building a separate factory to produce moon cameras, they decided to make a few available for government projects and aerial photography in the early 1970’s. They were sold privately as “Metrik Kameras,” and because they shot 70mm film, they called them “MK-70.”
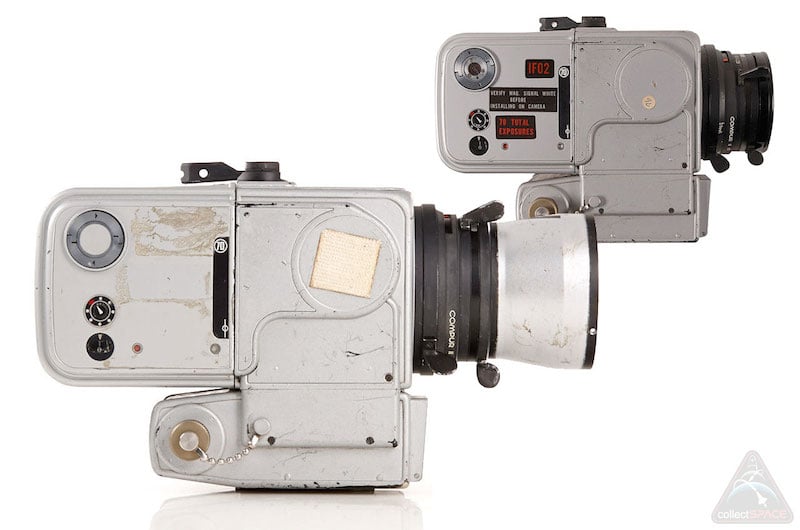
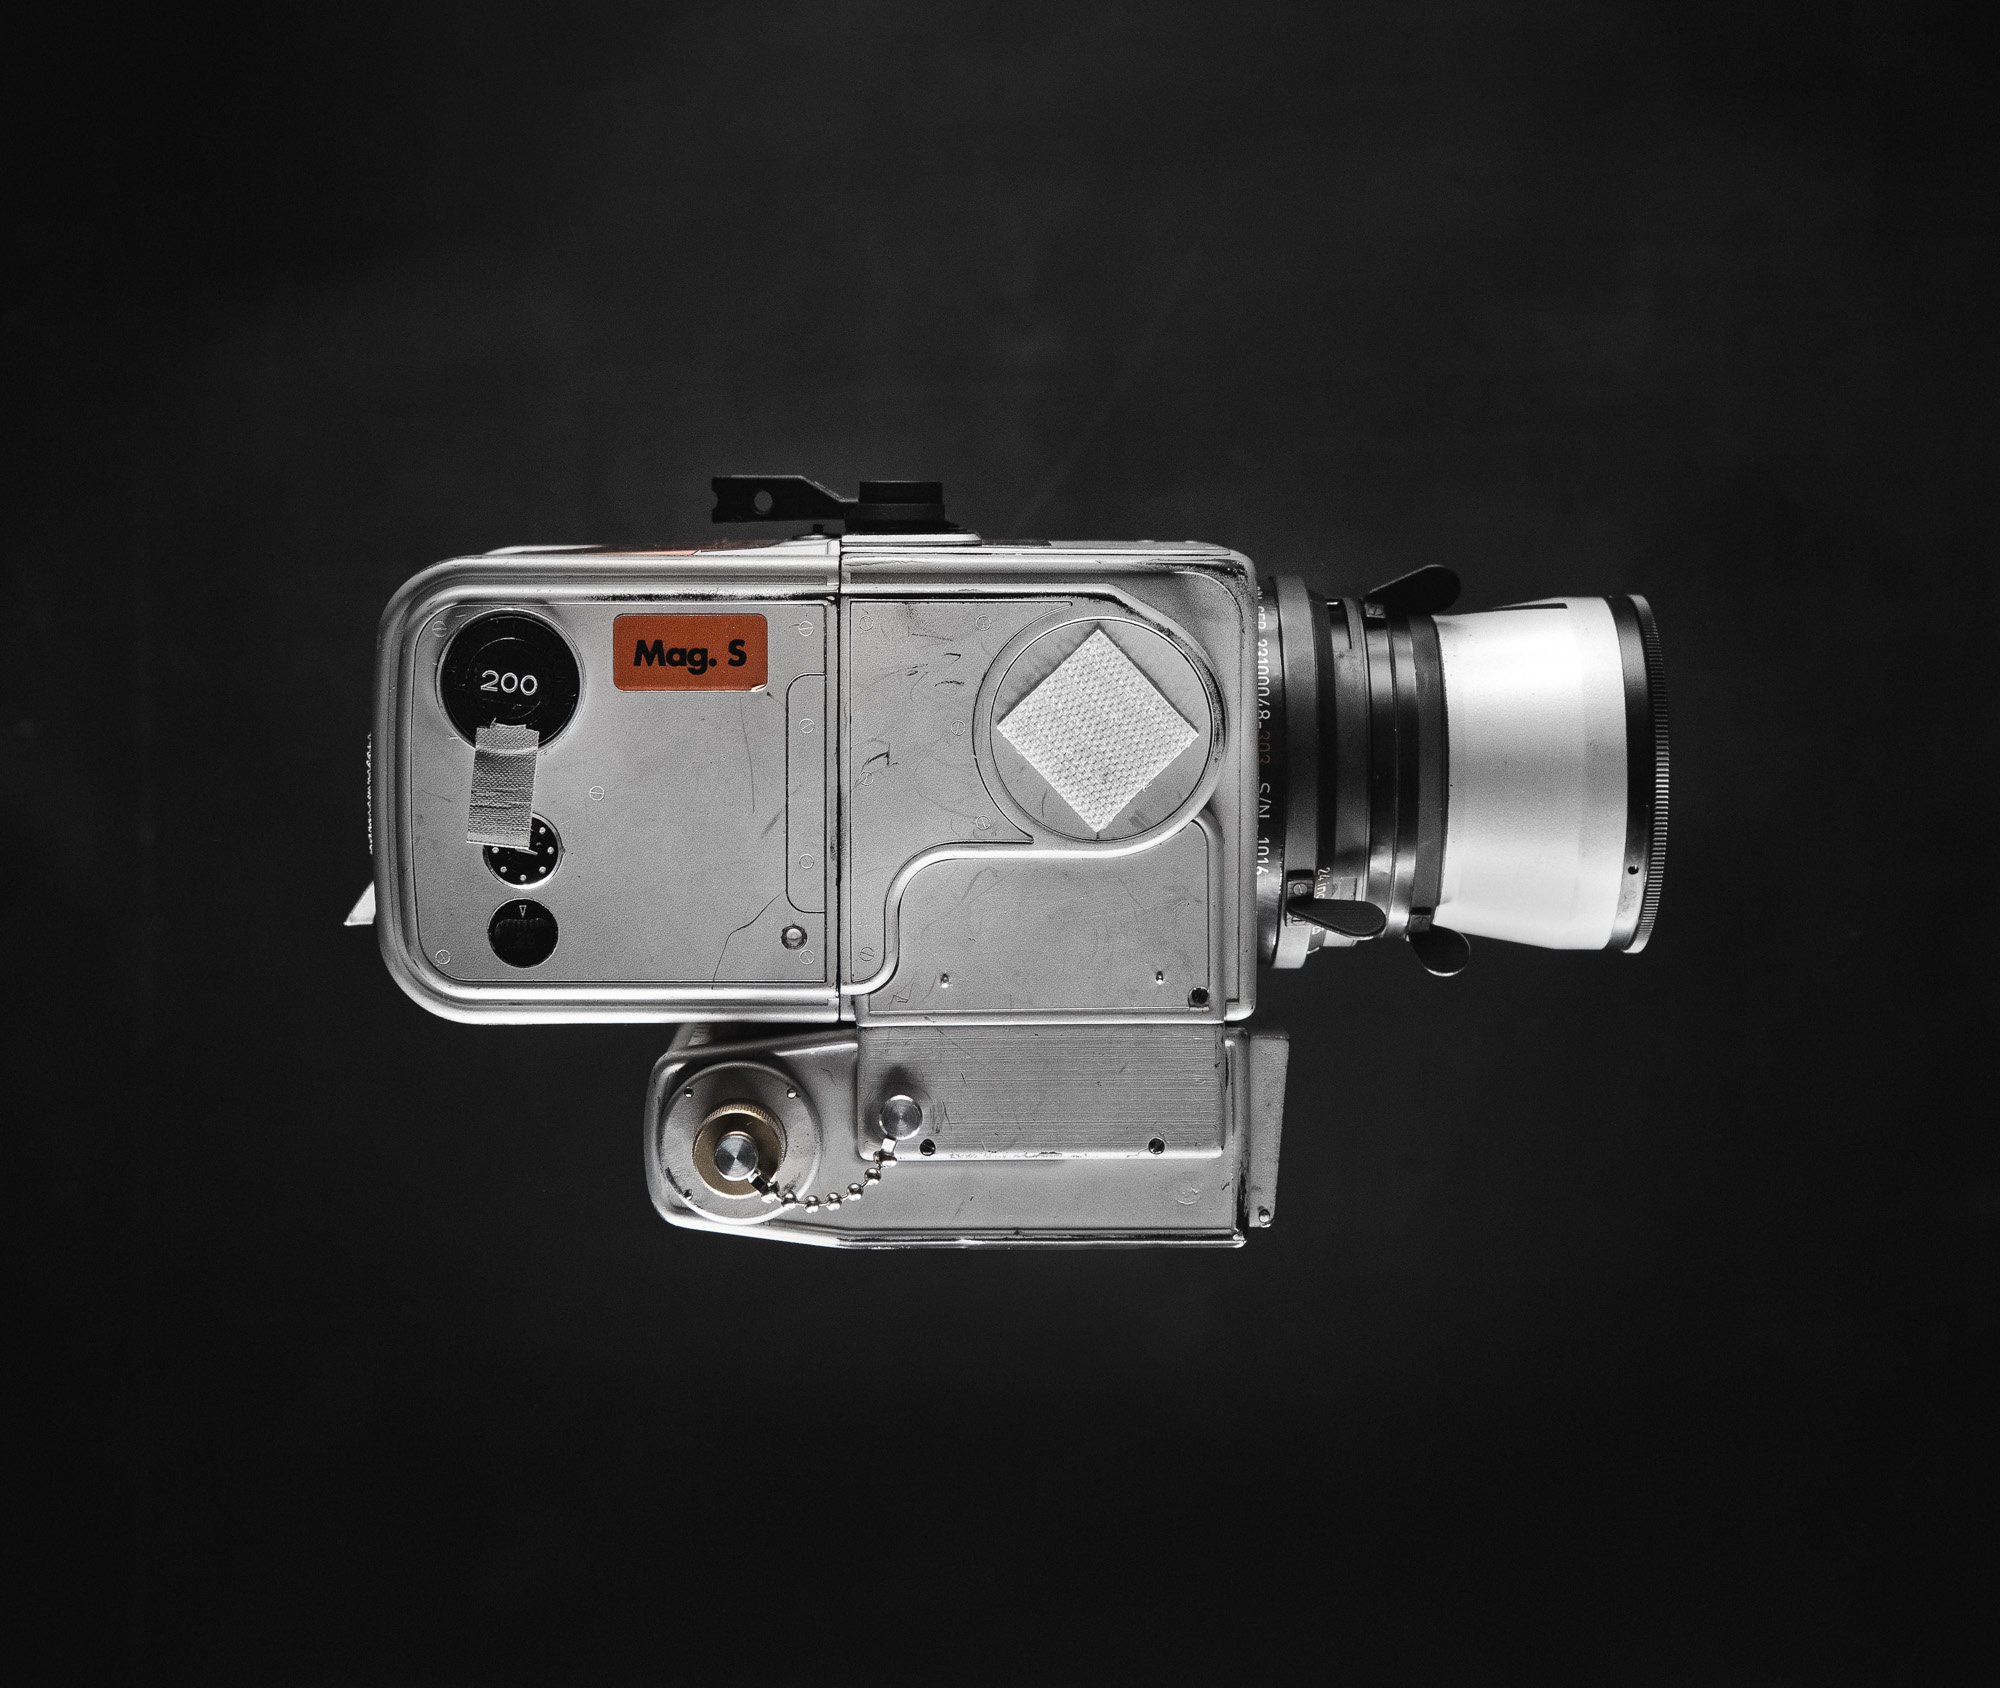
I was able to find an old government MK-70 in complete disrepair—with missing parts, chipping paint, non-functional motors coated in crystalized battery acid—and salvage what would have been extremely difficult to manufacture. Combined with a new body housing from another broken Hasselblad from 1965, a beater suddenly had a second chance at life as a moon camera. One that may have preceded it on the same production line.
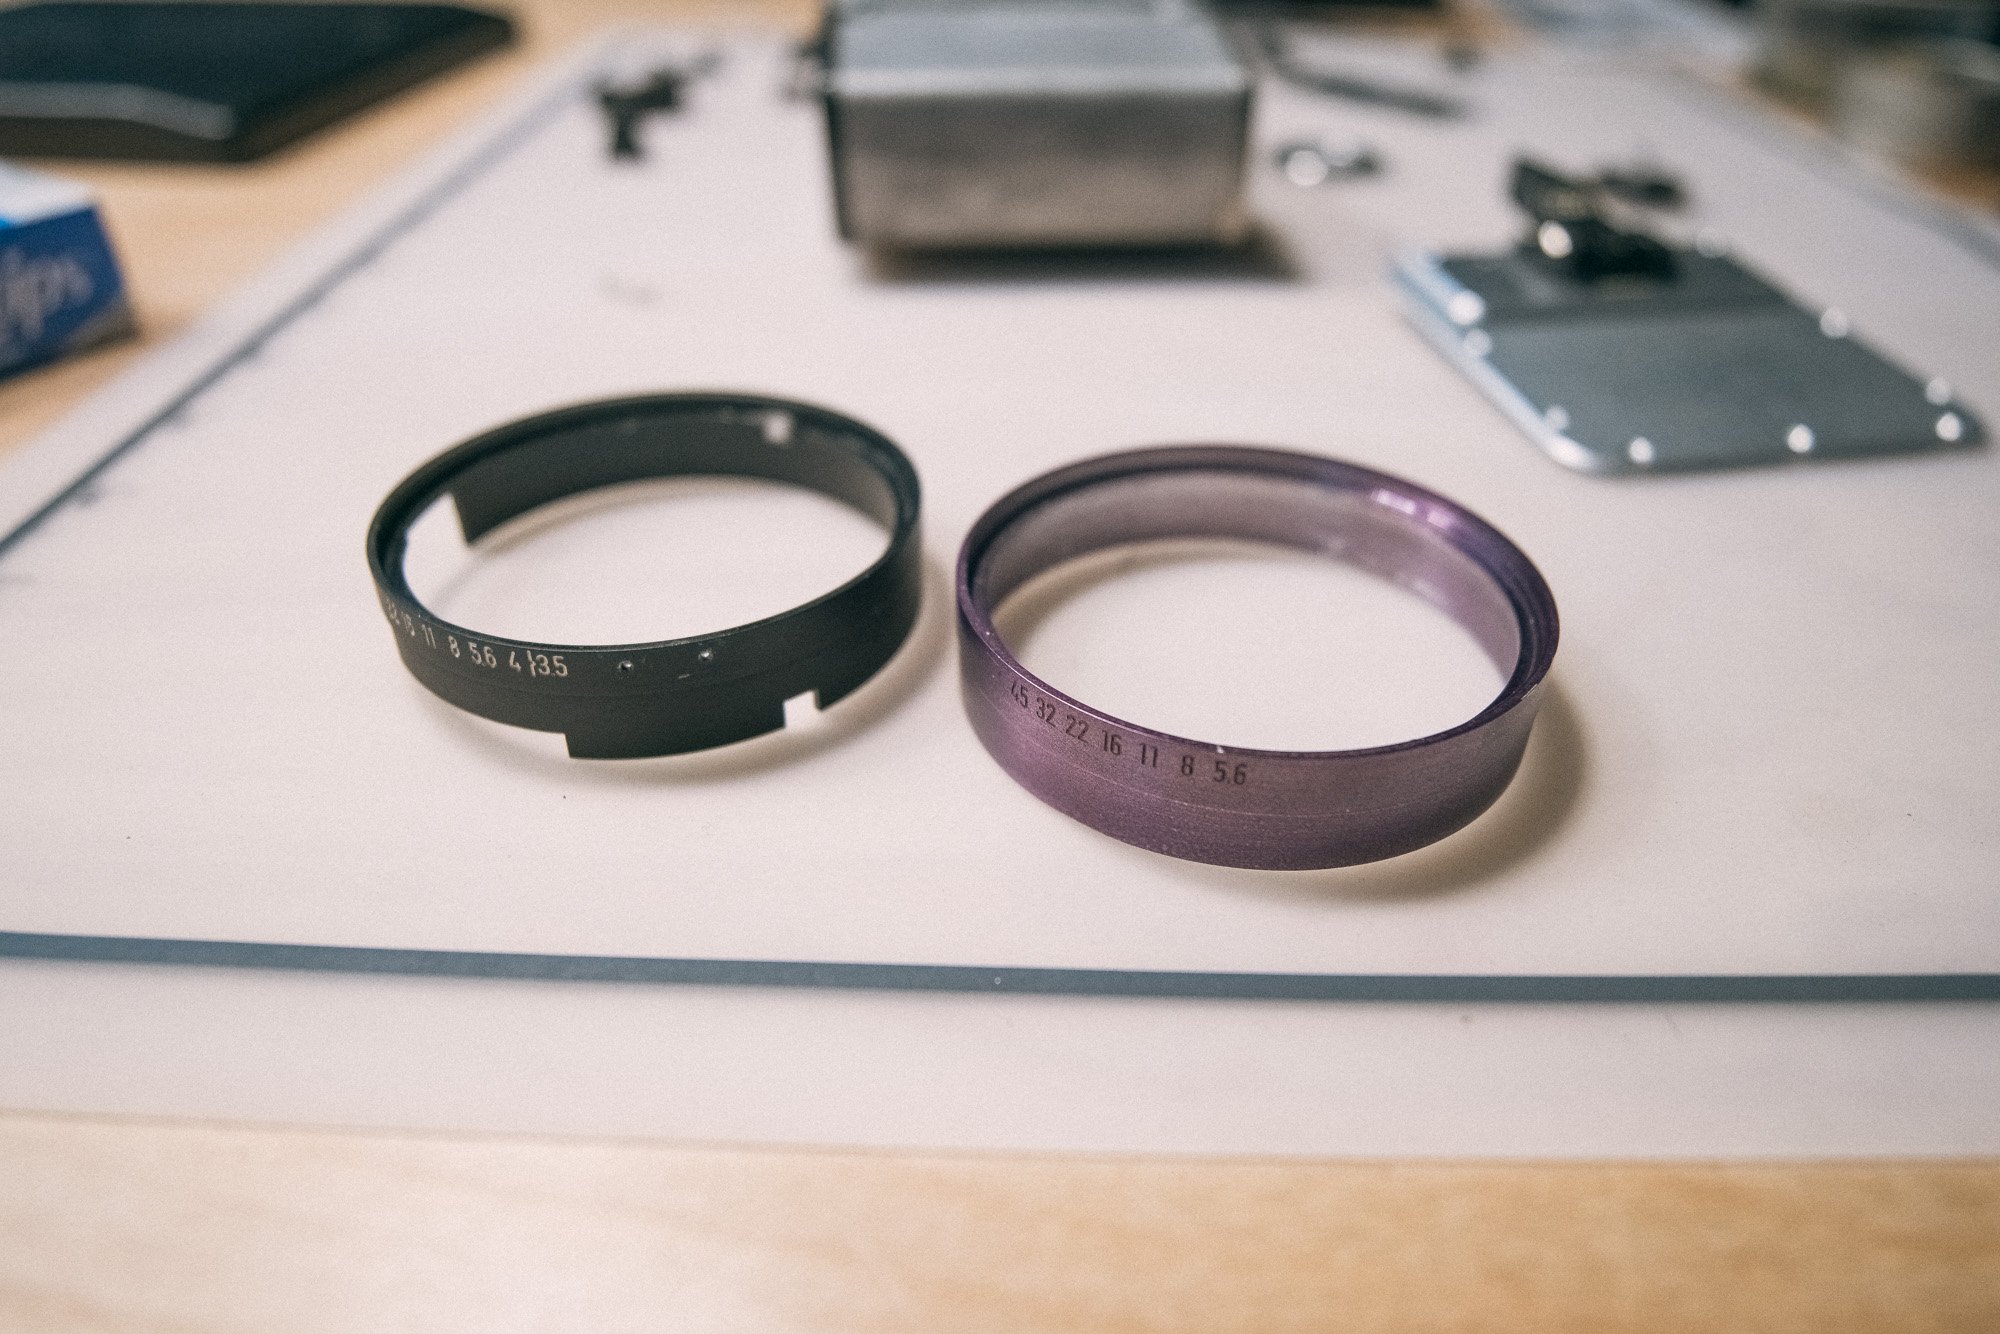
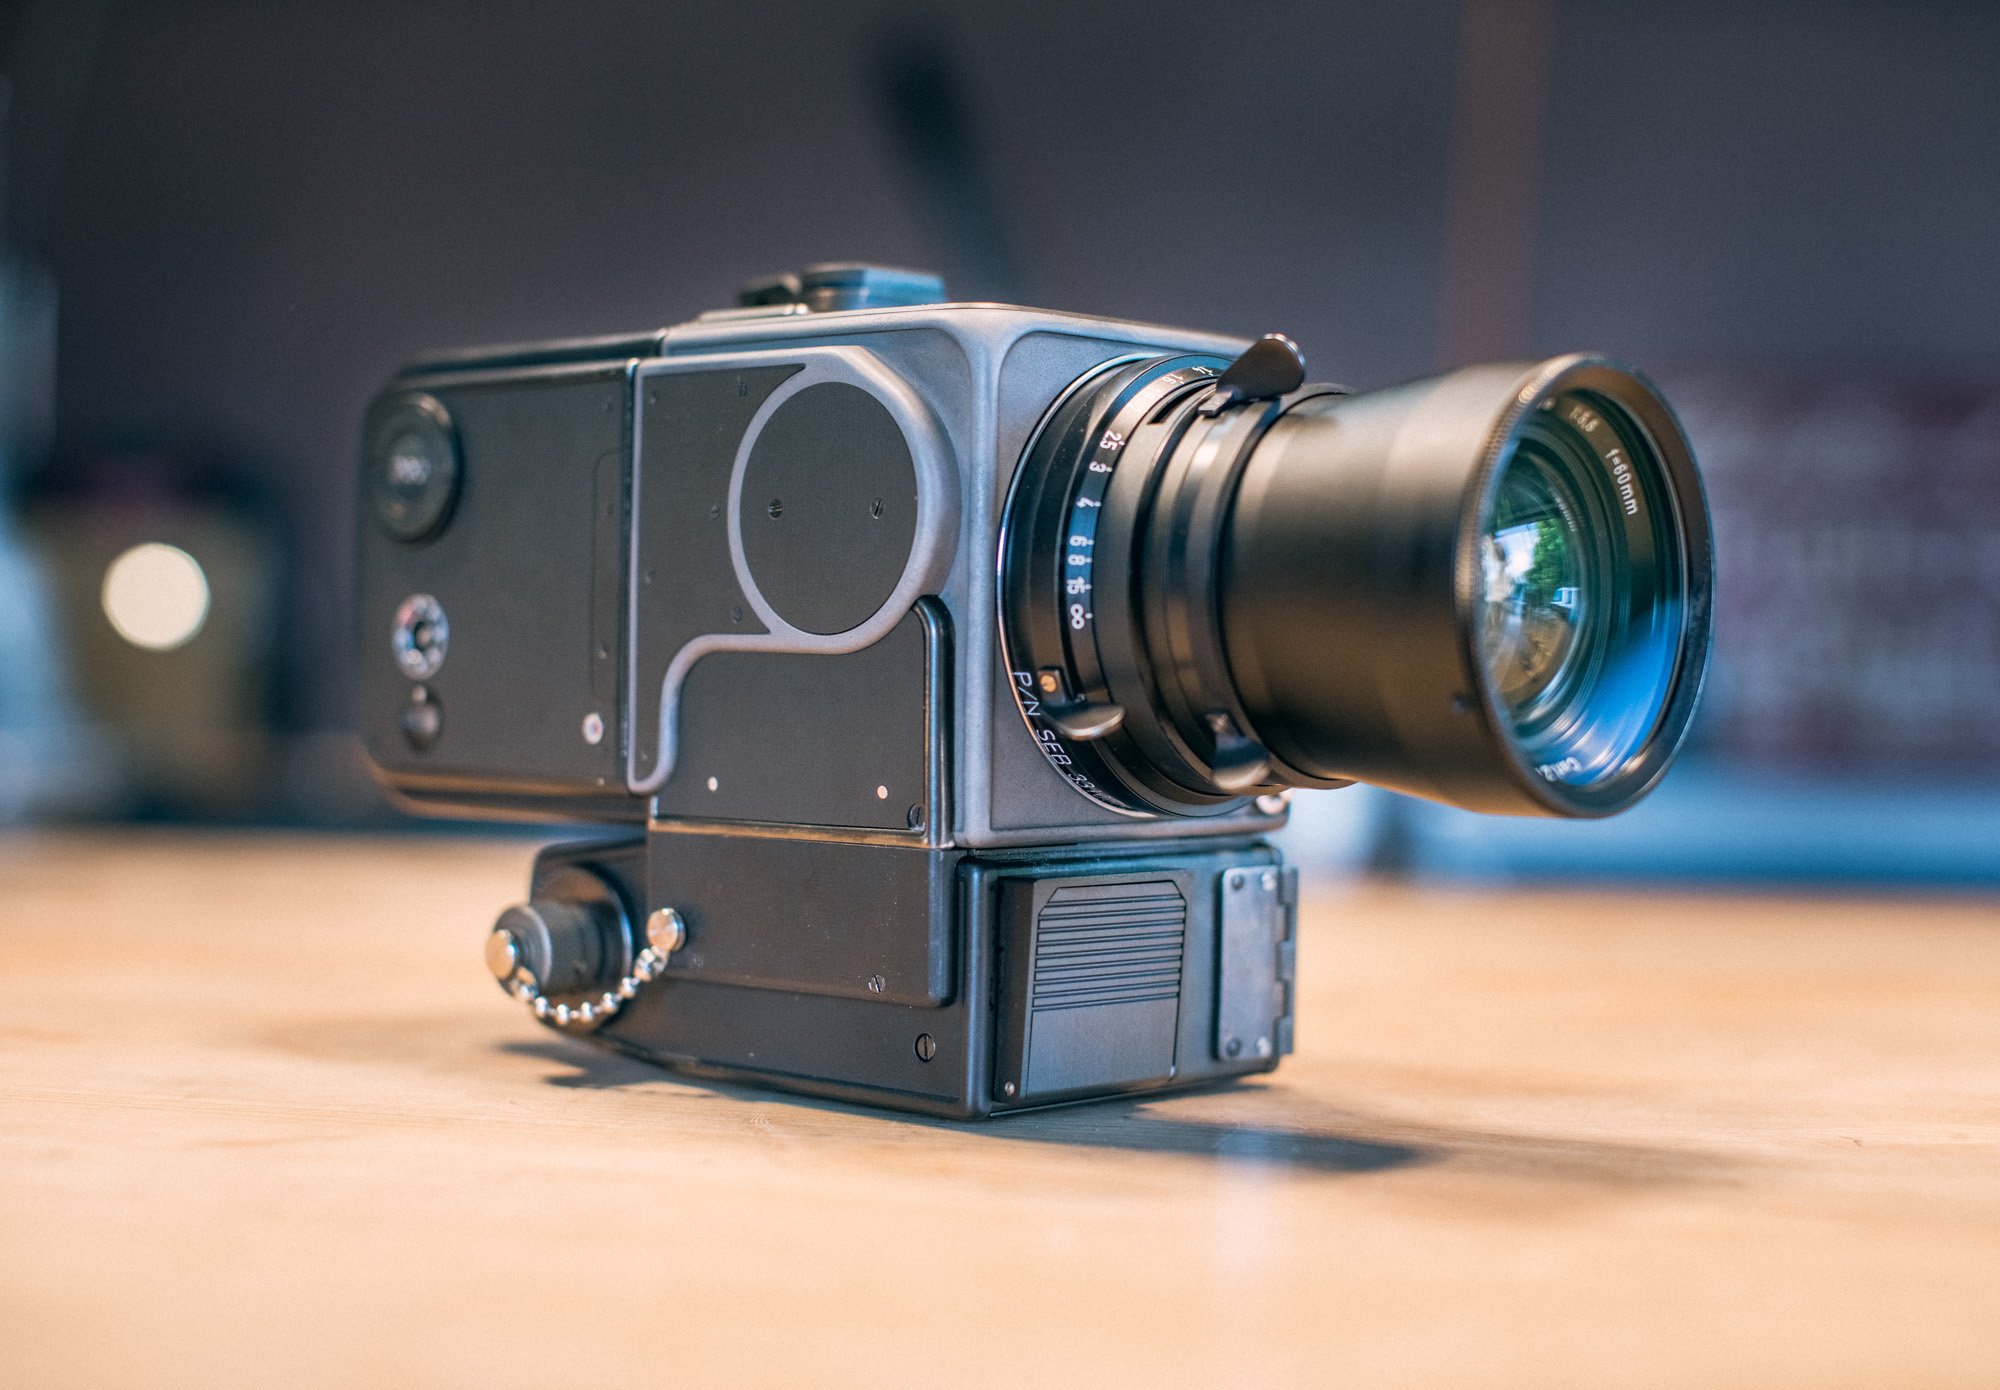
Modifying the Lens
The hardest part of the entire process was modifying the 60mm lens that came with the MK-70. The moon lens had a beautiful, matte black finish with rings that clicked crisply as you pushed friendly little levers with your bulky space gloves.
My lens? Modern shiny black finish, no levers, and the aperture ring didn’t click:
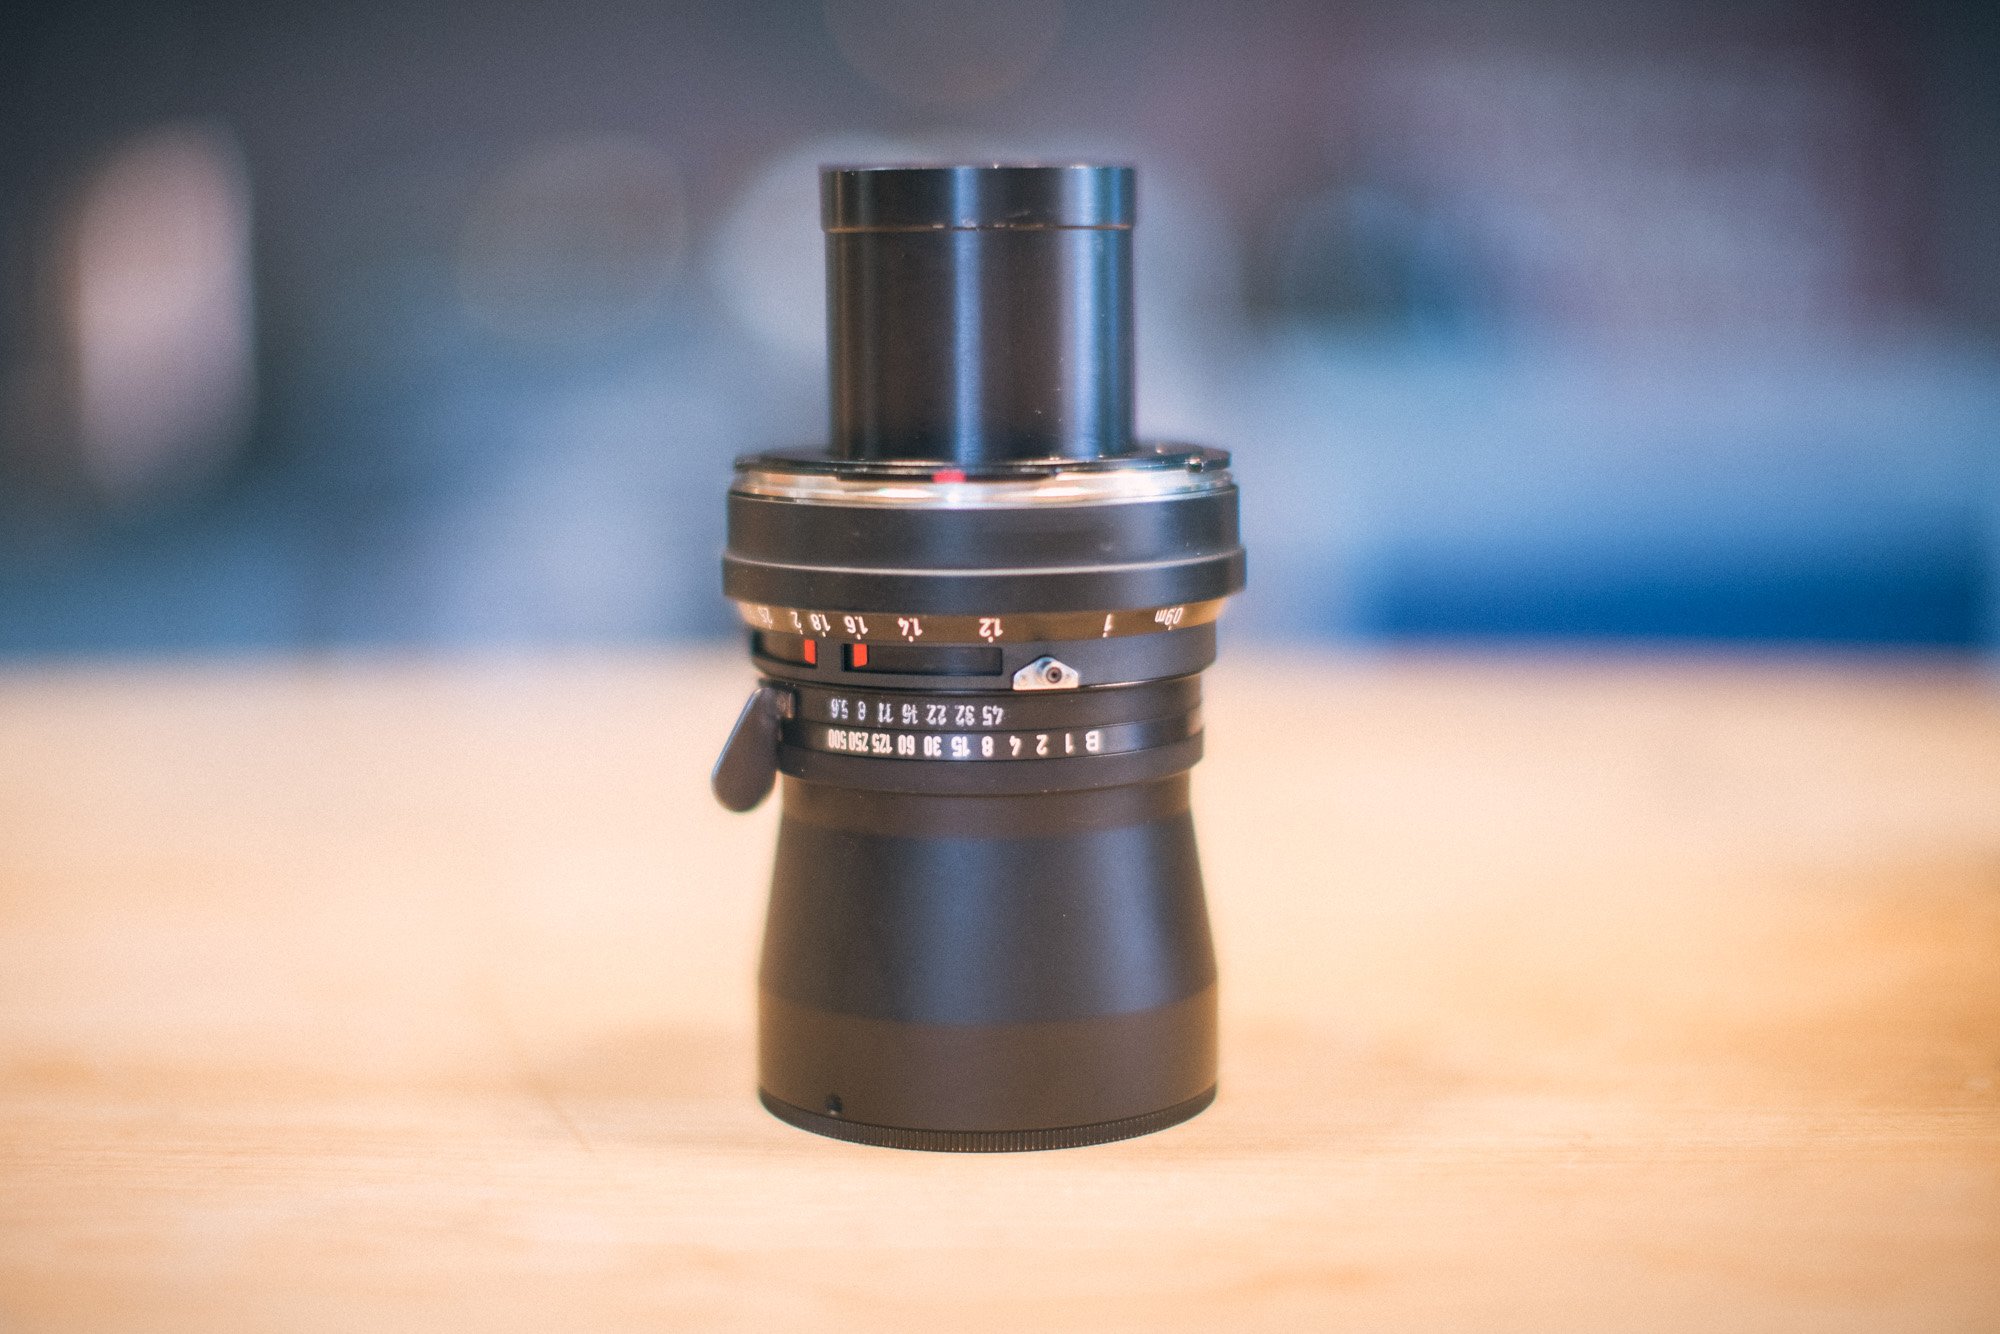
Damn. If we’re going for hyper-accuracy, we need clicking!
That meant a whole new aperture ring needed to be made, with engraved aperture numbers accurately spaced and internal gearing to make it *click* when you moved it. If any one gear, number, or bearing were off by more than half a degree, the aperture setting would be inaccurate, and the part would be junk.
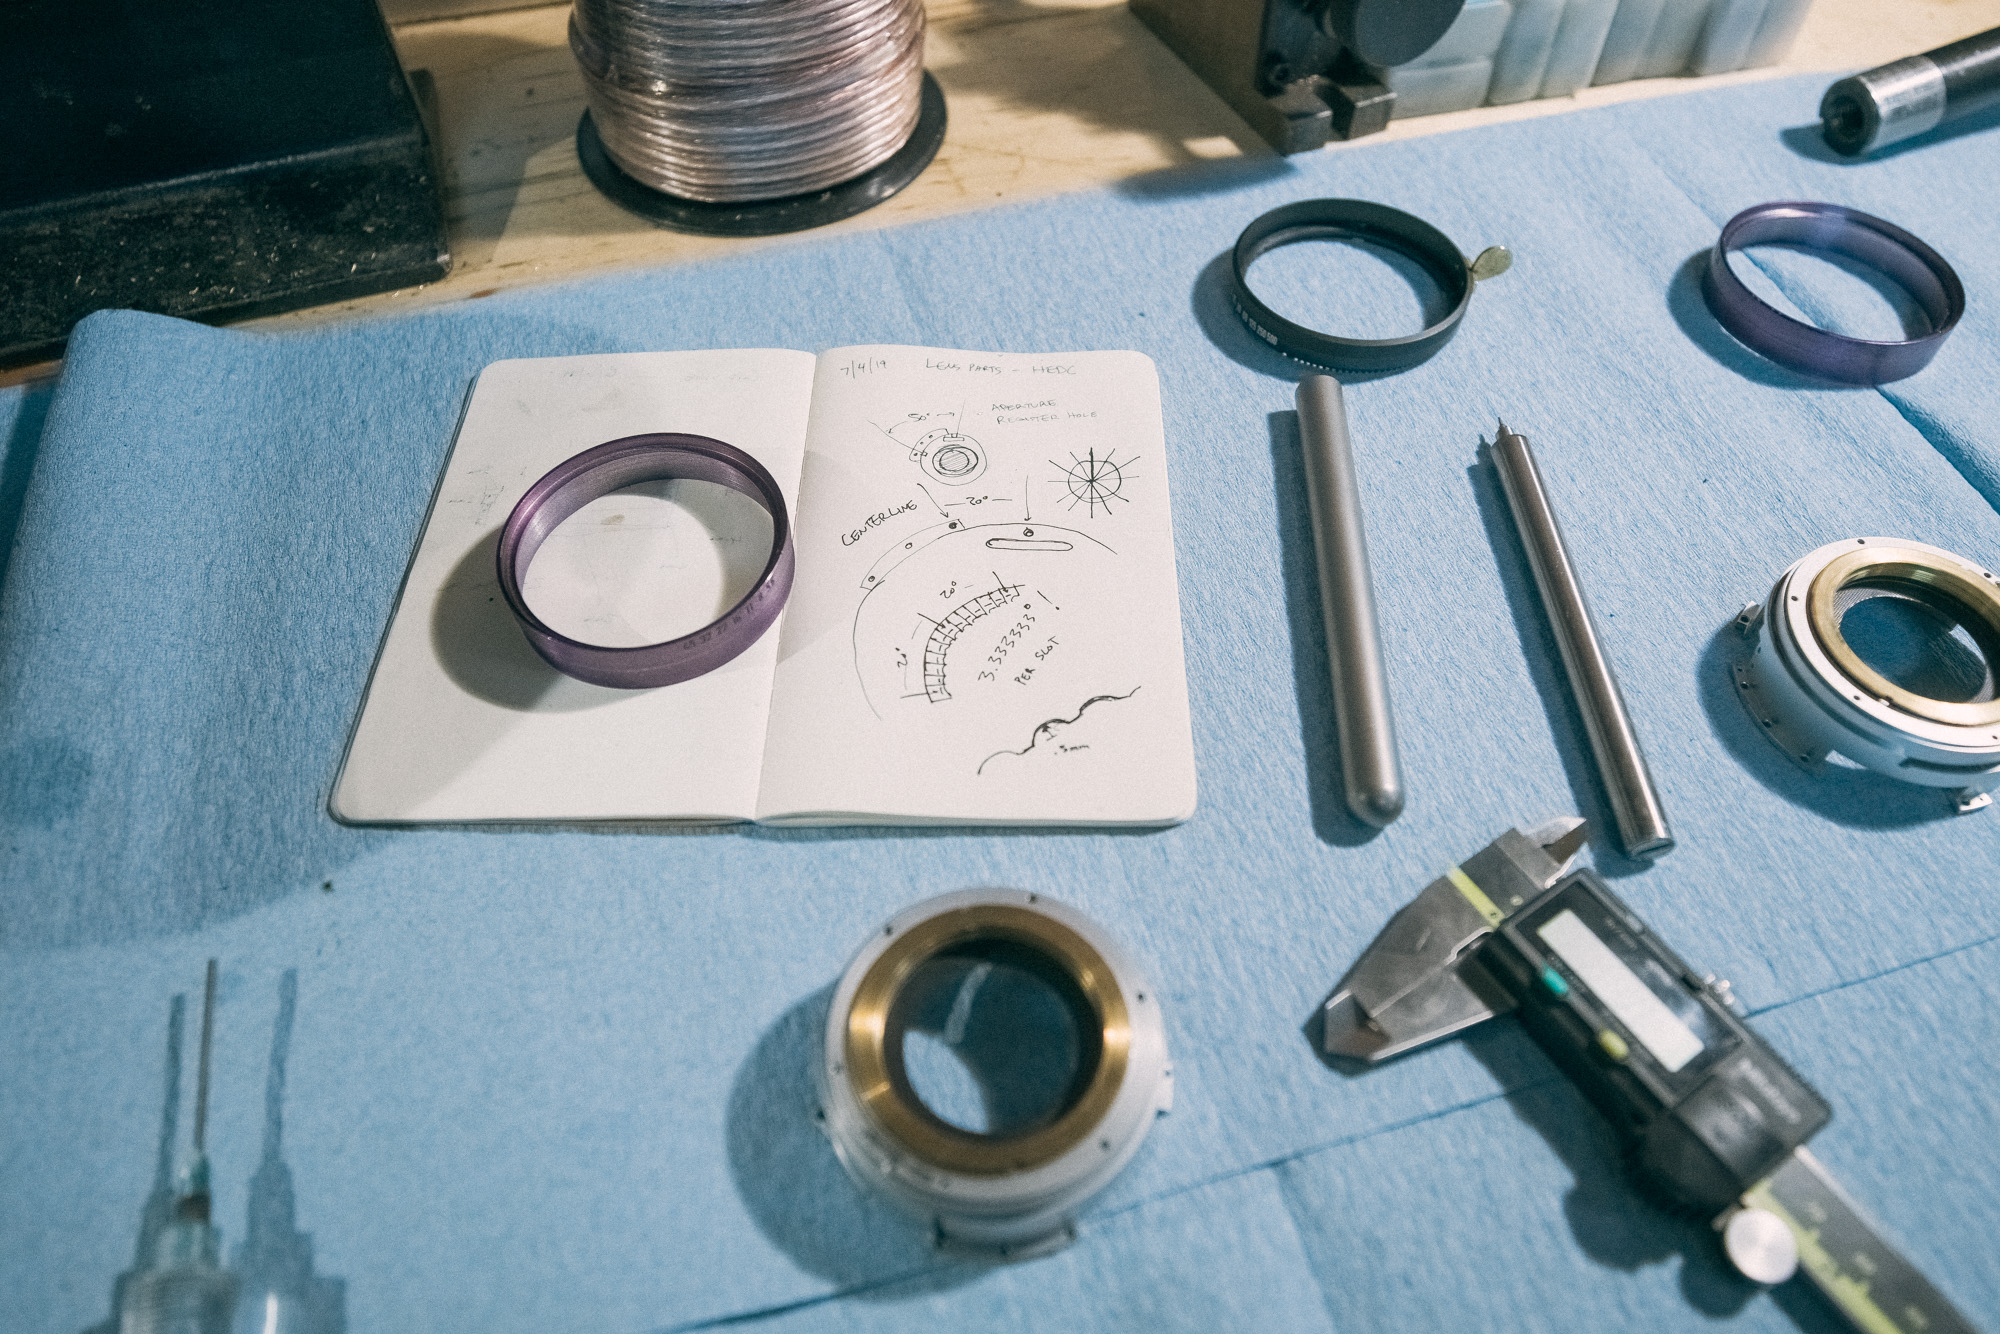
After four weeks of reverse-engineering other lenses and realizing my math teacher in high school was totally right about Pi, I was able to model the new part, and have three blanks made by a very generous local manufacturer; three chances to screw up the laser engraving, the five-hour manual machining process, and the bead blasted anodize finish.
Thankfully, I only screwed up two.
Those friendly little levers were relatively easy to 3D print and cast out of metal after that, and the entire modification process was non-destructive, which means I can reverse the changes in the future if I need to.
Locating “Space Lube”
A funny thing happens when you put common lens grease in a vacuum. It boils off and solidifies, becoming more like a glue after hazing your optics. In fact, keeping any complex moving part slippery in space is still a real challenge today, so of course there’s a wonderful document from NASA that focuses solely on space lube.
It was from this study that I was able to locate the kind of lubricant they used on the real space-faring cameras in the 1960’s.
Remaining Tasks
You know what’s crazy? Any part of this camera could be swapped on the real thing and it would both fit and function as it would on the surface of the moon. There’s still a long way to go, however, to make it the most accurate representation of what’s still sitting in the lunar dust in the Sea of Tranquility.
Most notably, there’s a detachable polarizing filter that needs to be manufactured from scratch, a feature I believe to be unique to Apollo 11. Amazingly, my lens still has the hole for where it was attached.
The internal motor that drives the camera was also unique, using redundant switches to improve reliability, and an extra capacitor that reduced noise. Theoretically, the cameras should even sound the same after this modification.
And of course, the entire body has to be painted silver and labels applied. Hasselblad used a high-heat aluminum paint, the same you’d find on grills and car engines, for protection as the camera moved across the 400°F delta between light and shadow.
People Smarter than Me
Finally, as with any large undertaking, I had a ton of outside help on this project.
David Fred, who made satellite parts before teaching me what a water jet and a CNC mill could do to metal, was instrumental throughout the entire build process. Museum curator Jennifer Levasseur, the world’s leading expert on space cameras, found the very specific Apollo 11 serial numbers. Hasselblad let me handle some of their original cameras, Brennan Letkeman taught me the basics of 3D modeling, and every episode of Adam Savage’s “One-Day Builds” instilled a deep love for making that pushed me to believe this project was even possible.
This camera was the hardest thing I’ve ever done, and a journey that continues as more parts come in. But it was a worthwhile endeavor for the sake of the camera’s legacy, and in the spirit of doing things not because they’re easy, but because they’re hard.
About the author: Cole Rise is a photographer, pilot, and space camera maker currently based in Asheville, North Carolina. You can find his photographic work on his website and Instagram. You can learn more about his space camera work and forthcoming documentary here.