Long Exposure Photography from the Cockpit of a 747
One of the most frequently asked questions I get is how I shoot long-exposure photos from the cockpit of an airliner and how they end up sharp, despite flying at roughly 950kmh/590mph/500kts through the air. I will try to answer that question in more detail, going through the process and challenges step by step. Hopefully it sheds some light (pun intended) on the techniques I use and for the pilot-photographers among us some valuable and easy-to-use tips for your next night-flight.
How it Began
Back in 2006, when I started flying the Boeing 737 all over Europe for Transavia, I was fascinated by the world at night that passed by my windows at an altitude where we would overfly most of the European weather. A perspective and tranquility that was unparalleled from what I’ve seen before and that simply asked for to be captured.
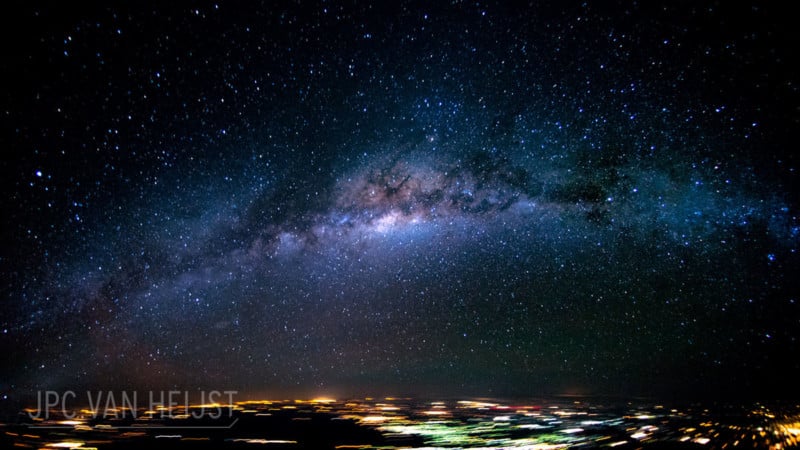
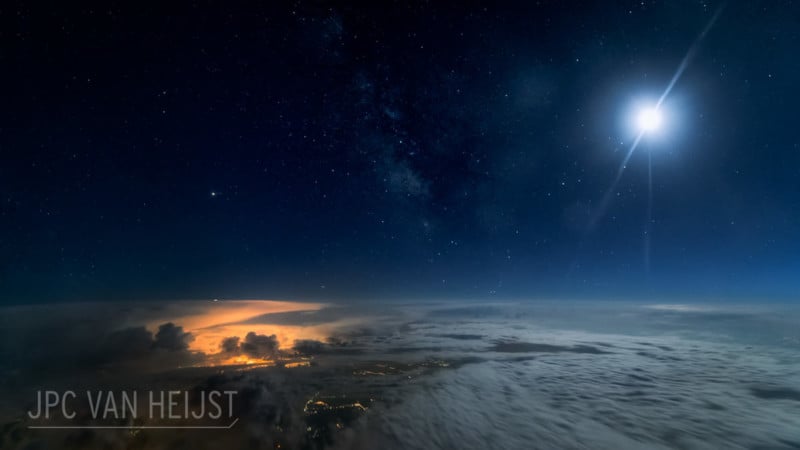
It was not just the mesmerizing view of countless of city lights of the sleeping world below that fascinated me; it was also the moonlight on the snow-covered Alps, the constellations above, and the other wonders of the night that are simply unique when seen from a pilot’s perspective.
In an attempt to capture those wonders of the night sky, I used my very limited funds to buy the Nikon D80, a beginner-model DSLR camera that gave relatively satisfying results by day. At least it was better than the compact camera I had before.
By night though, the D80 was having a hard time coping with the lack of light, so logically I decided to invest in a lens that would offer the widest angle and had the largest lens-opening (aperture) for light so that even my little D80 could achieve at least something at night.
Enter the Nikkor 10.5mm f/2.8 Fisheye lens. Buying this lens was a huge risk considering the steep price, my very restricted financial means, and the rather limited-use of fisheye lenses in general. You will often see these lenses ending up on eBay or second-hand marketplaces after owners found that their use is too limited or even useless in normal photography due to their extreme distortions.
For me though, this little lens has proven to be a unique asset to my unique position above the clouds and even today, nearly 12 years later, I carry that same lens with me. A few scratches, lots of stories and adventures later, she’s always close at hand.
Looking back, buying this tiny fisheye lens was one of the best investments I have ever made.
How it Evolved
In a small space like the cockpit of an aircraft, the fisheye lens proved to be a winner, but the camera was clearly a limiting factor. Soon, my holiday money was invested in the Nikon D200, a slight step up the camera ladder and my photography took another small step forward.
But it wasn’t until I was starting to fly the Boeing 747 in 2011 that my night photography started to get serious.
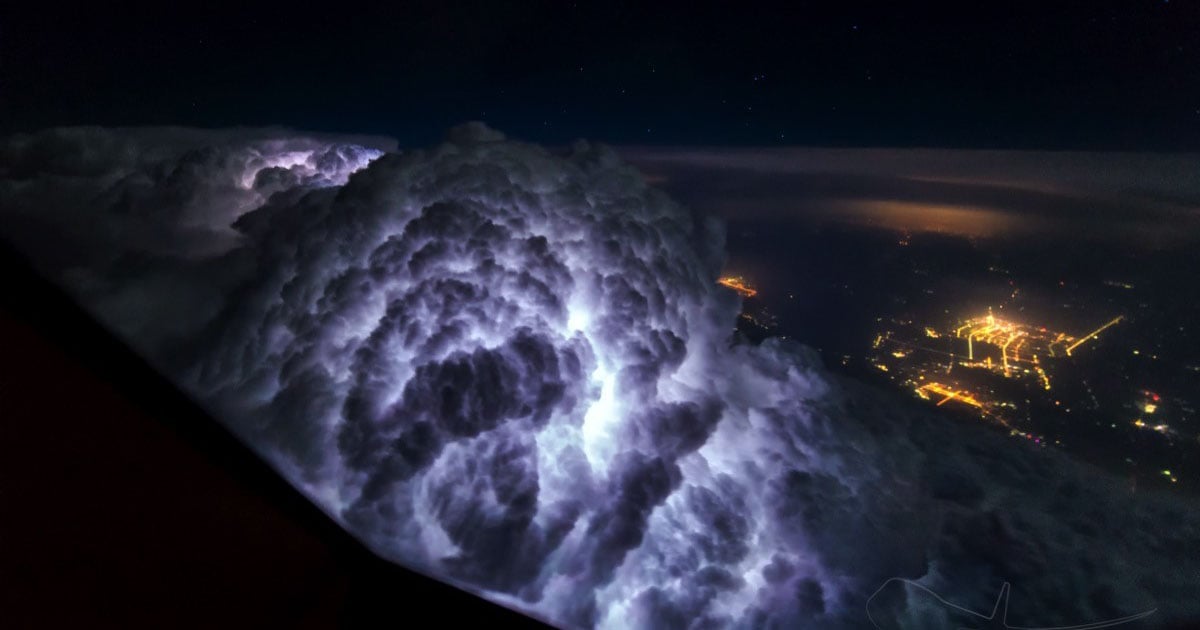
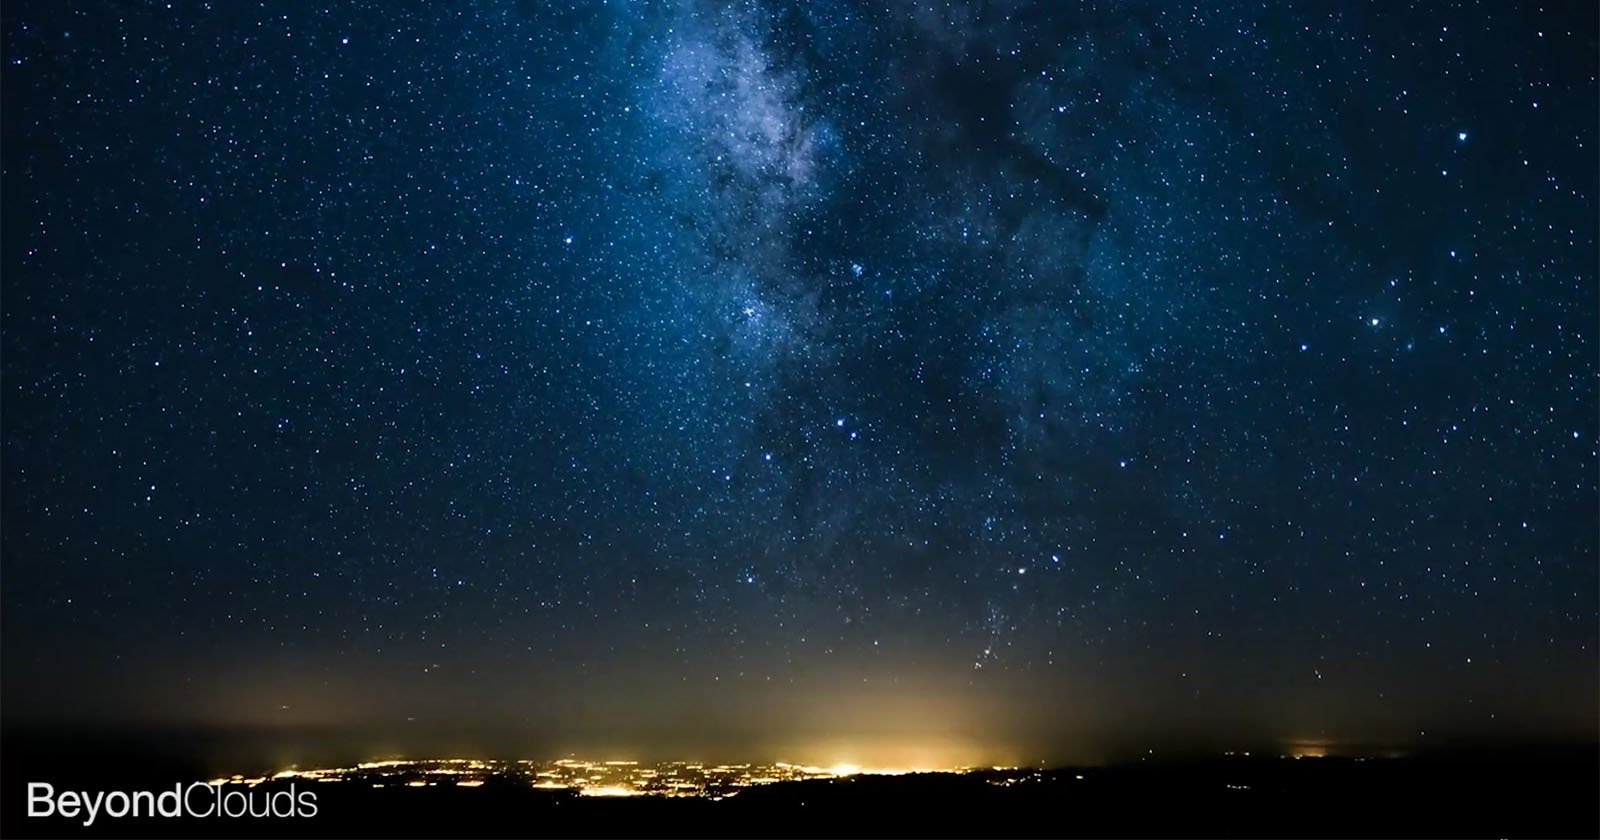
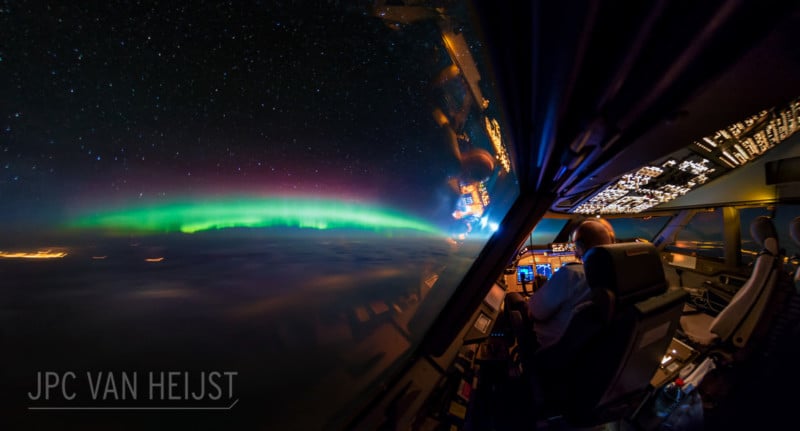
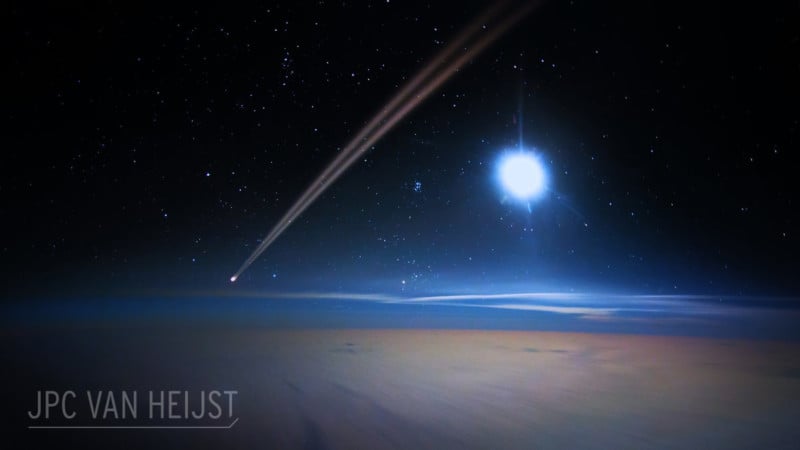
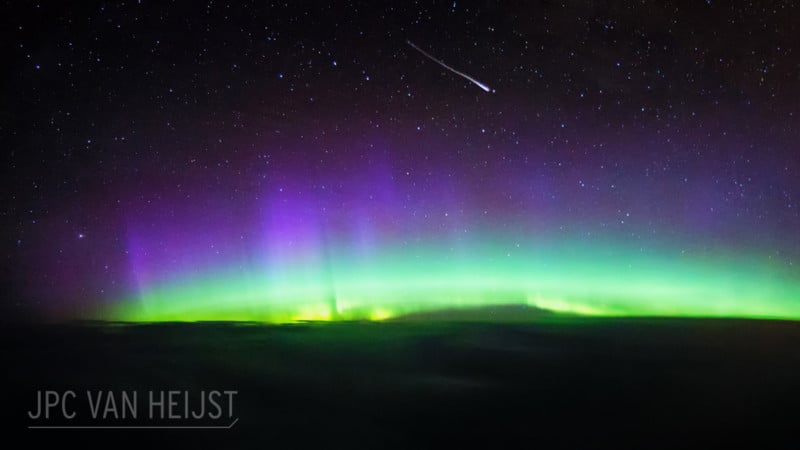
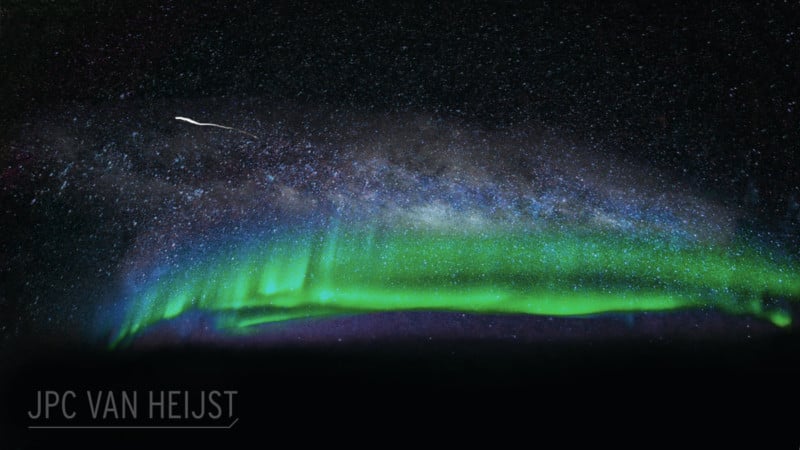
With flights all over the world and through all time-zones, I was getting more and more interested in capturing the next challenging thing; the moonlight reflected on the clouds, the tender light of a sun long gone below the horizon, or even the wonders of the northern lights or falling meteorites.
Finally, my finances (barely) allowed me to invest in my very first full-frame DSLR, the Nikon D800. Only now I started to reap the benefits of using a prime f/2.8 lens on my camera and the real experimenting began.
The balance between shutter speed, aperture and ISO became more and more a second nature. Just a glimpse out of the window will tell me what settings are needed without too much ado.
Factors like the phase of the moon, the amount of light from the ground, the strength of the Northern Lights, or the intensity of nearby thunderstorms all led to the point that I started to get a good intuitive feel for the camera settings needed at any time.
Sharp Images
Many people have asked me how I manage to get sharp images despite the fact that the airplane is flying at high speeds through the atmosphere. There are a few factors at play here, and I’ll try to cover them all with as few words as possible.
Airplane movement
The airplane is flying at nearly 950km/h or 590mph or 500kts through the atmosphere. When taking pictures with a long shutter-time (anything between 3 and 30 seconds), you are bound to get some blur from the lights that pass by.
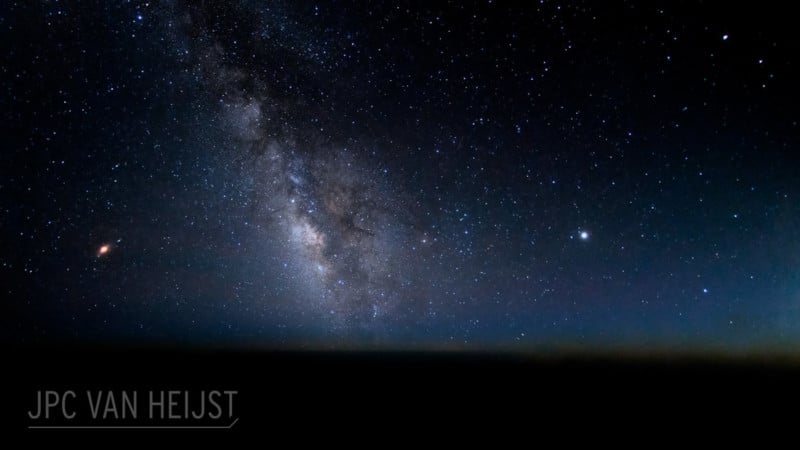
But what is the actual movement? Sure; the lights on the ground pass by noticeably, resulting in streaks or lines of light. But what about the stars? Don’t they move?
Well think about it: the stars are literally light years away. Many billions of miles/kilometers. The movement of the airplane relative to the stars is nil, nothing. We can easily fly a thousand kilometers an hour, but the stars are so extremely far away that they simply don’t move.
Besides the lack of relative moment, with shutter-times over 30 seconds you will see the movement of the stars ever so slightly, but that is simply because of the rotation of the earth. Then again.. for shutter-times of anything above 15 seconds you will need to have an extremely stable atmosphere to get a sharp shot and you have to be lucky to get any sharp shot anyway. The movement of the stars is your least concern with those very long exposure times.
Turbulence
The eternal and unpredictable spoiler. Whenever I see something incredible that requires a longer shutter-time, I grab my camera and… turbulence starts. Just as predictable as when getting a fresh cup of coffee filled to the brim, or starting to fill out the fuel-calculations on the paperwork; turbulence.
Sure to make my handwriting look like Japanese characters with an Okinawa accent.
Long story short; there is nothing I can shoot with turbulence and perhaps its nature’s way of telling me to just enjoy the view without being able to share it with the rest of the world. I have been unable to shoot some of the most amazing views of Northern Lights and moonlight because of this. It’s frustrating but hey, what can you do but to simply enjoy it in all silence.
Apart from those annoying moments, most of the times I simply wait for a few minutes when the air is stable enough to just get my camera out and hope for the best.
Fortunately, the Boeing 747 is one of the largest planes in the world and due to its size and weight, the machine is very stable by nature and not easily tossed around. Another benefit of flying the most iconic and beautiful machine in the world.

Camera Stabilization
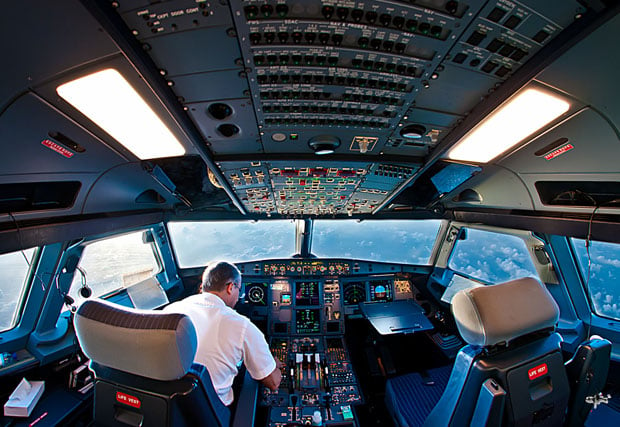
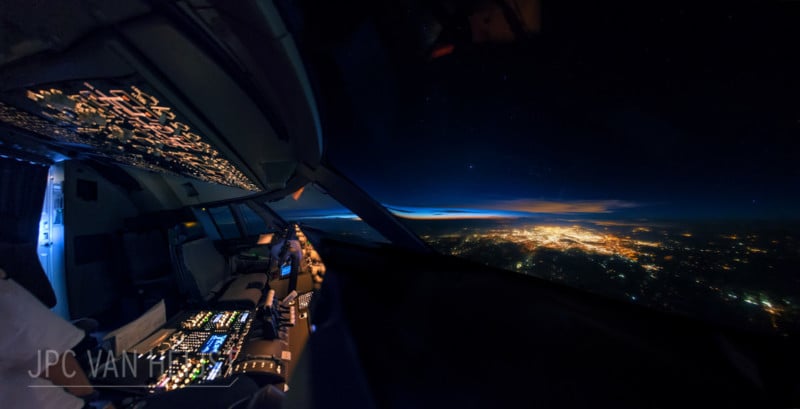
No tripods or other equipment are used. There is simply no room in the small cockpit for those things, neither are they practical to carry along during a 3-4 week trip. The most efficient way is placing the camera on the glare-shield (the cover of the instrument panel up to the front windows) where I simply put the camera and press the trigger, hoping the air is stable enough.
To fix the camera a notch up or down I use simple stuff like my glasses-case, agenda or lens-cover to stabilize the camera position.
For the window shots, I hold the camera by hand and push it into the corner of the window frame and hold it there. The camera is quite bulky and this allows a relative easy fixation in a position somewhere in the window frame.
Wide-angle Lenses
One other trick to get sharp images in-flight is using a wide-angle lens. The further you zoom out (use wider angle view), the less any eventual movement will show in the photo. Imagine; let’s say you zoom in with a telephoto lens on the moon or a star and use a long exposure. Even the slightest movement of the camera, air or tripod could blur the image. Now imagine using a wide-angle lens to cover the entire sky. A slight tremble of the tripod or camera becomes nearly unnoticeable in the general photo.
The same applies to cockpit photography; use a wide-angle lens and cover as much as you can from the sky as possible. This gives you a bit of leeway for any tremble or movement of the airplane.
Window Reflections
Next to turbulence, reflections are my worst enemy. In general, I found that dimming the cockpit lights as much as practically possible helps in reducing the ambient light pollution of my images. Another trick is to place the lens-opening as close to the window as I can.
You’ll see that if you press the camera nearly against the window, the reflections are more or less disappearing from immediate view. Unfortunately, there will always be some reflections and here comes another benefit of the 45MP sensor of the Nikon D850; you can crop a lot of the image out and still end up with a very high-resolution image. A definite advantage of the D850 or any other high-end camera.
From the Passenger Cabin
“Well Mr. Pilot; it’s all nice and dandy that you’re shooting images from that fancy cockpit but how about us passengers, bound to the inflight-entertainment of a wing-view, crying children and a few peanuts?”
Fear not, my friends, for I have often taken my photos through the small windows of airliner cabins as well and I know the limitations of life and photography from the passenger cabin.
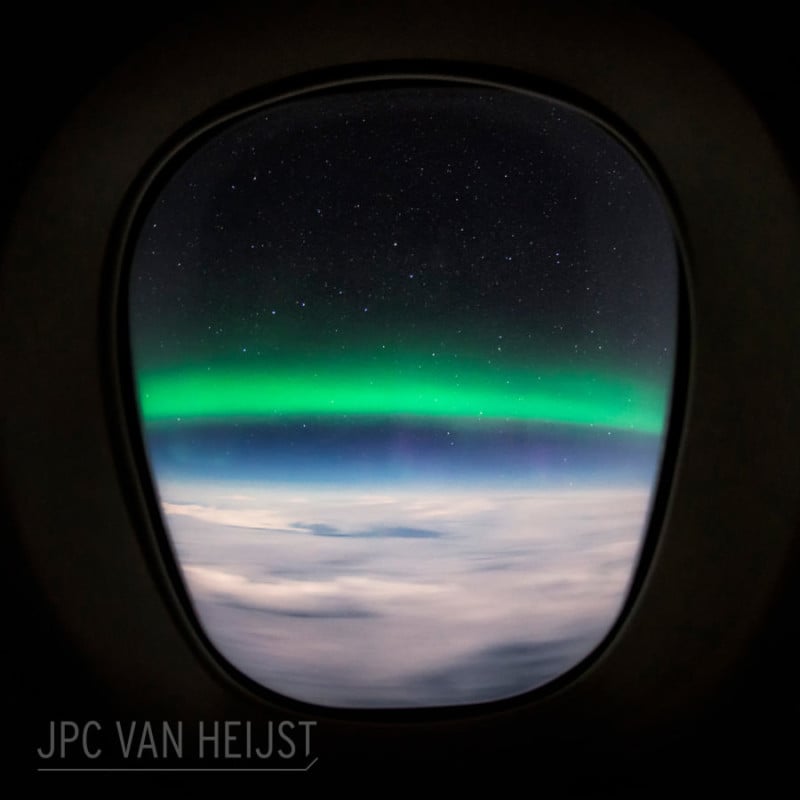
Basically, the same principles apply. Try to fix the camera as close to the window and prevent any reflections. One way to do that is to try and block the camera body between a seat and the window, if possible. Or just press it against the window with any means possible and keep it as still as possible.
In order to reduce the amount of reflections and ambient light, ask for a blanket and try to cover as much of the area around the window as possible. You might get a few frowns from other passengers, but after a few tries you might end up with that awesome shot of the stars, northern lights or moonlight finally.
What’s in the Bag
Today I always carry the Nikon D850 in my flight bag, together with the following lenses.
Nikon 10.5mm f/2.8 fisheye lens. Even though this is a DX lens (designed for crop sensors) I love the sharpness, speed, and reliability of this little lens. Ideal for long exposures from the flight deck and easy to carry with me due to its small size and low weight, I always have it at hand while I’m flying.
Nikon 14-24mm f/2.8. By far, one of the very best wide-angle lenses that Nikon has to offer at the moment. The 14mm’s are just perfect for long-exposures and shots, both day and night.
Nikon 24-70mm f/2.8. Even though its relatively heavy and I do not use it that often, the 24-70 is perfect for daylight use and air-to-air photos.
Conclusion
To take sharp night-images from an airplane (both cockpit and cabin) you need to keep the following things in mind:
Preferably, use professional equipment that can handle low-light conditions, use wide-angle lenses, place the camera as close to the window as possible, and cross your fingers and hope for a smooth flight!
About the author: Christiaan van Heijst is a 747 cargopilot, photographer, and admirer of natural light. The opinions expressed in this article are solely those of the author. Van Heijst’s work was published as a photo book titled Cargopilot in 2016. You can find more of his work on his website, Twitter, Facebook, 500px, and Instagram. This article was also published here.