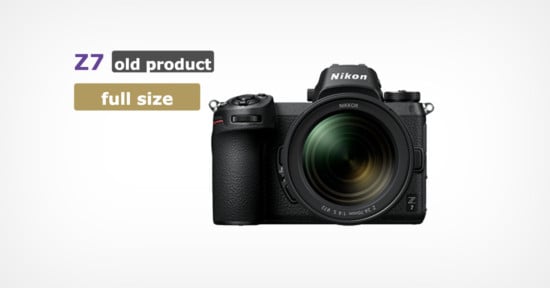
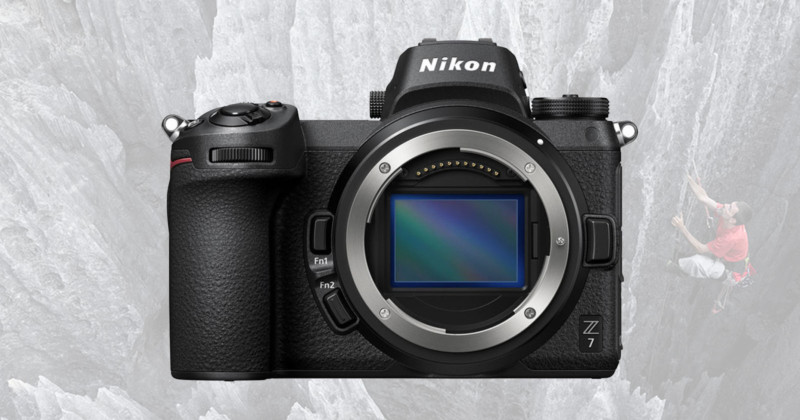
Nikon Z7 Field Report: Too Many Good Things to Not Like It
Earlier this year I got a phone call from Japan asking whether I would be interested in working on yet another important global introduction campaign for a new Nikon product. As I very much enjoyed creating the Hercules Rising night time-lapse for the introduction of the Nikon D850, I said yes.
I was instantly excited about this project, knowing how incredibly important this introduction would be and that I would be one of only very few photographers in the world to use Nikon’s first full frame mirrorless camera.
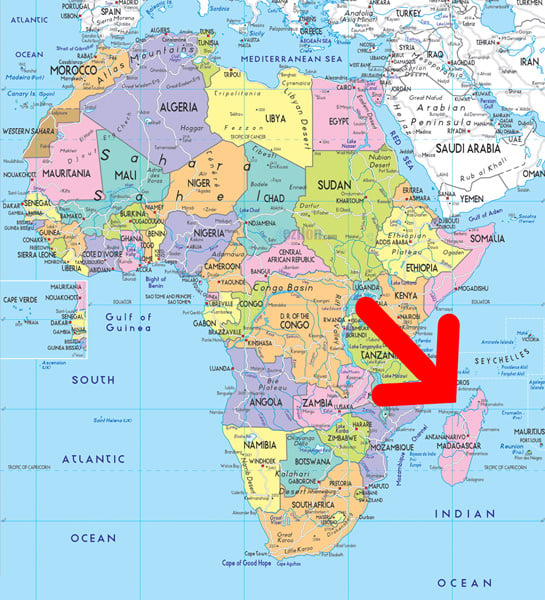
Like with the D850, I was given free choice as to where I wanted to shoot – the perfect assignment! One of the things that stuck with me after hearing all the features of the Z7, was the oversized lens mount and how it enabled the engineers to create new lenses that would produce edge-to-edge sharpness. I then decided to test this new level of sharpness by taking the Z7 to the sharpest landscape on this planet: the Grand Tsingy in Madagascar.
This place is so razor-sharp, that I literally had to climb up and down using construction workers’ gloves as to not cut myself on those limestone needles. But Madagascar is a unique place that has a lot more to offer, so I also decided to include the location where I shot my first National Geographic publication more than 10 years ago: the Allée des Baobabs, aka the Avenue of baobabs. I managed to get three Z7 prototypes for this project, which started in late May.
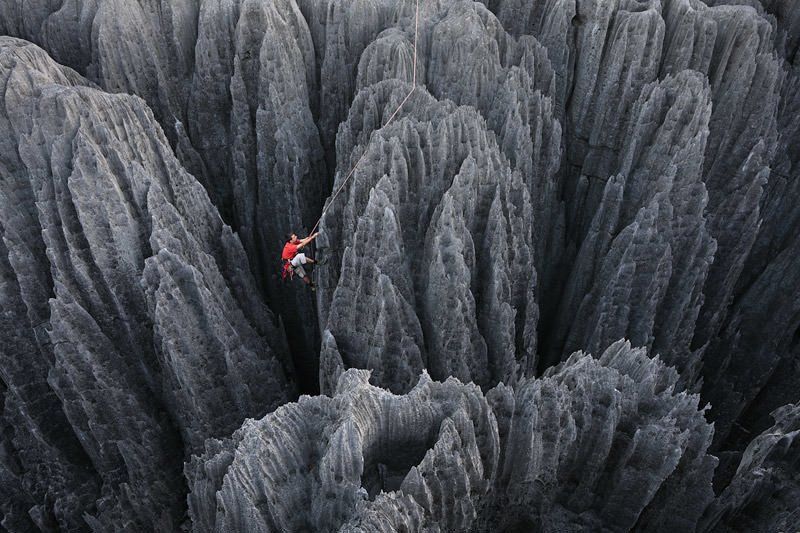
As always, I spent a great deal of time figuring out the best shooting locations and ways to create unique images. Great photographs start with great ideas, so that’s what I consider the most important part of any shoot: the pre-visualization. During my research, I noticed that it’s very hard to get a proper sense of scale when looking at the tsingy images that I found online. As it’s physically impossible to walk on top of 99.99% of the tsingy, putting a little person in there for scale was not an option, unless of course that person was a mountaineer. And so it started. I found a climber with a death wish who was very excited to give this a try, so the only challenge that was left was the fact that I’m afraid of heights. Minor detail.

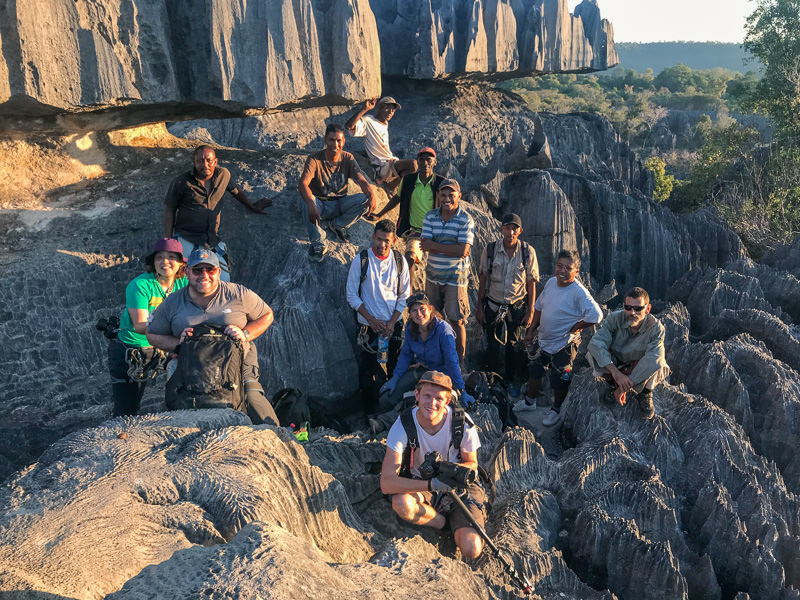
I should add that this was by no means a one-man show. As always, I did this project together with my wife Daniella who is critically important for keeping me on track, for solving logistical challenges, and for second opinions. But we were also accompanied by a video team to shoot the behind the scenes video clips, four porters, two guides, a location manager, a producer, an ad agency representative, and three security guys, and probably even more people.
I’m not used to working as part of a herd, but in hindsight, I could never have pulled this off without them – thank you all!
Note that this is not going to be a technical review with lots of numbers and charts – there are already quite a few of those around and I don’t like numbers and charts anyway. This is just my personal experience with three Z7 prototypes and the three new S-lenses during 12 days in Madagascar.
First impressions
My very first impression of the Z7 was that it was very black. Reason being that Nikon had carefully masked every detail on the camera with gaffer tape, in an effort to make it look as anonymous as possible :-) After all, the places we were going to visit are open to the general public and it was critically important that no one would see (or worse: photograph!) this new camera.
My second impression was a combination of three: size, weight, and feel. The first two were expected – this being a mirrorless camera means it’s smaller and lighter than a DSLR. But I use several DSLRs and they’re not all created equal in the weight department.
I consider my D5 and D4s to be heavy, and my D850, D500, and D810 are lightweight compared to those two. Well, the Z7 basically makes the D850 feel like a German tank. From WW I. What truly surprised me, was how the Z7 feels: like a DSLR. Nikon’s ergonomics are unrivaled, and with the Z7 it’s no different.
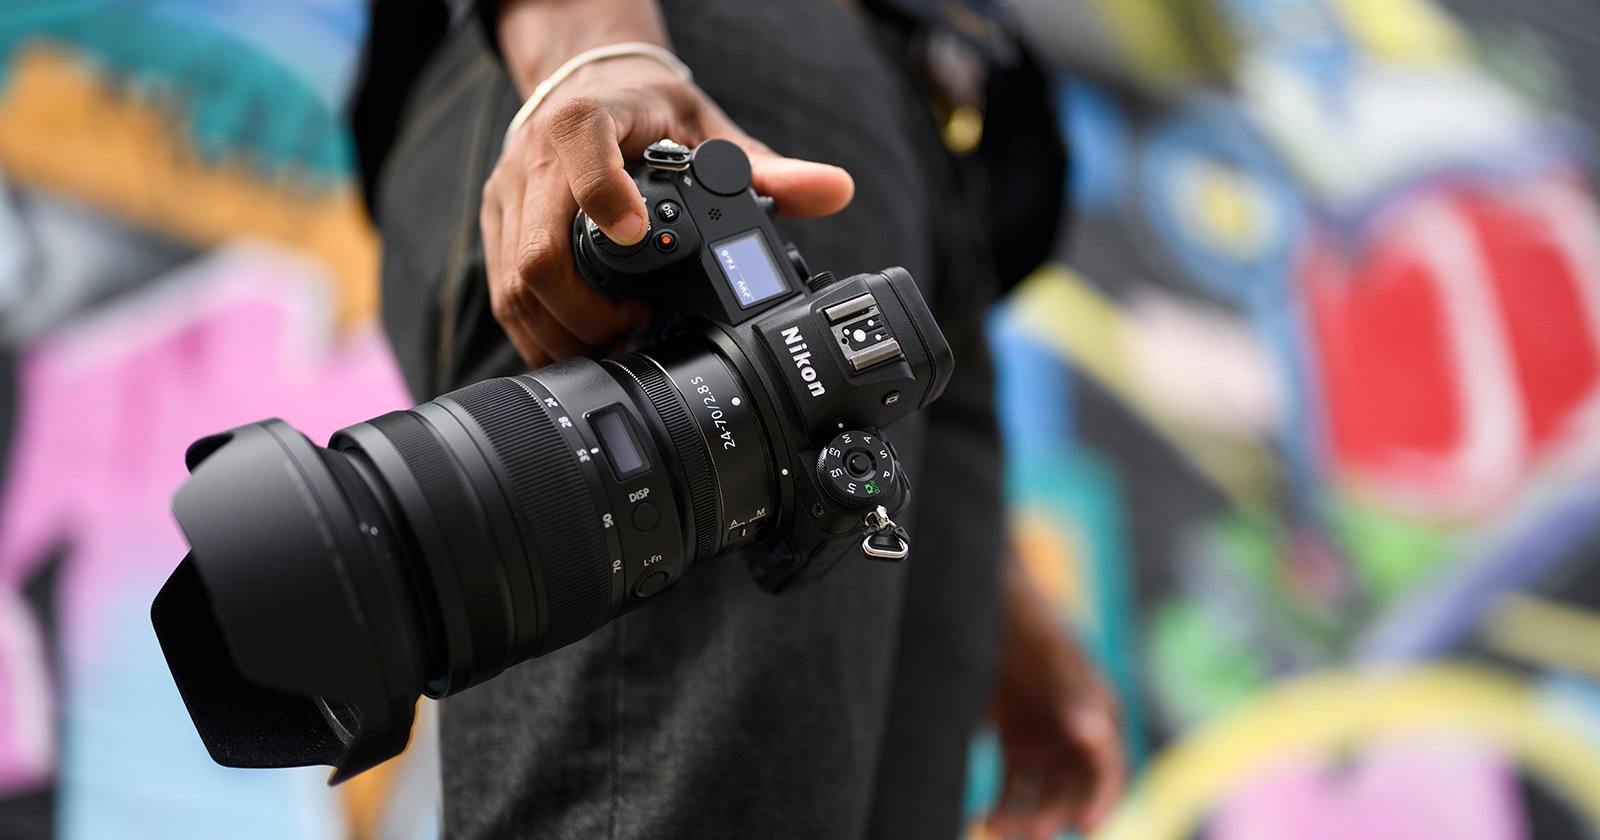
My main concern with mirrorless cameras has always been that they feel like vulnerable toys, impossible to operate if you have big hands, while wearing gloves, or if you don’t have a magnifying glass handy. Nikon resisted the temptation to simply shrink a DSLR, and instead designed it from scratch and gave it a really beefy grip. The moment I picked it up for the first time, it felt familiar and in a very good way.
Buttons, dials and menus
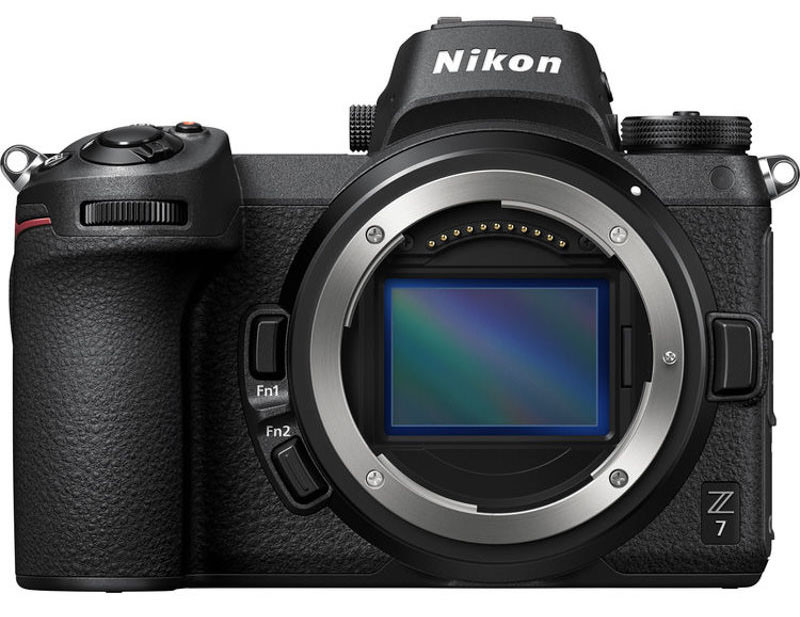
Apart from the body being a lot smaller than what I’m used to, there are not many surprises on the outside. All the buttons are in the right places. On the front there are two function buttons that you can program. I typically use the top one for depth of field preview and the bottom one for the virtual horizon, but I no longer need to use the DOF preview button as the EVF will always show you exactly what you’re gonna get. Look at that mount, it’s humongous!
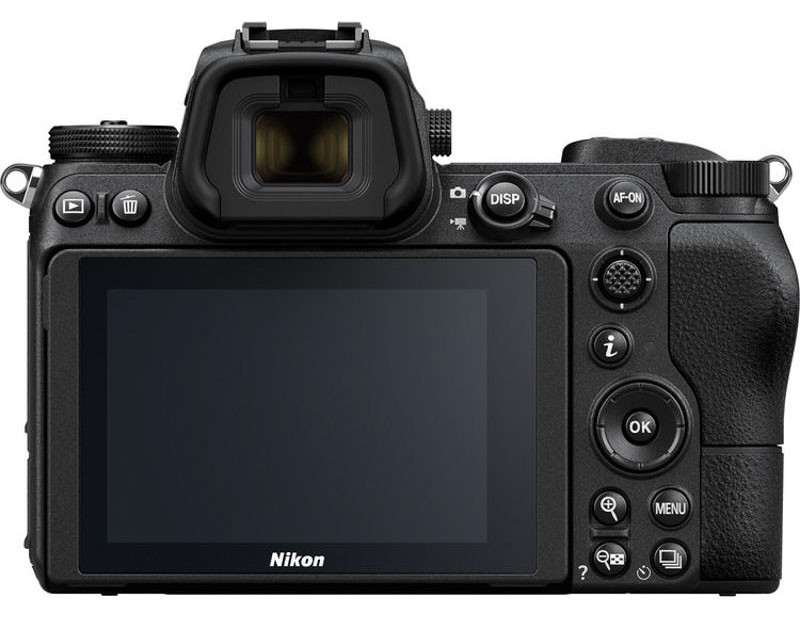
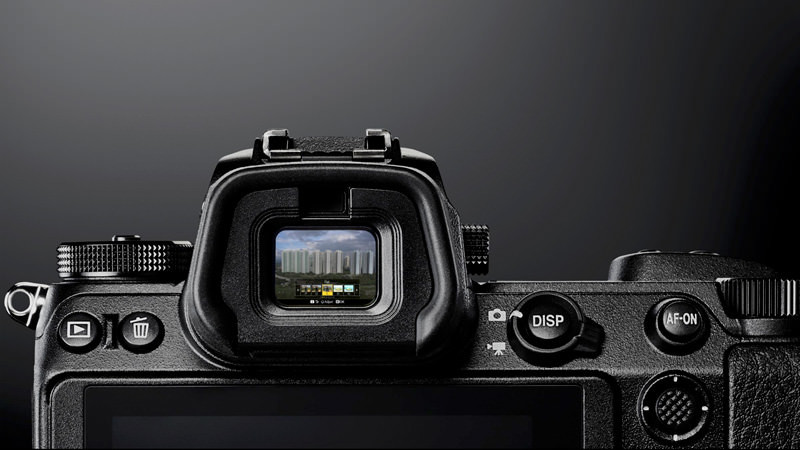
On the back, the row of buttons we’re used to seeing on the left are obviously gone – lack of real estate. Most of them have been moved to the lower right corner and all buttons have kept their original size. At the top of the viewfinder is an eye sensor – placing your eye to the viewfinder activates this sensor, switching the display from the monitor to the viewfinder.
You can use the DISP button to view or hide indicators in the monitor or viewfinder. The menus are no different from usual. The first thing I always do is move all the items I use regularly into My Menu and assign it to a customizable button, which saves me a lot of time in the field.
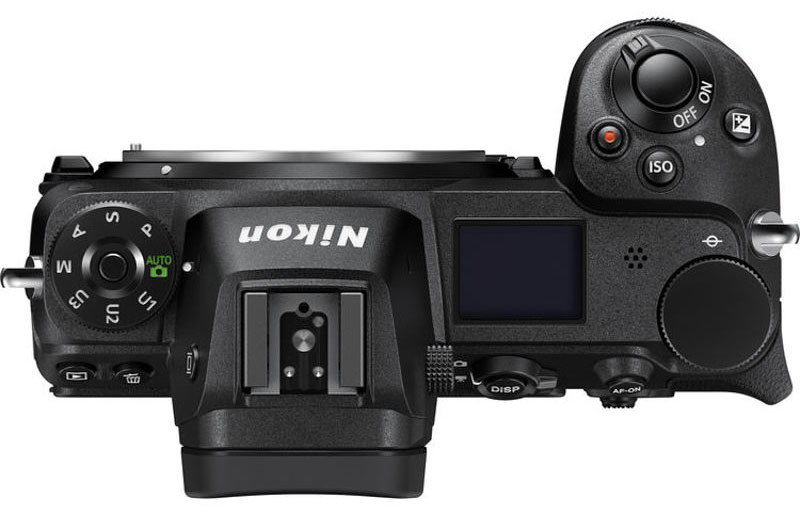
The big dial on the left shows three user setting modes: U1, U2, and U3. Gone are those dreaded menu banks! You can assign frequently used settings to these positions for quick recall. Although I haven’t used these options yet, I will most likely put my landscape settings under U1, wildlife under U2, and night photography under U3.
I also quite liked the main dial on the right being exposed on the top, unlike all my DSLRs. With gloves on this will be more easy to operate. The top LCD screen is much smaller than I’m used to, but all the essentials are in there. From this angle, you can clearly see that beefy grip. The flange distance is only 16mm.
All in all, I feel that Nikon has done a great job with the design and ergonomics. This camera may be compact and lightweight, it still feels like a DSLR.
The FTZ-adapter
To say that I was curious what the FTZ-adapter looked like and how it performed would be an understatement. I had visions of poorly performing teleconverters (I have a drawer full of those) that cause poor autofocus, take light away and degrade image quality, so I was skeptical. But now I know that’s because I didn’t fully comprehend the concept.
The Z7 not only has a massive new Z-mount, it also has a tiny flange distance. Flange is the distance between the sensor and the outside edge of the lens mount. Regular F-mount lenses have been designed for the typical flange distance of a DSLR, so they wouldn’t work on a camera with a different flange distance, even if I had the same lens mount.
So this adapter does two things: it converts the Z-mount into an F-mount, and it increases the flange distance to that of a DSLR. This also means that no glass is needed inside the adapter, unlike a TC. Understanding this, it makes perfect sense that there is no loss of quality or performance when using my F-mount lenses on the Z7.
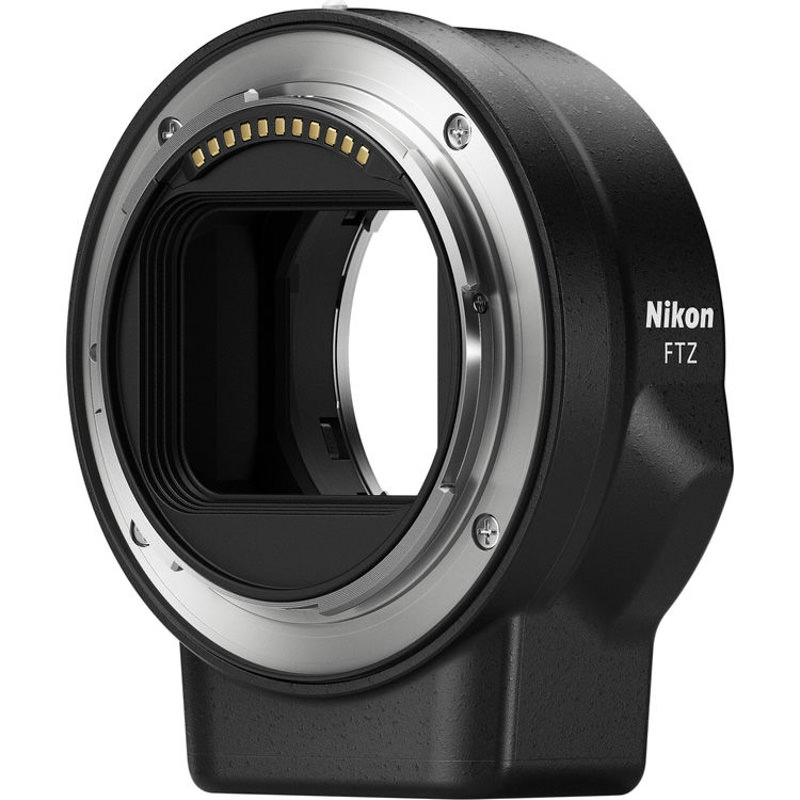
During this trip, I have used the FTZ-adapter with the following lenses: 14-24/2.8, 20/1.8, 24/1.8, 24-70/2.8, 70-200/2.8, 180-400/4.0. It has performed well with all these lenses. With this simple adapter, you can basically use 360 Nikon F-mount lenses, of which 90 will autofocus. But not only your Nikon F-mount lenses will still work, also any third party F-mount lenses like those from Sigma or Tamron.
Another big advantage of the FTZ-adapter is that it will add vibration reduction (in-camera image stabilization) to all your non-VR lenses!
I had one issue with the adapter though: at the bottom, there is this square looking part that will end up very close to the body of the Z7. I noticed that some of my generic camera plates, the ones that ‘hug’ the bottom of the body to prevent the plate from twisting, sort of wedge in between the body and the adapter, pushing the bottom of the adapter away from the camera. This didn’t look good and I was afraid I would damage the adapter or performance of it, so I ended up using completely flat plates.
In-camera image stabilization
The Z-series bodies are the first interchangeable lens Nikons to come with an in-body vibration reduction (VR) mechanism. This offers compensation in 5 directions and the effect is supposedly equivalent to a shutter speed up to appr. 5 stops faster. The in-body VR is effective when paired with non-VR Nikkor F-mount lenses by using the FTZ-adapter. That means that all your non-VR lenses suddenly get VR when used on the Z6 or Z7 – pretty cool.
Nikon lenses that already have VR (pitch and yaw) will get the added benefit of roll axis, which means that both in-body image stabilization, along with lens VR will work simultaneously to get the best out of the two. I’m addicted to my tripod, so I typically only shoot handheld when I’m shooting wildlife that’s running or flying all over the place, or when I’m just scouting and taking test shots. I have not tested this in-depth, but I’ve seen inside the viewfinder that it works well: a very steady image, and the shots were all sharp.

The EVF
Apart from the obvious size and weight reduction, the EVF is clearly the biggest difference with all my DSLRs. To be honest, it took me some time to get used to. There were times that I cursed it (mostly because of operator error), but most of the time I thoroughly enjoyed it.
What I really loved is the fact that you can superimpose your histogram inside the viewfinder, so I no longer need to take my eye off the viewfinder to check my exposures. For wildlife, this is particularly useful, because lowering the camera to check your exposure might coincide with the most spectacular action ever photographed in the history of wildlife photography, and you’d miss it.
What’s also great, is that you can not only directly see the effect of the aperture you’ve selected, but also of your white balance. I usually just shoot my daytime images in auto white balance and fine tune it later, but sometimes I don’t like what I’m seeing and I tweak it in-camera to give me a more pleasing result on location.
The EVF also rules when it comes to precision focusing. When you focus, you can actually zoom in on your focus point and manually fine-tune the focus – while looking through the viewfinder. I think that’s awesome. And to make it even better, you can use focus peaking to help you get things critically sharp.
But there’s more. When you’re shooting in bright conditions, it can be hard to check the results on your monitor. Well, that’s no longer an issue, because your image will show up inside your viewfinder. For this shot, I wanted to use a reflector to bounce some fill light on her face to better show her face paint, but I didn’t want it to be too strong. In bright daylight, it would be impossible to check the subtle differences between my exposures on the monitor. This is where the EVF really shines. It’s like using a Hoodman without having to use a Hoodman.
To the left of the viewfinder (more or less where the on-camera flash button usually is on my DSLRs) is the Monitor Mode button. There are a couple of different settings for how the EVF behaves in combination with the monitor, for instance: the display can automatically switch from the monitor to the viewfinder when you place your eye to the viewfinder, and back from the viewfinder to the monitor when you take your eye away. Or you can set it to prioritize the viewfinder, making it behave like a DSLR: placing your eye to the viewfinder turns the viewfinder on and taking your eye away turns the viewfinder off.
In photo mode, the monitor remains blank. Having only used DSLRs for so many years, I was often surprised by what was happening with the viewfinder/monitor, simply because I had set it to the wrong mode or forgot that I was shooting with a mirrorless camera. Eventually, I got the hang of it and moving back to my DSLRs after the project felt like going back in time – I really missed the EVF.
However, there was one thing that I really struggled with: the EVF brightness. When you look through the viewfinder of a DSLR, you see the scene at the same brightness as with your bare eye. With an EVF that’s different because you’re basically looking at a miniature Live View monitor, and you need to set the brightness level for that yourself. Several times I found myself being fooled by the brightness of the EVF, tricking me into thinking that I shot a nice and bright image with tons of shadow detail, whereas in reality, the image was actually horribly underexposed.
While it is true that one look at the histogram would tell me this, in the heat of the moment that sometimes did not compute. An overly dark scene like the one above will easily look well exposed in the EVF, but later turn out to be way too dark. There have been moments where I was looking at the image in the viewfinder and then to the histogram next to it, and realized those did not seem to belong together – the image looked so much brighter than what it should look like according to the histogram.
At first, I started to change the brightness level of the EVF to match what I was seeing, but that didn’t prove to be a definitive solution either. I ended up more or less ignoring the brightness level of the image in the EVF and only use it for composition, light direction, focus, depth of field, and instead relying on the histogram for exposure. Overall, I would say the default setting of the EVF is too bright.
Using the EVF you can also use Silent Photography mode, without first having to switch to Live View like with my D850.
Another thing I really enjoyed is the fact that the autofocus points now cover 90% of the frame and that you can focus all the way to the edge. Even with pro-level DSLRs the AF system still limits AF points to the central area of the frame, which means you will often have to focus and recompose or use Live View. With the Z7 I did not need to take my eye from the viewfinder as I could basically focus anywhere in the frame.
In the field
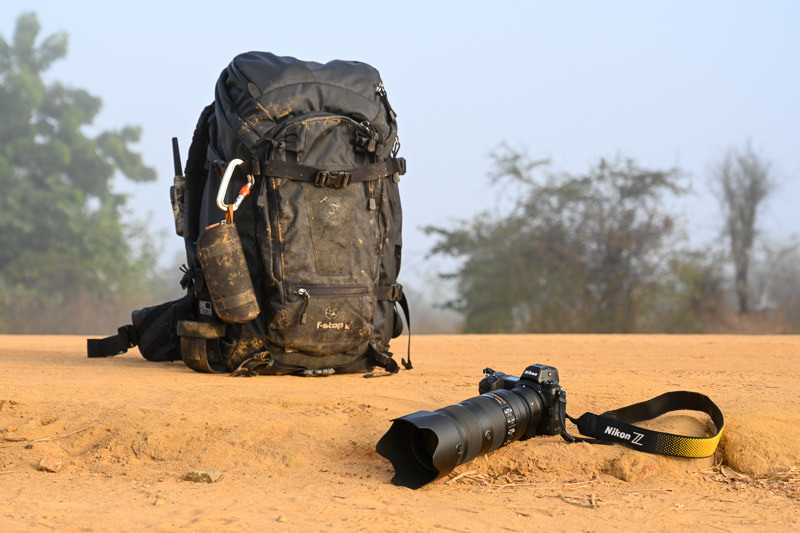
The contents of my f/stop Tilopa camera bag changed each day depending on the shoot, but this is about average.
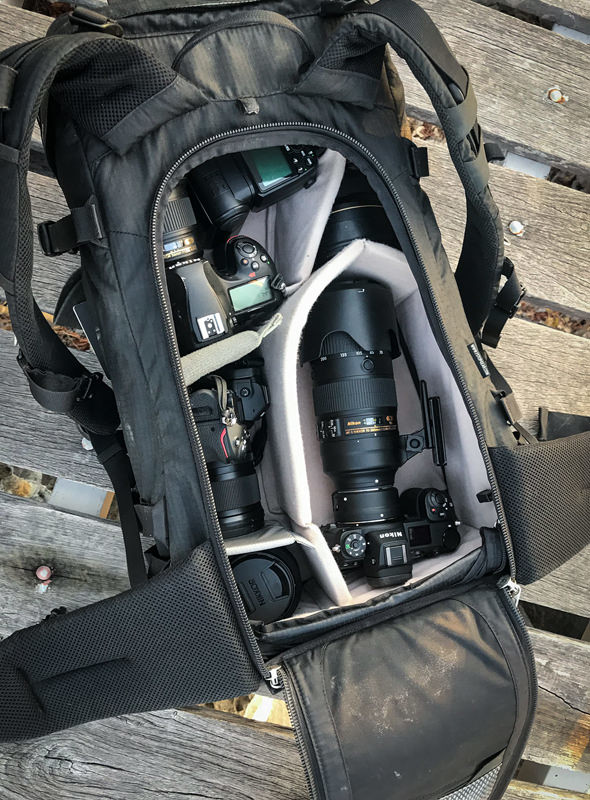
On the top left there’s my D850 with a 24mm f/1.8 and an SB-5000, next to it a 14-24mm f/2.8 F-mount lens. In the lower left corner, there’s a Z7 with 24-70mm f/4 S lens and the 35mm f/1.8 S just below it. In the lower right corner is another Z7 body with the FTZ-adapter and a 70-200mm f/2.8 F-mount lens. When I snapped this image with my iPhone, the third Z7 was on a tripod with my 180-400mm f/4.0 and another FTZ-adapter. The 50mm f/1.8 S was in a different bag.
Autofocus performance
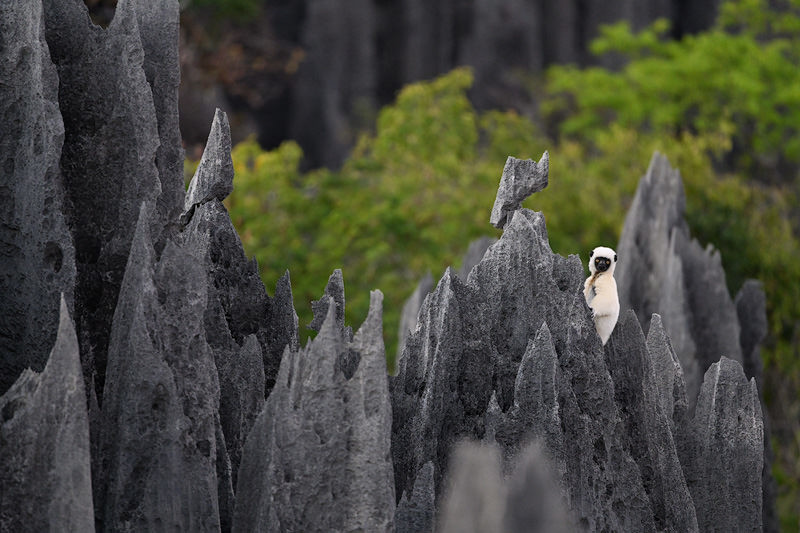
The thing I was most interested in when it comes to autofocus, was how my F-mount lenses would perform with the FTZ-adapter. I found that it was easy to get focus and keep it. The good thing is that the camera can still focus in very dimly lit situations, up to -4 EV. I created a little animated GIF of one of my last shoots.
After several failed attempts, I finally managed to find a lemur on the limestone needles, but the sun had already set and the light was quite murky. Focusing with the 180-400mm f/4.0 and the FTZ-adapter was not a problem. Nikon engineers had advised me to turn VR on the lens off, but I saw no difference between the shots where I had turned it on. I actually like to turn it on, because the scene inside the viewfinder looks so much less wobbly.
The Z7 can shoot 9 fps, and that’s exactly what you see here: this animated GIF consists of one burst of 9 images. But although it works well, autofocus is organized differently on the Z7. There is no dedicated autofocus mode button on the front of the camera anymore to switch between the various autofocus point modes, and some of those modes have disappeared.
For instance, there’s no group mode, and no D21 or D51 – only D9. I shoot D9 most of the time myself when I’m in AF-C, so it’s not a deal breaker for me, but it’s worth noting. You don’t need to enter a menu to change autofocus point modes though, because you can assign a custom button for this purpose – like the movie record button. Works like a charm.
I must add that I haven’t used the Z7 much on moving subjects (the wildlife wasn’t cooperating, as usual), so I haven’t been able to properly test the autofocus for wildlife. From my limited experience, I can say that the AF is not as fast as my D850 and that tracking a moving subject is more challenging.
Another thing is that the buffer is not particularly large, so don’t expect to shoot a cheetah chasing a gazelle with the Z7 (23 images when shooting lossless compressed 12-bit) as you will only be able to shoot for 2.5 seconds before the buffer fills up – a bit like the D750.
Low light and high ISO performance
I like shooting before the sun is out and after it has set, and I also greatly enjoy shooting at night. Needless to say that I was very interested to see how the Z7 would perform in low light conditions. The low-light AF performance of the D850 is nothing short of amazing, but the Z-series takes this even further.
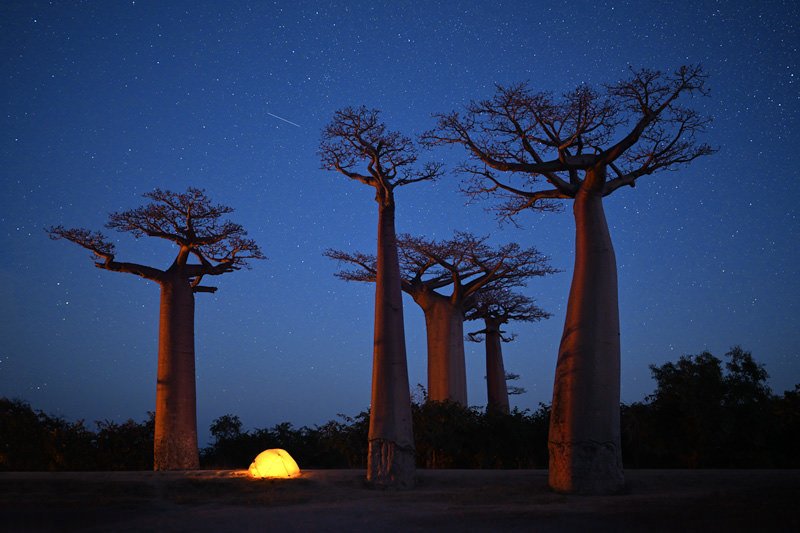
Hidden under a11 in your Custom Settings menu is the option Low-light AF. When turned on you’ll get even more accurate focus, providing you’re in AF-S. The autofocus becomes a bit slower, but the result is pretty amazing. For the image above, I was actually able to use the Low-light AF to focus on the branches of the largest tree. The tent would have been easier, but my depth of field was not sufficient to get that big tree in focus as well when I tried.
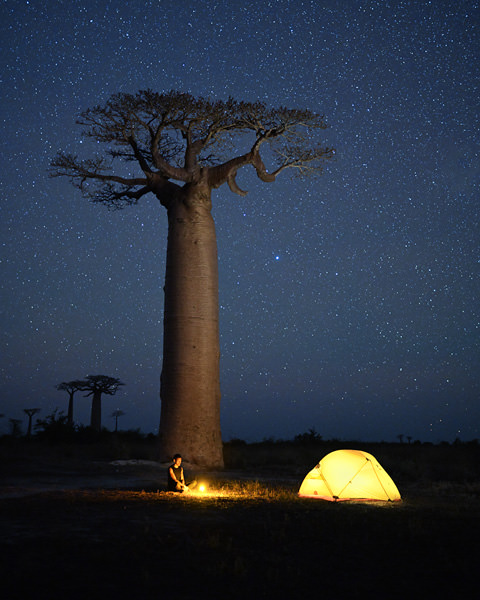
Here’s another example where I shot at night with the same 35/1.8 S lens. Focusing was not an issue here, because I could just use the bright light in front of the tree. When you’re using a 35mm lens for shooting the night sky, you have to watch your exposures – shooting longer than 15 seconds will already show some star trailing. With a 14mm I can shoot this scene at ISO 3200 because I can expose as long as 25 seconds, but with the 35mm I had to go up to ISO 5000 to get a similar exposure at 16 seconds. And 16 seconds was also the maximum time that my assistant could sit still during the entire exposure. The resulting image quality looks very similar to that of my D850.
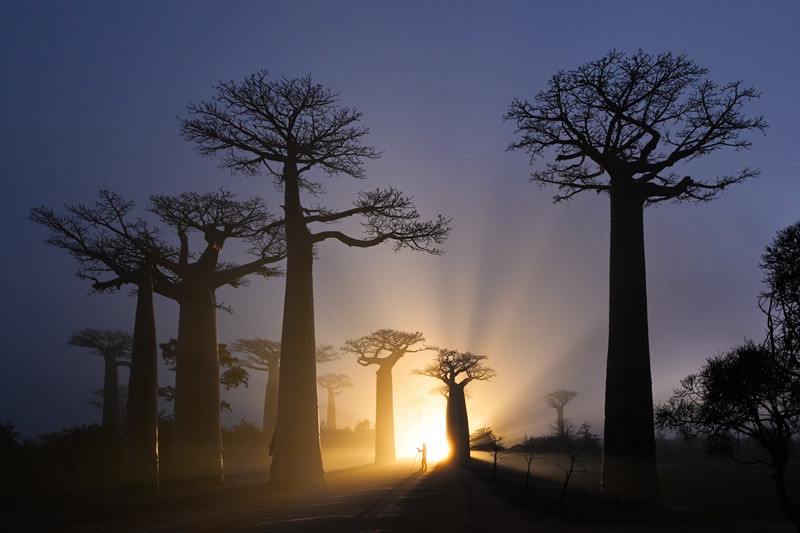
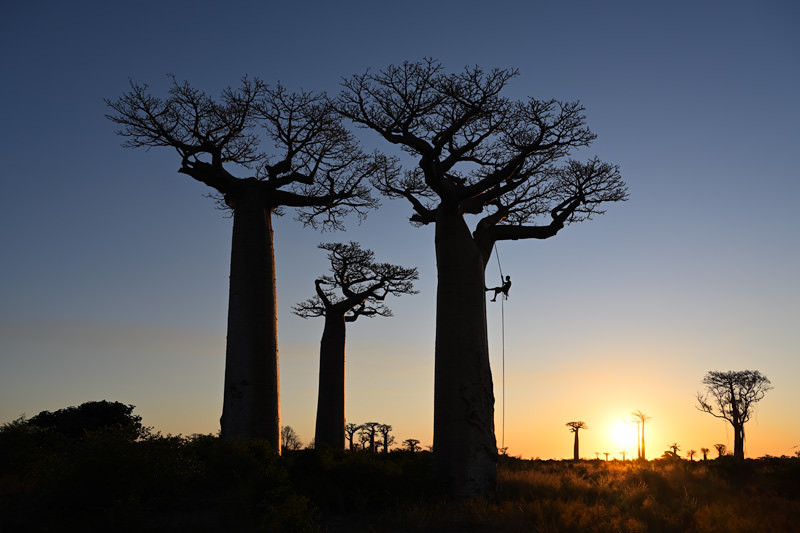
When Kazuo Ushida, the president of Nikon, presented the Z-series system during the global live event, this image was displayed behind him. Well, they used the completely unprocessed version – I did a perspective correction on those trees (they were quite heavily converging because of my 14-24 pointing upwards). For this image, I also used the Low-light AF to help me focus on that tree on the right (and by shining a small headlight on it). It’s one of my favorite images of the trip because it’s so different from what’s already out there, and from what I’ve shot there myself 10 years ago.
It’s not easy to create something unique at an iconic location like this, but therein lies a big artistic challenge – and I really enjoy those. This was shot on a very early morning, and the light was changing rapidly. I had to work super fast because I wanted to have some color in the sky combined with the light beams. This moment was gone in like 5 minutes.
Overall, I found that the EVF was the only challenge when shooting at night. Our eyes are so amazing at picking up the tiniest details in the landscape even during a new moon, there is no EVF that can match that.
When using a regular viewfinder, once you’re eyes are used to the darkness you will be able to see the landscape even when the only light source is the stars. I usually switch off the camera so that I don’t get blinded by the bright numbers inside the viewfinder, and then fine-tune my composition. With an EVF this is not possible, after all: it’s an illuminated micro monitor. In total darkness, it will always be too bright, and it will never be able to show the amount of detail that your eyes can see at night.
This is not a shortcoming of just the Z7, but a general phenomenon for all mirrorless cameras. When you look through the EVF on a really dark night, it’s hard to see what you’re doing.
Diffraction compensation
We all know that shooting with very small apertures will deteriorate the quality of the sharpness: diffraction. Most serious landscape photographers will therefore choose to shoot several exposures at different focal distances at a larger aperture – focus stacking. But focus stacking requires additional post-processing time, and ideally you don’t want anything to move within your frame.
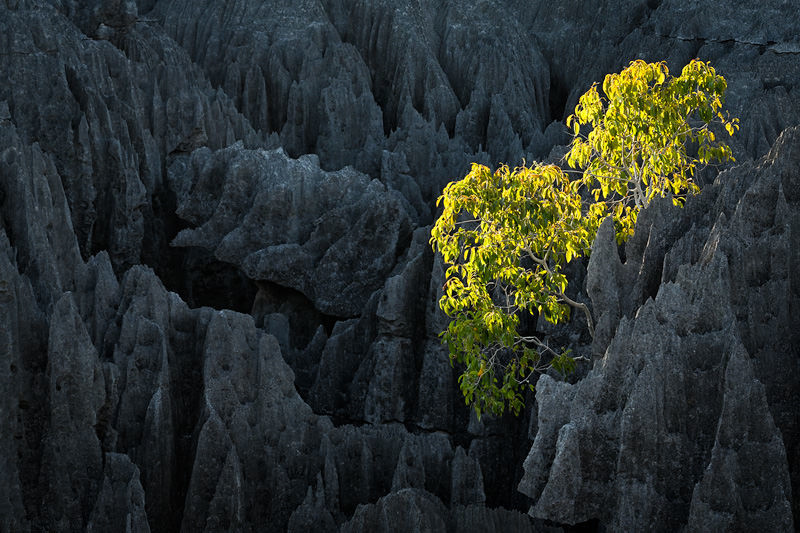
The Z7 has an option called Diffraction Compensation, and I was super curious how it would perform. While climbing in the tsingy, I saw an interesting backlit tree which contrasted nicely with the dark limestone surrounding it. I could not get any closer to it, and the only way to frame it the way I liked was to use my 70-200/2.8 at 125mm.
Getting sufficient depth of field was a real challenge here, and I would usually have gone for a focus stack in this situation. However, there was a fair amount of wind, so the leaves were moving, and I figured this would be a good moment to test the Diffraction Compensation option.
I stopped the lens down to f/22 which gave me the DOF I needed and took two shots: one with Diffraction Compensation set to ON and one to OFF. When I compared the two images, there was a subtle but noticeable difference – this option really works. Shooting a focus stack will still give you better results, but if there’s no time or you just don’t feel like it: this is a useful option.
Enhanced Focus Stacking
Since I already mentioned focus stacking (Nikon calls it ‘focus shift’), the D850 was the first DSLR to have this as an automated option, but the Z7 takes this even further. With the new ‘Peaking Stack Image’ function you will be able to see a monochrome preview of the focus stack you are able to capture – pretty awesome. If you like to be close to your subject and want everything in focus, then focus stacking is the way to go to get maximum depth of field at maximum quality. Ever since I got my D850 I have been using the automated Focus Shift function regularly, and this latest enhancement has made it even nicer to use.
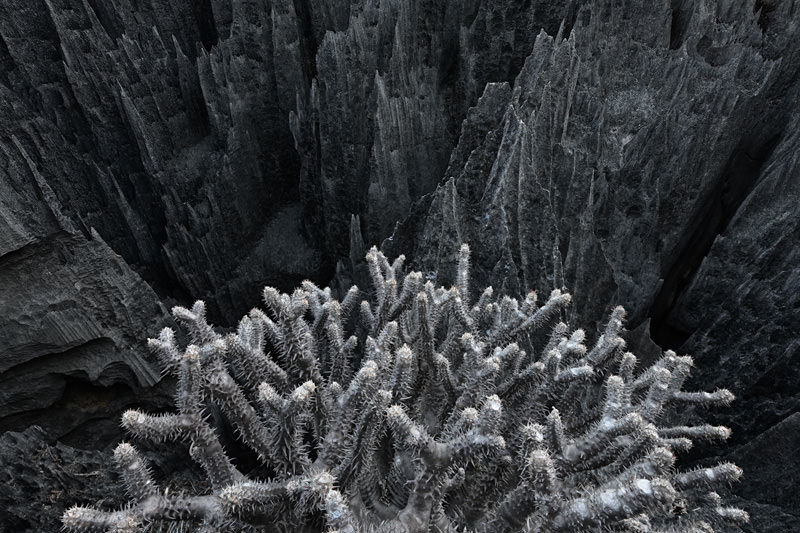
For this particular image, I placed my Z7 and 14-24 inside a very prickly cactus, and the only way to get front to back sharpness is by shooting a focus stack. I ended up shooting an automated focus shift sequence of 16 images that I later combined using Helicon Focus. The cactus needles in the front and the limestone needles in the background are all razor sharp. I should add that working with a much smaller body like the Z7 makes it a lot easier to set up shots like this.
Wireless Speedlight control
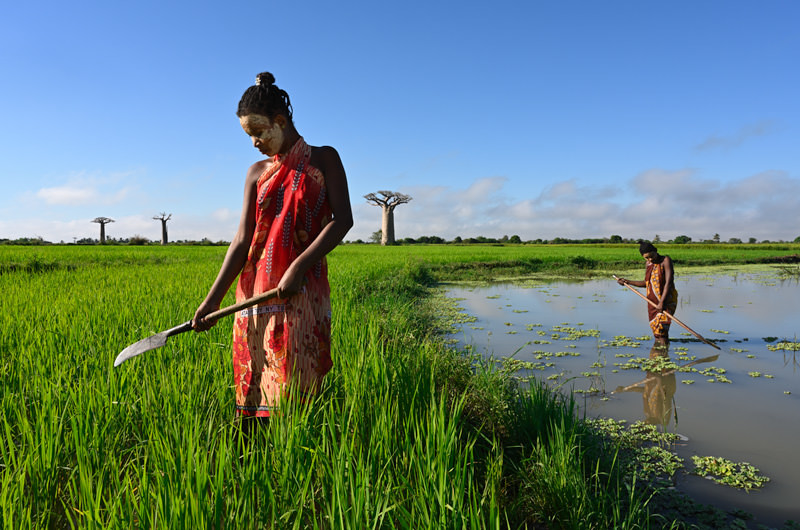
I love my Speedlights as they allow me to create my own light. In that sense, a flash really is an important creative tool for me. When working on my shot list before the start of the trip, I thought about creating an environmental portrait of a local girl using my Speedlights to create selective lighting and drama.
What surprised me when I arrived at this location, is that many of the young girls paint their faces with a yellow ‘paint’ that is made from a special type of wood. This isn’t merely decorative but also applied to protect the skin from the damage of the sun as well as ward off insects such as mosquitoes. It is also believed to make your skin more beautiful, much like a face cream would. The mask is known as Masonjaony.
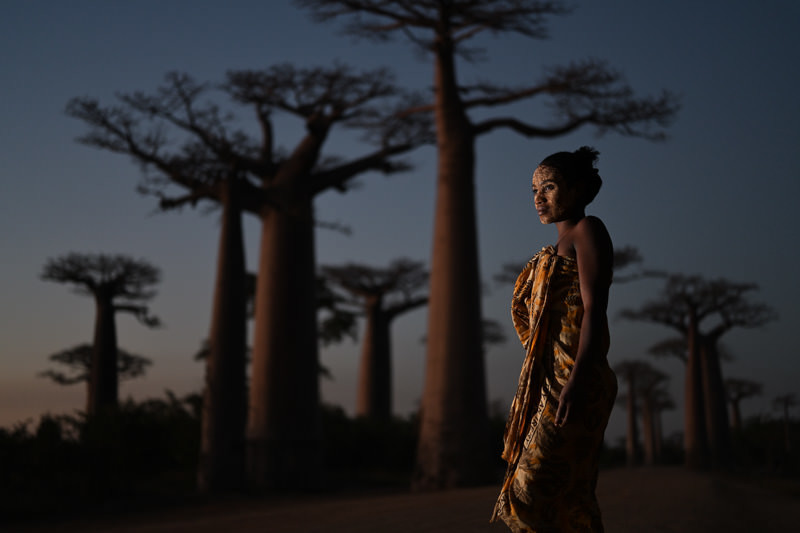
The idea was to use the 50/1.8 S lens to throw the background out of focus and create a nice contrast with the sharp subject in the foreground. I waited for the sun to set and for the afterglow to hit the trees with beautiful low contrast warm light, and I set the Speedlight to a very low output.
I triggered the SB-5000 with the WR-R10 transceiver. That thing is very small and connects directly into the side port of the camera. The flash settings I controlled with the in-camera flash menu that I added to My Menu for quick and easy access. The detail on her face is amazing, and I love the quality of the light created by the Speedlight.
In order to be as flexible as possible and work fast – I really wanted to keep some color in the sky – I decided to shoot everything handheld. I don’t usually shoot people, but for this project, I decided that was something that I needed to do to add some more life to the landscape. I was way out of my comfort zone here, but I fully enjoyed the experience and I strongly believe that it actually makes you a better photographer if you step out of your safe space every now and then.
Endless detail
One of the coolest things to do when you’re shooting 45+MP is to zoom in on your image and admire the detail. With the new S-lenses that detail now goes all the way up into the corners and to the edges. With the Z7 you can now control the amount of detail via the Picture Control menu. You already know that you can tweak these picture controls, and now even more so than ever.
If you want to adjust your selected picture control, you can now choose Quick Sharp, Sharpening, Mid-range Sharpening, and Clarity. Mid-range Sharpening is particularly interesting because you can adjust sharpness according to the fineness of the patterns and lines in mid-tones affected by Sharpening and Clarity. And when you’re in the Picture Control menu, you will also find the Creative Picture Control where you can choose from a bunch of effects, similar to the ones in Instagram.
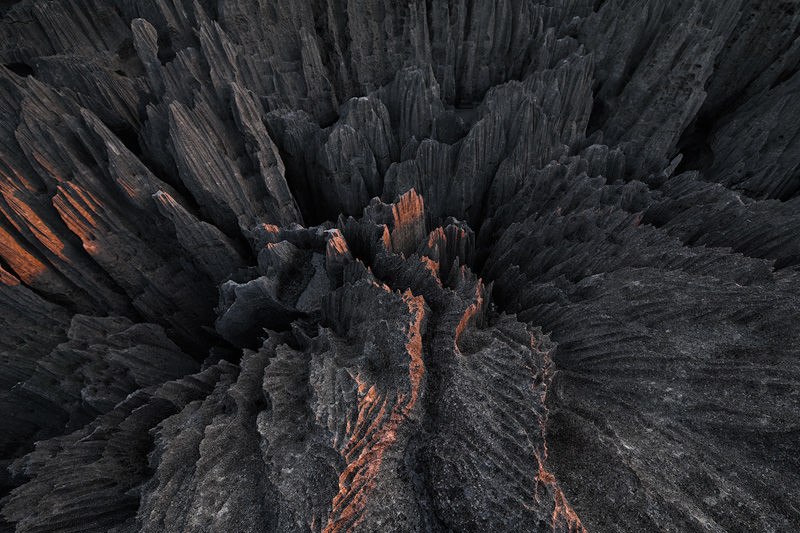
The image above is probably one of the best examples of what this camera is capable of: edge to edge sharpness with tons of detail. To get this shot I was perched on top of one of those nasty limestone needles, pointing my 14-24 straight down into the abyss – not the greatest experience if you’re afraid of heights. But you have to suffer for your art, or so they say.
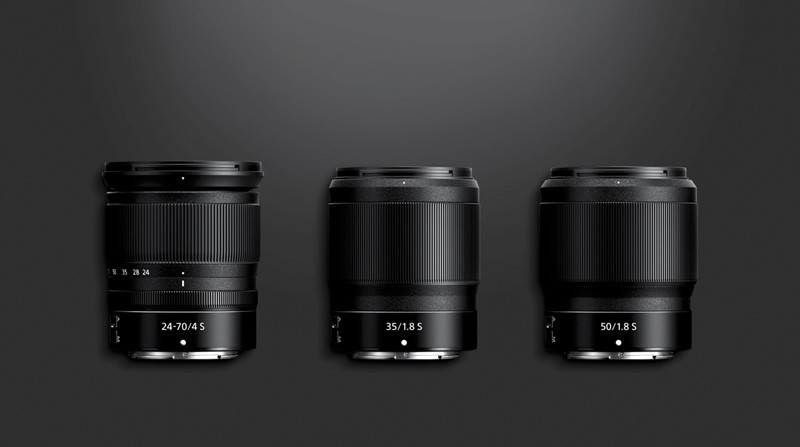
The Lenses
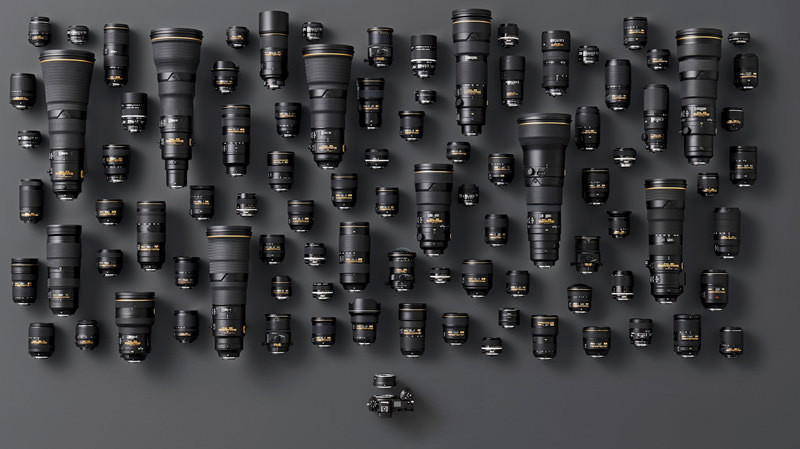
During this project I have used a wide variety of lenses; F-mount lenses as well as the new S-lenses that were specifically designed for this new system. The idea behind the large Z-mount was to create a future-proof mount that is large enough to accommodate modern lens designs that can be as fast as f/0.95.
The new Nikon Z-mount is 17% larger than the trusty F-mount, thanks to its inner diameter of 55mm. This, together with a 16mm flange distance will allow Nikon to make lenses that were much more difficult to design with the Nikon F-mount. One of the objectives was to design lenses that would deliver edge to edge sharpness. This has clearly been something that I have tested constantly by checking the edges and the corners after every shot. And I have to say – the results are very good.
Of the three S-lenses that I have used, the 24-70/4.0 is by far my favorite. I love zoom lenses for the creative flexibility that they offer, and this lens was also the widest of the three which I often preferred for the landscape shots. Comparing the three, the 24-70/4.0 also seemed the sharpest to me.
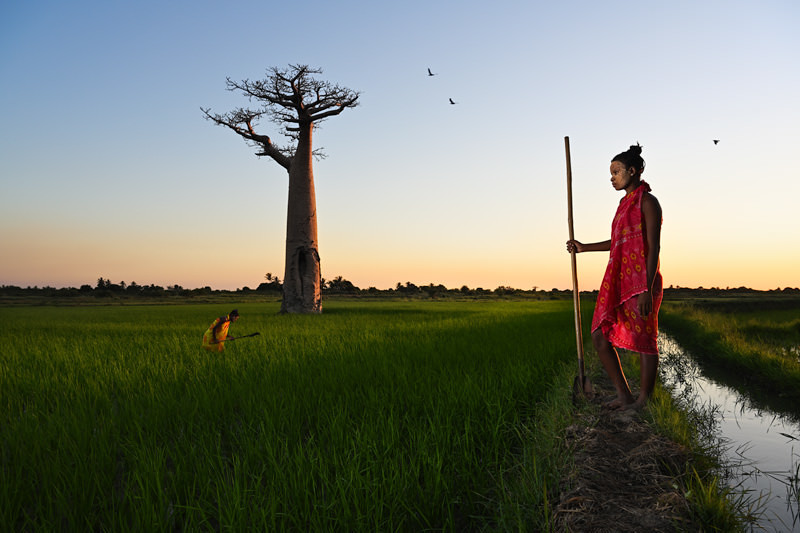
Overall, the lenses are all compact and lightweight and nicely balanced on the Z7. For the image above I really wanted those grasses in the foreground to be razor sharp all the way up to the corners, and at the same time have the tree and the background crispy sharp as well.
Looking through the EVF, I was able to zoom in on those areas and check them for sharpness. Each click of the aperture dial would result in a live DOF change inside the viewfinder – very useful. To add some fill light on the girl in red, I used my SB-5000 that I triggered with the WR-R10 transceiver. That thing is very small and connects directly into the side port of the camera.
The Z-series feature an on-sensor hybrid autofocus system, which works very differently compared to the traditional phase detection autofocus system on Nikon DSLRs. There is no need for a secondary mirror, and this basically eliminates all AF micro-adjustment issues that many photographers spend so much time on (AF fine tune). By incorporating phase detection pixels right on the sensor, Nikon is able to perform focus on the image sensor without relying on a secondary focusing system: no more lens calibration necessary!
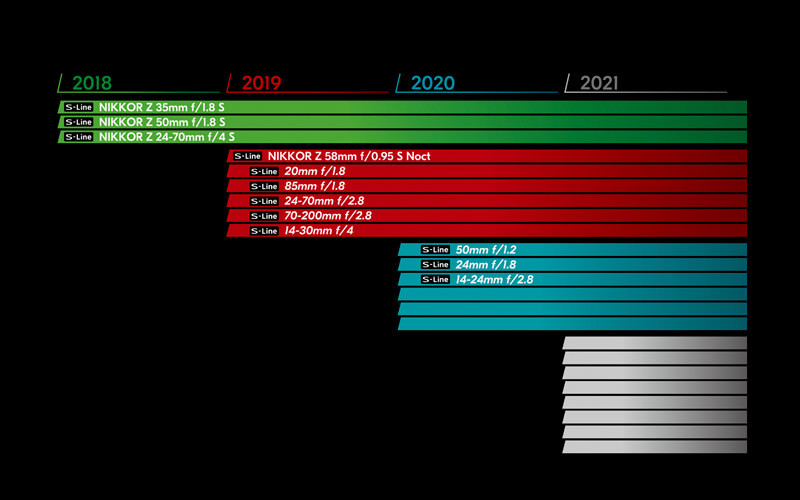
Nikon is planning to release between 4-6 new S-lenses per year, and I’m especially looking forward to both the 20/1.8 S and the 14-24/2.8 S. I have extensively used my 14-24/2.8 F-mount lens on this trip with great results, but that’s neither a lightweight nor a compact super wide angle zoom, and I can only imagine what a killer landscape photography combo the Z7 with a compact and lightweight 14-24/2.8 S-lens will be.
Image quality
From my limited experience with this camera and the large variety of lenses I have used, I can say that the image quality is superb. All my F-mount lenses performed just as good as on my DSLRs, and some of them got VR as a bonus via the FTZ-adapter (AF-S 14-24/2.8 VR!). The S-lenses are all very sharp, compact and lightweight. Colors, contrast, detail, and sharpness of the images are all very good and comparable to the D850.
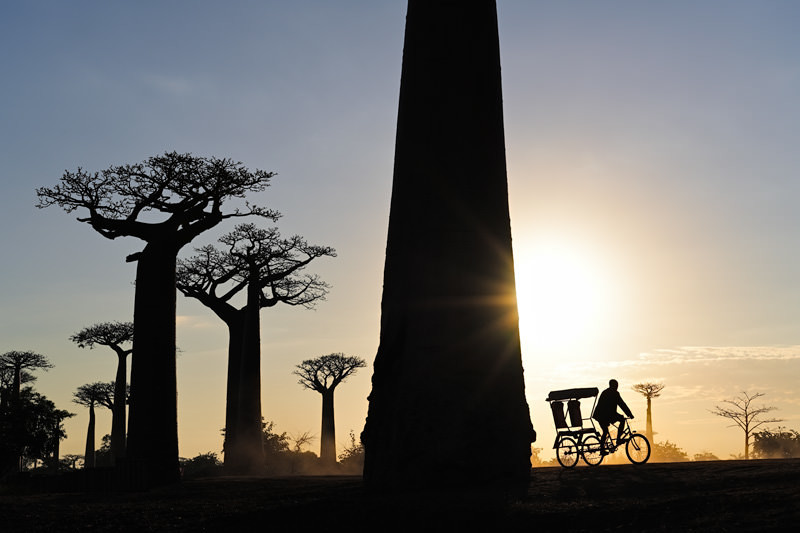
For the image below I wanted to shoot straight into the sun with the 24-70mm f/4.0 S to create some graphic silhouettes, but zoom lenses are more prone to flaring in those conditions. I was happy to see that there was very little to no lens flare, even with the sun away from the center of the frame. In some ways, the Z7 felt like a D850 Light in terms of image quality, but that would actually not be fair to the Z7 because it is a fantastic camera that even has some features and advantages that the D850 does not have.
Weather proof
This is a biggie. No matter how great a camera is, if it can’t survive harsh conditions I won’t use it. This has always been the main complaint I’ve heard from our photo tour participants who are shooting mirrorless: the cameras struggle in dusty/humid/cold conditions and become unreliable. As I spend most of my time in dusty/humid/cold conditions, I’ve never been really interested in going mirrorless.
When I first looked at the Z7 I was still skeptical, but that was mostly because it is so much smaller and lighter and you sort of expect it to be less weatherproof and reliable than a DSLR. During this project, I have photographed in blistering heat, high humidity during the night, in dense fog, and in very dusty conditions. At no point did these conditions affect the cameras, only me (I forgot to bring a down jacket for the cold nights).
The tilt-screen of the Z7 seems to be the same as the one on the D850, which works fine but I’m always worried when I flip it open and look at the intricate construction – I’m always afraid to damage it. Funny enough I let my D850 crash onto the ground during the Hercules Rising time-lapse project with the tilt-screen open, and although it was severely bent out of shape, I simply bend it back and it just kept on working fine. And so did the camera.
I have an angle finder that I use a lot for shooting from low angles, but I find myself using the tilt-screen more and more now, also on this trip. The Malagassy dust did not affect the mechanism. I would have loved the tilt screen to also tilt sideways when shooting verticals, though.
The One Card Slot Controversy
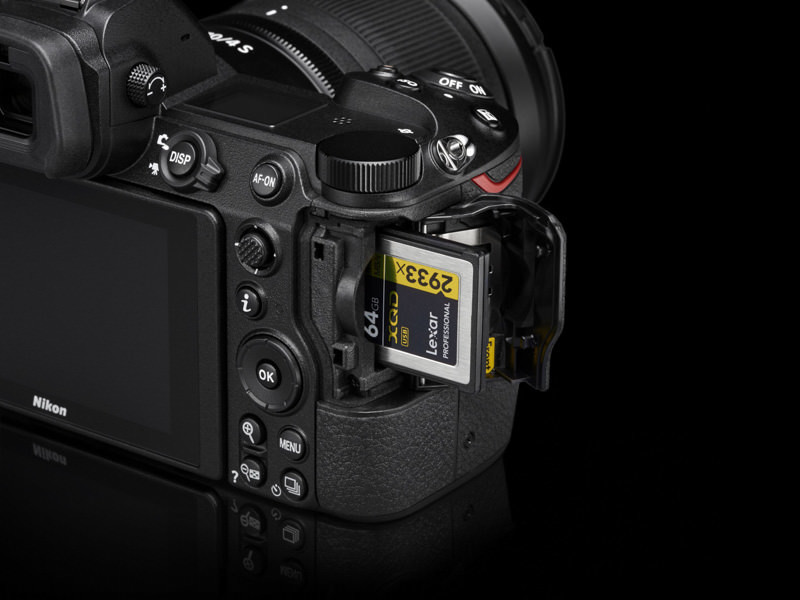
The trolls really had a field day with this one. To be honest, I don’t understand why there is only one card slot as both the Sonys have two, but at the same time, it is not an issue for me. I always set the second card slot to ‘overflow’ anyway, so the one card slot will have zero impact on my workflow.
I get it that wedding photographers get freaked out by the idea of not having a second card as a backup option, but at least that one card slot is for the mighty XQD card (which will eventually be compatible with CFexpress as well, after a firmware update). They’re much more solid, durable and capable than SD cards and I’ve never had one crash on me – as opposed to CF and SD.
Also, don’t forget that the Sony A7 II and A7R II had just one card slot, and it’s only the most recent Sony’s that have a second SD card slot, barely more than a year ago. Even the new Canon R only has a single SD card slot, so it’s clearly not that unusual.
Battery life
There have been some wild stories on the Internet regarding the supposedly poor battery life of the Z7. This is not my experience. As a matter of fact, both Z bodies use a similar battery as the D850. During the Z7 project, I have used three Z7 bodies extensively and never did I have to use more than one battery per day, so the CIPA numbers seem extremely conservative to me.
However, your camera’s battery life depends on many factors: temperature, live view, image review, monitor brightness, standby time, EVF use, EVF brightness, focusing, VR, etc. If I’m shooting polar bears in the Arctic with my 180-400/4.0 in sub-zero temperatures, using AF-C and VR continuously while looking through my EVF and regularly reviewing my images on the LCD screen, that will seriously impact battery life. But for the Hercules Rising time-lapse project for last year’s introduction of the Nikon D850, I used similar batteries and never had any issues either. I already have quite a few of those batteries, so I won’t need to buy extra when using the Z7.
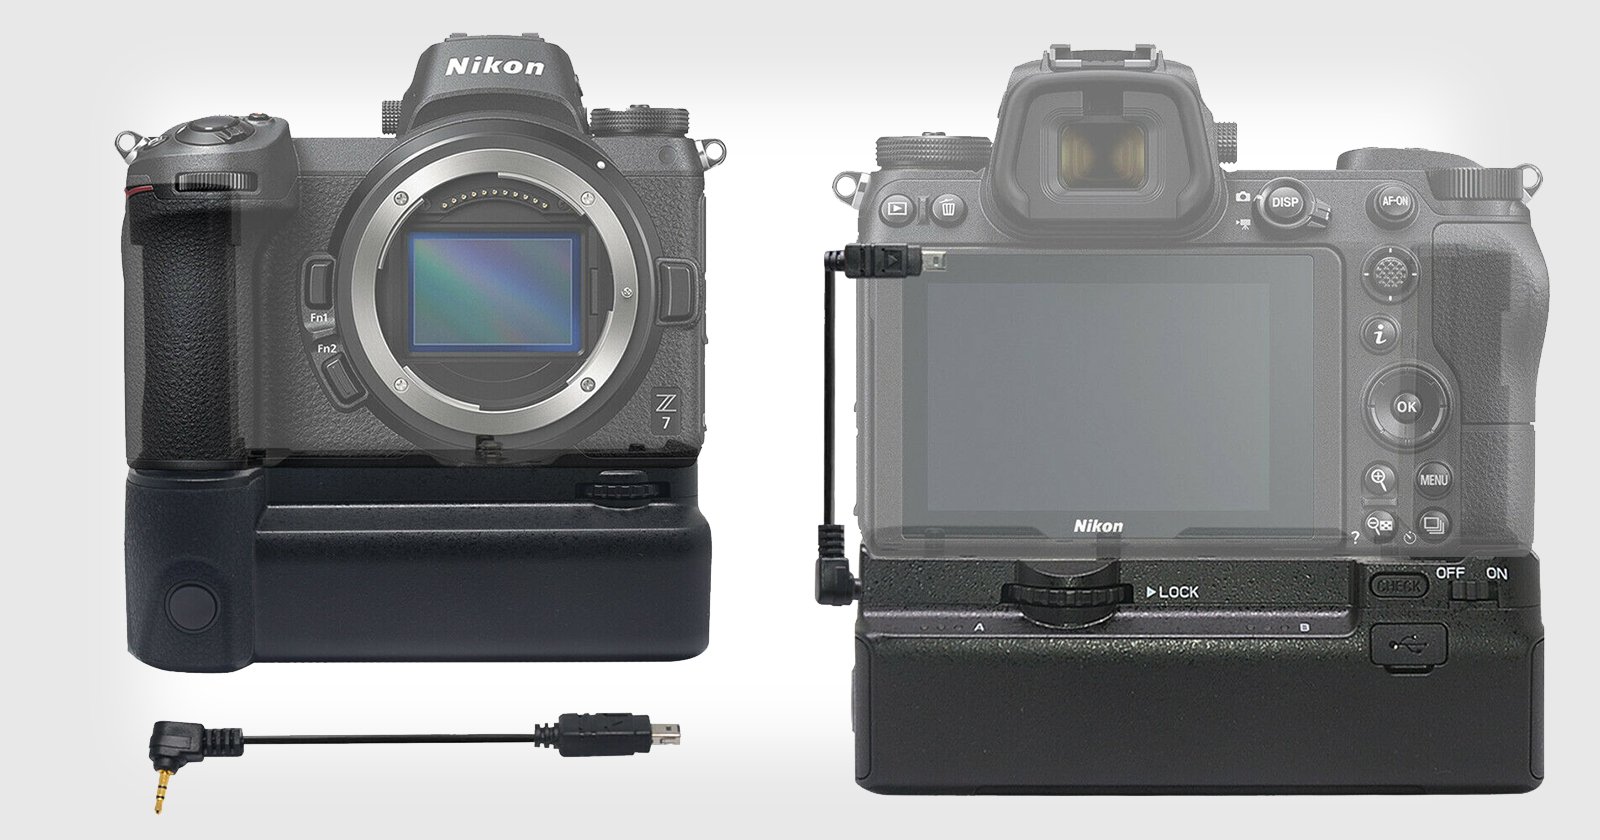
I was happy to hear there will be a battery pack available soon. I use battery packs on all my DSLRs for increased battery life and better handling when shooting verticals, so I’m definitely going to get me one of those for my Z7.
The End
That’s it. I can go on forever, but I’ve been told that’s gonna bore people to death. I hope you enjoyed reading about my experiences with the Z7 and I hope you will someday be able to try one yourself. It’s a really great camera that has earned a spot in my camera bag. No, it doesn’t have eye AF and only one card slot, but those are not even minor disappointments in my opinion.
There are simply too many good things about this camera to not like it, and I haven’t even talked about the customizable lens control ring, 4K and 8K time-lapse, 120p slow motion full frame video at full HD, fast start-up time, no low pass filter, fast XPEED 6 processor, and a whole bunch of other stuff. The next time I go hiking in the mountains or the desert, there is absolutely no question which camera I will put in my backpack.
About the author: Marsel van Oosten is a professional nature photographer from The Netherlands. The opinions expressed in this article are solely those of the author. Together with his wife Daniella Sibbing, Van Oosten runs Squiver, a company that offers specialized nature photography tours all over the world for small groups of all experience levels. You can find more of Van Oosten’s work on his website and Instagram. This article was also published here.