How Camera Film Gets Processed in a Lab
I was recently fortunate enough to get an inside and ‘behind-the-scenes’ look into how film processing works at Richard Photo Lab in Valencia, CA. As the step by step process is very complex, if you’ve ever wondered what the stages of film developing are and look like, come and take this video tour with us!
Richard Photo Lab
Scanning and printing for the past fifty years, Richard Photo Lab is quite the destination for premium processing and printing- whether it’s for amateur photography or for well-established photographers throughout the world.
As first mentioned by our photo lab guide, Albany Katz, the first step is receiving the packages that contain film rolls and processing the orders from there. Once it’s time for processing, the film is then sorted out between color and black and white- there’s a different darkroom for each! The film is then prepped and organized on racks.

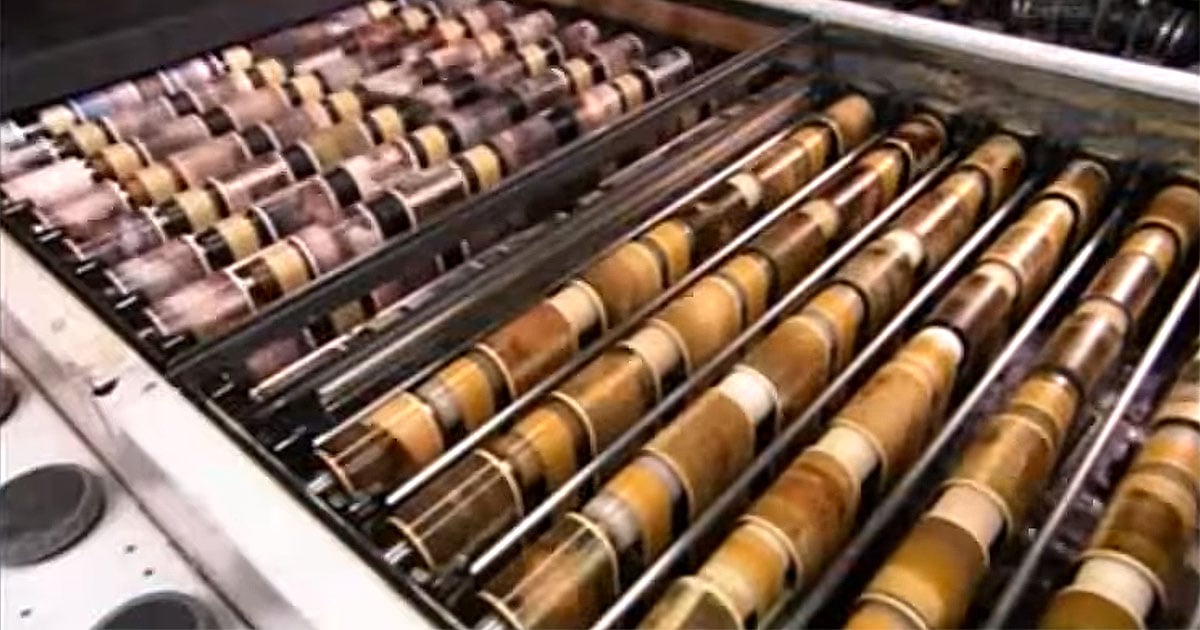
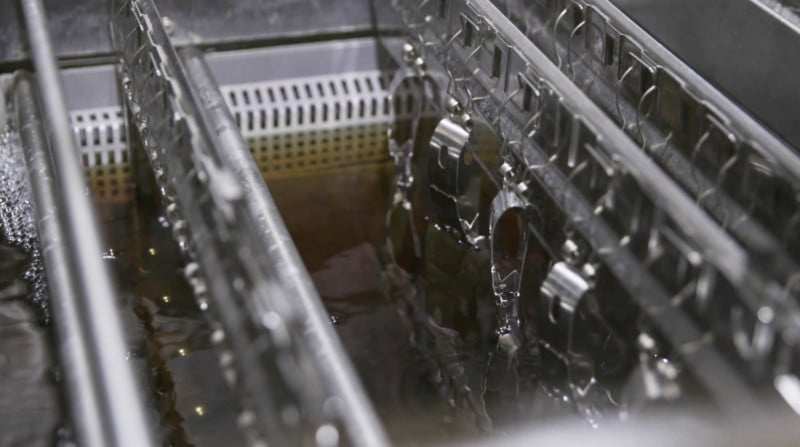
‘Dip & Dunk’
Here come’s the fun! Once the film is organized by a ‘twin-check’ sticker, it is then ready to be dipped and dunked. While other labs use pull-through machines that could compromise the film because of this being maybe more time-efficient, the dip and dunk process is what seems to be the most effective and provides a better end result. When dipping the film, it will only touch the chemistry, nothing more. Once dipped, the film then hangs from a rack to be inspected by staff.
While the film is blacked out and nothing can be seen, the staff feels the film to check for any irregularities. Then, from there the film is sent to be replenished and processed. This is run through sensors before being sent to soak in developer, bleach, and then to a wash process. From there the film then goes to a fix tank and then back to a wash tank before being dried.
The process of going into developer and then out to dry takes all together usually about an hour. The more film being dunked at once makes for a healthier process, and the Richard Photo Lab machinery is able to sense just exactly how much film is being dunked through, that way the right amount of developer is released to then go with the exact amount of chemistry. Truly fascinating.
Richard Photo Lab credits themselves as using the same developer for the past ten years now. We learned that a developer is like a fine wine — it needs to be aged.
Final Touches
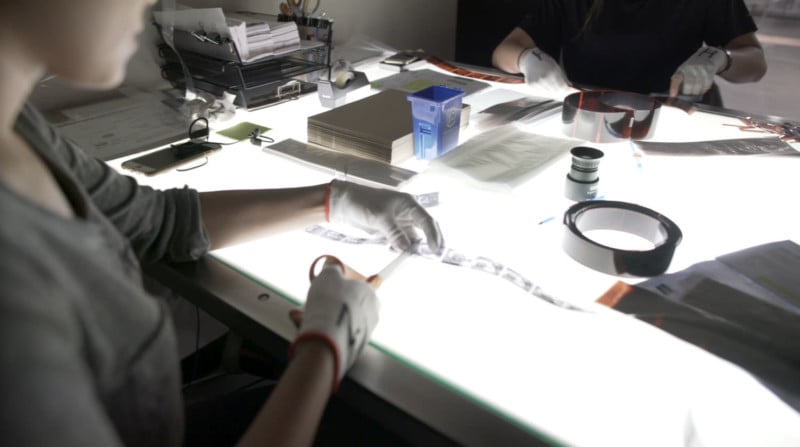
Post the dip and dunk process, the film is then inspected. As Albany mentioned, there are every now and then moments of realization that film rolls are blank. (Not fun).
There are two different scanners at Richard Photo Lab: the Frontier scanner and the Noritsu scanner. The Frontier scanner is an older technology, where the film is scanned one by one. The Noritsu scanner allows multiple frames to be scanned at once allowing more of a consistent flow and the ability to be able to see up to six images side by side to compare. And if the customer is looking to print, the Noritsu scanner is quite possibly the scanner to choose due to its high image quality. After scanning, the prints are then cut by hand (yes, each one is cut by hand!) by the staff and then sent back to the client for their enjoyment.
About the author: Jay P. Morgan is a commercial photographer with over two decades of experience in the industry. He teaches photography through his company, The Slanted Lens, which runs a popular YouTube channel. This article was also published here.