Creating Beautiful Multiple Exposure Wedding Photos
The multiple exposure is one of the easiest, fastest and most flexible ways to create striking images. It is usually my go-to technique when I am struggling with creativity and I need a good shot fast or when the venue is less than ideal for creating amazing images.
Introduction

So what are multiple exposures anyway? In technical terms, a multiple exposure is the superimposition of two or more exposures to create a single image. Originally done in film photography by exposing the same film negative multiple times to create an overlaid image, These days it can be done with digital cameras by exposing the camera’s digital sensor two or more times and then overlaying those images.
Overlaying multiple exposures is one of the oldest forms of “trick photography” and is responsible for many of histories “unexplainable” photographs.
Understanding Multiple Exposures

The way that multiple exposures work can be a bit tricky, so let me start off by explaining that white in an image represents exposed data. Once you expose part of your image to the max that part is exposed forever. You will not be able to bring it back or overlay anything over it because it is already exposed.
Black represents unexposed area. Which is perfect for overlaying the second exposure. Black parts of the image are still unexposed and so the second exposure will fill those parts with substance. This means ideally you want a black area on your first exposure to allow your second exposure to show through.
Everything in between is just different densities of black or white, so they will show through different amounts of the second exposure.
Technical Details
As far as I know, there are 3 ways to do a double exposure.
1. Using a multiple exposure setting on your camera to combine two or more consecutive shots into one.
2. Using a multiple exposure tool in the camera that allows you to combine two images that have already been taken.
3. A program like Photoshop.
95% of the time I am using option number 2, which I believe gives me the most flexibility. The other 5% of the time I will use number 1. Sometimes I will use a combination of Number 1 and Number 2 but I will explain that later. As for number 3, I’ve never combined exposures in Photoshop after that fact — not that I am against using Photoshop, but I just prefer to do it in-camera.
Setting up for consecutive multiple exposures on Nikon
Most Nikon Cameras will have a double exposure mode that can be found by navigating to your Camera Menu->Shooting Menu->Multiple Exposure and from there you can turn on multiple exposure mode, and select the number of shots you want to have combined. This is how you would do a traditional multiple exposure but like I said earlier, I only do this maybe 5% of the time. The majority of the time I am using Nikon’s combine multiple exposures tool.
(Note: I have my BKT button on my Nikon d5 mapped to double exposure mode so I can quickly set it up if I need too.)
Combining already taken multiple exposures in camera with Nikon
Navigate to the Retouch menu and then Image Overlay and from there you will be able to select two images that you have previously taken and combine them into one. You will be able to adjust the density of each image and then combine them. The output will be a RAW image of the two selected images but combined into one. In my opinion, this is the best way to do multiple exposures because it offers the most flexibility.
Setting up for Double Exposures on Canon
Most Canon cameras can be set up for double exposures by navigating to the camera menu and then navigating through the shooting tabs until you see a multiple exposure option that will allow you to enable multiple exposure mode. You will also be able to select how the exposures are combined, how many exposures you want the camera to combine and if you want the camera to shoot in multiple exposure mode continuously or for just one complete multi-exposure.
Combining multiple exposures in camera with Canon
Similar to Nikon there is a way to combine already taken images in camera, You can do this by going to menu, navigating to the same tab where the multiple exposure mode can be found and selecting “Select images for multi. Expo.” This should allow you to go through the images on your memory card and select the two (or more) images that you want to combine.
(Canon cameras have the ability to select different kinds of blending modes for the multiple exposures. I don’t know a ton about the different modes, but when I was shooting with canon cameras I would always use “additive” mode which I believe is the closest thing to what would be considered a traditional multiple exposure.)
The Thought Process
Multiple exposures can be a bit tricky to wrap your mind around when you first start doing them, there is a lot of stuff going on when multiple images get combined that it can be confusing trying to keep track of whats going on. For that reason, I like to keep things simple by breaking them into two parts. Part 1 being the “Canvas” and part 2 being the “Subject”.
The Canvas
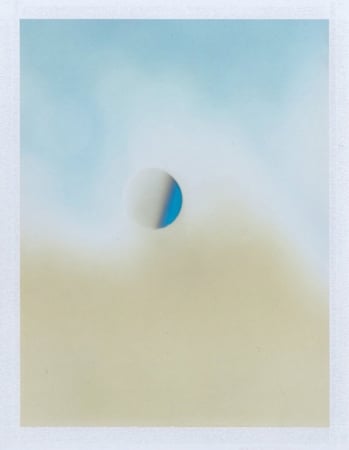
The canvas is the background, foreground or any part of the image that doesn’t have a subject in it. This is for me the most interesting aspect of a double exposure and I will take the time to figure this out before I consider adding the subject to the frame. Usually, for canvases I’ll look for interesting lights, abstract designs, geometric shapes, cityscapes, fire, sparkly stuff and I’ve even been known to use pages from a magazine or paintings on walls to make interesting canvases. Here are some examples of canvases:

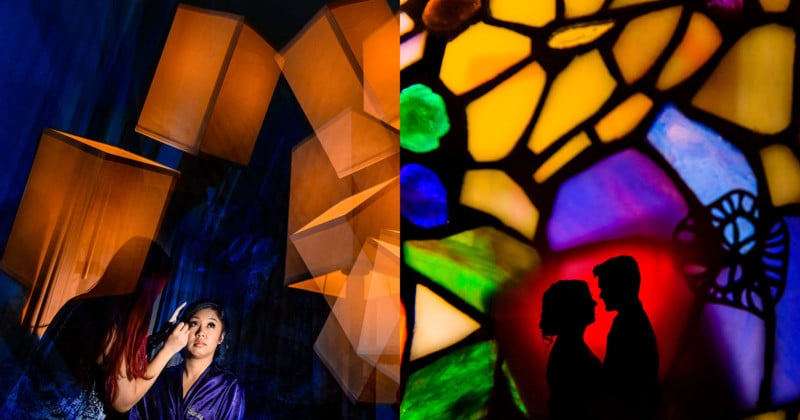
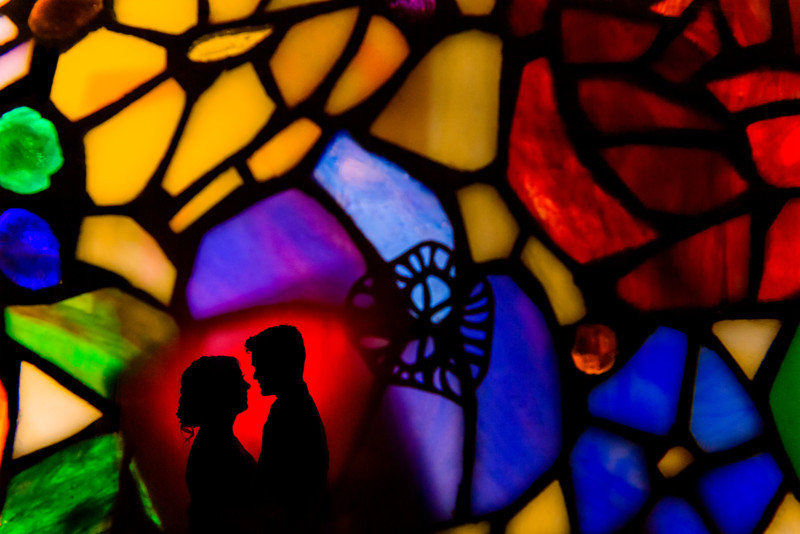
This is a stained glass lamp shade that I found while walking around the venue. Notice the black area on the left, That was actually made by placing a credit card behind the lampshade to flag a dark area because I knew I eventually wanted to put a subject in that area.
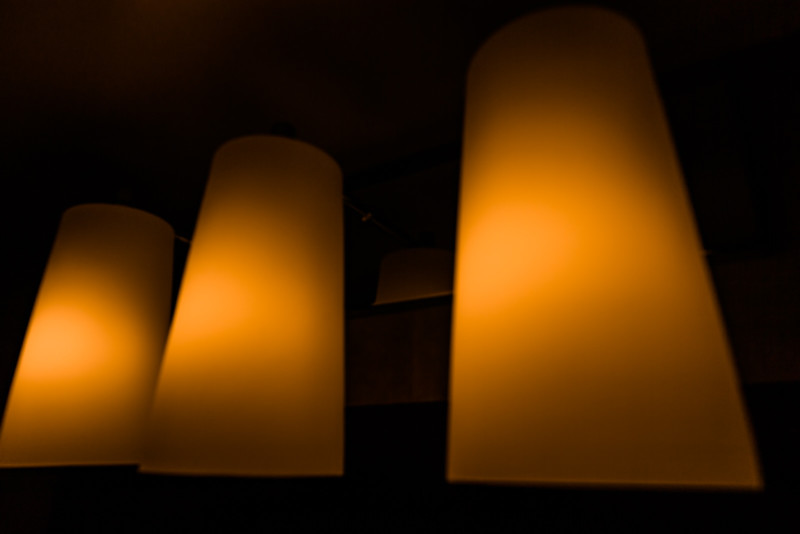
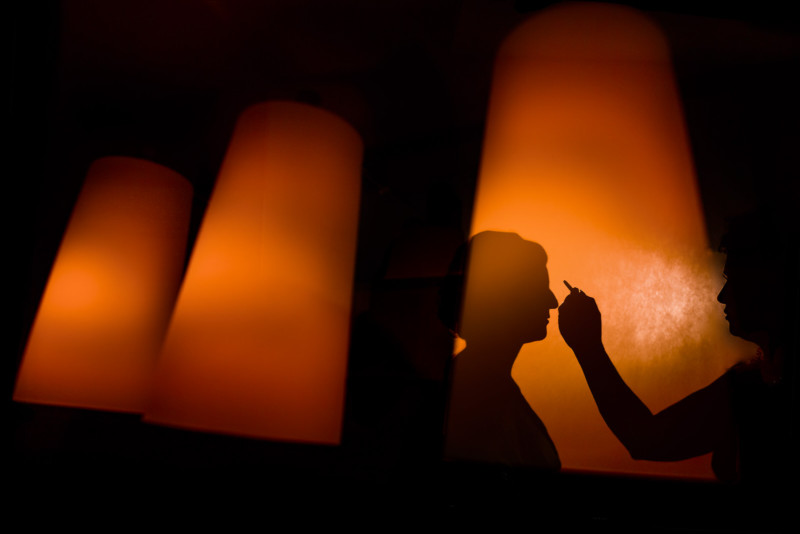
These are 3 lights that were above the bathroom mirror in the bridal suite. Ordinarily, they would be pretty boring but I saw them for their basic geometric shape and thought they looked kind of cool. I under-exposed my camera quite a bit to try and only get the basic shape and color from the lights.
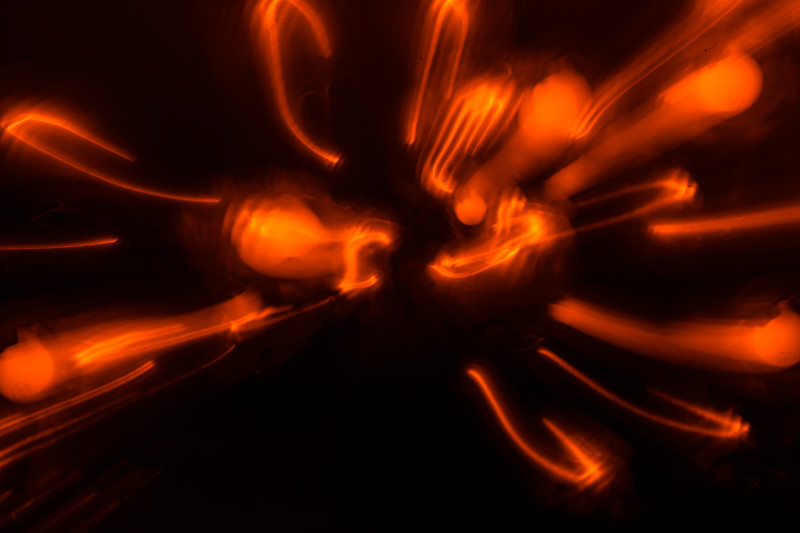
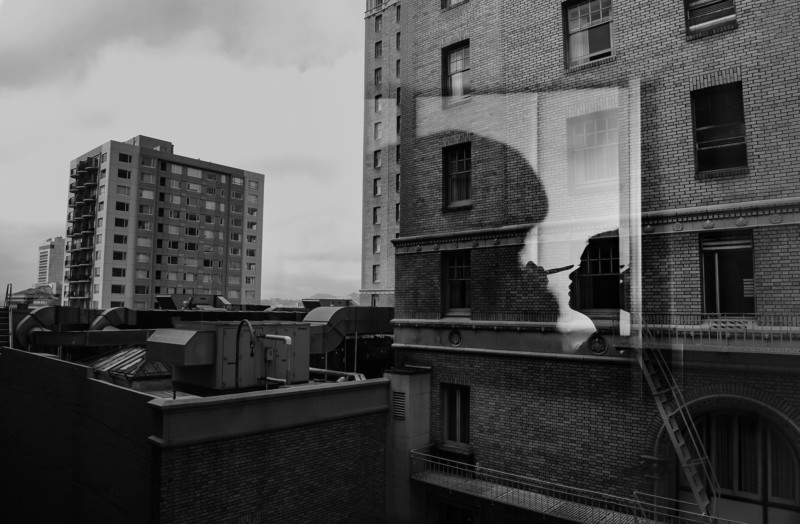
This is a chandelier and I just I opened up the shutter speed to get a long exposure, then I moved the camera around and also zoomed in and out to get these cool abstract light trails.
Once you have decided on your canvas, you need to decide where to put your subject. When I am looking for good canvas shots, I am looking for good places to put my subject within the canvas. Remember that black represents no exposure, and so will show the second exposure. For that reason I intentionally look for dark areas within my canvas shot, knowing that it is going to be the place I put my subject.
If I can’t find a naturally dark area I will create one by putting an object in front of the lens to flag the area I want my subject to go. I’ve used my finger, a credit card, and other random objects to create a dark spot in the canvas frame so that I have a spot to place my couple.
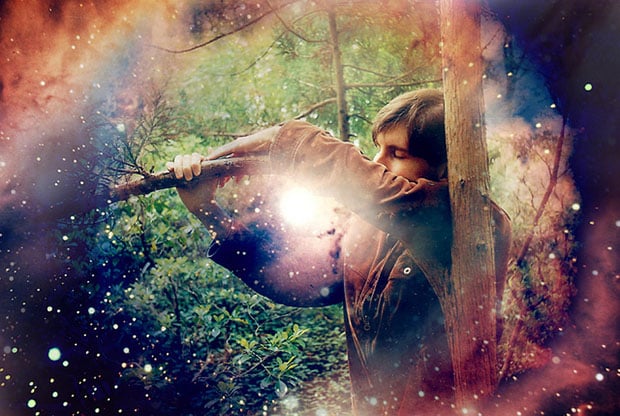
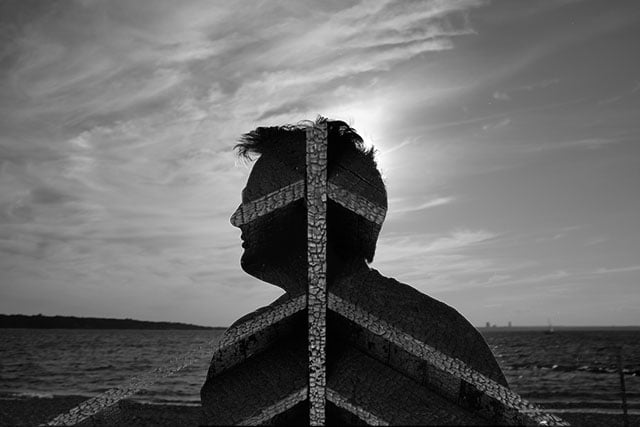
The Subject
I’ll do one of two things with the subject, turn them into a silhouette, or light them with a completely black background. Here are some examples of Subject photos.
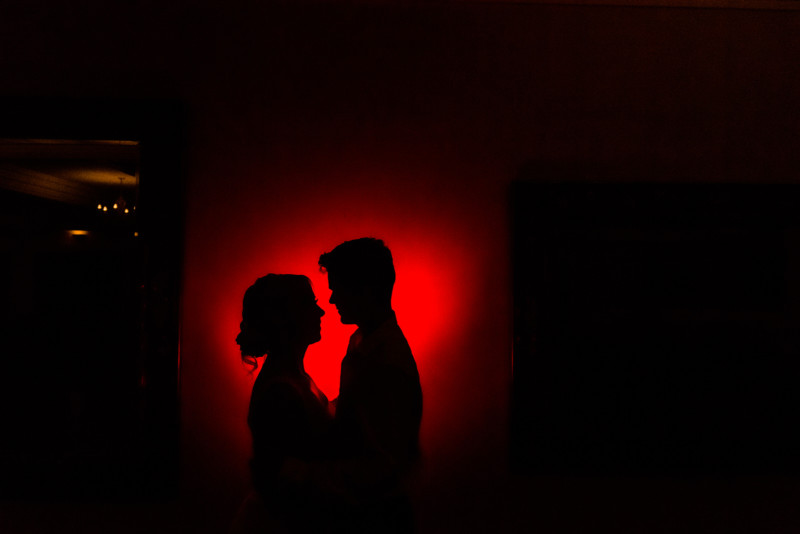
This is just a silhouette taken against an empty white wall. I used the red gel from Magmod and had the groom hold my flash at his waist and point it directly at the wall behind him. Then I used my shutter speed to kill all the ambient light in the room and got this simple silhouette.
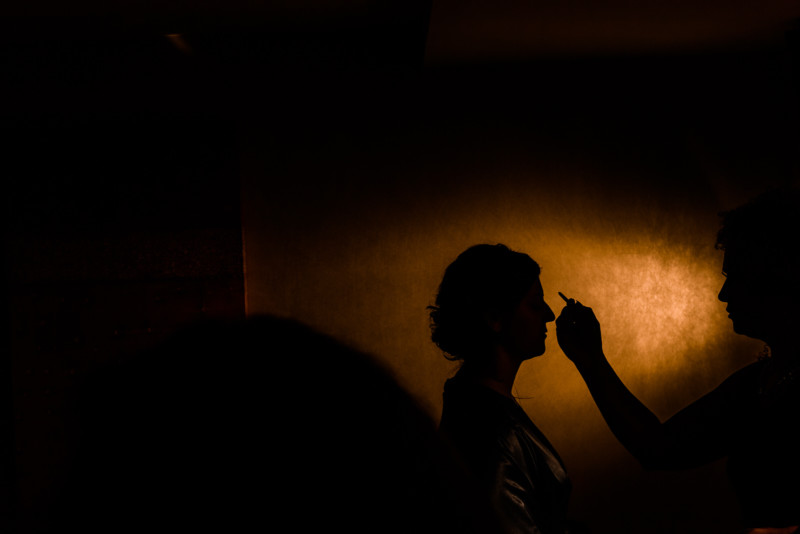
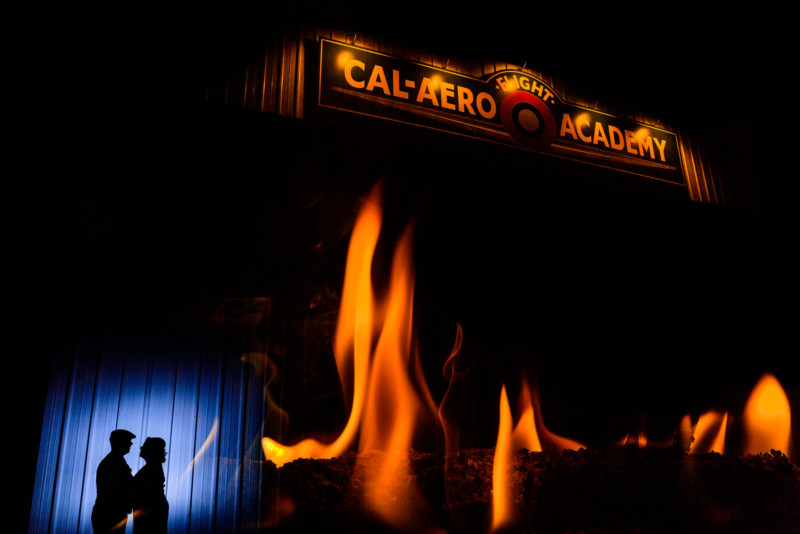
This is just a very simple silhouette made by placing a flash behind the subject and pointing it at the wall. Then I just increased my shutter speed to kill the ambient light and got this simple strong silhouette.
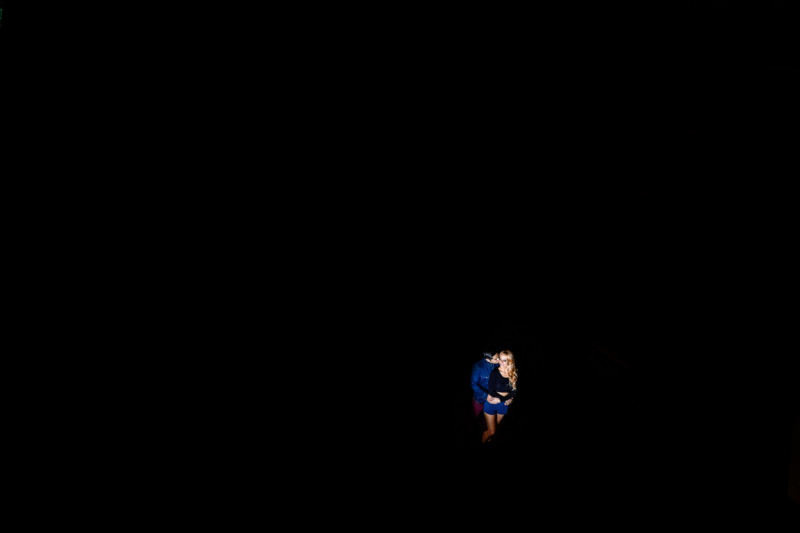
All I’ve done here is put the couple in a completely black frame. This can be achieved pretty much anywhere with a gridded flash, just kill the ambient exposure by increasing your shutter speed until your frame is completely black and then put a flash on the couple. The completely black parts are perfect for filling in with a cool canvas frame.
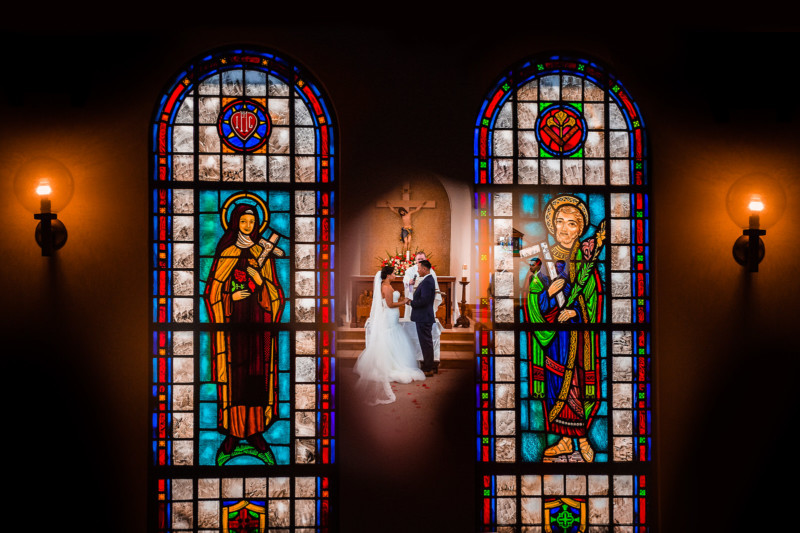
Complete Double Exposures
Interesting Canvases
Here are a few of the techniques that I use to create interesting canvas shots, Obviously the sky is the limit on what you want to create but I usually stick to these.
1. White Balance Throw
This is when you use a different white balance with each exposure. For instance, I’ll crank up my white balance to 10,000k and photograph some interesting lights (like a chandelier, candles, or twinkle lights) as my canvas. This makes the lights super orange because I’m tricking the camera into adding orange to the image.
Then for the subject image, I’ll move my white balance to the correct white balance, this will make the subject correctly colored while the canvas image is still bright orange. You can do this the complete opposite also by setting your camera to something like 3200K and making the canvas image a strong blue color. If you are doing a silhouette you can set the white balance to 10,000K for the canvas and 3200K (or the opposite) for the subject and that will add a strong orange/blue color contrast to your image.
2. Long Exposures
This is one of my favorites, you can find interesting light sources and set the camera to do a long exposure. Then shake the camera around to get cool motion blur and or light trails for your canvas shot. Then just place your subject in as usual. You can also use a zoom lens and zoom in and out while taking the long exposure shot and it creates an interesting zoom in effect that I’ve done a few times before.
3. Multiple exposures
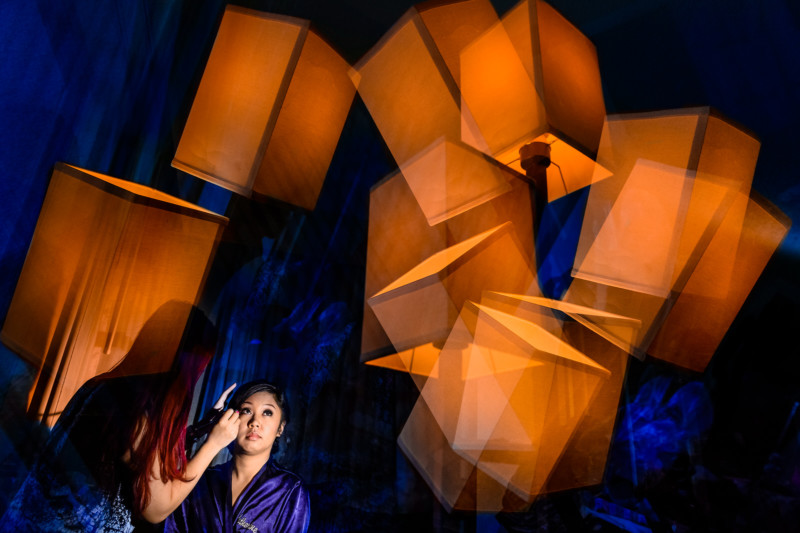
This is when I will use multiple exposures just to build my canvas. For example I will set my camera to shoot consecutive multiple exposures, then take an image of a chandelier, re-compose and take another image of the same chandelier, I sometimes will do this like 10 times which results in a canvas image that is build of about 10 exposures with 10 of the same chandelier in the shot but recomposed a bunch of times so it is just an abstract mess of chandeliers. Then I’ll just add my subject in as usual. This usually results in some pretty crazy/abstract shots, which can be pretty fun.
4. Mixing Focal lengths
Sometimes I’ll use a 200mm lens to compress lights, cityscapes, or anything else for the canvas. Then I’ll switch to a wider angle lens to capture my subject. By mixing focal lengths you gain control over how big or little your subject/canvas can be. For example, you can use a 200mm lens to make something small look huge and fill up the entire frame, then use a wider angle lens and step back to make your subject look small. Then put your tiny subject within the bigger canvas.
Conclusion
I try not to do multiple exposures all of the time because I feel like they are not always 100% true to life, not an accurate representation of what was really happening on the couple’s wedding day, and sometimes I feel like they are kind of gimmicky. That being said, however, the couples who hire me are doing so because they want amazing images and it is my responsibility to create them.
I will always strive to capture real moments, and real emotion before I fabricate something like a multiple exposure, but at the end of the day if the venue isn’t the most ideal place for amazing portraits, or if I am low on portraits for the day I know I can always put together a multiple exposure that will blow the couple’s couples mind and make me look good in the process.
So ultimately look at double exposures as just another tool in the tool-box, something you can break out whenever the occasion calls for it.