An Ultimate Guide to Every B&W ISO 400 35mm Film on the Market
I’m photographer Andrew of Denae & Andrew, and this is my 400 speed, 35mm black-and-white film guide. In this guide, I will be comparing every 400 ISO black and white film which is actively being produced and readily available to the U.S. market, that I know about.
Table of Contents
1. Methodology (2:38 in the video)
2. Film Histories and Characteristics (5:34)
3. Blind Test (17:57)
4. Analysis and Conclusions (41:14)
You should also know that this will not be a short guide. We’ll proceed like this. I’ll first explain how I conducted the testing for this guide, as transparently as possible. Next, I’m going to talk about the history and characteristics of each one of these emulsions. If you’re going to skip a section, this might be a good candidate, although, some may find this fascinating. After that, we’ll get to the most important section, and that is the blind testing to help you and I figure out what type of film we find most appealing. Finally, I’ll give you my own analysis, for those who are interested.
Now, you should know that the way any of these films look, both grain, contrast, sharpness, tonality, etc can all be drastically affected by your choice of developer, your development technique, and your scanning technique. The good news there is that, within reason, you can probably make most any film, developer, scanning, and post processing combination get you results you’re very pleased with if you experiment long enough. And any experienced film photographer would tell you that that’s exactly what you should do.
Pick a film and a developer that works for your budget and workflow, and start experimenting with developers, development times and methods. But, we all need a place to start. I’m hoping this guide will give you a point of departure. If it sparks your interest in a specific film or introduces you to a film you’ve never tried but decide you’d like to try, to me that makes the whole thing worth it.
Methodology
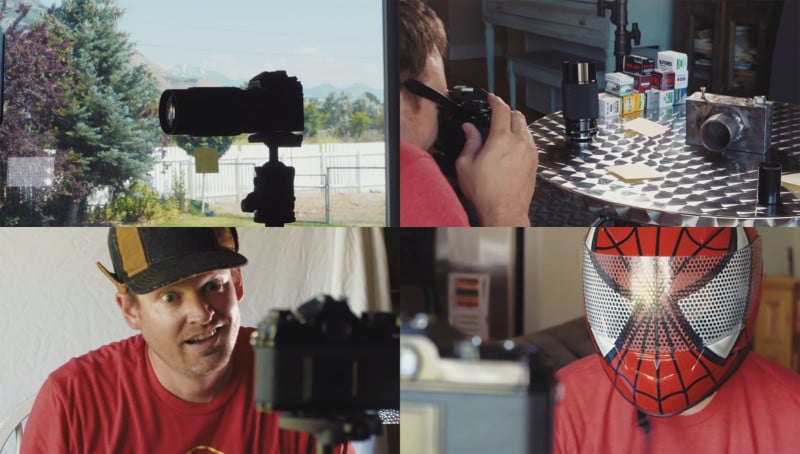
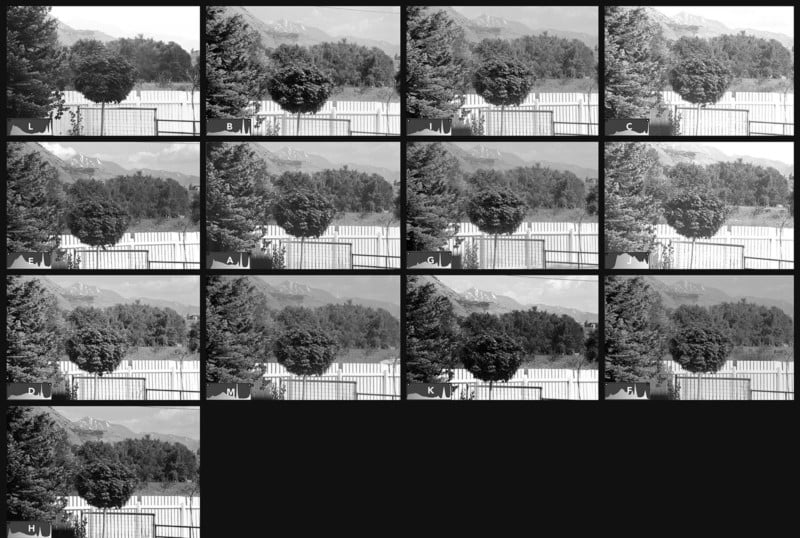
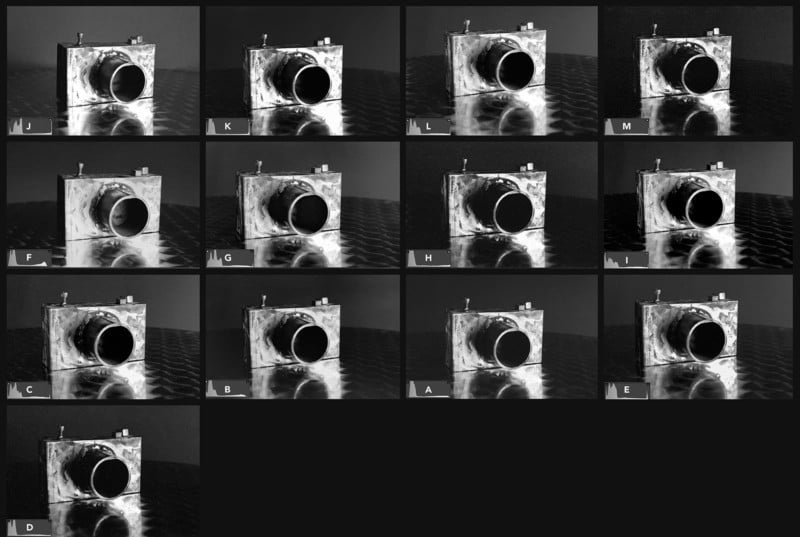
So let’s talk about how I did this. I wanted to start with four different photos that were taken in exactly the same conditions for each film. To do that I setup a tripod in the center of my living room and setup four different scenes to shoot. One shot through the window at a tree, a fence and a mountain on a bright, cloudless, summer day, one shot at a naturally lit metal art that I proudly welded myself, and then two portraits, one with some nice rim lighting against a white backdrop and the other against the dark interior of my home. As I progressed through each film I shot each scene with each film.
So I’ve given a lot of disclaimers so far, and I want to add yet one more, but this is probably the most important disclaimer. Except in the case of one film (which we’ll get to later), I used the same developer: Kodak HC 110.
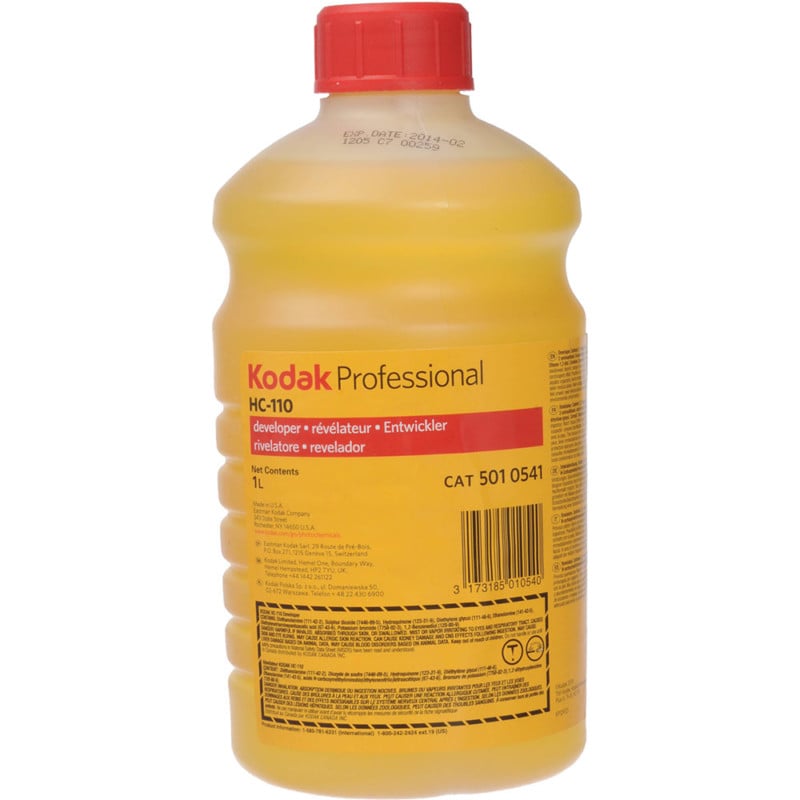
For development times I stuck with times recommended in the Massive Dev Chart. Now, plenty of people will criticize my choice of developer and/or, the Massive Dev Chart. But for the purposes of this guide, we have to start somewhere, and testing each of these emulsions with even several of the more popular developers would be completely unrealistic. I spent a lot of time considering this and ultimately decided on Kodak HC 110 for a lot of reasons. HC 110 has been around forever and is known for being reliable and being able to produce predictable results.
In fact, this is the one Ansel Adams himself recommended for those learning the zone system. It has a long shelf life and it’s cheap to use as one-shot. It’s not great for pushing, but we’re not doing any of that for this test. At box speeds, I feel like it’s a strong choice for most of these films. For many of these films, people will argue that other developers would be better to start out with. I’m not disagreeing with that, but again, I had to start somewhere and I certainly can’t test all of them.
Additionally, several of the films I’m going to cover, people will claim are not “true 400-speed film.” People will say “the box says ISO 400, but everyone knows it works better when exposed with at 200 exposure index or blah blah blah. Look, that may be true of several of these films. However, if the box says it’s a 400-speed film, we’re going to treat it like a 400-speed film. Any film can be developed at a different ASA to yield different results. Just because you may like Foma developed at 200, for instance, doesn’t mean it’s invalid to develop it at the marketed box speed of 400. And that’s exactly what we’re going to do.
For scanning, I used the Epson V800 with the same settings for each scan. It’s important to note that a scanner acts like an on board image processor in a digital camera and will absolutely have an effect on the look of a film. Again, there’s just no way we can test a wider set of options. I think you’ll find that my scan probably adds a bit more contrast than what you’d get if we’d just have enlarged these. And I think that’s important to note.
Phew! That was a lot of disclaimers. Maybe I should have had you sign a waiver. But with the fine print out of the way, let’s start looking at the history and characteristics of these films.
Film History and Characteristics
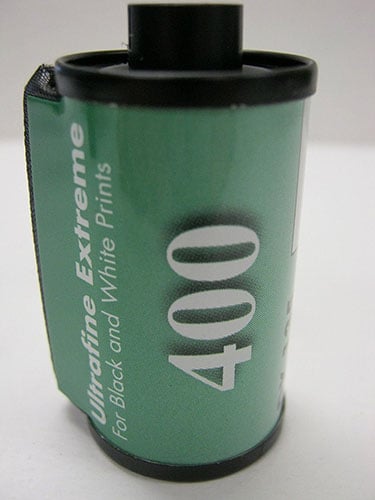
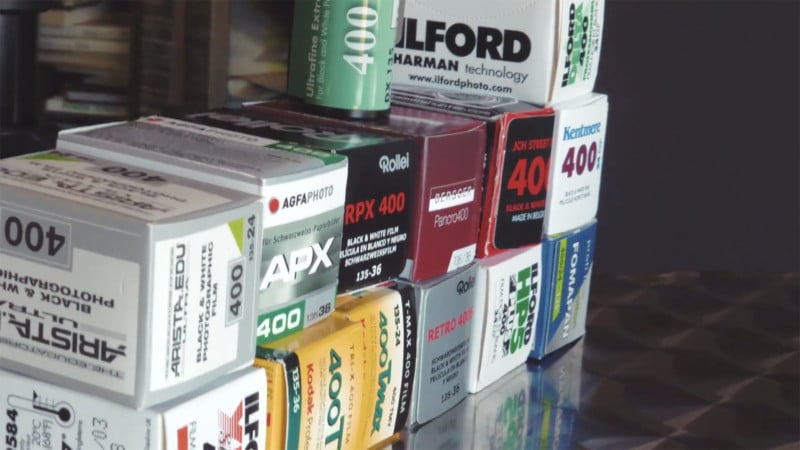
We’ll start with the cheaper or what I would call the budget films. These are films typically used by students or the budget conscious photographer. And, weighing in at a pretty nine cents per frame (again, in USD), the cheapest of all of the films is Ultrafine Xtreme 400. I couldn’t find a lot of information on the history of this film. Though it is labeled as being produced in Europe, and many believe it to be another film simply rebranded, I can’t find any hard evidence to substantiate that claim.
It seems safe to assume that Harmon (maker of Kentmere and Ilford films) does the coating/finishing of this film, but I wouldn’t go so far as to say that this emulsion is simply Kentmere or HP5 as many claim. Regardless, this film, to me, is surprisingly high quality for one so cheap. It has low contrast with good latitude (define latitude), and I’d say a medium to fine grain. It dries flat and is great for scanning.
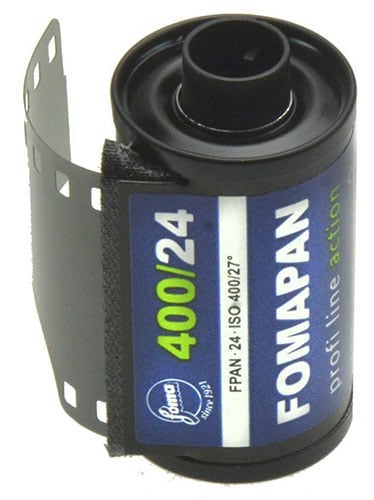
Next up is Fomapan, which, is also Arista EDU Ultra, which, is also HOLGA. It’s all the same emulsion. Fomapan 400 has been produced for by Foma, Czech company, for almost a hundred years. It is Europe’s popular budget-friendly brand. I’ve found that prices vary between its various brands, so I’ll usually watch and compare these prices and get the version which happens to be the cheapest at any given time.
Currently, Foma can be purchased in the states at the cost of 11 cents per frame. Fomapan’s grain is quite fine for an ISO400 traditional cubic grained emulsion. I’d call it a medium to strong contrast film which renders a bit on the soft side, with a bit more halation than, say, Kentmere. This halation, or retro film glow, is probably why the HOLGA version of this film exists, as this is usually seen as a virtue in the toy camera market. Unfortunately, it also scratches easily and some say becomes brittle after development. But it dries extremely flat and is super easy to scan.
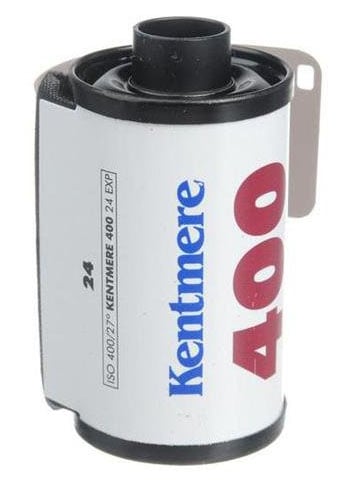
Kentmere is owned by a Harman, which also creates the Ilford films. Kentmere represents Harman’s budget or student film and costs 11 cents per frame. Kentmere is a plastic-based film known for being soft and it scratches easily as a result. It dries fairly flat, though as a bit more bounce to it than Ultrafine Xtreme and Fomapan. It has very fine grain. It is sharp, medium contrast, but its grain tends to be clumpy and the film, in general, can yield unpredictable results. It definitely has lower quality standards than it’s Ilford cousins.
The next two films are what I would consider mid-range films preferred by documentary style photographers, where high quality and predictable results are important, but going through rolls and rolls of it necessitates keeping the price point low.
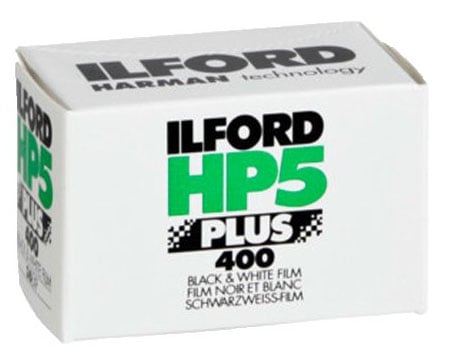
Like Kentmere, Ilford HP5+ is a product of the Harman technology company. It is a lower contrast film. It has good shadow detail and well-separated mid-tones with sharp grain. Although the contrast is low, there is a great deal of latitude in this film, which makes it great for pushing or flavoring the curves and contrast to taste, after scanning. Selling for about 14 cents per frame, currently, it might be less sharp than some films, but it will provide predictable and reproducible results. Like Kentmere, there is a bit more bounce to this film after drying. As a side note, I’ve found HP5+ fans to be some of the most loyal and enthusiastic in the community, more so, than perhaps, any of the other films that I’m talking about.
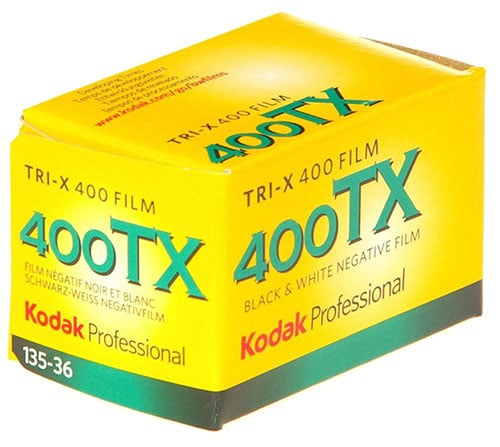
Next, we’ll talk about the oldest and arguably the most beloved black and white film, Kodak Tri-X. Introduced in 1940, to this day, Tri-X remains the world’s best-selling black and white film. When photographers combined its high-speed with the small 35mm form factor, it revolutionized photojournalism. It was used by most photojournalists for over three decades.
Tri-X has undergone a number of minor engineering changes during its long history. The modern version has smaller grain than the original. It’s known for its unique grain characteristics. It is the reason that many prefer film to digital. It’s also a cost-effective film, at 14 cents a frame. Tri-X is also known for its deep contrast. It’s a forgiving film, it’s accurate, consistent, has good tonal range, and scans well and sharp. Unfortunately, when Tri-X dries, it becomes difficult to scan, unless using glass film holders, owing to the lateral, rather than length-wise, curling.
With Agfa APX we need to emphasize that this is New Emulsion, which is not to be confused with the old emulsion which was much-loved by a loyal group of photographers until Agfa officially closed its doors in 2014. A European company, Lupus, purchased the trademark, but not the technology. With the name Agfa APX only for their film, I couldn’t figure out where their film technology came from. This film is considered inferior and cheaper than the original emulsion. It is known for being milky, faded, or having low contrast tonally. It does retain highlights well, but it’s also known for being unforgiving if exposure or development times are not nailed. This film is also a bit more pricey in the U.S. at 19 cents a frame. One redeeming quality of this film is how flat it dries. In my testing, it’s probably the flattest of all the emulsions.
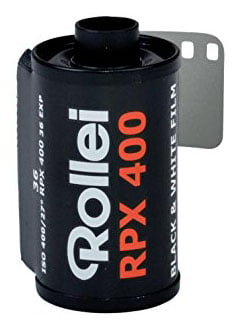
Whereas Lupus may have inherited the Agfa APX name, Rollei inherited the technology. Most agree that Rollei RPX is the successor of the old Agfa APX. Rollei RPX is known for its high dynamic range and holding details in the shadow. It is fine grained and shows some high contrast. Allegedly, this film was designed to be pushed. While it was introduced as a low-cost film eight years ago or so, it currently sells at more on the expensive end at 18 cents per frame, in the US. Rollei RPX is a bit more challenging to scan than some, as it does have some significant curling after drying.
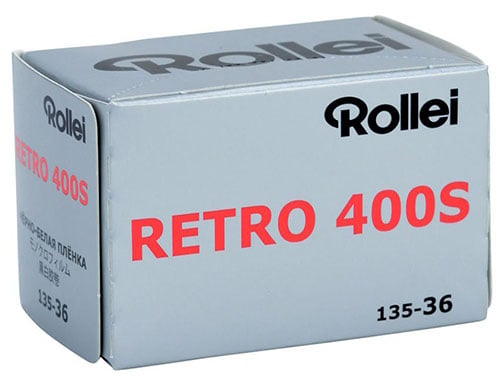
Rollei Retro 400S is the successor of Agfa Gevaert Aviphot which is an aerial film. It is considered an excellent fine art film and is characterized by high-contrast and tightly packed grain. With a bright red anti-halation layer (which you’ll see rinse away in development) it has extended infrared sensitivity, so you’ll see increased sensitivity to foliage, greenery, as well as red tones. The IR sensitivity enables penetration of haze in landscape photography. This film is unique among the other film types we’re looking at in that it’s a transparent film. The drawback here is that flaws and dust will appear much more easily in scanning. And speaking of scanning, this film has amongst the worst curling, making it rather difficult to work with. It’s also on the expensive end, at a current price of .25 cents per frame in the US.
The next two films we’ll be discussing are exciting to me since they are both new films. With the last few decades seeing film after film company shutters its windows, it really is encouraging to see two new films come out in the same year.
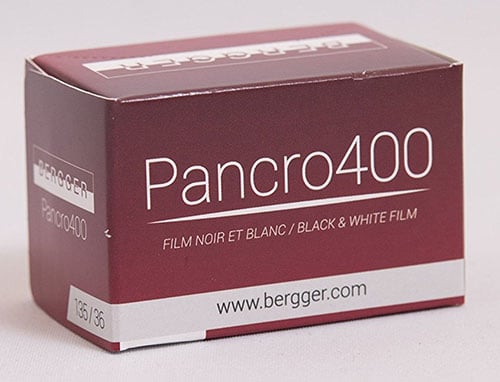
First up, we have the Bergger Pancromatic 400. It incorporates a dual emulsion design that gives it some of the tonality seen in some finer grain emulsions, but with a lot more forgiving results, which also allow for a wide range of pulling or pushing. Bergger claims this film will work well with virtually any developer. But, as a new black and white film, developed for a modern era, it has a flat profile which makes it a great choice for custom curves at scan time or in your favorite processor. This is an affordable film, at .14 cents per frame, in the US. About the only negative thing you can say about this new emulsion is that it dries with that same frustrating bowing you get from Tri-X.
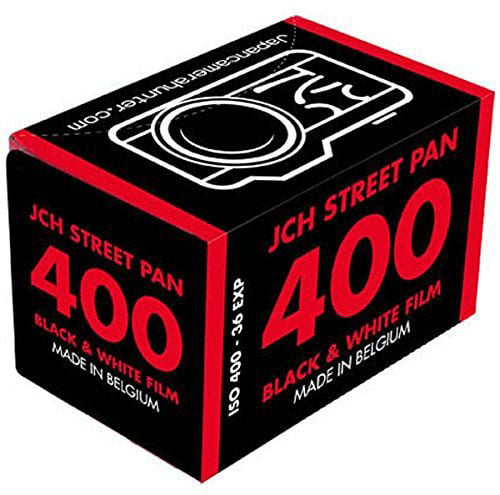
This next film was also newly released in 2017 by a name familiar in the film resurgence movement of the digital age Bellamy Hunt, otherwise known as the Japan Camera Hunter. Bellamy was able to reproduce this film from an old discontinued surveillance film technology, which was originally made by AGFA. Having it put back into production, he has named it StreetPan 400. Streetpan is a flexible and forgiving, with higher than usual contrast. Similar to Rollei 400s Retro, it has some sensitivities to infrared and thus has good haze and fog penetration. The emulsion is coated onto a transparent polyester base. It is a thin emulsion and it dries flat. The one drawback of this film is its price in the US, weighing in at a whopping .27 cents per frame.
We’ll conclude with two films which are called T-grain films. Up until this point, we’ve been talking about classic or cubic grain structure. But a more modern development in film photography has been the t-grain emulsions. Without getting very technical (as I’m already outside of my comfort zone in this guide without delving into the science) I’ll just say that T-grain film is uniform in its grain characteristics. It allows for grain which is more predictable, more even, and also a lot less obvious than the classic or cubic grains of the other films we’ve been discussing, so far. T-grain is often compared to digital. It’s preferred by those who don’t like the grainy characteristics of most film. T-grain films are also more sensitive to variations in developer temperature, time, dilution, agitation etc. They are going to be less forgiving than classic films.

The first t-grain film we’ll discuss is Kodak T-MAX and Lady Gray (which is the same film). This film is very linear, tonally. It has very fine grain. The T-grain emulsion, as I mentioned, high sharpness and very high-edged detail. T-MAX is a great choice if you don’t like grain. The T-MAX base has a pink tint to it. Like Rollei Retro, T-MAX is also extremely curly upon drying but is also currently fairly affordable at .15 per frame.
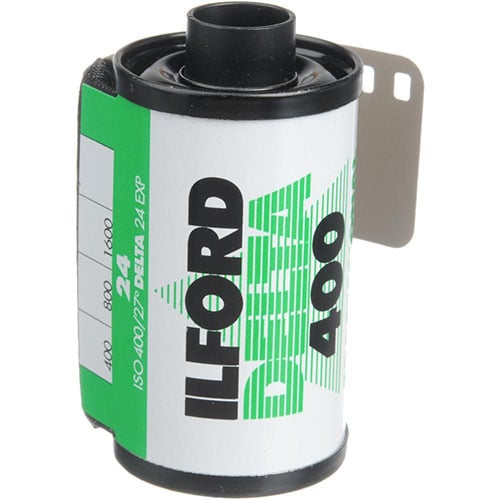
Ilford Delta 400 is very comparable to T-MAX. And, while many will say, it’s not technically a t-grain like T-MAX, it uses a similar technology, and most just group them together as t-grain emulsions anyway. Like T-MAX, it is characterized by high sharpness, T-grain characteristics, wide latitude, linear tonality with not much contrast. The results you’ll get with Delta 400 are absolutely predictability but it also commands a higher price at .21 cents per frame. Delta is also a joy to scan, drying as flat as Ultrafine Xtreme and AGFA APX.
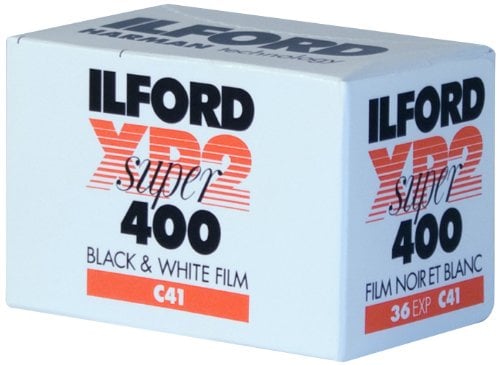
Finally, we have a bit of a black sheep in the 400 speed, black and white film comparison. And that is another Ilford film, the XP2 Super. XP2 is unique from all the rest in that it is not developed with black and white development processes, but rather, C-41, or color development chemicals and process.
Now, if you don’t ever plan to develop your own films, this will matter to you not at all. I’m not even sure the cost will be different if you take this to your local developer. However, if you do your own development, it matters. C-41 process is a bit more complicated than black and white. Black and white processing can be a lot more forgiving, with temperatures more of guidelines rather than die-hard rules. But with C-41 chemical temperatures matter a lot more and so does precision. Any miscalculation in your chemical measurements can screw things up a lot faster than with black and white. Now I don’t want to scare you away, I mean, I do both types of development, and if I can do it, trust me, you can do it.
But if you’re a beginner to film processing, I’d absolutely recommend starting with any of the films I’ve mentioned previously and not this one, as you’ll have an easier time of it. With that disclaimer out of the way, let’s talk about this film.
XP was released by Ilford in 1980 but has since progressed through a number of improvements. Like most Ilford films, Kodak had a competing product in BW400CN. In 2014 Kodak announced the discontinuation of BW400CN, which means that Ilford XP2 Super is the only black & white film on the market that can be developed using the C-41 process.
As, technically, a color (or chromogenic film), XP2 has what many consider an extremely strong advantage over all other traditional black and white films as it allows you to use Digital ICE during scanning.
Digital ICE is a feature in scanning software which can automatically remove dust and scratches because they have strongly contrasting infrared signatures. It becomes fairly easy for products like Silver Fast to remove a lot of this junk with one click. But since all other black and white films produce silver halides during the development, there is no infrared information, and thus, no Digital ICE. But XP2 Super does, giving it a distinct advantage for those who wish to make use of this feature when scanning. Additionally, XP2 has a similar exposure latitude to color negative film, so it can be exposed with an exposure index from ISO 50 to 800 on a single roll and be developed in traditional C-41 processing. This film is extremely sharp and is very smooth, tonally. Its grain is extremely subtle.
Blind Test
Now I know you’re probably anxious to dive into the actual photos. But first I’d love to share with you a tool I built to help myself to determine which film I want to commit to, long term, for myself. If this can also help you, then I’m happy to share it.
This spreadsheet is based on the split 10 decision-making process, though simplified a bit and customized to fit, specifically, to our blind film test.
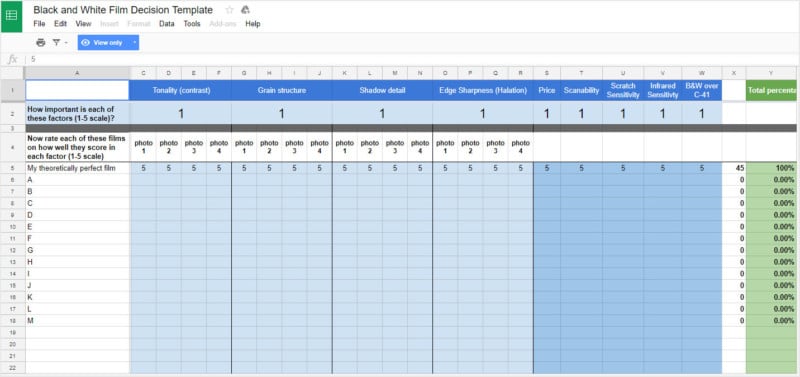
If you’d like to use this template, all you need to do is go to this URL and then make a copy of it. Since this version is read-only, you won’t be able to make changes to it. To make your own copy, you can do this by downloading it as an Excel spreadsheet, if you’d prefer to work on your desktop, or go to “File > Make a copy” to create an editable version you can work with in your own Google Drive.
Once you’ve got a copy that you can edit, the first step is to rate your priorities when it comes to film in this second row here. Now keep in mind, I built this for myself and factors I consider when evaluating these films. You may have your own criteria and, as such, you may need to do some refactoring of this spreadsheet to get it to reflect this. But showing you to change the business rules on this spreadsheet is beyond the scope of this tutorial, so you’re on your own if you choose to go that route.
But assuming you’re ok with my own set of criteria, what you’re going to want to do first is to go through each of these criteria and rate how important each one is to you personally on a scale of 1-5, with 1 being not important at all and 5 being extremely important.
Once you’ve prioritized the various factors, the next step will be the actual blind test. To proceed with the test you can either follow along with the video, as I show you the result of the each of the 13 films in each of the scenes. Or you can download the contact sheets here and evaluate them at your leisure.


Analysis and Conclusions
Phew! That was a lot of work. So with the blind test out of the way, now comes the big reveal. Here are the film names associated to their letters:
A Ilford XP2 Super
B Foma
C Kentmere 400
D JCH StreetPan 400
E Kodak Tri-X 400
F Bergger Pancro 400
G AGFA APX 400
H Rollei Retro 400S
I Ilford HP5+
J Kodak T-MAX 400
K Ilford Delta 400 Pro
L Ultrafine Xtreme 400
M Rollei RPX 400
For those of you who used your own methods to evaluate these films, you’re done. Please let me know in the comments what your results were. I’m really curious to hear if they met your expectations or not and what you learned from this experiment.
For those who are using my spreadsheet, we do have a bit more work to do. First off, the way to reveal the actual names of the films is to expand column B (the easiest way to do this is to right click, go to “Resize column” and enter 160 pixels). After that, we need to complete the evaluation for the more empirical factors of price, scanability, scratch sensitivity, and infrared sensitivity.
For most of these numbers, you may be able to just use mine. Here is another link to a second version of this read-only spreadsheet. This one has my results, and you are welcome to copy numbers from the sections here which apply.
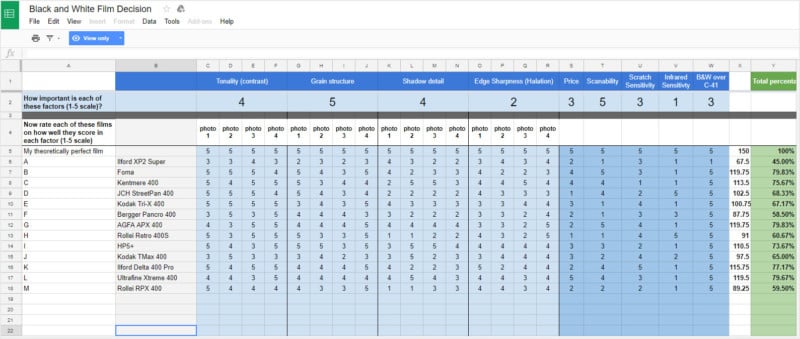
When it comes to price, if you live in US and it’s still 2017 you could probably just trust my numbers. If you don’t, what you’ll want to do is figure out the price per frame, as some of these films come in 24 frames in a roll and others 36. Here are the prices per frame in the US as of the time of me filming this video:
Ultrafine Xtreme 400 $0.09
Arista EDU Ultra 400 $0.11
Kentmere 400 $0.11
Ilford HP5+ $0.14
Kodak Tri-X 400 $0.14
Kodak T-MAX 400 $0.15
Bergger Pancro 400 $0.17
Rollei RPX 400 $0.18
AGFA APX 400 $0.19
ilford xp2 $0.19
Ilford Delta 400 Pro $0.21
Rollei Retro 400S $0.25
JCH StreetPan 400 $0.27
Next, you may just want to use my numbers here for scannability. These are based on how flat these films were able to lie for me when I scanned them.
Next, I have scratch resistance. After everything else, I ran a quick, not super scientific test to see how well these films hold up to being scratched with this plastic fork like object. After scratching I scanned them again and just studied how well these films held up against this scratching and rated them as best I could.
Finally, for infrared, I put 1s on everything but the three films which are particularly sensitive to infrared, and then on BW > c41, obviously you’re going to either have 12 1s and 1 5, or 12 5s and 1 1.
And here are my results. These results are super surprising to me. For those who watched my first version of this test, these results are extremely different. Part of the reason for this is that this time, I am taking into account things like scannability and price into the equation. But even more than that, I just think I had a better process of development and scanning this time.
At any rate, I am really amazed that the results, at least for me, aside from Ilford Delta, point to several films working best for me that I just never would have chosen without conducting these tests. As you may have picked up in my review of each film earlier on, I consider AGFA APX, Foma, and Ultrafine to be inferior films, for various reasons. And yet, here they are topping my personal charts next to Delta. I guess the good news here is that Ultrafine is extremely cheap. As I start shooting more seriously with this film, though, time will tell if it’s going to provide consistent and reliable results and if it provides my blind test results seem to think it has.
So what were your results? Does this test change anything for you? Has it sparked your interest in a new film? I’d love to hear about it in the comments?
Also, what can I improve in these tests? What would you like to see me change or do differently in the next one? I definitely have plans to do more of these, and I would love to hear what can make them better.
As hopefully is evident, these tests represent a lot of work and also some expense. I truly hope you found it valuable and that you’ll subscribe and support what we’re doing on our YouTube channel.