14 Hidden Lightroom Shortcuts That Use the Alt/Option Key

Did you know that there are lots of hidden Lightroom shortcuts? Some of the app’s most useful shortcuts are tucked away in places you might never look. As a result you may be unaware of them until someone points them out to you. Here are 14 you might want to know.
To get you started, here’s a list of the Alt/Option key shortcuts for Lightroom’s Develop module.
All right-hand panels except the Tone Curve panel
These shortcuts work in the right-hand panels of the Develop module.
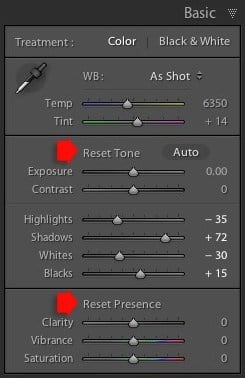
1. Reset sliders
Hold down the Alt/Option key to reveal the option to reset sliders. Click on a Reset command to return the sliders below it to zero. This shortcut comes in useful for resetting multiple sliders with just one click. Just like the example shown here where the Highlights, Shadows, Whites and Blacks sliders have all been adjusted.
The shortcut works in all the right-hand panels in the Develop module except the Tone Curve panel.
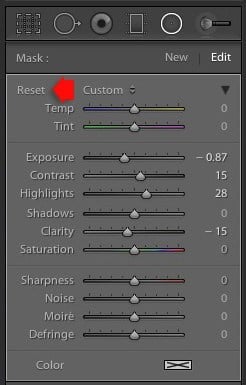
2. Reset Radial and Gradient Filters
The Alt/Option key has a similar function in the Radial and Gradient filters. Hold it down to change the word Effect to Reset. Click Reset to return all the sliders to zero.
3. Activate and deactivate solo mode
When solo mode is activated Lightroom only lets you open one panel at a time. It simplifies the display and means you spend less time searching for the tool you want to use. This is how the Alt/Option key shortcut works with solo mode.
With more than one panel open: Hold the Alt/Option key down and click on a panel to close the others and leave that panel open. Or click on a closed panel to open it and close the others. Both actions activate Solo Mode at the same time.
With one panel already open: Hold the Alt/Option key down and click on another panel to open it as well. Deactivates Solo Mode at the same time.
These shortcuts work in all Lightroom modules.
4. Move between Adjustment Brush and Erase Brush
If you press the Alt/Option key while using the Adjustment Brush Lightroom switches to the Erase brush. This is a useful shortcut that lets you rapidly erase part of the mask you are creating with the brush. Release the Alt/Option key to go back to the current brush settings. This feature comes in handy for work like portrait retouching.
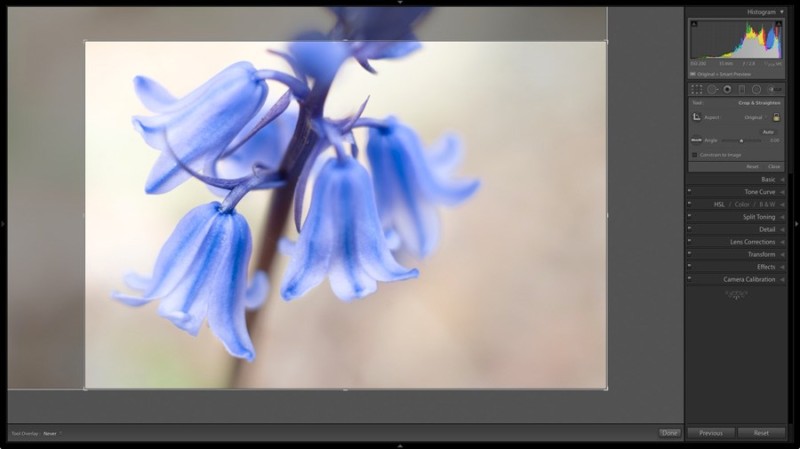
5. Center the Crop Overlay
When you click the Crop Overlay icon, grab a corner of the crop overlay and drag the mouse, the crop overlay remains anchored to the opposite corner. It looks something like this.
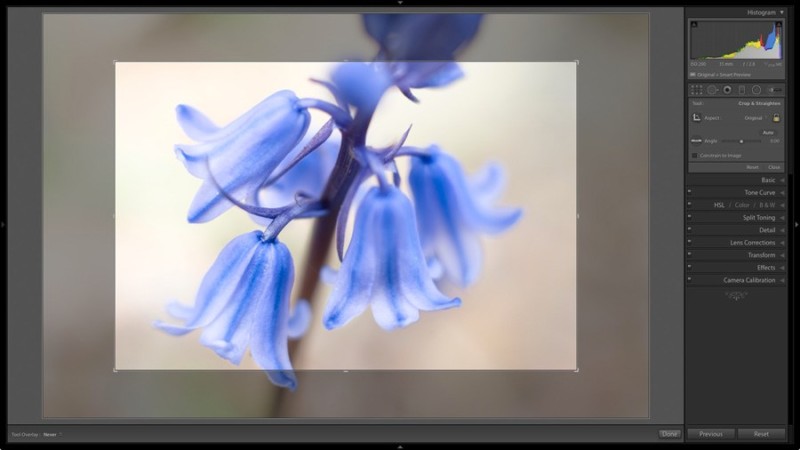
But hold the Alt/Option key down when you grab a corner and drag the mouse and Lightroom keeps the crop overlay centered.
This is useful if you are using cropping as a kind of digital zoom, and want to keep the crop centered to take advantage of the better image quality at the centre of the frame.
It may also be useful if you are cropping to eliminate vignetting caused by the wrong lens hood or too many filters stacked on the lens. It looks like this.
6. Make fine adjustments in the Tone Curve panel
Hold the Alt/Option key down while you make tone curve adjustments to slow the mouse drag speed down. This lets you make finer adjustments.
7. Visualize post-crop Vignetting
Hold the Alt/Option key down while you move the Midpoint, Roundness, Feather or Highlights sliders. This shows the effect with the Amount slider set to its maximum.
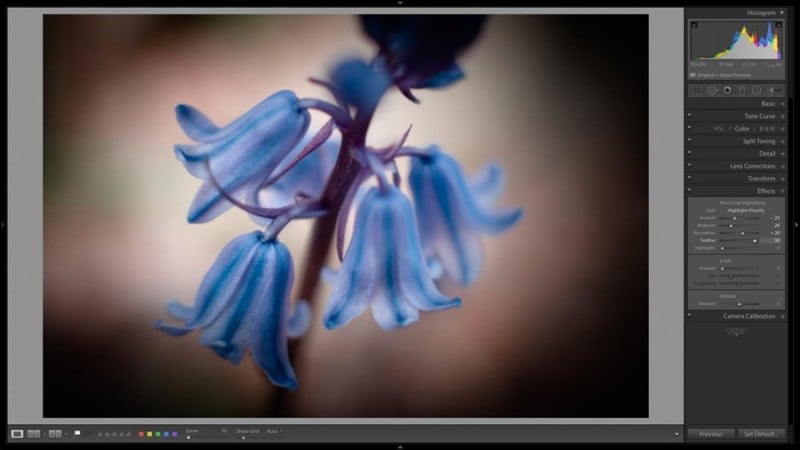
If the Amount slider has a negative value, Lightroom sets it to -100, and if it has a positive value Lightroom sets it to +100 when you press the Alt/Option key. It’s an easy way to see the effect these sliders have on the photo.
8. Batch update process version
When you click the lightning bolt icon below the histogram to update to the most recent Process version Lightroom displays this window.
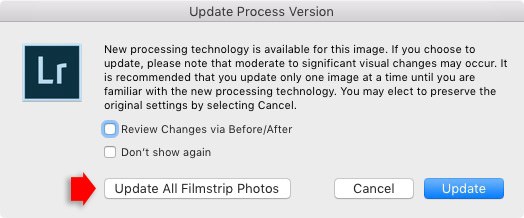
Note the Update All Filmstrip Photos button at the bottom. This is a useful time-saving shortcut that tells Lightroom to update all the photos in the current Collection or Folder to the newest Process version. Because of this, you may not want to tick the Don’t show again box.
If you hold the Alt/Option key down when you click the lightning bolt icon, Lightroom doesn’t display the Update Process Version window. You can use this shortcut when you only want to update one photo in the filmstrip.
9. Show the Set Default button
Whenever you hold the Alt/Option key down in the Develop module the Reset button in the bottom-right corner changes to the Set Default button.
![]()
Clicking it brings up this window.
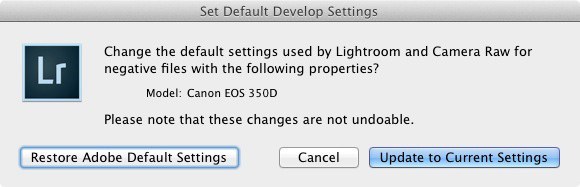
Click the Update to Current Settings button if you want Lightroom to use the current settings as the default for photos taken with that camera. This is a useful feature that lets you apply certain settings (such as Lens Corrections or sharpening) automatically.
The Set Default button is hidden away because it is designed to be used sparingly. Most photographers will be happy with the default settings and won’t want to change any. But, if you want to change the defaults you can do so here.
If you click the Update to Current Settings button then you won’t be able to use the Undo command to reverse it. The only way to go back is to click the Set Default button again and click the Restore Adobe Default Settings button.
The Alt/Option key as a visualization tool
The following uses for the Alt/Option key all have one thing in common. They are designed to help you see which parts of your photo are affected by the changes you make in the right-hand panels in the Develop module.
10. Show clipping with Exposure, Highlights, Shadows, Whites and Blacks sliders in the Basic panel
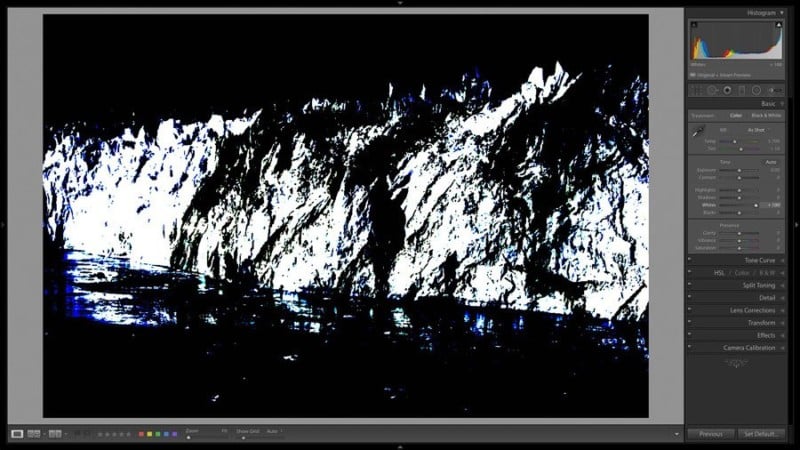
In the Basic panel you can press the Alt/Option key while moving the Exposure, Highlights, Shadows, Whites or Blacks sliders to see if there are any clipped highlights or shadows.
With the Exposure, Highlights and Whites sliders clipped highlights are shown in white or color against a dark background.
With the Shadows and Blacks sliders, clipped shadows are shown in black or colour against a white background.
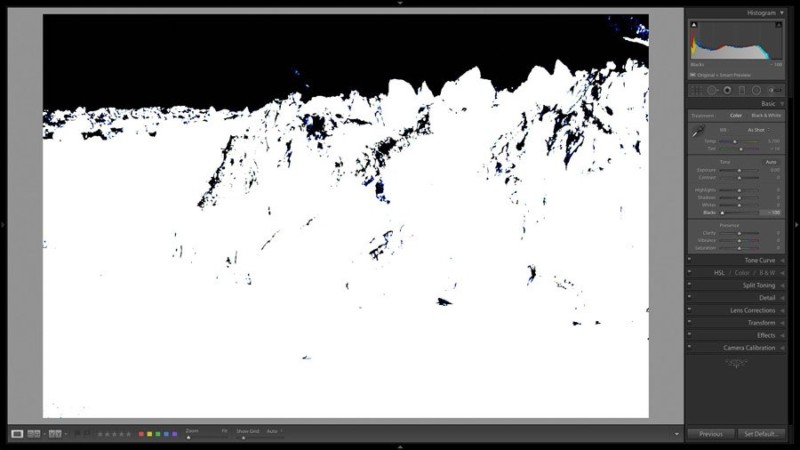
The colors in both cases indicate clipping in just one color channel (red, green or blue) or two of the three color channels (in which case you will see cyan, magenta or yellow).
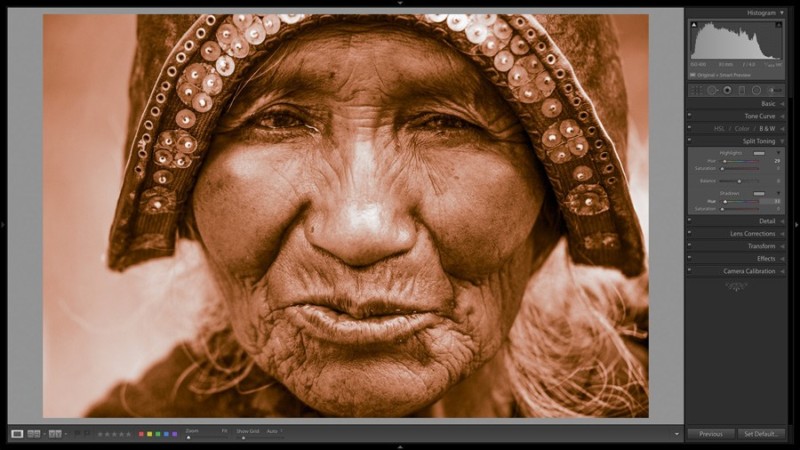
11. Show 100% hue in the Split Toning panel
Hold down the Alt/Option key while adjusting the Hue slider under either Highlights or Shadows to reveal the effect with Saturation set to 100. This lets you see which color you have selected, something that is more difficult to perceive with Saturation at a low setting.
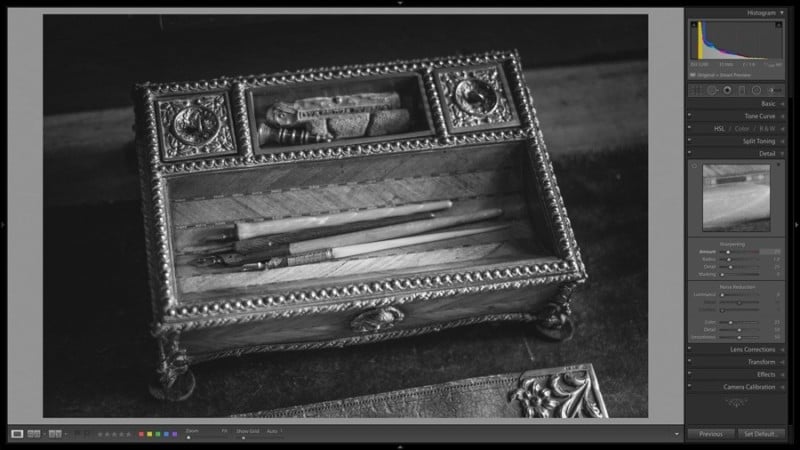
12. Show a sharpening preview in the Detail panel
The Alt/Option key is useful for determining the effect of sharpening on your photo. When you hold the Alt/Option key down and move the Amount slider the photo is shown in black and white to help you judge the effect more clearly.
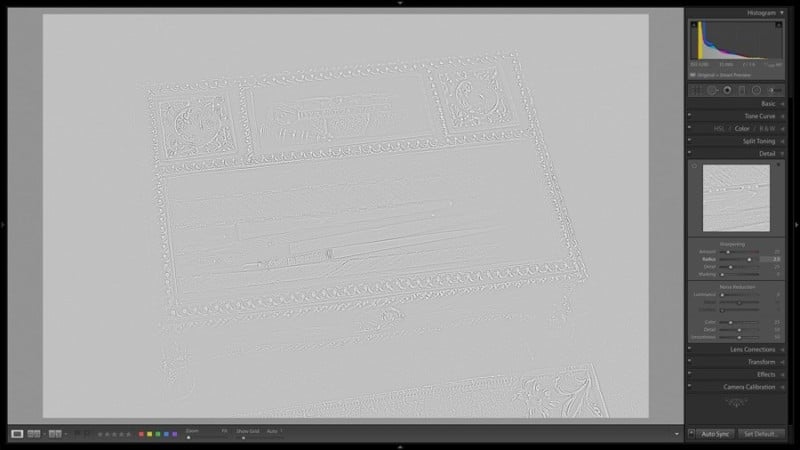
If you hold the Alt/Option key down and move the Radius slider the areas affected by Sharpening are shown in white against a grey background.
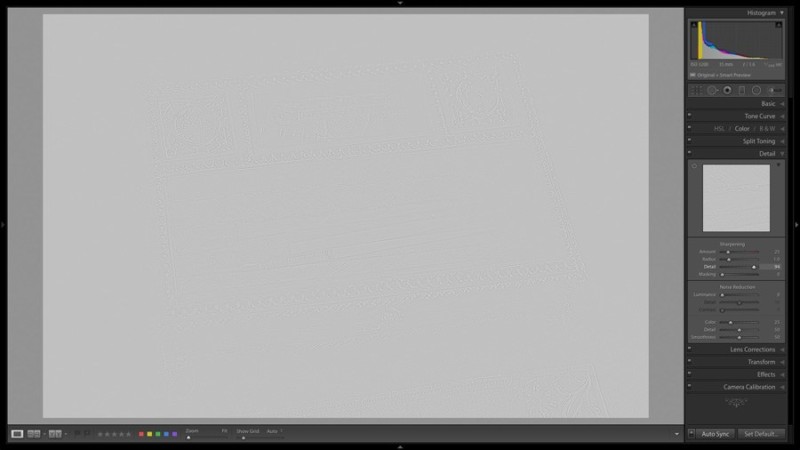
When you hold the Alt/Option key down and move the Detail slider the areas affected by Sharpening are also shown in white against a grey background.
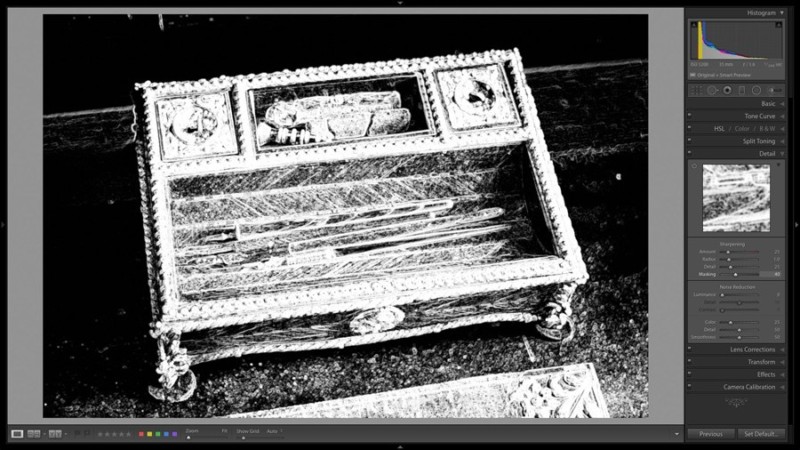
If you hold the Alt/Option key down and move the Masking slider the areas affected by Sharpening are shown in white against a black background.
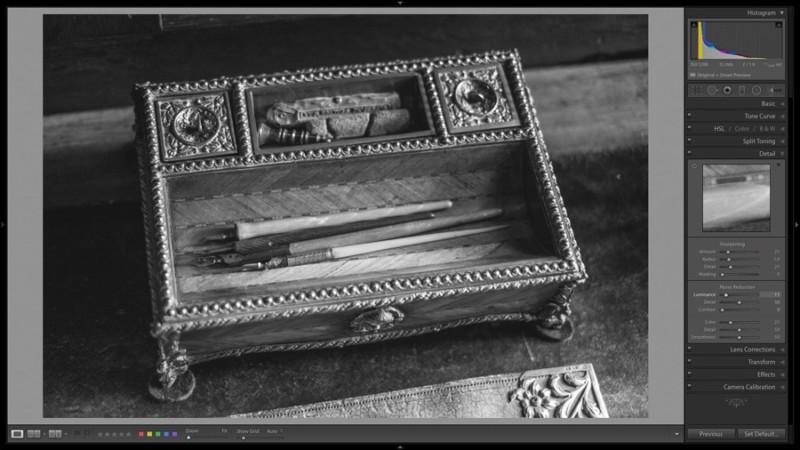
13. Noise reduction preview in the Detail panel
When you hold the Alt/Option key down and move the Luminance, Detail or Contrast sliders the photo is shown in black and white to help you judge the effect more clearly.
14. See where chromatic aberration removal is being applied in the Lens Corrections panel
Hold down the Alt/Option key when moving the purple Amount or green Amount sliders to reveal the areas affected by those sliders in black and grey. The rest of the photo (the unaffected area) is shown in white.
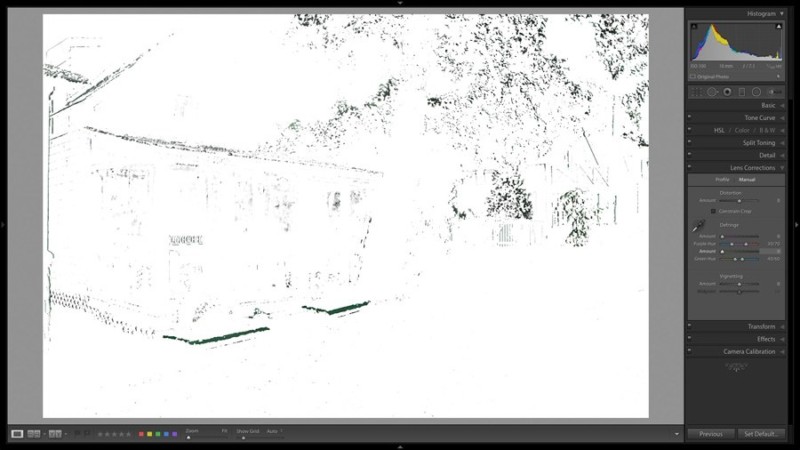
Hold down the Alt/Option key when moving the purple Hue or green Hue sliders to see the range of tones encompassed by the sliders. Affected tones are shown in black and grey, unaffected tones are unchanged.
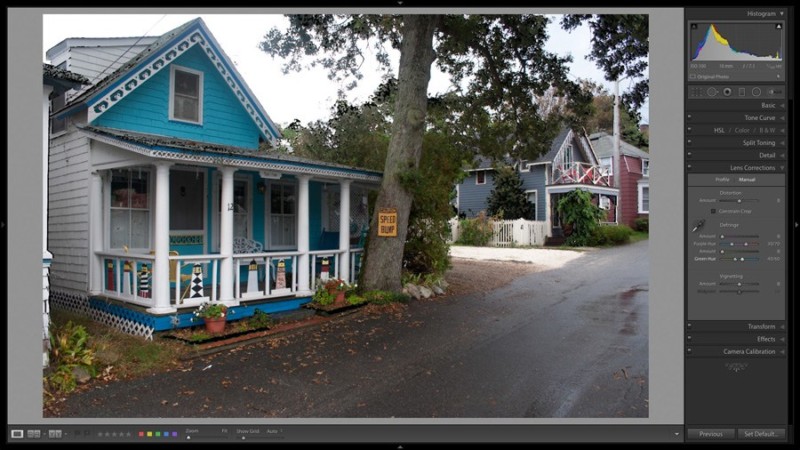
Note that the wider the range of colors included with the purple Hue or green Hue sliders the greater the area of the photo affected by the purple Amount or green Amount sliders.
The use of the Alt/Option key in this panel is to help you verify that your manual chromatic aberration removal is limited to genuine aberrations within the photo, and isn’t inadvertently affecting other areas.
Conclusion
If there’s a lesson to be learned about Lightroom shortcuts, it’s that there are lots of hidden secrets to be discovered. Try testing out the Alt/Option key at any time to see if it does anything useful, no matter which module you are in.
About the author: Andrew S. Gibson is a writer and photographer based in the UK. You can find more of Andrew’s work on his website, or by following him on Facebook and Instagram. This article was also published here.