Making a Photography Showreel That Showcases Your Work

As a professional photographer I’m always looking for ways to showcase my work and convey a feeling. Recently I’ve been working hard on a photography showreel to highlight my portfolio. I’d like to share with you some of the lessons I learned, and explain how you too can create a showreel of your own.
Why a photography showreel can be a great addition to your portfolio
What’s great about showing your photos in a video is that viewers will know how long watching the thing will take them. Somehow video just feels way more accessible than browsing through multiple albums on a portfolio website. In addition, when people visit your website it’s hard to control which albums they’ll open and how long they’ll spend browsing your work. A video allows far greater control, though of course viewers can always get bored and stop watching before the video has ended.
Of course I still want potential clients to be able to browse through my work at their own speed and have a better look at the photos they really like. For that reason my website will always be the headquarters for my photography. This showreel video is a great piece to quickly give an impression of the work I do though, and can easily be embedded and sent as a link.
Moreover, the music and energy that come with a video are quite valuable marketing instruments. By choosing the soundtrack and pacing that best fit your personal style and niche, you can really give your audience a good feel for what it is you’re trying to say through your photography, and build your brand image if you’re doing photography as a profession.
Enough about the argument for showreels though, let’s get on with actually creating one!

Software
You’re going to need some software to edit your video. For my photography I normally use Lightroom and switch to Photoshop if I want to do any extensive editing. Lightroom doesn’t offer a whole lot of options for editing video or fine-tuning slideshows though, so I quickly switched to Adobe Premiere. iMovie can also be used but offers far less options than Premiere. Final Cut Pro can probably also be used for our purposes, however I have no experience with it. Premiere offers a free 7 day trial and can be licensed through an Adobe CC subscription after that. Seven days proved to be just enough time for me personally to finish my reel.
Premiere offers a pretty overwhelming range of menus, buttons and windows when you first open it. I recommend you watch some tutorials on YouTube for the basics. Teaching you a crash course in Premiere is beyond the scope of this article, and I wouldn’t want to force you to use this particular piece of software instead of your own personal choice.
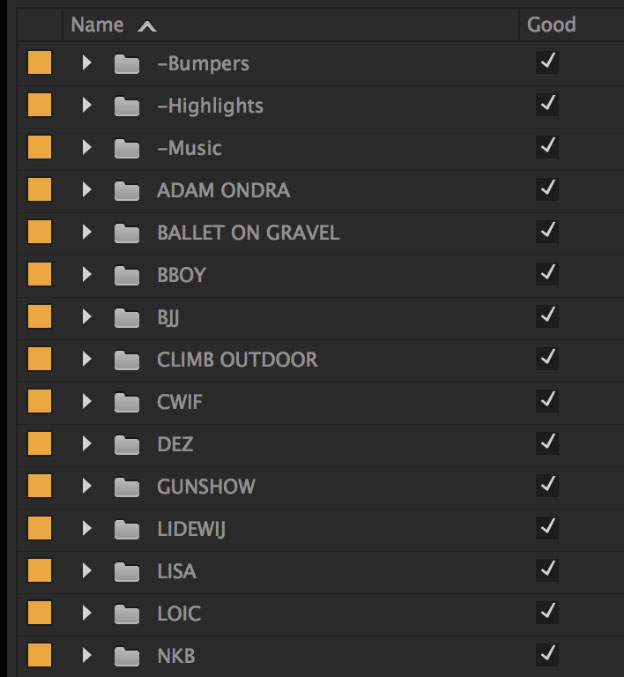
For our purposes, you’ll probably only be using two tracks. One for the audio, and another to place your photos in. I used some additional video tracks to temporarily store some photos while I was arranging them in the order I liked.
Getting your photos into Premiere
So, you’ve installed the Adobe Premiere software and are ready to get started creating an awesome showreel. First order of business: actually getting your photos into Premiere. It’s best to first determine the resolution you’ll be using for your video. I opted for 1920×1080, since all of my photos are in 16:9 aspect ratio anyway, and 1080p would be sufficient for HD quality on both YouTube and Vimeo. Of course you can always go with even higher resolutions if you like. I then created a preset in Lightroom to export photos at this resolution. Next, I went over to my portfolio collection in Lightroom and exported all photos using this preset.
In the end I had about 700 photos to use in my showreel. I knew this was a bit too much so I culled it down a bit, until I had about 500. It’s easier to do the culling using Lightroom or just Finder/Explorer, instead of doing it in Premiere. Be sure to have a little buffer of photos though, you may find that certain series end up not working as well in your showreel as you thought they would.
Next up, just import the photos in Premiere. I opted to retain the folder structure I used on my hard drive, so I could easily drag entire series of photos into my reel. At this point I also decided it’d be smart to pick a couple of my best photos and put them in a separate highlights folder. These photos would be used for frames that lasted a bit longer due to pacing in the music, so my best work would get the most airtime.
Finding the right tunes
Now before you start actually editing your showreel, it’s imperative you first find the right soundtrack to accompany your photos. At this point I recommend you really think about which feeling you want to convey. I don’t think there are any hard rules here, and it comes down to your personal taste in music as well of course. For my own showreel, I wanted to get people excited and convey the feeling that the athletes in my photos are heroes. I’d previously used a song by my friends of the Dutch band DeWolff, whose music is actually quite similar to The Black Keys. I’m a huge fan of this band and went looking for a similar track.
I ended up on the website premiumbeats.com, where you can browse a huge number of songs that are available for licensing. Tracks are priced at $49 here, which I was more than willing to pay for the high quality music. What’s great about this website is that when you buy a track, you get multiple versions of the same song, each being of a different length.

I do urge readers to actually pay for the music they’re using in their showreels, or use tracks that are free to use. Photographers hate it when people steal their work, so let’s not be hypocrites and steal musicians’ work. In addition, YouTube may actually delete the music from your video if you use copyrighted songs.
Editing
Now comes the labour-intensive part: editing your showreel. Be prepared to sink quite a number of hours into this if you want to get the best results possible. At this point it’s best you sit down for a bit and think about the order in which you want to present your work. You’ll probably want to start off with some of your best photos, and save some of the best for last as well. In addition, listen to your song of choice carefully and try to identify some of the climaxes in the flow of the music. Think about loud parts, fast parts and points where the music stops. Try to think about which photos will fit best with these sections. You don’t have to make a definitive choice yet of course, just try to get a general feeling for the flow of the song and your showreel.
My own song had a distinctive beat to it, and I decided to time the transitions from one photo to the next to match these beats. At first I tried to time the transitions by ear, and figure out a system for the durations of each frame. A friend pointed out to me though that since my soundtrack wasn’t electronically produced, every beat could be off by a tiny bit. This meant I would have to time each individual frame manually. As I said, be prepared to pour some hours into this! The screenshot below shows you the scale of planning and timing that will go into a project like this.
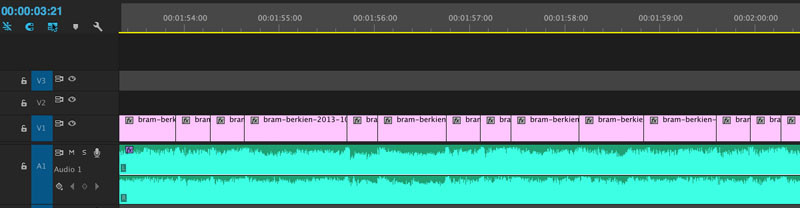
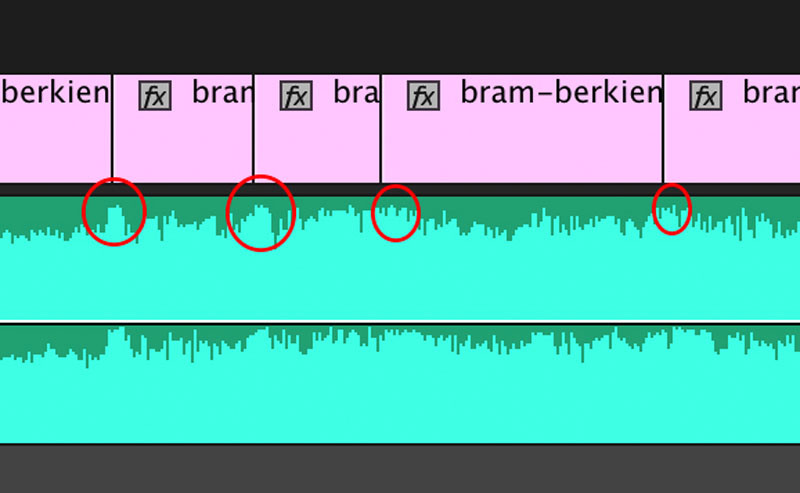
Luckily I quickly figured out a great way to speed up the process. Using the hotkey ‘M’, a marker can be placed at a particular time slot. A frame can then be lined up with this exact point in time. Finding the proper time slot was incredibly easy using the graphical representation of the music. Every beat resulted in a tiny peak in the graph. I went about placing a marker at every single beat by both listening to the music and looking for the peak in the graph. Now of course this took quite some time, but I got better at it pretty fast and in the end I feel it resulted in the best possible bond between the music and the frames.
Effects and titles
Finally, most showreels contain some titles and effects. You’ll want to help people understand what they’re about to see and where they can find more information about you if they’re interested. I decided to open with my logo and a simple title. Both of these are just still images I created in Photoshop and then added as frames in Premiere. Same goes for the ending of my showreel, where I deliver a payoff (Capturing athletes’ lifestyles) and the URL to my website.
Naturally, if you’re looking for something fancier, you could create some nicely animated titles using After Effects or Premiere’s own Titles module.
In order to make these titles a bit less static I added some transitions. In retrospect I probably could have done the same to all individual photo frames, for instance adding a zooming effect.
Getting it out into the wide world
The final step in this process is actually getting people to see the fruits of your hard work. First, you’ll want to think about how you’re going to output your video. Using the export dialog in Premiere can be a pretty daunting experience. I recommend watching this video to learn about the best settings to use for getting your video online.
Next up, do a final check of your video and then put it out there for the world to see! I uploaded my showreel native to Facebook, since this way supposedly your reach is far greater than just embedding a Vimeo or YouTube video. Opinions on this differ though, so I recommend you do a little research and decide for yourself. Vimeo embeds cannot be player directly in Facebook and will instead open a new browser tab. YouTube seems to be the most versatile of these three options, while Vimeo allows for the best quality, but at a cost. Looking back I think my video doesn’t look as good on Facebook as it does on Vimeo and YouTube.
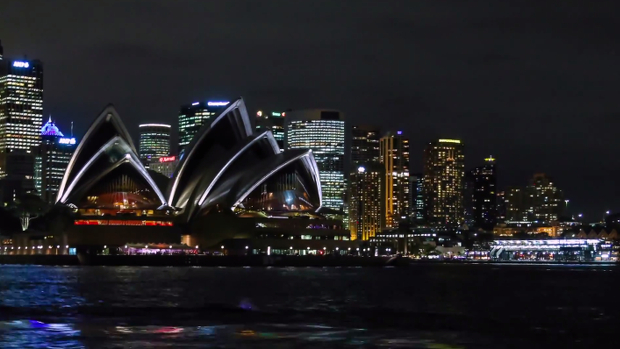
Below is my own showreel: