Wildlife Photos with a Bridge Camera: A Tiger Safari and a Sony RX10 III
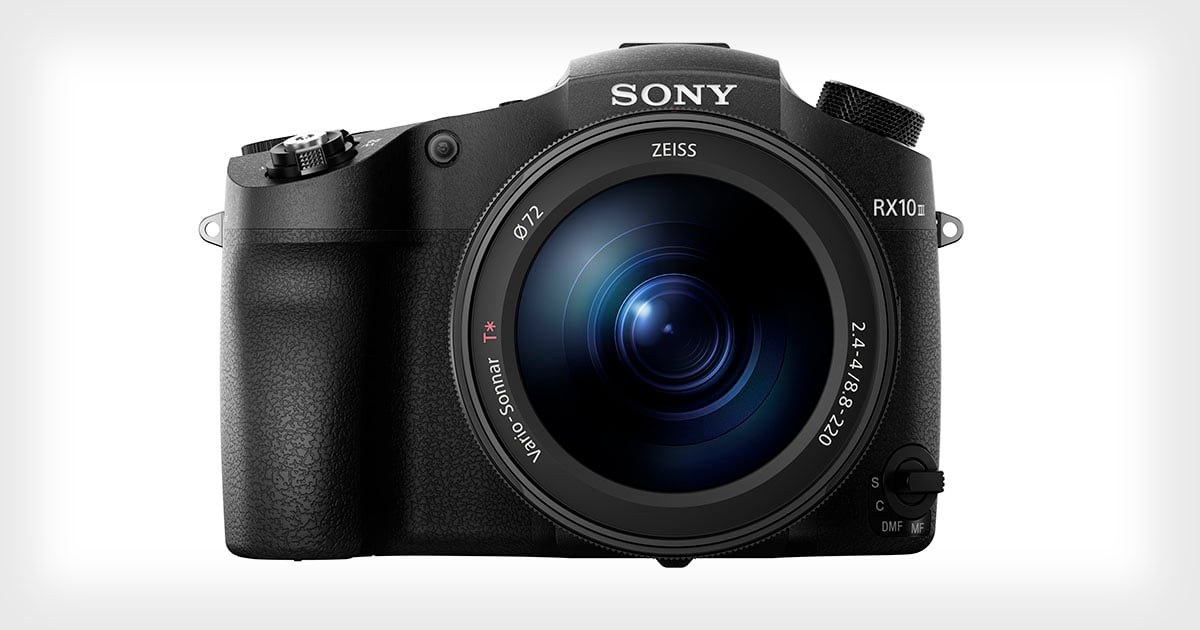
With only 4 hours notice, Kaustubh from Jungle Lore asked me join him for a trip to Ranthambore National Park in Rajasthan, India. I packed my bag quickly and decided that I am going into the forest to photograph wildlife with my new Sony bridge camera, the RX10 III.
Along with it, I stuffed my camera bag with 3 extra NP-FW50 batteries, the Sony ECM-XYST1M Stereo Microphone and my trusty Carl Zeiss Terra ED 10×42 binoculars. That’s it.

It was the start of monsoon in Maharashtra. Sitting in a cab on my way to Mumbai Central Railway Station, I wondered if this simple setup for wildlife photography will work as the rain pours and the traffic jams.
There is a preconceive notion that a high-speed flagship full-framed DSLR and huge telephoto lenses are necessary to get good images. Those are the camera systems that professionals and well-heeled enthusiasts used on wildlife safaris. The audible high FPS clicking (reminding you of a gatling gun) inject awe into those sitting beside them.
But what about those people who just want to go for a safari and capture a few decent images and videos along the way. Will the a powerful bridge camera like the RX10 III fit the bill?
I got to the station with 30 minutes to spare and hopped onto the sleeper train for a ten hours journey to Kota, Rajasthan. From Kota, it was another three hour car ride to reach Ranthambore at the break of dawn. After an hour for freshening up, my first of four safaris starts.
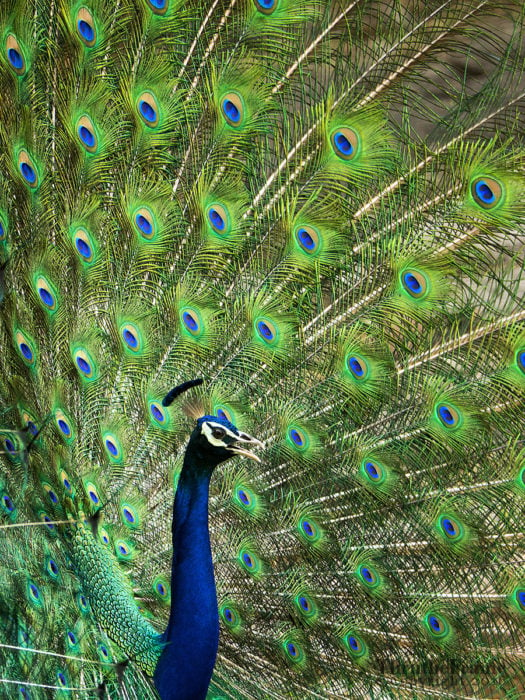
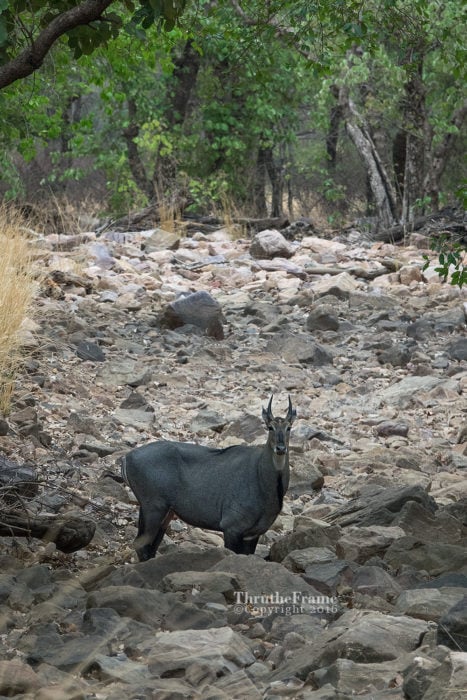
The first safari in the morning was uneventful, as it rained the previous night. The forest was cool and refreshing. Very little movement. We caught the usual sightings: Peacocks, Sambars, Spotted Deer, and Langurs were seen grazing and resting in the forest.
This was a good time to get the settings on the camera right with “live” subjects. Below were the settings I applied to the RX10 III.

Setting Up the RX10 III
Drive Mode to Continuous Shooting: Continuous burst shooting is important to get the right action shot. While not as fast as the 14fps on “Speed Priority Continuous Shooting,” I do not want to take the risk of the camera focus locking and firing at breakneck speed. I may end up with very few usable shots.
AF Mode to Continuous Autofocus (AF-C): This is very important as most of the subjects are not going to sit or stay in the same place over a long period of time. Continuous AF helps to keep the subject in focus.
Focus Area to Lock-on AF – Expand Flexible Spot: When this function first came out on Sony camera, I was initially very confused with it. How was it so different from Lock-on AF – Flexible Spot Small?
After some Googling, I found out:
…the camera will first try to focus on a subject within the small box frame. If it cannot find a subject to focus on in that small area, it will expand its scope and try to focus on a subject within the area immediately surrounding the frame, which is outline by 4 small brackets,,,
Hence, I choose this setting so that the camera can focus better on wildlife that has various degrees of camouflage.
Metering Mode to Multi: I left the metering mode as the standard Multi. I did not want to risk overexposing (blowing out) an image. As the dynamic range on the stacked sensor is very impressive, I can always pull up the shadows in post.
Picture Quality to RAW: Yep, I shoot RAW. Why? It gives me a lot more flexibility to process the images. On the other hand, I usually advise those who do not want (or could not be bothered) to do any post-processing to shoot in JPEG. The images will usually come out nicer straight out of the camera.
White Balance to Auto White Balance: This is another setting that I do not meddle too much with in-camera as I shoot RAW. I can always alter the White Balance in post to suit the mood I want.
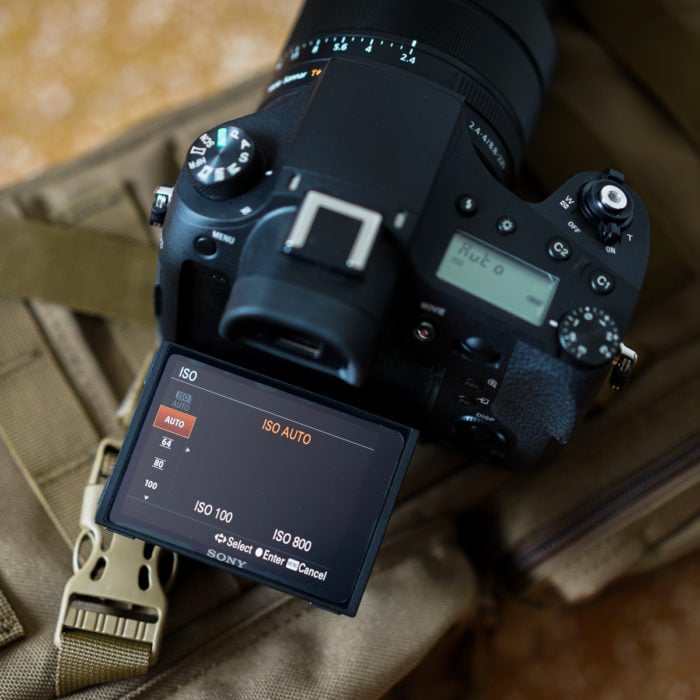
ISO to Auto with ISO 100 – ISO 800 range: This as an important setting. While I prefer to let the camera choose the ISO values, I want to control the range of ISO the camera can take. This helps to ensure that the camera do not decide to do an ISO of 12800 that results in an artistically salt & pepper image.
On the RX10 III, an ISO value of 800 was the most I can tolerate. But for small prints, ISO 3200 is still workable.
ISO Auto Minimum Shutter Speed to 1/500: In the forest, I use Shutter Priority Mode in low-light situations (i.e. under the tree canopy, at dawn, and at dusk), and Aperture Priority Mode during the day where light is plentiful. This is because I always want to maintain a minimum shutter speed to reduce motion blur.
Set EV Compensation Dial to -1.3EV: The RX10 III stacked sensor seems to be ISO invariant. In both Aperture and Shutter Priority Modes, I toggle the EV compensation dial between -1 to -2 EV. Why? It allows me to keep the ISO as low as possible. I will always get an underexposed image, (which a lot of people commented when looking at my LCD screen) but will adjust the exposure in post-processing.
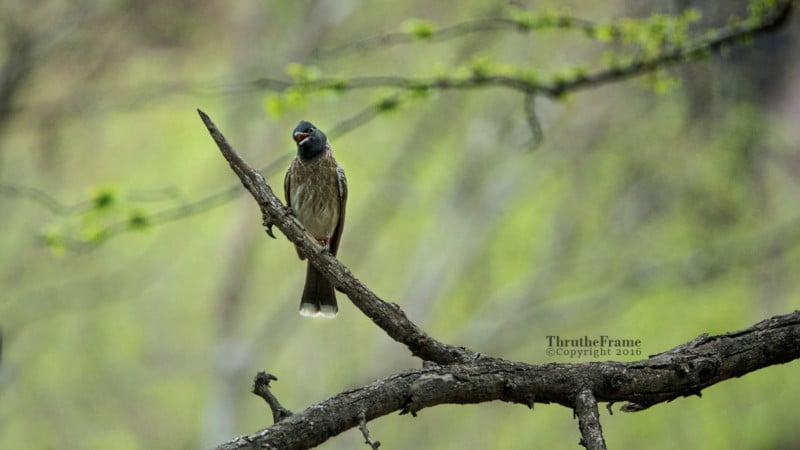
Below are the some of the images from the first safari.

During the first ride, I realized that the Pre-AF function was ON. This is the function I dislike most on Sony cameras. It refocuses when I put the camera down in between shots, shortening the already short battery life.
I quickly disabled it before the second safari.

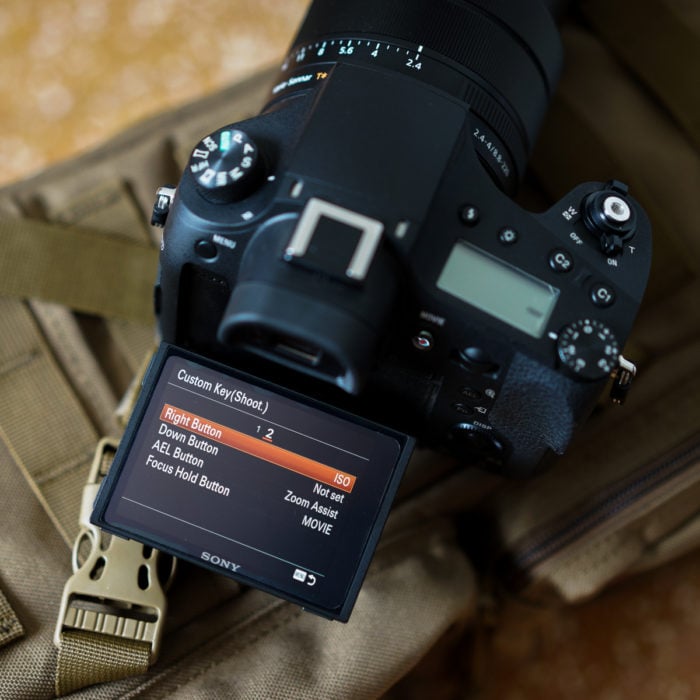
Before the start of the second safari, I customized some of the buttons on the RX10 III to provide me with the functions that I needed most without having to use the Menu.
I assigned the Right Button to ISO and Left Button to Drive Mode, which was identical to my A7II. The Center Button was assigned to Focus Standard, allowing quick access by my right thumb to change the Flexible Spot focusing point.
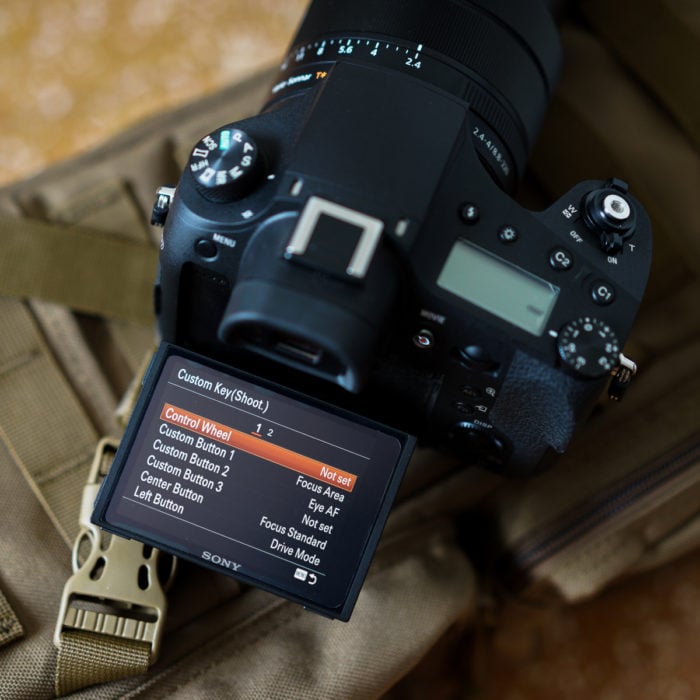
One of the function that I find super useful on the RX10 III is the Zoom Assist. The chance of loosing your subject when framing at the longest focal length is very high. When using a button assigned to Zoom Assist, the lens will zoom out, giving me the chance to re-frame the subject, and then zoom back in again when I released the button. It even has a little box that show me the focus area at the telephoto length.
I assigned the AEL Button to Zoom Assist. I also reassigned the Focus Hold Button to Movie. Why? My left hand is basically free since the zoom toggling is done with the right index finger.
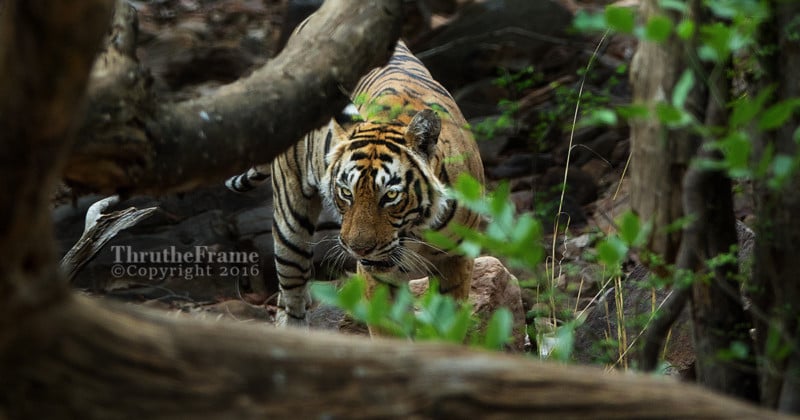
Sighting of T19
Rain clouds loomed as we entered into Ranthambore National Park for the second safari. The forest air was hot, stuffy, and humid, and I was sweating profusely. It also meant that the forest animals were feeling the heat too, and needed to visit a watering hole to cool off.
Our guide, Saad bhai, led us to the direction of a known watering hole to try our luck, and Lady Luck was smiling on us. Just minutes after we found a spot to start our wait, T19 appeared from the undergrowth. I raised the camera and focus onto her. The RX10 III locked onto the subject decently fast and stayed onto her as she walked towards us. I could hear all the other DSLR cameras furiously clicking away. At that point, I was worried that there was something wrong with the RX10 III as I could not hear any sound coming from it. A quick check with the playback button confirmed that I did take pictures. It was just very silent.
All the shots were taken with the Exposure Compensation Dial set at -1.3EV, resulting in lower ISO and lesser noise. In post-processing, I was able to increase the exposure without any loss in details, thanks to the stacked sensor that captured a lot of details.
A full-frame sensor is 2.7 times bigger than the 1 inch sensor on the RX10 III. At f/4, it is equivalent to f/11 on a full-frame (where depth of field is concerned). It is important to keep in mind this depth of field (DOF) difference when framing the subject. The DOF is definitely deeper, and a background that is further away from the subject is better to help isolate it.
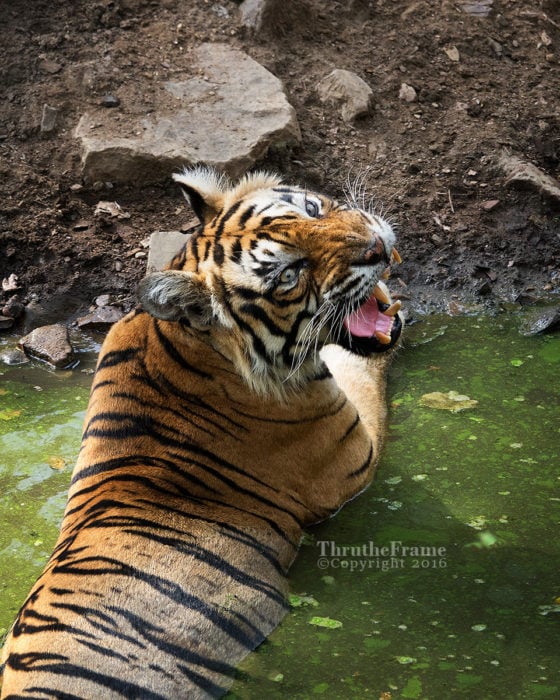
The sighting came to an end when she had had enough of humans. She walked off into the forest, sniffing and scent marking trees within her territory. It was also just in time, as the sky broke and rain came pouring down.
Packing the camera away into a water proof bag, we headed back to civilization—drench but excited with the first tiger sighting on this trip.
Capturing Video with the RX10 III
I woke up at 5am in the morning, had some fruits and lots of coffee before the start of the third safari. On this trip, I decided try out the video functions of the RX10 III. All I did was to set the File Format to XAVC S 4K and Recording Setting to 25p100M. I also kept the Picture Profile in OFF, as I do not want to meddle with the settings till I fully understand what they are.
The early part of the trip was uneventful. There were no reports of sightings, and Saad bhai decide that we should try waiting at a backwater lake. We were in luck, as a young male tiger was spotted along the banks of the water. His name was Pacman (due to the markings on his head). He laid down at the edge of the water, looking at the commotions caused by the birds and crocodiles before walking back into the forest.
IMO the resulting videos were good. On one of the videos, I started out at the widest 24mm and zoomed all the way to 600mm. The RX10 III was quick to focus onto the subject. But at 600mm, the image can get very shaky, even with Steady Shot set to ON. It is better to have a monopod or something to lean against when capturing video at such a long focal length. Expecting good results handheld is not realistic.
I did warp stabilization and color editing on Premier Pro CC. Finally, I reduced the 4K video to 1080p to be uploaded to YouTube.
We drove around the different trails hoping to see if we were lucky enough to get more sightings, but that was it for that morning. Two out of three safaris, was pretty good. I only hoped that our fourth and final ride through Ranthambore would yield another good sighting.
Using ETTL in the Forest
As I mentioned earlier, I underexposed my images using the Exposure Compensation Dial on the RX10 III. Some may wonder why am I exposing to the Left (ettL) instead of exposing to the Right (ettR). In the case where I could fix a base ISO of 100 – 200 and didn’t need a fast shutter speed for the shot, I would definitely use ettR. After all, I would prefer to maximize my signal to noise ratio and get the cleanest digital image by distributing the images across the sensor’s least noise sensitivity area (click here to read more about ettR).
But in this case, I need a fast shutter speed to reduce the motion blur. Without a very fast lens, I will have to increase the ISO to get a proper exposure. This will increase the noise on the image. With the stacked sensor on the RX10 III, I found it was somehow ISO invariant. This allows me to shoot at a lower ISO, and pull up the exposure in post-processing.
While this process may cause extra noise into the image, the level was a lot less than if I have shot the image with the correct exposure at a higher ISO value.
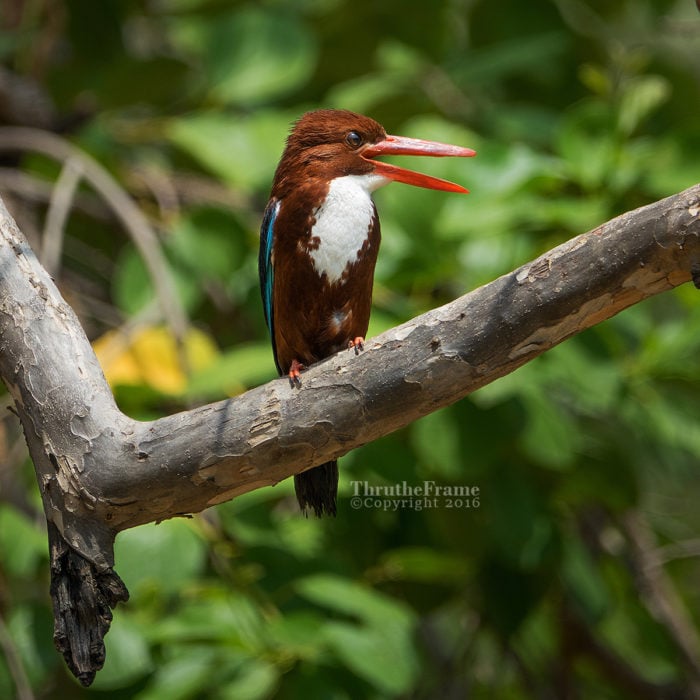
As shown by this example of the White Breasted Kingfisher. I underexposed the image by one stop. If I wanted to get the eyes properly exposed, I would have to over expose the image by one stop instead. The camera will have to select an ISO value of 400 in order to maintain the same shutter speed as the aperture is at its max, resulting in an increase in noise.
By adopting ettL, I was able to keep the noise low, and I was still able to pull up the exposure and get the details I needed.
This is not the most extreme example. But in the forest canopy, a sudden overcasting cloud can cause a drop in light of up to 2 stops. IMO, I feel that ettL works better in that situation.

A time to photograph, and a time to watch
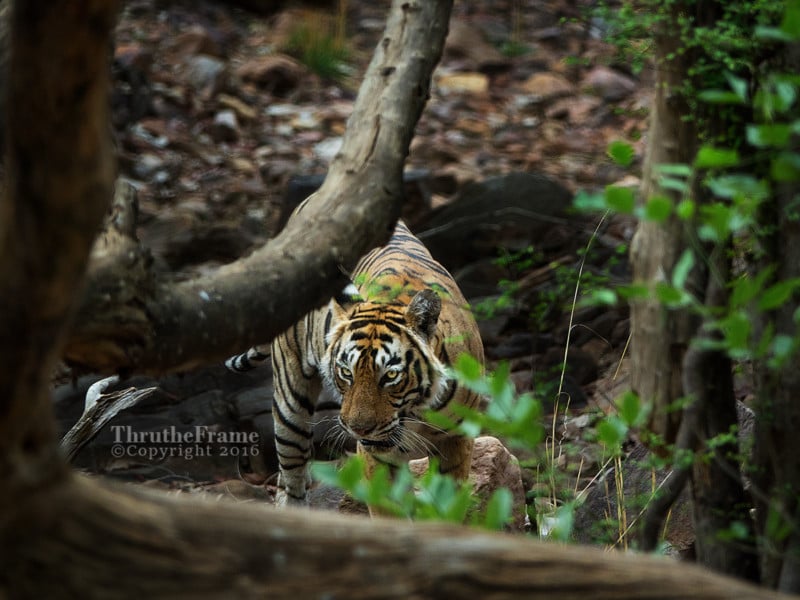
On the fourth and final safari in Ranthambore, Rahij bhai joined us. I like to have him on the safari, as he has a knack of positioning the vehicle with a good clear view for good shots. The first two hours involved driving to several known watering holes to spot for tigers. But the forest was quiet.
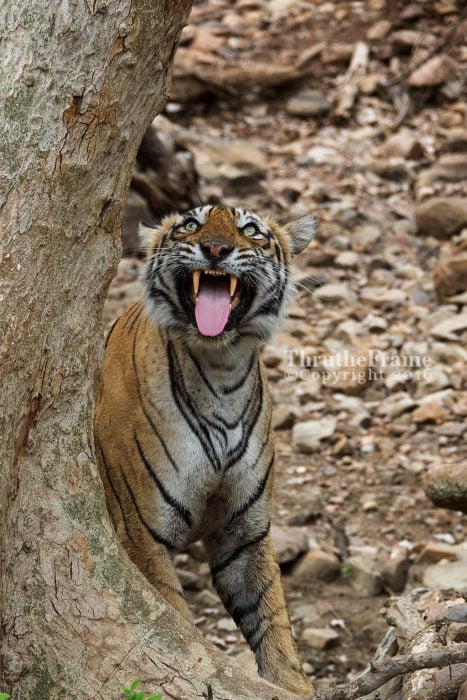
Around 5:30pm, Arrowhead came out of the undergrowth and onto the trail to scent mark trees. I put down my camera and watched her in action. A friend once told me, “There is a time to photograph, and a time to just watch.” I do agree with him.
As Arrowhead approach one of the trees to sniff and scent mark, I realized that it was a good time to start clicking. The RX10 III AF quickly locked and stayed onto her, resulting in eye level shot of a wide-eyed tiger.
The shot below is another example of why I shoot ettL. We were under the forest canopy and it was almost 6pm. The amount of light was low. I had to turn the Exposure Compensation Dial to -1.7EV, allowing me to use a shutter speed of 1/250 and ISO 800.
If I had shot the image at a proper exposure. I would either have to use a shutter speed of 1/80 or an ISO value of 2500. IMO, both choices are not good options. Hence, I choose ettL method.

As Arrowhead walked into the tall grass and back into the undergrowth, I manage to capture a bit of 4K footage of her. I noticed that the RX10 III kept the focus on my subject, even when a tree came into view, the camera was not over eager to switch focus. This results in a decent clip.
Conclusion
Pros of using the RX10 III on my trip
- The 24-600mm equivalent f/2.4-4 Zeiss Vario-Sonnar T* lens is optically very good. A lot of details can be captured, even at the longest focal length of 600mm.
- The 1-inch stacked sensor has excellent dynamic range, allowing me to apply ettL for my shots. I was still able to get details back in post without the need to increase the ISO value.
- 4K videos and slow motion capture were fun to use. Giving a different dynamic to the whole experience of using a camera. I manage to get both photos and great videos.
- This was the lightest setup I have ever used on a wildlife trip. And thanks to the tilt screen, I was able to carry the camera at odd angles to shoot photos and videos.
- The Focus Assist function was great for recomposing.
- The weather sealing gave me a peace of mind during the slight drizzle when I was photographing T19.
- The shutter was very silent and did not disturb any birds when I was photographing them.
Cons of using the RX10 III on my trip
- I kept the camera on at all times as the startup was slow.
- Battery life was short. I almost juiced through 2 batteries per safari.
- Even though the Contrast AF was good, I wish it had PDAF that will be able to track subjects better.
- As for all bridge cameras with smaller sensors, the DOF cannot be compared with an APS-C or Full-Frame camera. Isolating the subject against its background is trickier, and requires a good eye.
- While the sensor is good in low light, it still pales against bigger sensors.
In conclusion, the RX10 III is an exceptionally good bridge camera. The lens sharpness throughout the different focal lengths produced images that rival that of bigger DSLRs with larger telephoto lenses.
Like all RX series camera in the Sony stable, it takes good videos up to 4K resolution. At a focal length of 500mm and above, it put a new dimension to wildlife videography. On the safari, there was a vehicle outfitted with a huge tripod, fluid head, and large video camera. There was not much space for the videographer to maneuver. I wonder what his reaction would be if he realized that his Goliath was giving almost the same results as my David.
All that being said, the RX10 III is still a bridge camera and it has its limitation. The sensor is smaller and the lens is slower, users cannot expect the DOF, subject isolation, and image quality to be comparable to a Canon 1DXII mated to an EF 600mm f/4L IS II. That would be unrealistic.
There was also the autofocus system on the RX10 III. I do not understand why Sony could not include PDAF on this small sensor. With only Contrast-Detect AF, there are situation when the camera goes hunting at longer focal length. Not on the tigers, as their stripes have good contrast. But on prey animals such as Sambar and Nilgais.
I found out that using Zoom Assist to re-frame the subject helps the camera to re-focus onto the subject. While it is not the best solution, it is a work-around for this camera.
So what role should the RX10 III play on my wildlife safaris? It will play the role of video rig, wide angle specialist, and backup camera.
About the author: Shannon Heng is a Singapore-based portrait photographer, with a passion for photographing flora and fauna. You can find more of Shannon’s work on his 500px, Facebook, Instagram, and blog. This article also appeared here.