How to Build and Shoot With a DIY Rain Machine
Below is a walk through of how I created ONE image for my portfolio, I will add some of the other images, but I don’t have them in my portfolio. This is because this was the start of a series of images and I had set out to come out with only one from each shoot.
The Idea
The concept started after I saw Simeon Quarrie’s work for a couple. He had stated in a BTS video that the rain machine they had ordered had not turned up, so they simply built their own instead. There was no more information on it, but it sounded so cool I had to try it for myself.
I had no idea what I wanted to do with it, but it was a quiet summer!
The Rain Machine Build
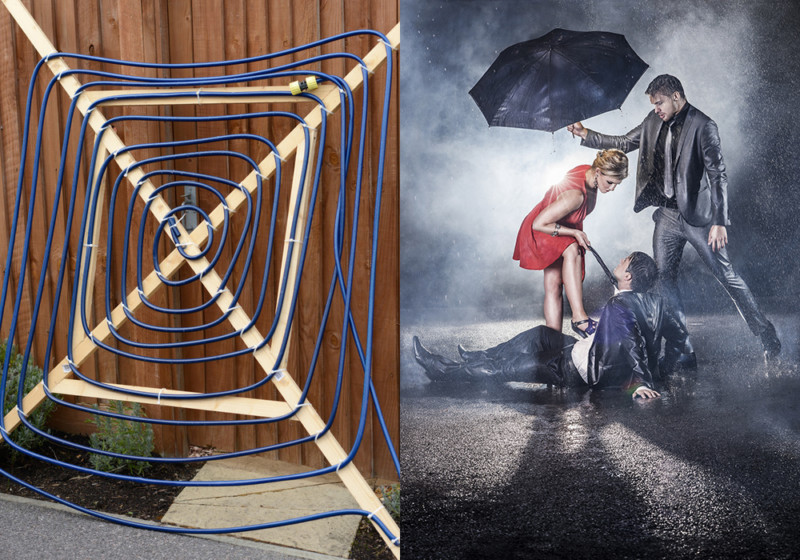
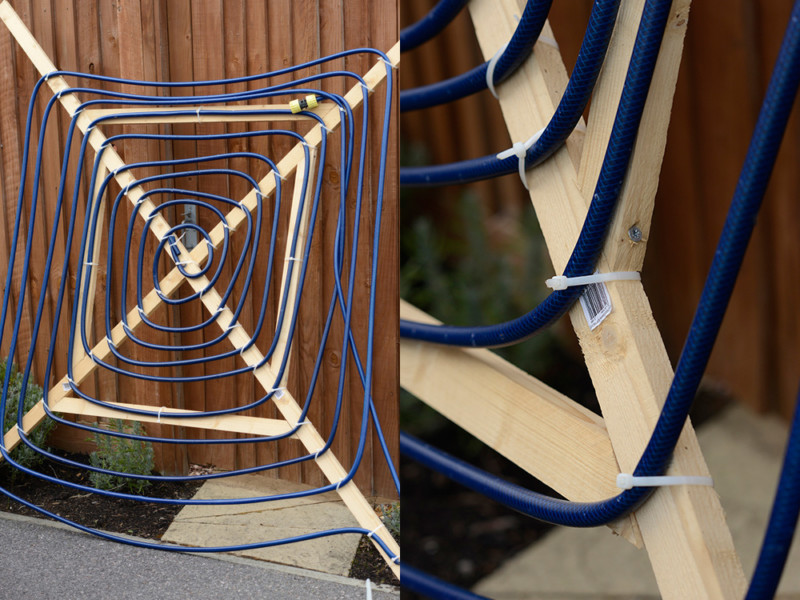
It was a surprisingly easy job. I started off with 2 long bits of wood (I can’t remember the measurement but it doesn’t really matter… but don’t use untreated wood like I did if you intend to keep it, otherwise it may rot) crossed them over, and drilled a hole through both. I fixed them together with a nut, bolt, and a couple washers, then roughly cut 4 brace pieces to stop it twisting around. They were simply screwed into place.
Now, using a hosepipe and a hell of allot of zip/cable ties, I simply spiralled the hose out from the centre, trying to keep a fairly even distance between each row. After trimming the zip ties, I started making the holes.
Bare in mind that, in order for it to look natural as rain, it has to spray upwards and then fall at gravity’s pace.
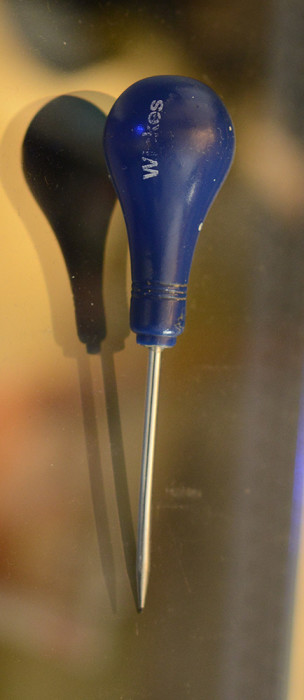
To start on the holes, based on information gleaned from the Internet, I used a tiny drill bit and drilled them. This was a terrible idea. Instead use a spike, like a pin or one of the tools pictured above. I don’t know what it’s for but it was perfect.
I did the holes every few centimeters, but that also turned out to be a mistake. Leave a good few inches between each hole, as there will be a lot of them! (As you can see, there was a lot of making it up as I went along).
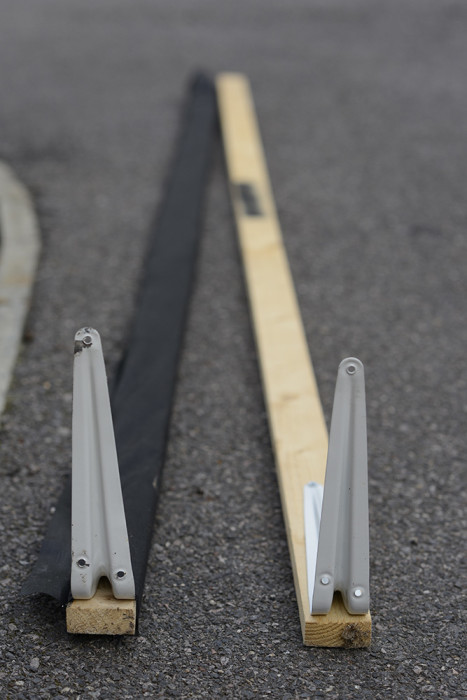
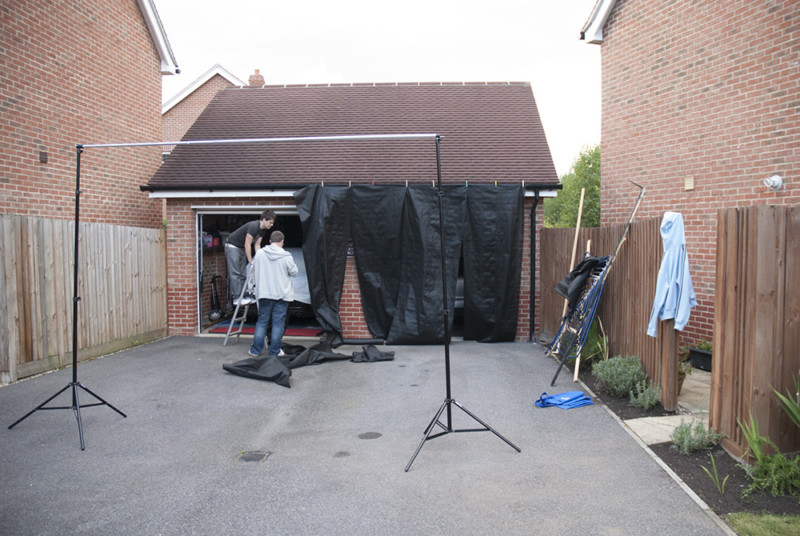
The legs were a bit rubbish, I figured 4 of the same bits of wood would do it, but they weren’t up to it. I recommend using a hook in the centre and hanging it above the subjects if possible.
In the end, I used 2 of the legs attached with standard shelf brackets and propped the front of it up over my backdrop stand. (backdrop stand weighed down by paving slabs)
The Shoot
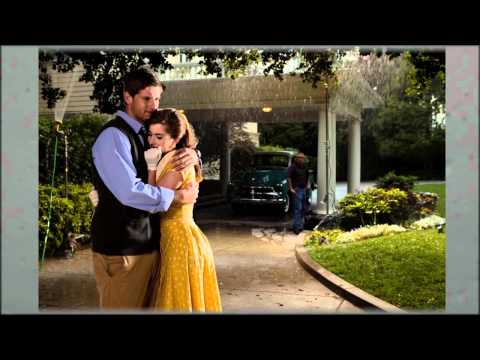
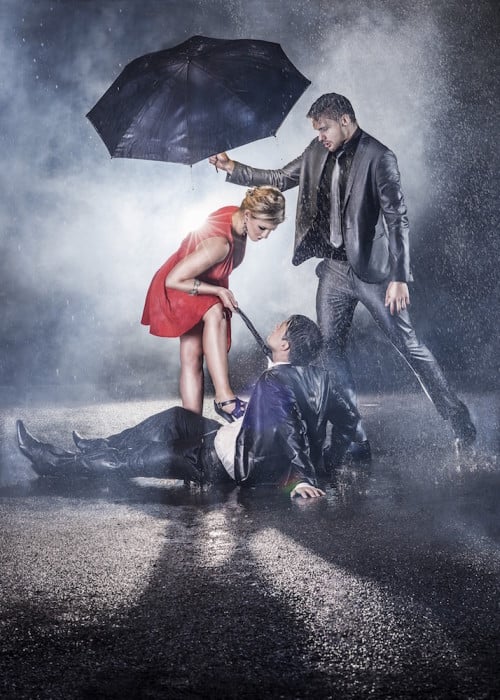
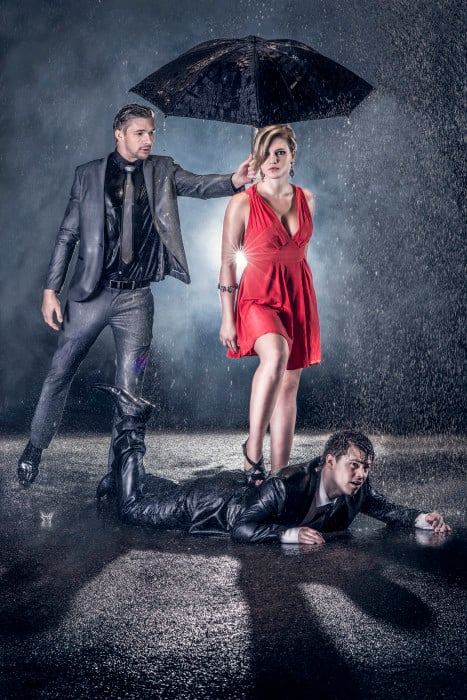
I had this image in my head of this beautiful female mob boss/gangster figure towering over some helpless schmuck, whose story I hoped to tell in other images further down the line.
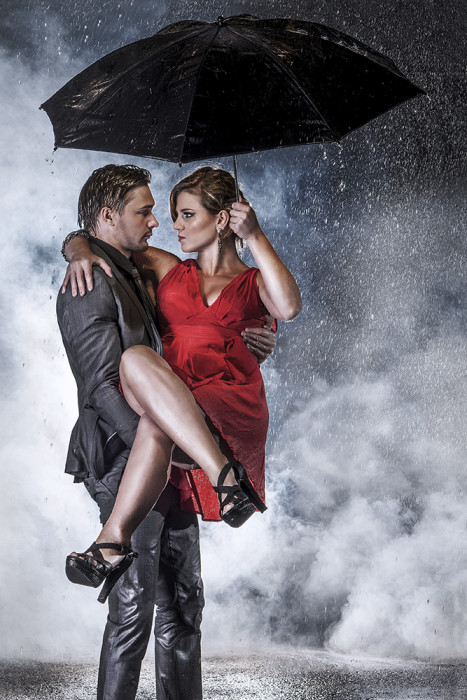
The exact image I had swimming in my head for months leading up to this is below, but as it turns out. it wasn’t the best shot of the day. I much preferred the title shot above which was suggested by one of my models!

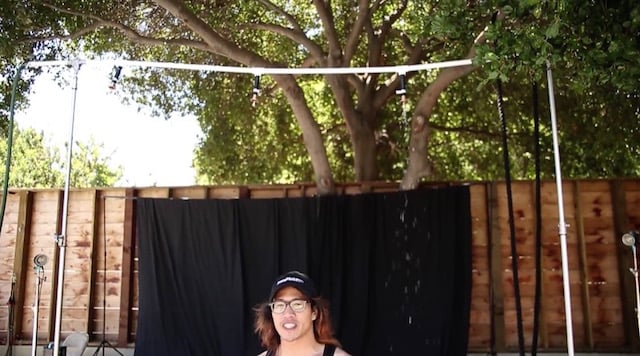
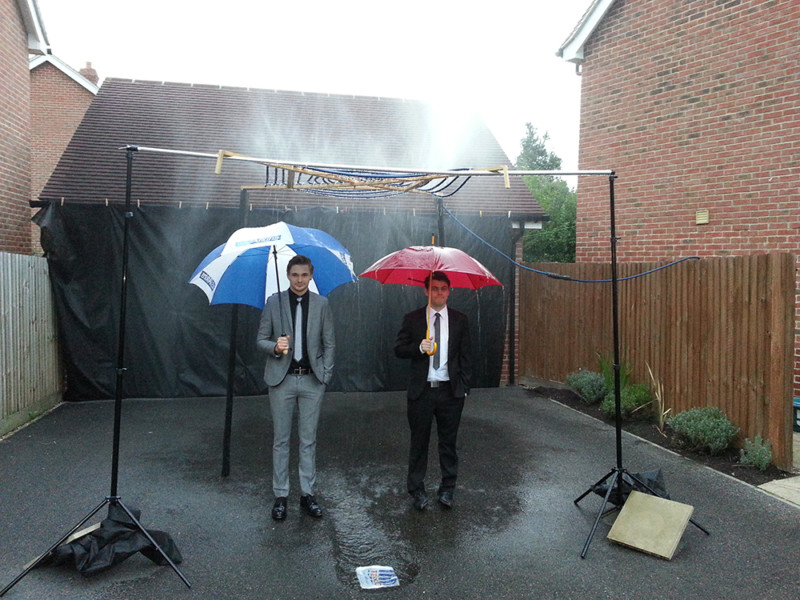
The shoot was quite a challenge. It was all done on my driveway and as the garage has white doors, we opened them up and hung black material (the stuff you put under gravel paths to stop the weeds coming through because it’s all I had lying around) held up with clothes pegs on the drain pipe.
Then the lights had to go around the rain machine without getting wet. We used plastic bags to cover the power supplies, other than that it was down to getting the water pressure just right so that it didn’t spray too high or far.
I had a 4 light set-up for the image: one strobe was taped onto the shaft of the reflector umbrella that they are holding in shot.
Once set up (light set-up diagram above) I had a nightmare when my cheap a** knock-off Chinese radio triggers decided to break. I had used all of my available lights already so I had to resort to switching everything to slave mode and triggering them all with the on-camera flash! At the distance I was shooting from this proved quite temperamental!
The key thing to taking advantage of the rain is having it backlit, as this catches the droplets really nicely as well as the smoke that my 1st assistant would pump into the back of the scene during some of the shots. The smoke added a lot of atmosphere and let me get away with the location being so boring!
By the end of the shoot it started raining properly so we had to bail and disassemble it all in an insanely quick time before someone got electrocuted.
Post Production
Yes there was a fair amount of post-production for this work. The bulk of it was cloning out the 2 rear legs holding up the rain machine. I would have suspended it differently in hindsight.
The rest of my process was the same as any other image.
Skin clean-up as needed.
Dodge and Burn, because I like to add contrast and bring out the highlights selectively. I’ve gotten better at this since this shoot… I’m more subtle now. This was a little heavy handed.
Then the part I’m still learning the most about: color grading. I went through many many iterations of subtly different colors until I was happy.
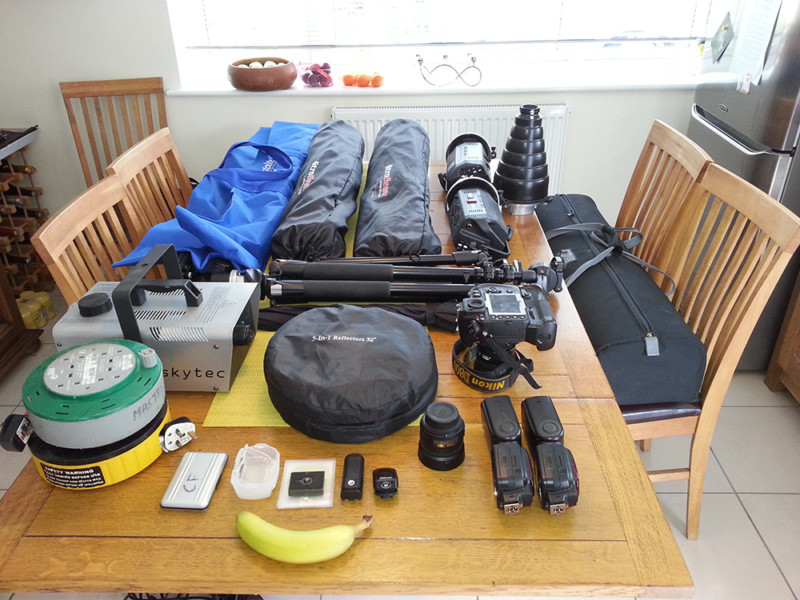
The Gear
- Nikon D800
- Nikkor 85mm 1.8
- 2 x Nikon SB900 speedlights
- Lastolight background stands
- Smoke machine
- 2 x Bowens 500w Gemini Strobes
- 2 x 120 octaboxes (only used one in the end)
- Radio triggers (that failed on me, don’t buy cheap stuff…)
- 5-in-1 Reflectors
- DIY Rain Machine
- Wacom Intuos 4 (for post-production)
- Banana for scale!
That’s It
That’s how I did it. I will be doing this in video form in the future, but I didn’t have a whole lot of assistants for this shoot! Massive thanks to Scott Luck for his assistance, the models Doug, Issi, and Richard, and my family for looking out for and keeping the models topped up with tea etc. Any feedback is welcome.
About the author: Raj Khepar is a photographer, retoucher, and furniture maker based out of Brighton, England. You can find more of his work on his website and Instagram. This article also appeared here.