I Bought a Holga Digital. Here’s a Hands-On Review.
I bought a Holga Digital through the Kickstarter fundraising campaign in August 2015. It is a fairly early model, so by the time you read this there might have been some tweaks or firmware updates.
I have never owned the original film Holga (or any medium format camera for that matter), so this review is based on the behavior of the Holga Digital camera on its own merit, not compared to its film predecessor.
Click on any image below to see it full size. All images are straight out of the camera, without any processing.
Hardware
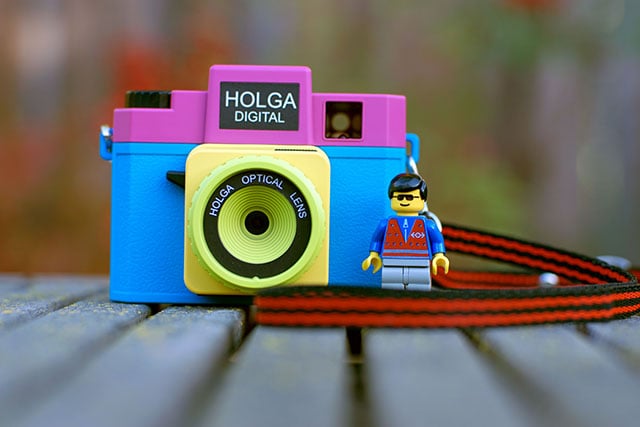
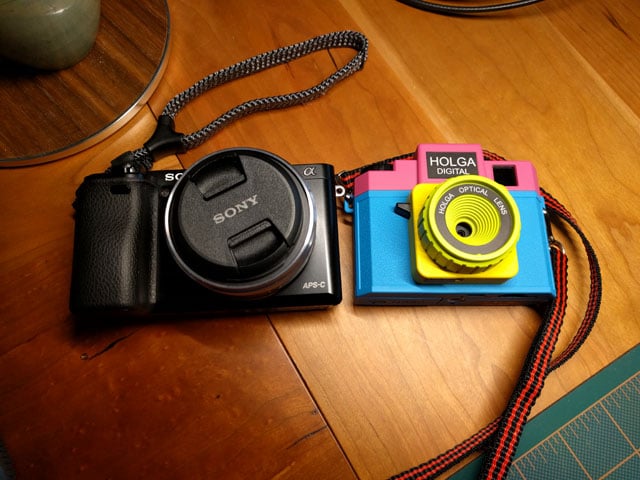
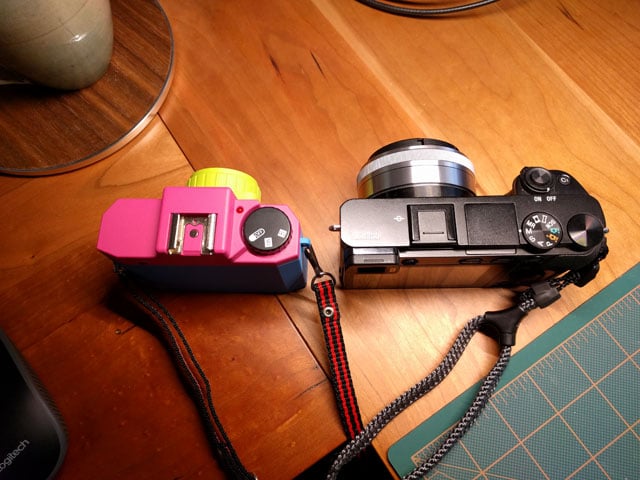
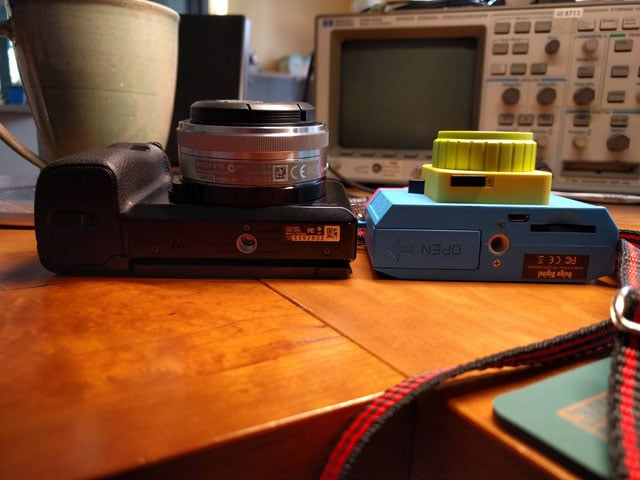
The camera is entirely made of plastic (including the single element lens). The only metal part aside from the USB connector and the screws that holds it together is the flash hot-shoe. It fits nicely in the hand and if I place the viewfinder in front of my right eye, the body rests against my nose resulting in a stable shooting position. My index finger naturally finds the shutter. Here you can see it next to a Lego minifig and compared to a Sony A6000 APS-C camera with a pancake (16mm) lens on.
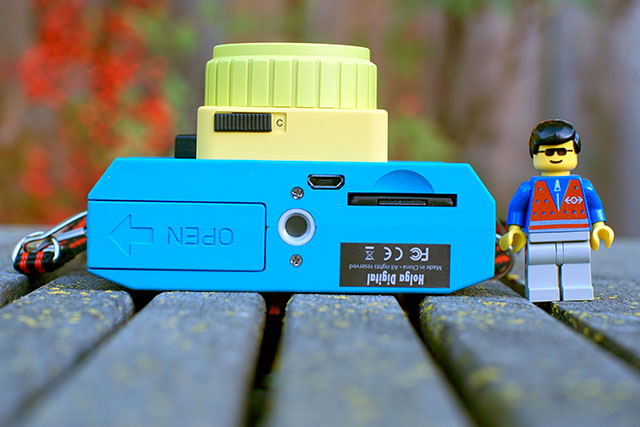
The fit and finish is on par with most name brand consumer goods. There are no sharp edges or obvious molding defects. Parting lines are not visible and textures are uniform. One point worth noting is the battery compartment: as you can see in the images below, there are two spring contacts inside the battery compartment, usually used for the negative side of the battery, but in this case, one of them is a positive contact.
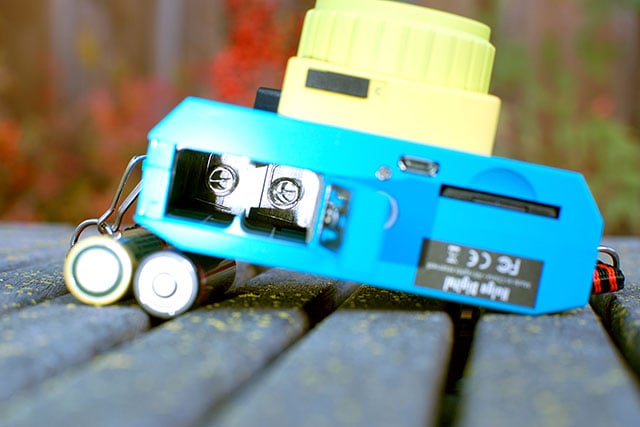
As long as you follow the marking on the battery door, you will be fine. The battery door doesn’t seat flush with the bottom of the camera: this happens with or without batteries, so it’s not due to the battery springs pushing on the door.
Operation
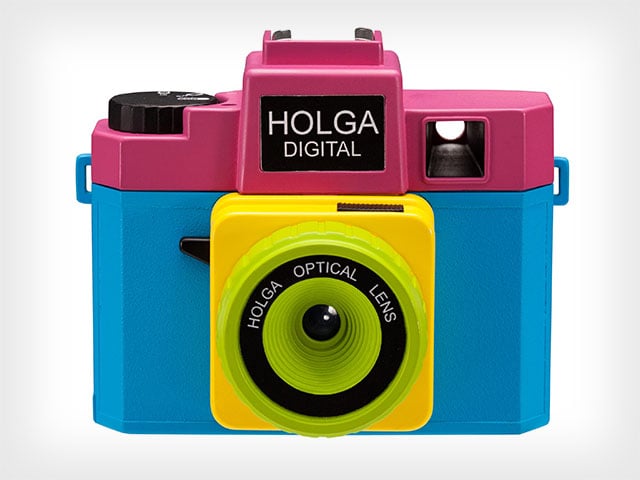
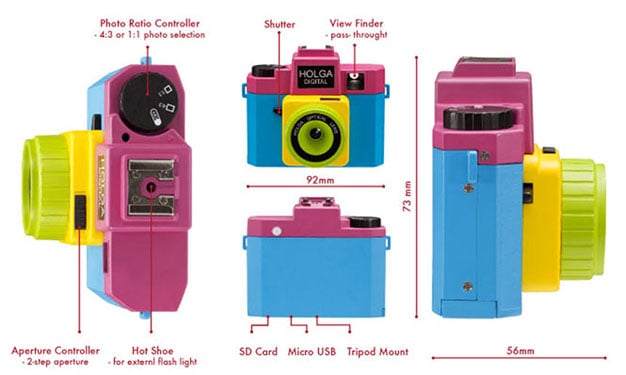
This camera can be summed up in one word: minimalist. It has the following controls: an on/off rotary switch that also selects the aspect ratio (marked OFF, 135 and 120), a sliding switch to select “the aperture”, located above the lens, a sliding switch that selects black and white or color (BW / C) located below the lens and of course a shutter lever located on the right hand side of the lens.
It’s powered by two AA batteries. I used Alkaline ones as I didn’t have any rechargeable ones handy. I did not use the camera enough to run the batteries down; however, I did a quick test with a variable voltage lab power supply and found that it uses about 200mA of current, so a good set of batteries should last 10 to 15 hours or so. Taking a picture does bump the current consumption briefly by about 40 to 50mA.
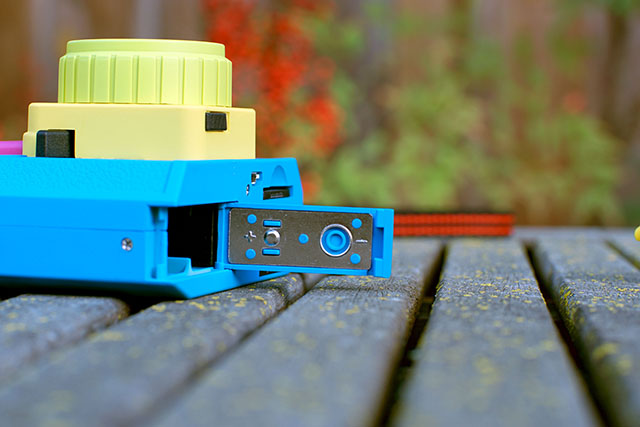
Images are saved on an SD card. I grabbed the first card I had out of my camera bag and it happened to be a 32GB model. This should allow for about 21000 pictures! Inserting the card is a bit hard as the spring mechanism offers a lot of resistance. Once the card is in, it is flush with the bottom of the camera (no door or cover) and can be difficult to extract as it requires pressing against the hard spring to eject it. The tip of a ball point pen or a solid finger nail makes the operation easy.
One thing this camera doesn’t have is a display: you have to wait until you get home to see your pictures. If you’re impatient, the manual claims that the camera supports SD cards with Wi-Fi. I don’t have one, so I can’t comment on this function.
To read the images, you can either remove the SD card or use the micro USB plug. When plugged into a computer via USB, the camera appears as a USB thumb drive with the pictures located in the usual DCIM directory. The files are around 1.5MB each.
USB works whether the camera is switched on or not. I did notice one bug though: if the camera is on before plugging USB, it will stay on after unplugging even when moving the power switch to the off position! At this point, the only way out is to open the battery compartment to completely reset the camera.
One other quirk of this camera: the files are dated January 1st, 2012. It took me a while to find them on my computer as my image management software organizes all the files by date. The time stamps appears to reset at midnight every time the camera is switched off, which is good for battery life (no clock running) but bad for sorting files.
I think the lack of immediate feedback is a nice throwback to film. And without, you know, actually dealing with film processing time! For fun one could use a very small card or write a very large file on the card before putting it in the camera, to limit the number of pictures to about 12 to 16 like on a 120 film, or 36, like on a 35 mm film. I did not test this, so I don’t know what happens when the card is full!
I find the power knob somewhat difficult to use with vague detent points. When the camera is on, the red LED next to the power knob illuminates.
Viewfinder: well, its main feature is that it exists. It is just a truncated pyramid with a clear piece of plastic at each end. The field of view appears to match the pictures taken in 120 mode (square image). When taking a picture in 135 mode, the image extends past the area visible in the view finder. There is an LED inside the viewfinder that blinks when the picture is taken. I use the word “when” lightly though: based on some tests with a flash attached to the camera, it appears that the picture is taken just after the LED blinks! It’s a good idea to keep the camera steady for a second or so after pressing the shutter…
Aperture selection: although the manual and the image meta-data both claim that the aperture switches from F8.0 to F2.8, I don’t see or hear any mechanical movement when I actuate the switch. The truth will be revealed below!
Sample Images
First, the same picture taken in all the combinations of modes and formats (The camera reports a focal length of 7.5mm and flash fired for every pictures):
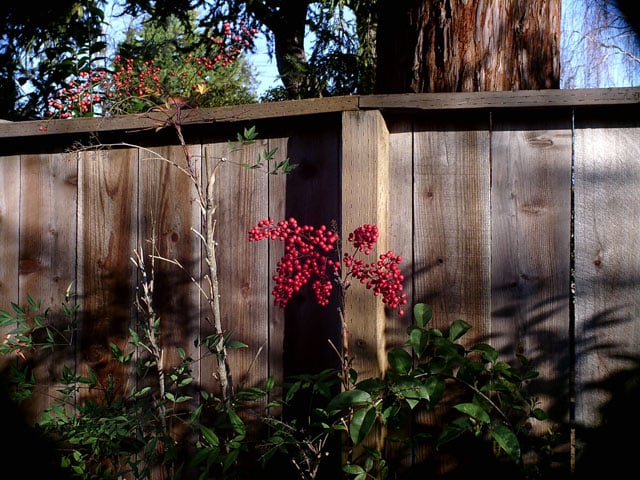
f/2.8, 1/1969 Second, ISO 100. 135 aspect ratio (3264×2448), color mode.
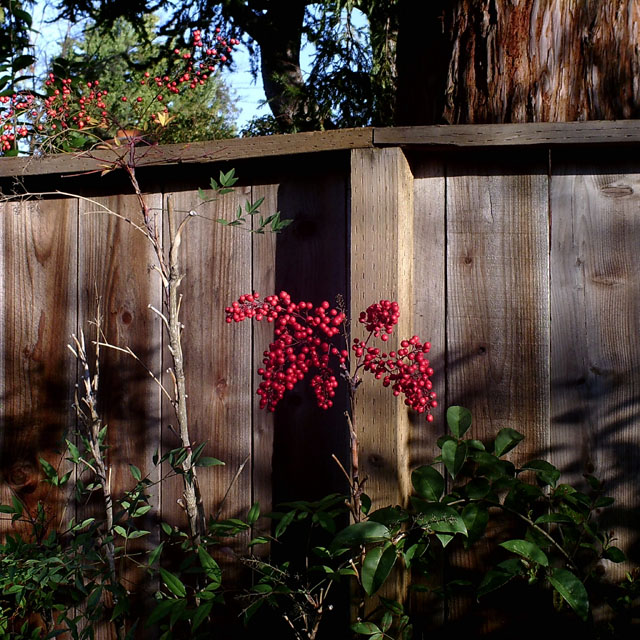
f/2.8, 1/2046 Second, ISO 100. 120 aspect ratio (2816×2816), color mode.
f/8.0, 1/1241 Second, ISO 100. 135 aspect ratio (3264×2448), color mode.
f/8.0, 1/1177 Second, ISO 100. 120 aspect ratio (2816×2816), color mode.

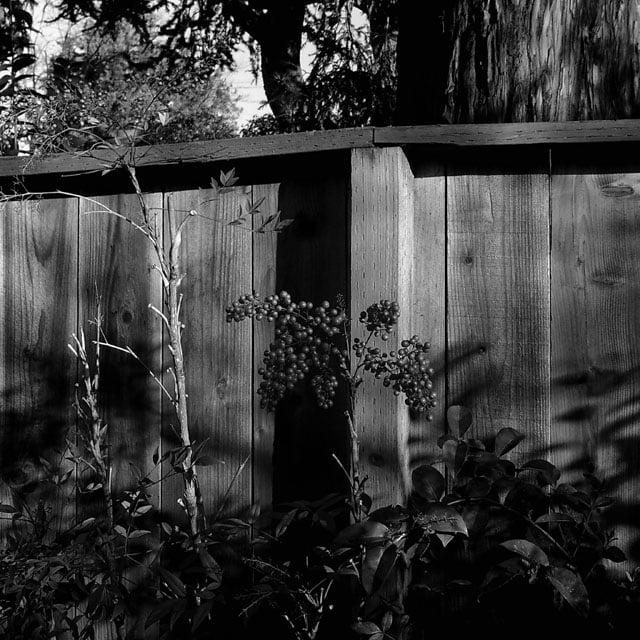
f/2.8, 1/2224 Second, ISO 100. 135 aspect ratio (3264×2448), black and white mode.
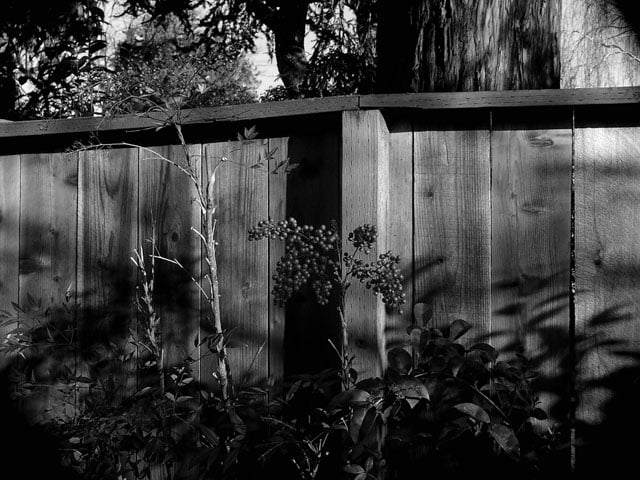
f/2.8, 1/2224 Second, ISO 100. 120 aspect ratio (2816×2816), black and white mode.
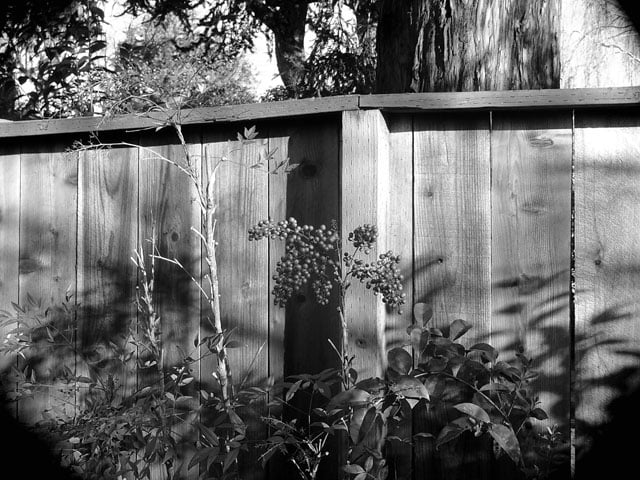
f/8, 1/1217 Second, ISO 100. 120 aspect ratio (2816×2816), black and white mode.

f/8, 1/1217 Second, ISO 100. 135 aspect ratio (3264×2448), black and white mode.
And now, for comparison, here’s the same picture, taken by the front facing camera of my phone (Nexus 5X). Sorry about the bad focus: I was trying to take the picture without being in it!:
f/2.0, 1/198 Second, ISO 50. 1944×2592.

And the phone’s main camera:
f/2.0, 1/190 Second, ISO 60. 3024×4032.
I took the following picture of a boring gray wall to show the lens distortion:

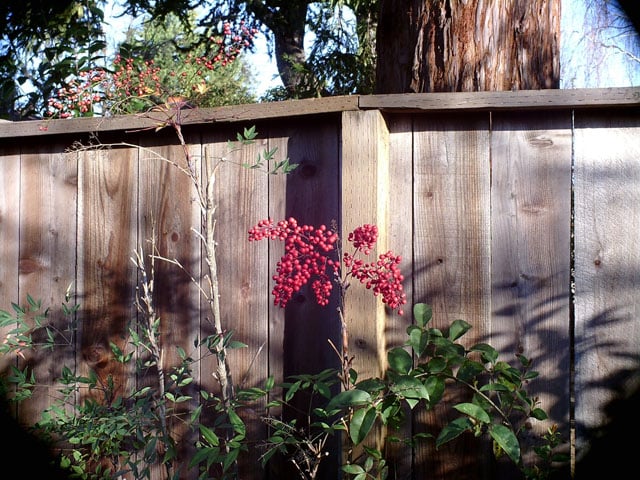
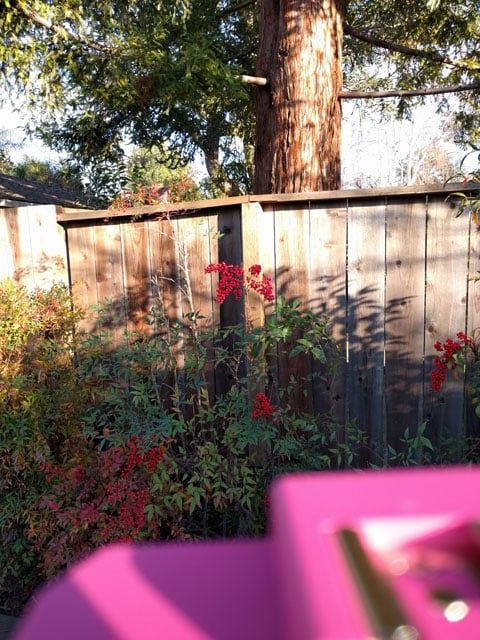
Outdoor pictures can be nice (this was taken in late afternoon, with sun already blocked by my neighbor’s house):

The picture looks good until you zoom 1:1 and find very saturated colors and noisy shadows. I think this is fine for web use and maybe passable as a desktop background, but I would not spend money on a print.
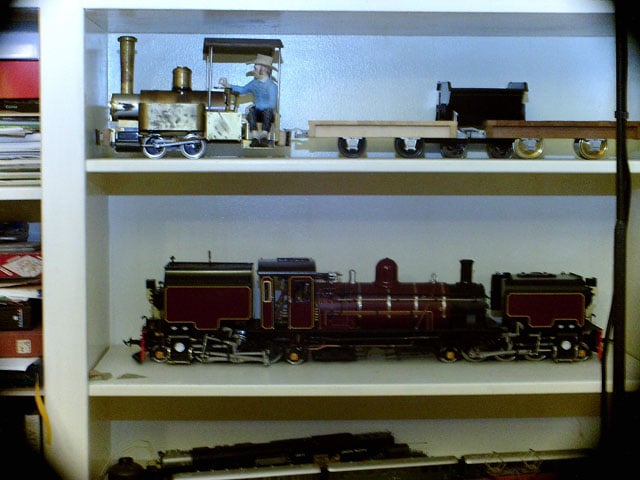
This camera needs a lot of light to shine: the following indoor picture shows what appears to be high ISO noise but could just be a noisy sensor as the exposure time is longer but the ISO setting is reported as 100, no matter the the light conditions.
In summary, this camera works well in broad daylight with mostly static subjects (due to the shutter lag). Its pictures look better downsized and are strictly for Web use. I do find its simplicity (including its lack of display) interesting and I think it’s a good way to get close to the film experience but with the convenience of digital.
Is it worth $90? Disclaimer: I paid $70 as an early bird Kickstarter contributor. A quick look on eBay shows that you can get many “proper” compact cameras with zoom lenses and even some body-only DSLR for less than $100. If your goal is maximum image quality for the buck, then you need to look elsewhere. If you want a basic film camera but don’t want to deal with processing (either in your own dark room or through a store or service), this might just work for you.
Of course, if you happen to own a camera (including one that comes bundled with a smartphone), you can duplicate the look of the Holga pictures via post processing. In this sense buying the Holga Digital is superfluous. However, the tactile experience is not the same: using the view finder and pressing the shutter release lever are somehow more satisfying than tapping on a piece of glass.
What would I improve, given the opportunity to do so? I would replace the red LED in the viewfinder by a dual color one. Green would indicate correct exposure, red would indicate over exposure and orange would indicate under exposure, of course this would require a two-step shutter or an extra button. True aperture change would also be nice.
A Peek Inside
Unlike a lot of modern gadgets, this camera is very easy to take apart and put back together. All you need is a very small Philips screwdriver. Below you can see the camera fully disassembled, including with the lens removed. Please note that removing the lens exposes the sensor to ambient dust and could ruin it. Whenever you handle electronic circuits, you need to be conscious of the potential for static electricity discharge, which can permanently damage the components (again, the sensor is by far the most sensitive component).
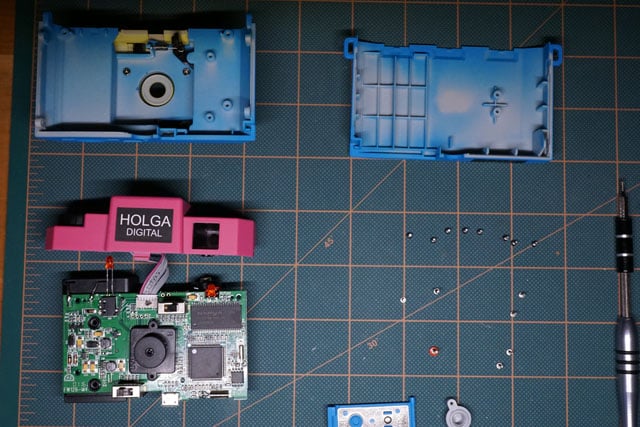
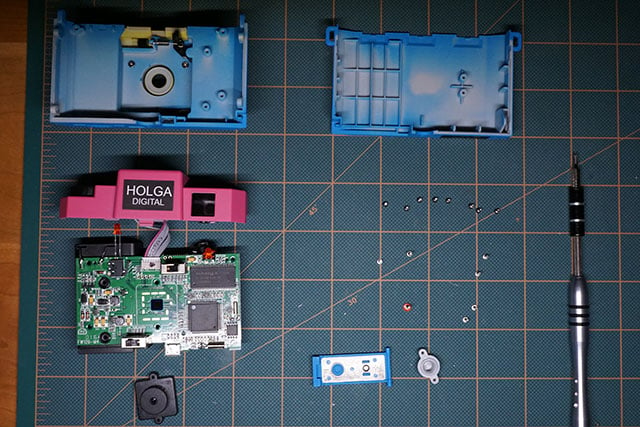
One surprise is that the main parts are painted! This explains the fine texture I observed initially. The electronics consist of a Sunplus image processor most likely paired with one of their sensors, a RAM chip and a small serial flash memory that stores the code running in the image processor. This type of parts is similar to what you would find in a mid-range webcam.
As I suspected, the “aperture” selector is just an electrical switch and has no bearing on the optical assembly. The lens is made of two elements and sits behind a “window” attached to the “lens”part (yellow on my camera). The lens itself is made in two pieces that appear to be glued together, possibly part of a production line calibration process.
In case you’re wondering: yes I put it back together, without any extra screw left over and it still works!
About the author: David Wegmuller is an engineer and photography enthusiast based in the San Francisco Bay Area. You can find more of his projects and writings on his website and on Twitter. This article was also published here.