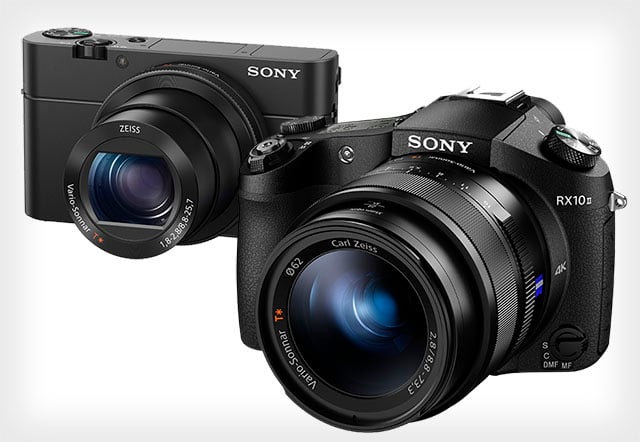
Review: Sony’s RX100 IV is One of the Best High-End Compacts Money Can Buy
The Sony RX100 III is a fantastic little camera and when I had the chance to play with its successor earlier in the year I was very excited to see if the RX100 IV would build upon the already high standards Sony has helped set. While Sony has been making some impressive advances in the high-end camera market, in the pro-compact area things are a lot tighter with Canon just edging ahead of the RX100 III with the G7X.
The key new features focus around some improvements to the sensor. More specifically, the camera now has the ability to shoot photos down to 1/32,000th second for stills and for the videographer it can record 4k video as well as 250fps, 500fps and an astonishing 1000fps
Out of the Box
The camera, strap, battery and USB cable all come as standard, along with two inches of printed manual, warranty and adverts. Yet again Sony does not include any form of dedicated battery charger. Seriously there is no excuse for this, Sony… With a $1,000 camera I want the ability to charge my batteries outside of the camera. Especially when, as you’ll see below, the battery life can be poor.
Usage and Handling
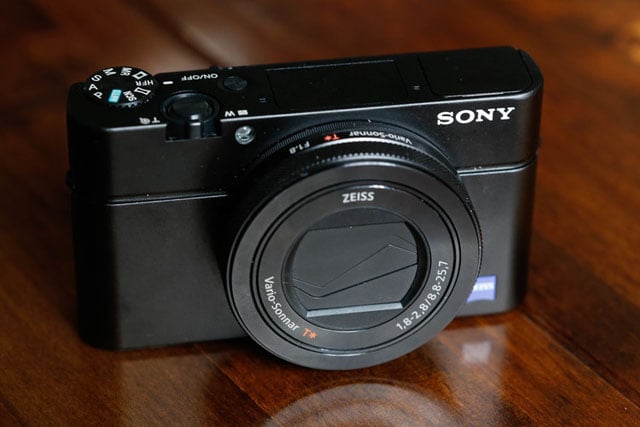
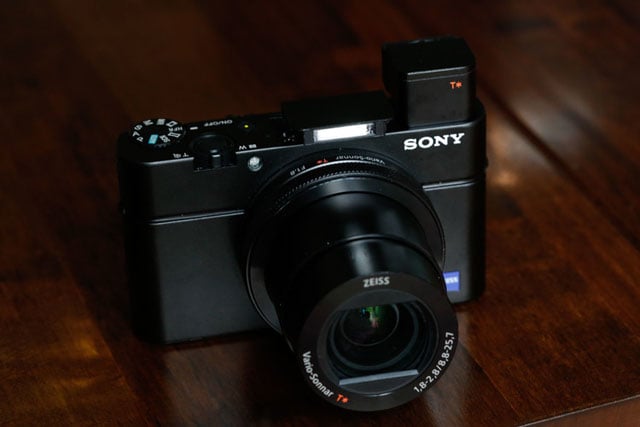
Not only does the RX100 IV look like the Mark III but it’s essentially the same camera to use. Except for the addition of the new HFR setting on the mode dial and the associated changes in the menus to account for it, to all intents and purposes the camera feels just like the older model. The same screen, the same controls and layout – it’s all very familiar. While this does mean all of the positive aspects of the RX100-3 are retained, it does mean all of the drawbacks are still present, such as the labyrinthine and poorly designed menus and a rear screen which still isn’t touch sensitive. That said, the pop-up LCD viewfinder has definitely had an upgrade and is noticeably sharper and more detailed. It’s still a fantastic addition to the camera and is especially useful in bright conditions. I still find that using it for a long time gives me the beginnings of a headache from squinting but really, it’s a great feature. For everything else except the new faster shutter speed and video modes you can read my RX100-3 review and it’s exactly the same. Generally, handling remains very good.
Battery life is also very similar to the RX100-3 albeit with an important caveat I’ll cover later. When shooting stills I found it to be about the same as the mark 3 and it just about handles a full day out shooting, provided you remember to switch it off when not using it. If you expect to get about 250 shots between charges you won’t be disappointed.
The biggest changes are focused around the headline new specifications of the camera – the 1/32,000th second maximum shutter speed and the vastly improved video functions. Both of these will have the biggest impact on how you use the camera so it makes sense I talk most about these functions. And yes, that means I’ve broken my prior embargo on looking at the video functions of a camera… But really, with the RX100 IV, I just had to!
The 32,000th second shutter speed is a huge step up from any other consumer camera on the market. Even top end DSLRs top out at 1/8000th second which means the RX100 IV shutter is four times quicker! This opens up a number of photographic opportunities such as shooting wide-open at f/1.8 in bright sunlight.
It would also seem to open up the world of high-speed photography too – freezing the action that would otherwise be too fast for the human eye to see. Typically, photographs like this are shot using off-camera flash to freeze the action; the camera settings are usually around 1/200th second (the common flash sync limit for many cameras) with a narrow aperture and low ISO values for maximum quality.
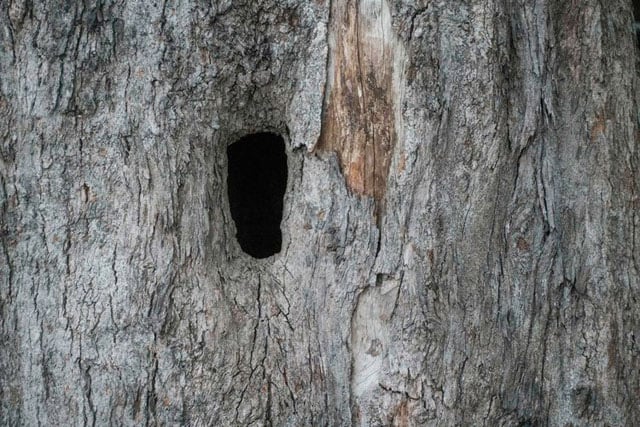
The image below was shot at f/8, 1/200th sec and ISO 100 in a dark room – the reason you can see an image at all is because a flash was bounced off the white background to illuminate the scene. So in effect, even though the shutter is open for 1/200th second, there is only enough light in the room for 1/10,000th second – that’s how long the flash burst lasts. The light needed to illuminate a scene is also the biggest drawback for the new fast-shutter mode.
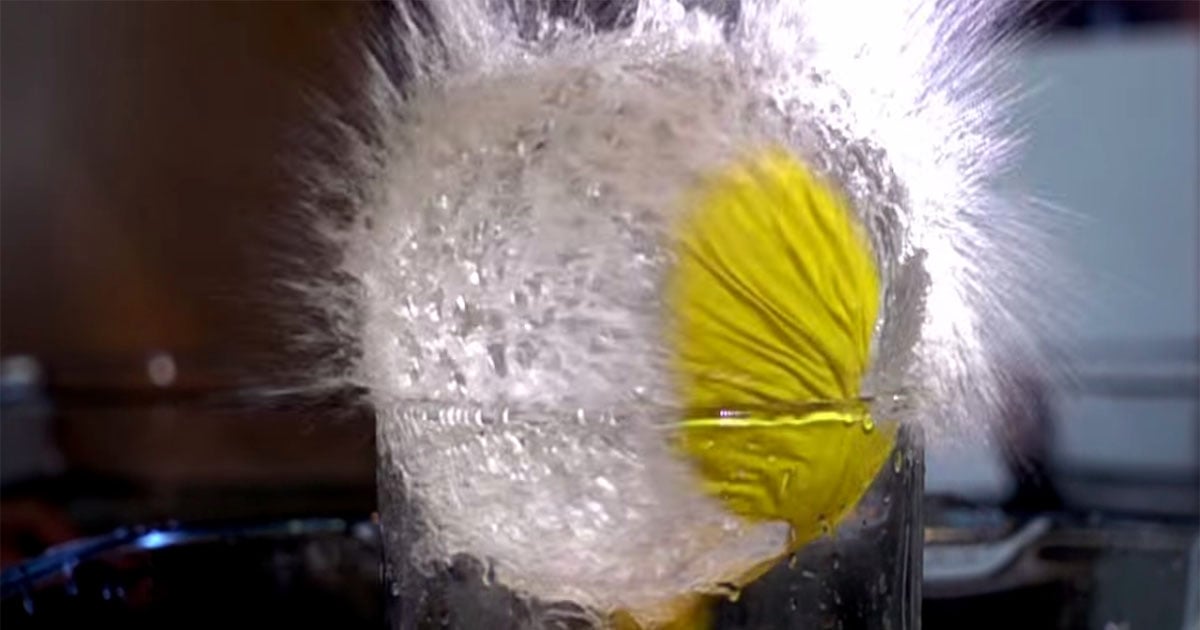
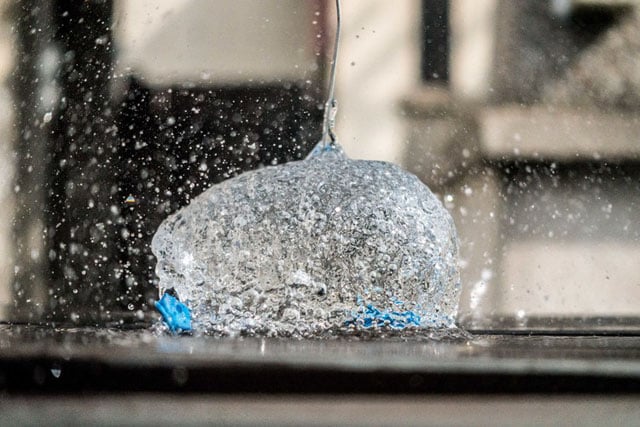
Simply put, in order to make best use of the 1/32,000th shutter speed, with a reasonable depth of field and a reasonable ISO, you need light. Lots and lots of light. If you look at the balloon pop image later in this review, it was shot outdoors in bright midday sunshine – yet to get the scene properly exposed at 1/32,000th second and freeze the action, I needed ISO 1000 and f/2.8! Ultimately this means that the real world scenarios where the fast shutter speed can be used are hugely dependent on the conditions. It might be great for capturing insects or butterflies flying around when it’s nice and bright but once that light goes, your options become drastically limited.
What you really need to make full use of the fast shutter speed is a powerful continuous lighting rig. This requirement is even more apparent when you factor in the new High Frame Rate video mode too.

The biggest surprise to me when reviewing the RX100 IV was how much I enjoyed using the video modes, both the 4K and HFR options. Normally I rarely bother shooting video on my cameras but it’s something I’m beginning to get more interested in and the RX100 IV really helped pique my interest further. Beginning with the more conventional HD and 4K recording, I was a bit confused between shooting in video mode, or shooting in one of the PASM modes and just pressing the video button. After much experimentation, it seems like Sony has continued in the theme of giving ultimate flexibility even if sometimes it makes no sense.
Watch the 4K video below — this was shot in aperture priority mode at f/8, but because it was in A mode and not movie-mode, the camera picked a frame rate the same as the shutter speed. As a result, the video is jerky, ugly and unusuable. Confused? I was – but when I figured out that the camera was letting me shoot videos with any settings, even if those settings were going to produce garbage it began to make more sense. For a little while, at least.
Not being overly familiar with all the different video modes available, I began my background reading to figure out what AVCHD, MP4 and XAVC S were, then what 25p, 50p, 100M and 60M were. Although the RX100 IV does provide an annoying description of what aperture priority mode is on a prosumer camera aimed at experienced photographers – thankfully you can disable that – it does expect us all to be expert videographers and know the difference between our video formats! Yet another quirk of the interface, albeit a minor one.
Switching the camera into dedicated movie mode was akin to selecting P-mode. Though I could have tweaked the ISO, by default the camera set it to Auto and it took complete control. Though this may be a problem for dedicated videographers, for me at least it was reassuring to know if I used movie mode the camera would ensure the results I got were halfway decent.
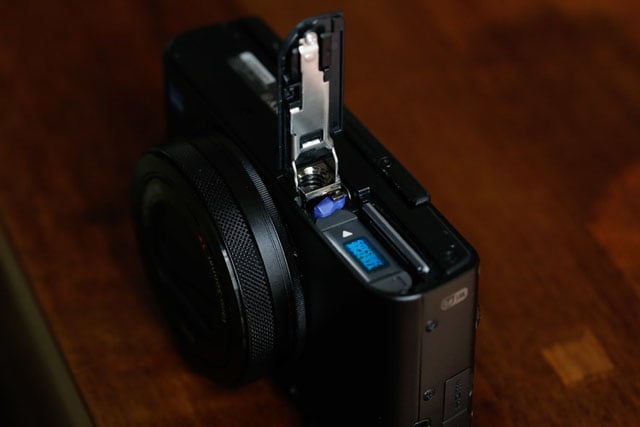
At this point it’s worth pointing out that the camera does have minimum memory card performance requirements. For shooting 4k video at 60Mbps, I found most of my memory cards were OK but that’s because the majority are UHS-1 standard, with at least 45mbps or higher data transfer rates. To shoot 4k video in the top end 100Mbps format the camera warns you that a minimum of UHS-3 is required. This is denoted by a little U with a 3 inside on your SD card.
As it happened, I didn’t own any cards of that standard so in the spirit of a thorough review I bought one. It turns out not all U3 class cards are created equal – apparently the U3 card I bought was only rated at 90mbps and not the 100mbps minimum needed. This was very frustrating – although I could have probably figured out the camera meant “to shoot 100mbps 4k video you need a UHS-3 card that is also rated at 100mbps or higher”, the warning the camera gives you doesn’t say that. It just says “get a UHS-3 card”. And to compound the problem, the UHS-3 card I bought didn’t even display the transfer rate and I needed to look it up online to learn my mistake. Quite an irritating experience, albeit not one I can lay entirely at the feet of the camera.
What makes the whole situation even more comical is that to shoot in HFR mode you do NOT need a UHS-3 card but you DO need an SDXC card. I own many memory cards, some of them at 64gb capacity. Only one of my cards was actually SDXC. So even though I have a 64gb SDHC card rated at 90Mbps, the only memory card that worked for HFR video was a 64gb SDXC card rated at 40Mbps. Quite why the SDXC designation is more important than the data transfer rate I don’t know (please leave a note in the comments if you do!).
My recommendation therefore to get the best out of this camera: buy a couple of… wait for it…. SDXC memory cards of 64gb capacity or greater that are UHS Class 3 with a minimum data transfer rate of at least 100mbps. That way you know your card will work in any mode and you won’t need to swap things around all the time.
The 4K shooting experience is limited to 5 minutes maximum filming time before a new file starts. Not an issue if you’re happy editing video but a constraint/consideration nonetheless. You can hook the camera up to a dedicated external recording unit (e.g. an Atomos unit) and I suspect that will be first thing many videographers looking to take advantage of the 4k video capability will do. I am far from that level :) Though I must admit, I thoroughly enjoyed the “movie mindset” while shooting 4k and the quality of the final videos was very impressive to me. Again, given my lack of expertise, I’m unable to make any kind of comparison or reliable judgement even though I was impressed.
The High Frame Rate mode was the final new feature that I was really looking forward to using. During the Sony preview under controlled conditions it was hugely fun and since then I have been trying to think of as many other speedy scenarios I could shoot at 1000fps! HFR mode allows three different slow-motion speeds, 250fp – 500fps – 1000fps. Although they are advertised as producing 1080p HD output, this is only partially true; each mood shoots at lower than HD resolution then upscales to produce an HD output file.
250fps generates the nearest to HD at 1824×1026 resolution but this drops noticeably to 1676×566 for 500fps and even more dramatically to 1136×284 at 1000fps. For the latter, it significantly impacts scene framing and the crop-effect is very visible. As you can see from the recorded resolutions, the 250fps option is by far the closest to true 1080p and this bears out in the results. 250fps looks a LOT nicer even though the recorded action is slower. 500fps isn’t too bad but I found I either wanted the high quality of 250fps or the fascinating effects visible at 1000fps despite the generally poor quality. 500fps was a middle ground I didn’t find overly useful as it filled neither role I wanted.
The HFR mode does also have some bugs unfortunately. The first and potentially most irritating is that the sensor can overheat and shut the camera down. I first encountered this shooting outdoors here in Singapore and wondered if the ambient temperature (about 32 degrees) was to blame but I also encountered the same problem indoors. Extended use of the camera in HFR mode seems to really thrash the sensor, which raises questions about the longevity of the unit (something that’s also a concern for the large A7x-II cameras too). The other problem with HFR mode, and 4k shooting, is that it destroys battery life. Starting with a fully charged battery I shot for just under an hour producing 20-odd videos before the camera was totally exhausted. Perhaps by turning it off between takes this could be extended but it was really disappointing, especially when you can’t be charging a backup battery at the same time because Sony insists on only charging the battery inside the camera itself.
While the overheating and battery life are annoyances, the other bug could be a deal breaker for some. While shooting in HFR mode — especially at 1000fps, I noticed that sometimes the AF of the camera would fail to lock onto a target – the normal AF mode doesn’t work in HFR and without the “green box” flash, you have no way of knowing the camera has focused. You will see in some of the later images shot at 1000fps that they are clearly poorly focused. This happens because even if the camera fails to nail focus it gives no indication and you can’t use the “focus zoom” feature – which IS available in stills mode – to zoom in and see how good the focus is. The rear screen is so small EVERYTHING looks in focus and is of no use. You either trust the camera to focus and wait until you see the final result or focus manually. The problems don’t end here either though. If you focus manually outside of HFR mode then change the camera to HFR then the focusing shifts slightly. The shift is smallest in 250fps mode and by far the worst in 1000fps. The water balloon videos later on show this effect – I prefocused on the pin manually > switched to HFR mode > the camera refocuses but because of the same bug above, you have no visual indication that the focal point has moved.
The only reliable solution is to therefore set HFR mode first, manually focus as best you can using the small rear screen (with no magnified view remember) and shoot. I can’t help but feel like this is an error Sony quality assurance must have simply missed and until you figure out what’s going on it makes HFR shooting an exercise in frustration.
That said, camera bugs aside, once you learn the limitations and quirks it can be very rewarding and addictive shooting high frame rates! It reminded me of the first time I bought a macro lens and I’d hunt around the house for things to “photograph bigger”. With the R100-IV I was constantly on the lookout for things to slow down!
Image Quality
With the RX100 III I took hundreds of photos, including one I was hoping to put into exhibitions let alone feature in a review. That was followed by the first time I’ve ever had a full on memory card failure, losing the entire card. I’ve had physical failures loads of times and those little plastic parts at the top of the card are constantly snapping. But never have I had a full on card failure.
Because of that I have completely overcompensated this time and featured more sample images taken with a review camera than ever before. I hope you enjoy.


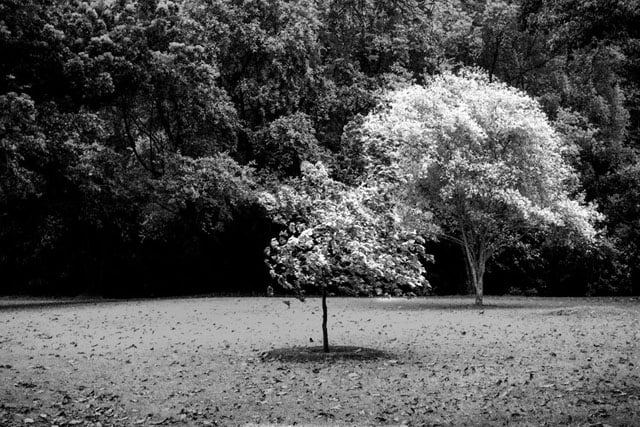
As you can see above, and will continue to see below, image quality from the RX100 IV continues what the RX100 III started. It’s very nice indeed, especially from such a small sensor. Colors and tones are lovely and the dynamic range was particularly impressive. That said the camera does have some limitations.
The first is much more of an edge case. When shooting at 70mm in very contrasty situations I did notice banding in the highlights taking the form of a faint ring. I generally did NOT see this in the final image unless I seriously pushed sliders to make it appear – under normal processing, I never saw it in the final image.
The second is the image noise and it feels like this might be a step backwards from the RX100 III. The image below takes slices of the same scene shot from ISO 100 across to 12,800. By default the camera will limit itself to 6400 and with good reason, 12,800 is absolutely horrid. However, I also found that the camera generally has an issue with noise at ALL levels and even though it’s far better in most cases at ISO 800 and below, even at levels as low as 100 you can see artefacts and issues.


Overall the RX100 IV has continued the trend of very good image quality from a small package. Although I think the noise and higher ISO capability is a small step backwards from the previous model, as you can see above it’s very easy to get good results. If you stick to ISO 800 or later then you should be able to fix any unsightly noise in post-processing.
Video Samples
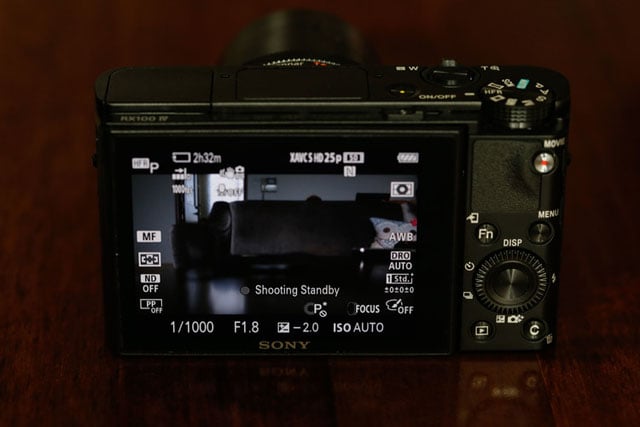
In a first for me, I spent almost as long playing with the video functions of the camera as the regular still images! The first video is arguably my favorite of all videos I shot during my time with the RX100 IV. Setting up a burning candle, I used the built-in ND filter and set -2 exposure compensation to tone down the flame highlight. It took a few attempts but this was the best one showing the flame change and the coiling smoke afterwards.
All three of the videos below have been tweaked using YouTube’s tools to bring out a little more color and detail.
The next video is the same scene but shot at 500fps. Although the slower-motion reveals more about how the flame is extinguished and the smoke movement, the loss of quality is quite pronounced.
The final of this series of three videos, this is shot at 1000fps. Already you can see the framing is different (neither the camera nor the candle moved) and the quality loss is very apparent. It’s still very cool watching it in slow-motion but the quality is disappointing.
The next two videos are different angles of a sewing machine in operation. The first is at 250fps and the second is shot at 1000fps. You’ll notice the light flickering in both; this is caused by the spotlight built into the sewing machine itself. Light flickering is a constant problem with most artificially lit scenes and although some lights are better than others, it’s definitely something you’ll need to plan and accomodate in your scenes. I deliberately left it in here to highlight the problem.
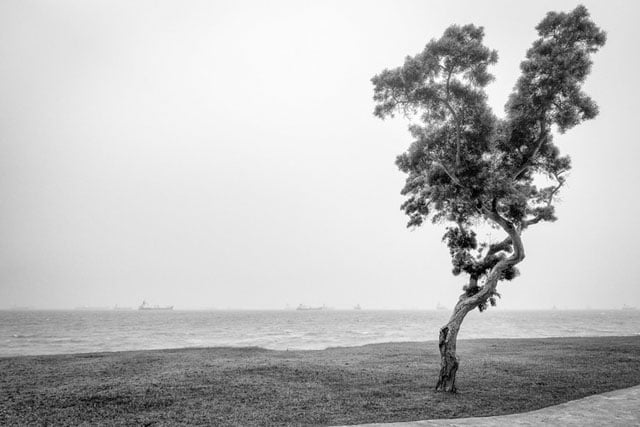
This next video is a 250fps sample of waves, filmed at East Coast Park beach. Unchanged, direct output from camera.
The next video is also from the beach, shot in 4K. Sadly it shows just how bad the junk and pollution situation is in East Coast Park.
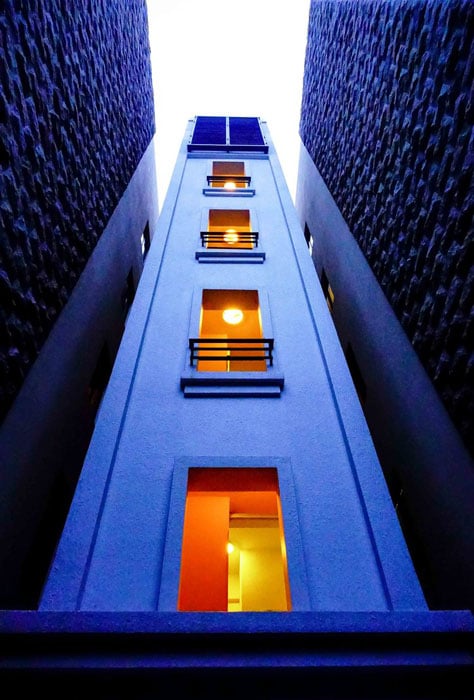
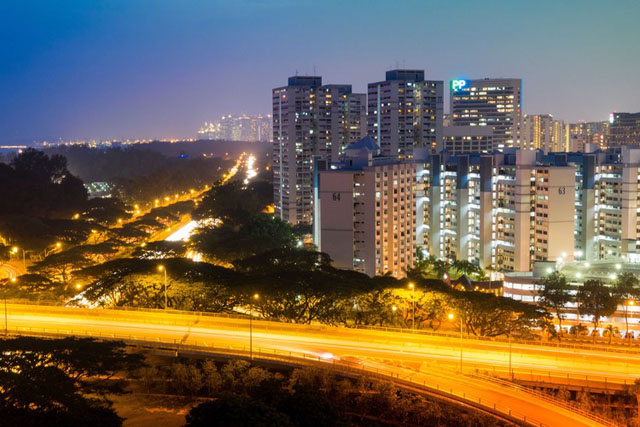
The next scene is also 4K, shot at night overlooking residential blocks in Singapore. This was shot with the camera set to movie mode and all controls except focus were governed by the camera.
This next video shows the bug with the focusing in HFR mode. For this scene I relied on the camera AF. In theory it should have easily focused on the central building but it has failed and the end result is blurry. Very frustrating, even if the double lightning strike is still cool to watch. My advice is to turn MF on, switch to HFR mode then focus manually as best you can on the tiny screen. Not perfect, but the best option.
No slow-motion video review would be complete without more water balloon explosions.
The first is shot at 250fps and the second at 1000fps. The latter shows that in good conditions (bright sunshine) with patient manual focus, 1000fps can produce some good results. It’s just a pain in the backside to setup and refocus between takes!
This one was frustratingly difficult to pull off. I used an entire box of matches to get one scene at 1000fps. I couldn’t get it at 250fps. They are called safety matches because they are so flimsy they snap immediately preventing any form of actual fire creation.
For the final batch of videos, I shot my home cooker hob on a range of settings. Because I was shooting in the dark, I prefocused manually (not an easy task working under a huge extraction hood!). As you will see again the difference between 1000fps and lower frame rates is very noticeable and this feels like I was pushing the camera to the limit.
The first two images are the same scene shot at 1000fps. The first is straight out of camera, the second is tweaked using YouTube to bring out more color and detail.
Shot at 250fps it’s still beautiful to watch the fire leap to life, albeit slower, but the quality is MUCH better. Shot at 24mm.
Conclusion
Pros
- Class leading video capabilities; the new super-fast shutter is groundbreaking
- Very good image quality in most situations
- The pop-up viewfinder continues to be great
Cons
- Extremely expensive for its class and capability
- Noise rendering can be poor, especially at higher ISO values
- Lens still only reaches 70mm focal length
- No touchscreen
- New HFR and fast shutter features highly dependent on very bright lighting conditions
Sony has once again produced a technical marvel. It’s really exciting watching how they are innovating and it’s great for photography. The image quality is good and the video capabilities are fantastic. It’s a great camera.
The headline new features are very exciting on paper and if you can shoot in conditions to take advantage of them they will give you something not seen on any other camera. That said, they still feel immature, more like first-generation “tech demos” which will need further refinement before they can reach their full potential. Take the 1/32,000th second shutter speed for instance – I can currently get more consistent and better quality results freezing the action using off camera flash. Even shooting at large apertures in bright conditions can be achieved using ND filters.
Similarly with the video. 4k recording in such a small body is impressive but if you take your videography seriously you’d opt for an external unit… and if you do that, might you be more serious and opt for a more capable camera? Likewise with the high frame rate features, they’re fun to use but aren’t serious production quality yet.
With the still photography side of the camera pretty much the same as the RX100 III, the Mark 4 seems to be aimed much more at the videographer. If you are primarily a photographer and are wondering if you should upgrade from III to IV, I would probably advise not. If you are looking to get into video and want a good quality compact, then it’s a lot easier to recommend. However the biggest problem with this camera is one I have not mentioned yet. The price. High-end compacts are most commonly used as backups for larger, more capable and more expensive cameras but with this camera retailing for $1,000, it’s more expensive than a larger-sensored, more-versatile entry-level DSLR. Videographers might still opt for the RX100 IV in that kind of comparison, but for stills the RX100 IV would not compete.
If money is no object and you will make use of the video features, the RX100 IV is the best high-end compact around.
About the author: David Candlish is a photographer from the UK and currently living in Singapore. You can connect with him through his website, Twitter, Instagram, and Flickr. This article was also published here.