How to Photograph Lightning, From Start to Finish
Now that storm season for North America is either already here (or coming soon), I thought it would be a good time to write a tutorial on how to photograph lightning.
Lightning is a very elusive beast that many seem to struggle with, so read on, and by the end you will be able to hunt and capture it like a pro!
- Camera
- Tripod
- Remote shutter control (optional)
- Camera rain protection (see previous tutorial here)
Safety When Shooting
Obligatory: first and foremost is your safety — lighting is dangerous! Not only lighting but the heavy rain and hail that comes with it, so make sure you are aware and prepared! Environment Canada has a good write-up regarding lightning safety — make sure you read it before going any farther!
Finding Lightning to Shoot
I am not going to spend a lot of time on this part, as it is a never-ending wormhole of information. If you want to get really in depth here is a PDF I threw together sometime last year from various sources on forecasting storms.
To keep this short and sweet, we will assume that you are going by your local weather forecast. Here are two good sites you should know: Weather Network and Weather Underground. Once you have established that you have a chance at a thunderstorm, Wundermap and ChaserTV are both great websites for tracking the storm’s progress on radar and getting a better idea of where it will end up.
Getting the Shot
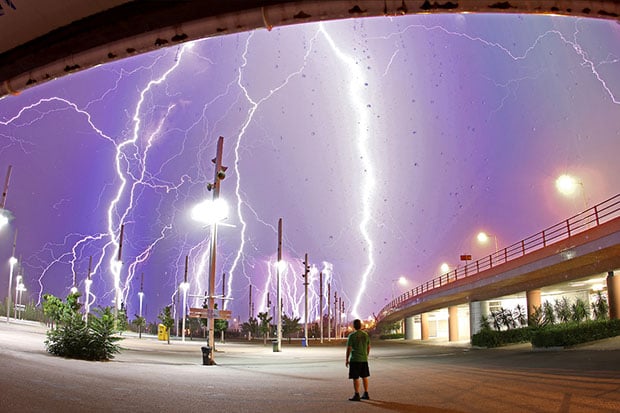
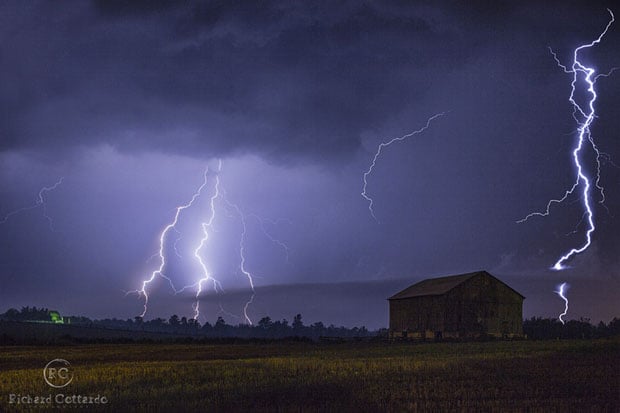
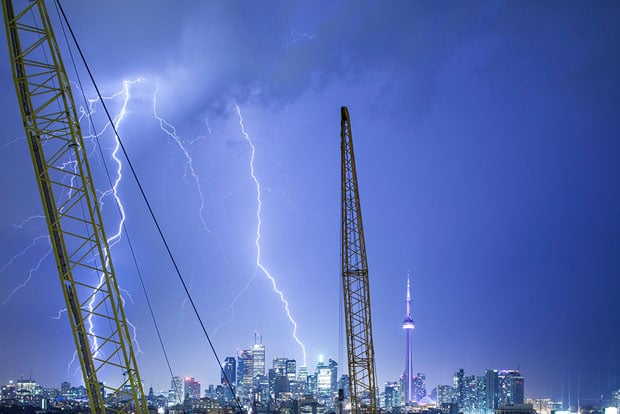
Once you have figured out where the storm is going to be, it is time to set up and get the shot. One thing many people overlook is trying just to get a photo of lightning itself and ignoring the framing of the shot. Once you know where the storm is, make sure you frame a shot that would still look good even without lightning!
This way, once you DO get a lighting strike, the photo will be that much better! It is not advisable to be standing in an open field next to a metal tripod during a thunderstorm; this is where the remote shutter comes into play. Once you have set the camera up, you can set it to shoot continuous frames – then leave it there and wait in a safe location until the storm passes.
A common mistake people make when shooting lightning is exposing for the scene they are shooting instead of exposing for the lightning shot. Shooting lightning has a LOT in common with flash photography, where the majority of the light in your photo will be coming from the strike itself and not from any ambient light sources.
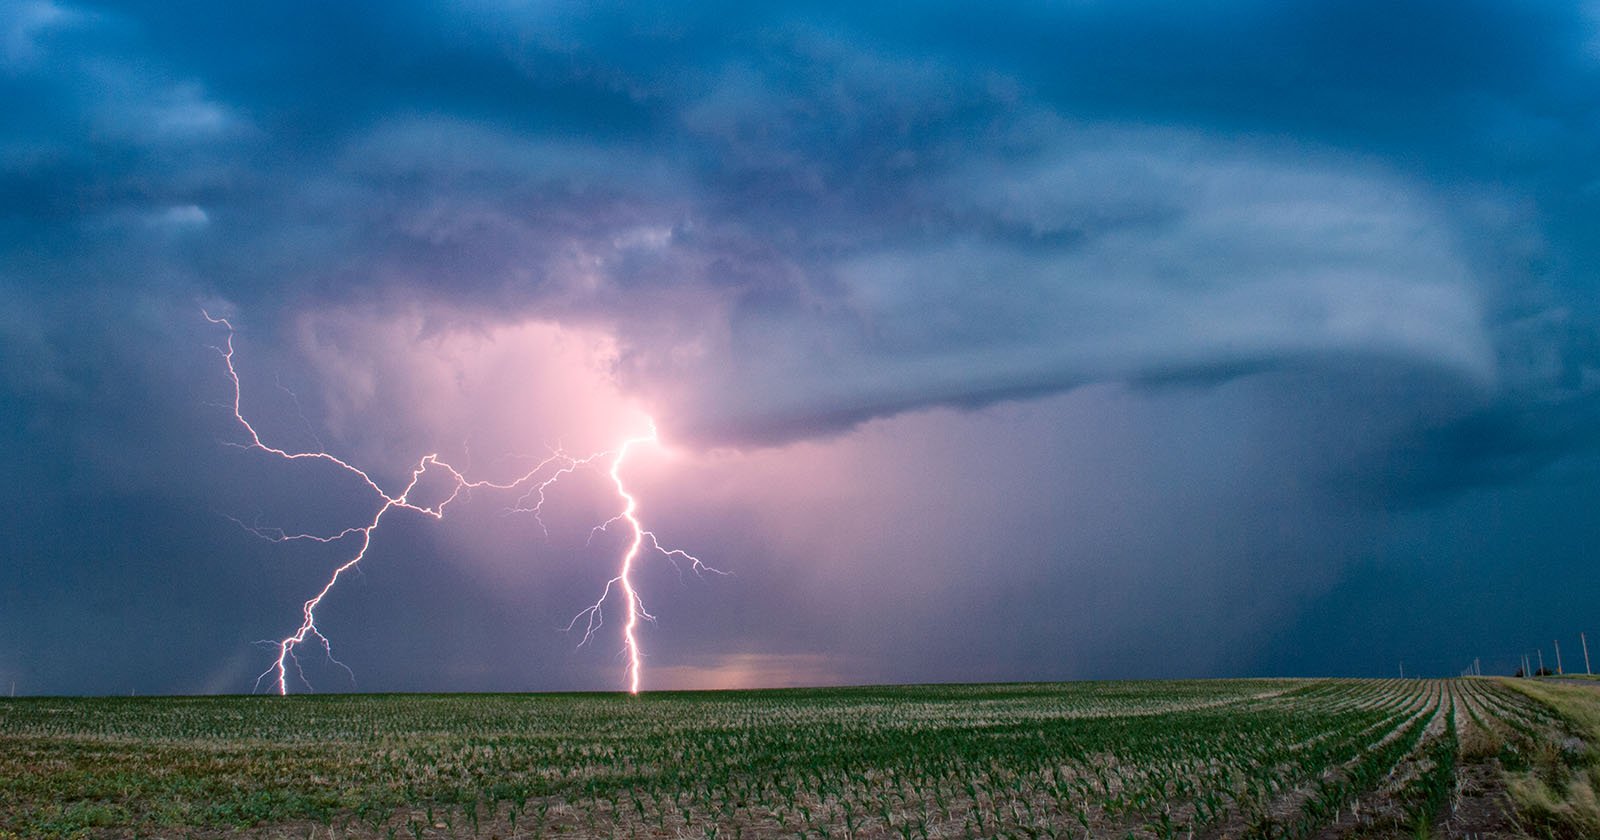
You will want to set an exposure time for between 20 and 30 seconds, for which a normal shot without lightning will be totally black. The settings I find that usually work for me are around f/7, ISO100 and 30s for lighting that is very powerful and very close, down to about f/5, ISO100 and 30s for lighting that is a bit farther off in the distance.
You will need to take a few test shots to really dial in on the right settings. All of the photos shown in this tutorial were taken at around f/7, ISO100 and 30s so this is really a great starting point.
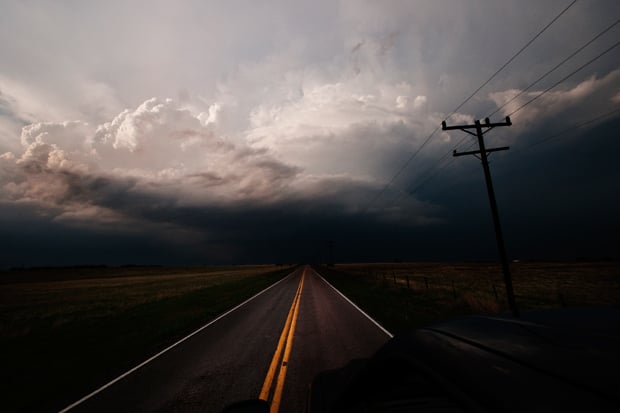
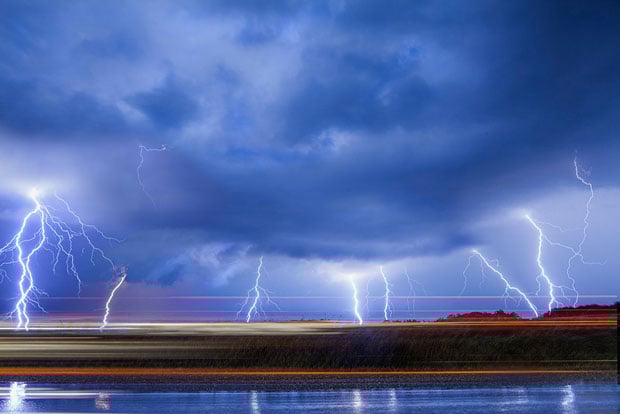
You will want to be using the widest lens available to you, and when framing the shot keep the horizon as low as possible in the photo while maintaining an interesting scene – as most lightning happens in the sky…
As well as setting the exposure manually, focusing manually is also a must! Take a few test shots focusing on something far off in the distance until you have it nice, sharp and in focus – this should get you somewhere near the hyperfocal distance of your lens and allow your lighting strikes to be in focus.
Editing Your Lightning Photo(s)
Do your self a favor, if you have never shot a photo using your camera’s RAW mode before, do it now! Because of the unpredictability of lightning strike intensity, photos will usually require at least some work in post to get them looking really good. Some strikes may be more powerful than others, some weaker, and the camera will rarely ever set the proper white balance for lighting photos. If you are shooting JPEGs, it is much more difficult and not as effective to alter the photos later.
The editing outlined here will be assuming either the use of Adobe Lightroom or Adobe Camera Raw for Photoshop.
This photo illustrates what you would end up with if you had just shot JPEG instead of RAW with no editing – straight out of the camera. The white balance is way too warm and the lighting doesn’t “pop” as much as it could:
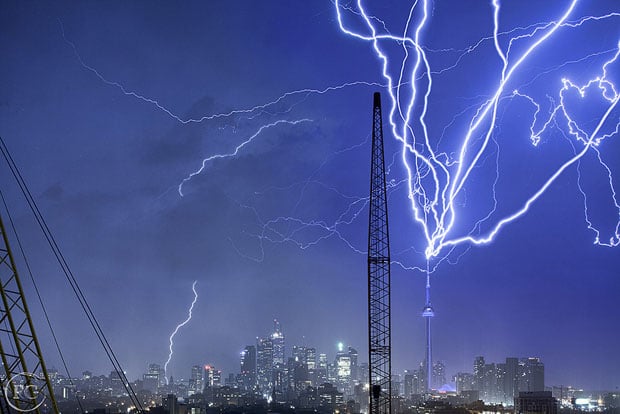
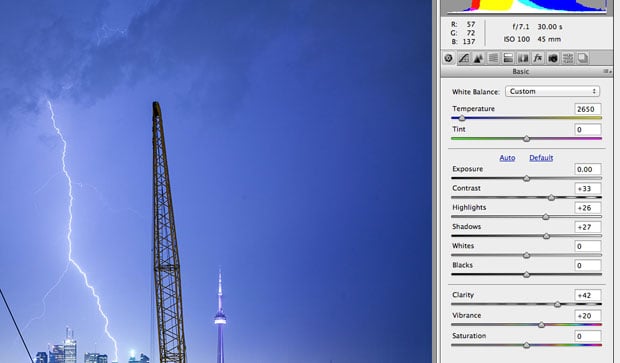
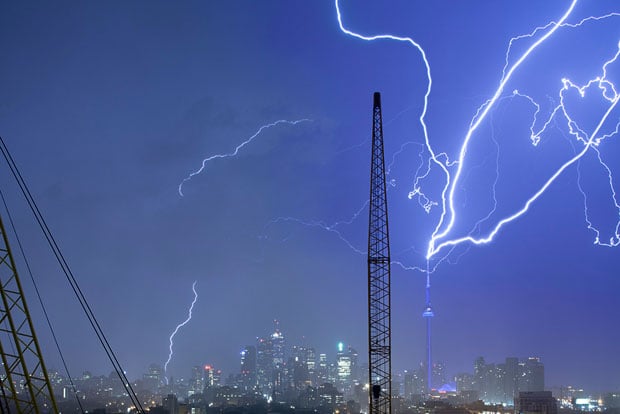
Here is the same image after editing. I have attached a screenshot from Adobe Camera Raw below it to illustrate the changes that have been made. One rule of thumb: Lightning ALWAYS looks better with a very “cool” white balance. Something about blue hues and lightning always looks great!
Now here is the same image after a little bit of tweaking in Adobe Camera Raw. Lightroom users can still make the same changes.
The photo looks a lot more vibrant, and the lightning really stands out now. You can see the changes made below. White balance has been pulled way down, Contrast, Highlights, Shadows, Clarity, and Vibrance have all been bumped up to help make the photo really pop.
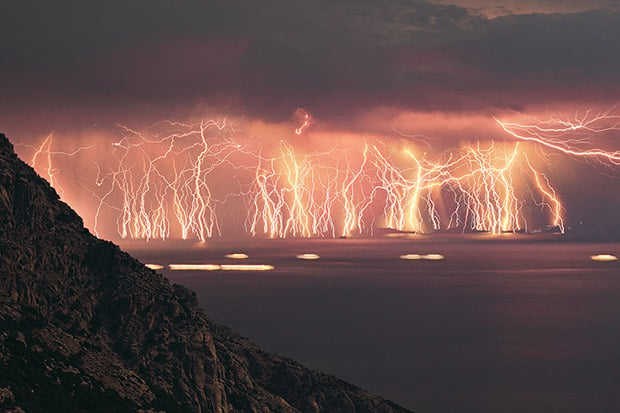
Stacking Your Lightning Shots
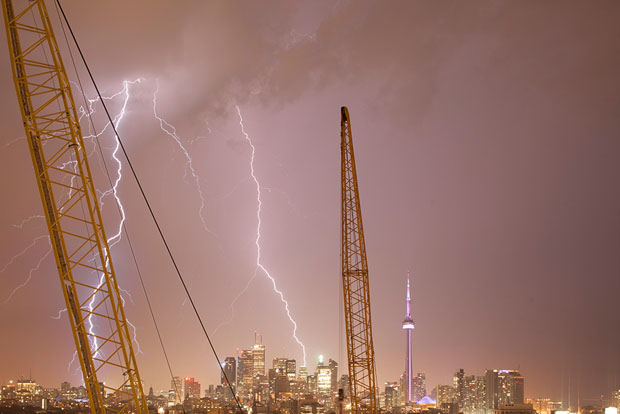
Sometimes if you get lucky, you will have a very active storm and be able to capture a number of lightning strikes from the same vantage point. If this is the case, and you want to really highlight the intensity of the storm, you can “stack” all these images in Photoshop to show every lightning strike in the same photo. To this, you will need Adobe Bridge and Adobe Photoshop.
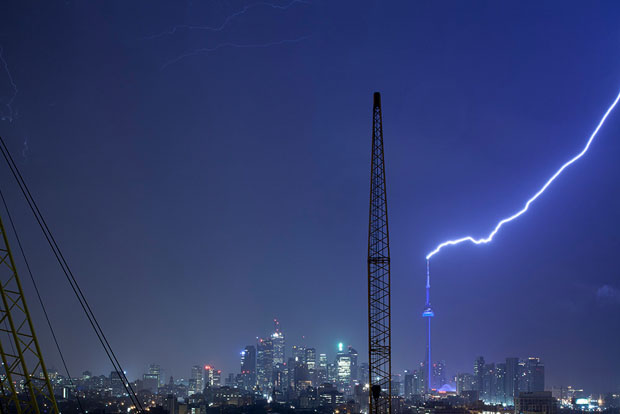
If you don’t have Bridge, it is still possible! You just need to open all the photos and copy and paste them on top of each other; Bridge just automates this process. We will be doing this method using the four photos below.


In Bridge:
- Import all your photos into Adobe Bridge
- Open one photo into adobe RAW through Bridge and edit it to your liking
- Select all your photos, right click and select “Develop Settings > Previous Conversion” this will synchronize the editing across all your photos
- With all your photos selected, click: “Tools > Photoshop > Load files into Photoshop layers”. Depending on how many photos you have, this step can take quite awhile.
- Once they are loaded, we can move over to working in Photoshop (this is where the fun begins)
In Photoshop:
Bridge will have made you a nice large file with many different layers containing all your photos.
- Make sure none of the layers are visible except for the bottom layer by clicking the small eye icon on each layer
- Starting from the bottom layer, click on “layer blending options” and select “lighten” This will blend the layers together keeping only the lightest areas of the photo
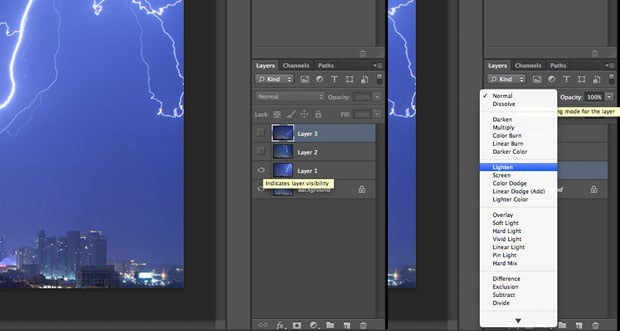
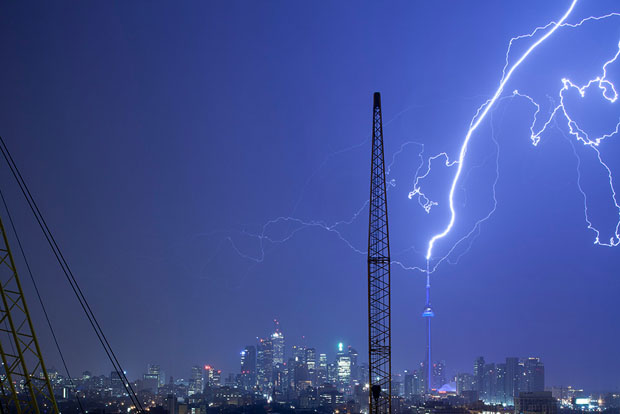
- Continue selecting each layer and change the blending mode to “Lighten”. As you continue changing each layer to “Lighten, you will see more and more lightning strikes start to appear.
Your photo is now done! You can flatten the image and save it in whatever format you like. I hope you found this tutorial useful!
About the author: Richard Gottardo is a wedding photographer and storm chaser based out of Toronto, Canada. Visit his website here. This article originally appeared here.