How to Customize the ‘Before’ View in Lightroom
In Lightroom, the backslash key can be used in the Develop module to toggle the Before/After view. But you can actually do more: here’s a 50-second video that shows you how to customize which “Before” view is shown.
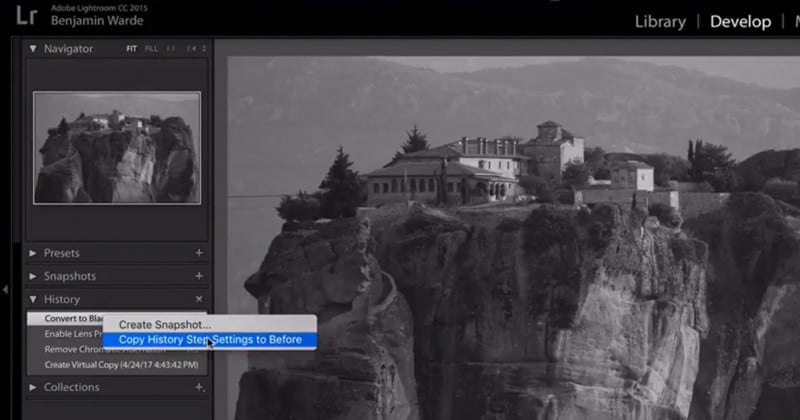
The example used by Lightroom team member Benjamin Warde uses a black and white conversion. Instead of showing the original color image when you press backslash, you can change the “Before” view to show the point in history just after you applied the black and white conversion.
To do this, toggle open the history panel, right-click on the point in history that you want to act as “Before,” and choose Copy History Step Settings to Before.
Voila! Now when you press the backslash, you’ll be comparing your current edit with the point in history you selected instead of the original image.