How to Use a Prism to Capture Creative Wedding Photos
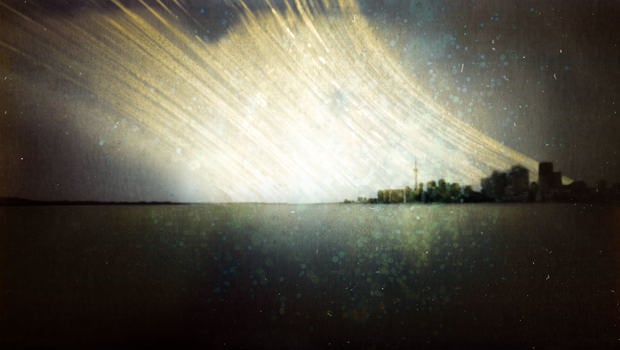
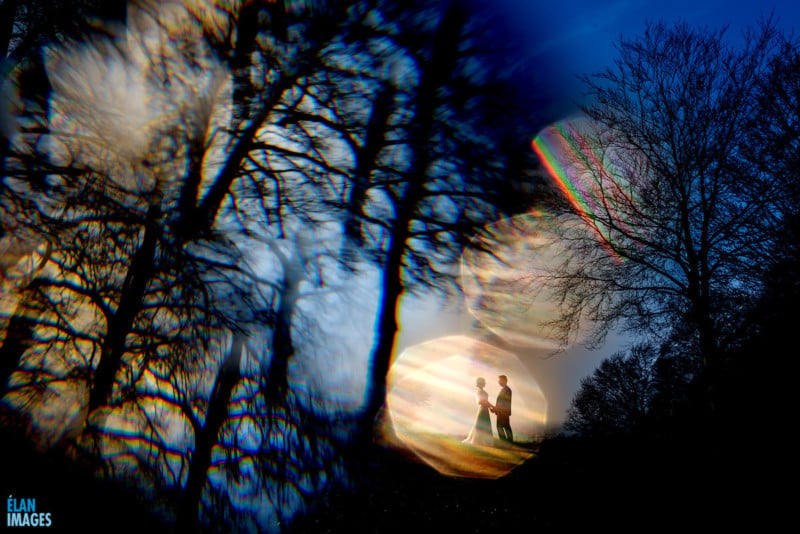
I was delighted this week to see that one of my photographs from a recent wedding was selected as an ‘award winner’ in the ‘All About the Light’ category ISPWP’s quarterly competition. Even more so that the founder, Joe Milton, had selected it as his ‘photo of the day’ yesterday! Here is how I made this image.
Credit for the method I used really has to go to the awesome Erin & Ben Chrisman of Chrisman Studios in Charleston, USA. I joined them on their masterclass during the Nine Dots Gathering last year in London, as I hugely respect both their work and ethos. If you haven’t done already—go and spend some time enjoying their awesome work!
First off, before I get in to the nitty gritty of the stuff you’re after, what lens I used and how I bounce the light around on pieces of glass and crystal, I want to get a few important things clear.
The Right Couple
Finding the right couple for this kind of photograph is critical, and I really can’t stress this enough. These experimental and often vastly abstract photographs aren’t shot in a minute, unless you’re uber-talented, vastly experienced or plain lucky—and I’m none of the above. I have to work hard to achieve these images and very occasionally it just doesn’t work out at all and I move on.
They aren’t everyone’s cup of tea either. Brides will be drawn to their seductiveness, and there’s no denying they look pretty, but they then actually want something completely different for 99% their wedding. When it comes to ‘creative portraits’ on a wedding day I shoot both, and on’t get me wrong, I love the very natural moments as well as these abstract creations. We all work within a tradition and I’m no different—sometimes I use the rules and sometimes I throw them out of the window.
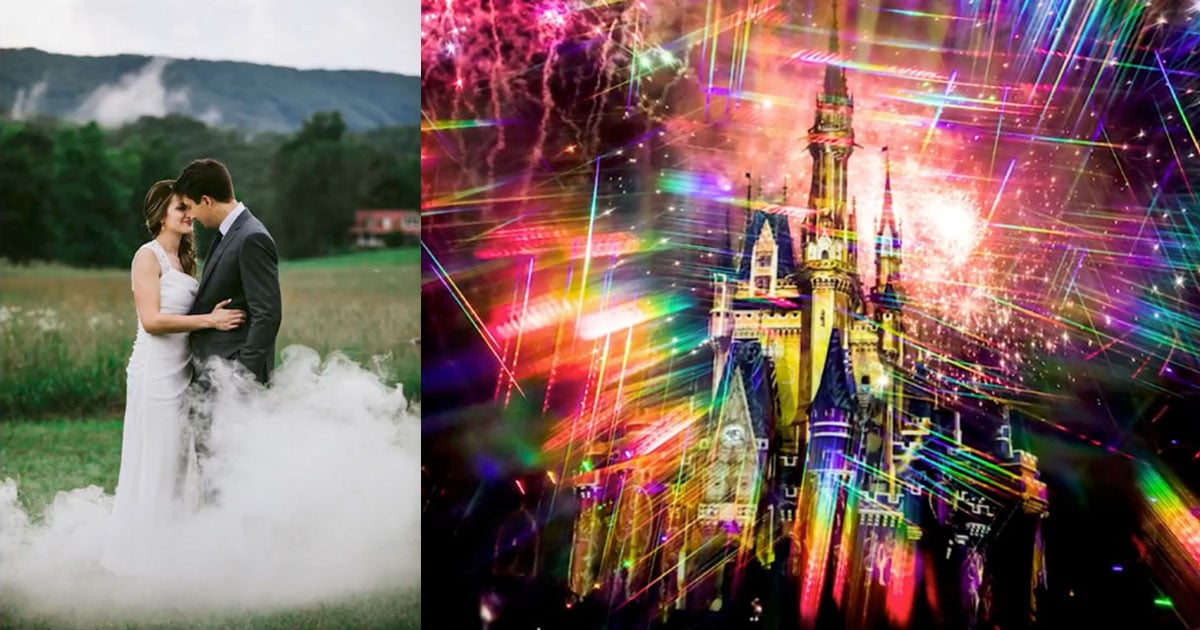
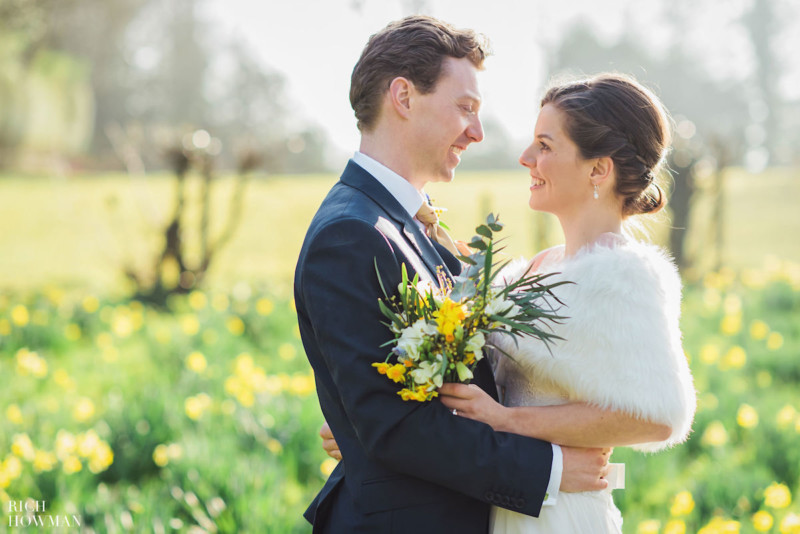
Here is another photograph which was taken at the same wedding at Coombe Lodge within 10 minutes of the photo above. The client gets both styles. The only difference is the position of the couple in relation to the light; in the winning image above I’ve exposed for the strong highlights hitting their faces directly from the sun, in the photo below I’ve positioned them in open shade to give a clean and balanced exposure across their faces.
Be true to yourself
Throwing these photographs in as a gimmick or as a ‘trick in your bag’ is a bit naff. Done badly it’s right up there with selective colour on a black and white image. But don’t get me wrong, I do understand how seductive they are! Like little macaroons lined up in the window at La Duree in Paris, all shouting for attention in their perfectness.
Many years ago I studied for a degree in Fine Art—I trained as a Painter. My paintings were concerned with contradictions and were abstract in nature with small figurative elements to allow the viewer a link to enter them. They were vivid, contrasty, and colour featured strongly. The ‘mark making’ and ‘gesture’ were all really important parts of each work. This is a little of my background and this is part of why I sometimes choose to try and translate this using photography.
I saw something in Erin & Ben’s work which I saw I could use to try and emulate that abstract and painterly touch which I’d used before with a brush and palette knife.
Making Time
I recently invited another brilliant UK photographer along to shoot a wedding with me and we got to the creative portraits part of the day. I’d already explained the detail of what to expect to her the couple before the wedding day. After we’d finished she said to me, “I’d have a heart attack if I tried to do that at a wedding.”
These photographs can take time to make and it’s so important that the couple are briefed and on-board with what I’m trying to achieve for them. I do this well before the wedding day.
Practice with Prisms
A wedding day is never the time to practice your photography. It’s an even less great time to try and learn how to photograph through a prism.
Experimenting with certainties is one thing, practicing on someone else’s wedding is completely another.
I spend a lot of time in playful curiosity at home trying to achieve the impossible and trying out settings for difficult lighting situations, which I can call upon later during a wedding. I also experiment with my camera during a wedding, but never practicing at the expense of the couple.
Technique
Photographing using prisms is pretty simple to explain, but the application of the method is the fiddly bit. It depends entirely on what you’re trying to achieve, so this is just a ‘quick start’ guide and is how I created the photograph Joe selected above.
Start by exposing the subject as you want it. In this photo I’ve used the sun to light both the couple and the prism in one go. The sun is to camera-left shining almost right at the front of the lens. Indoors or in low light, I’d need to light both the subject and the prism (depending on what you want to achieve, of course).
Lighting the prism at the right angle is important or you’ll just get messy light flying everywhere, as it’s a single point light source. LED light panels just don’t work as well as they are actually multiple little light sources. In the photo I’m talking about here, the sun was my single point source.
Using quality glass and crystal prisms is something I’ve found to be really important. The more optically clear the better. Don’t even bother with cheap plastic or low grade glass, it won’t refract and reflect the light well enough.
I work with prime lenses and the prism itself needs to be held really close to the lens. I remove my lens hoods to allow it right up to the surface of the lens. I then make loads of tiny changes to the position of the prism or glass to move the reflections and refractions around on the image surface. Correct aperture is important depending on what you’re trying to achieve. I’m sure there are lots of people out there who can tell me exactly why this works in a much more scientific way, so please do leave a comment at the end if you’ve something helpful to add to this thread.
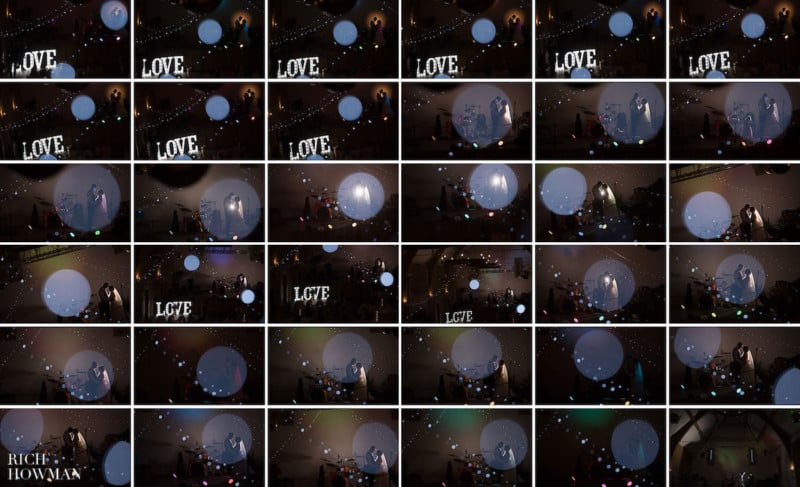
Something I’m often asked is how I manage to position lens flare right over the couple or subject so perfectly in a photograph. Many people think I add it later during post production—I don’t. It’s difficult but not impossible and requires lots of tiny adjustments with the prism and light.
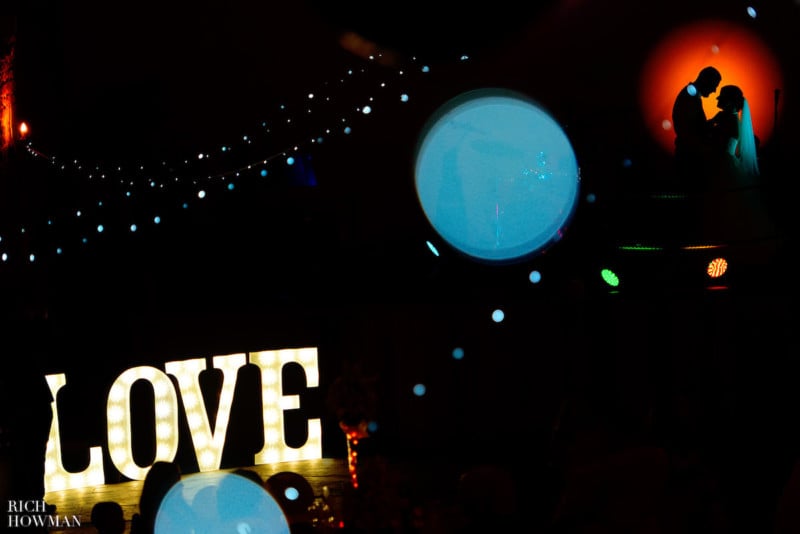
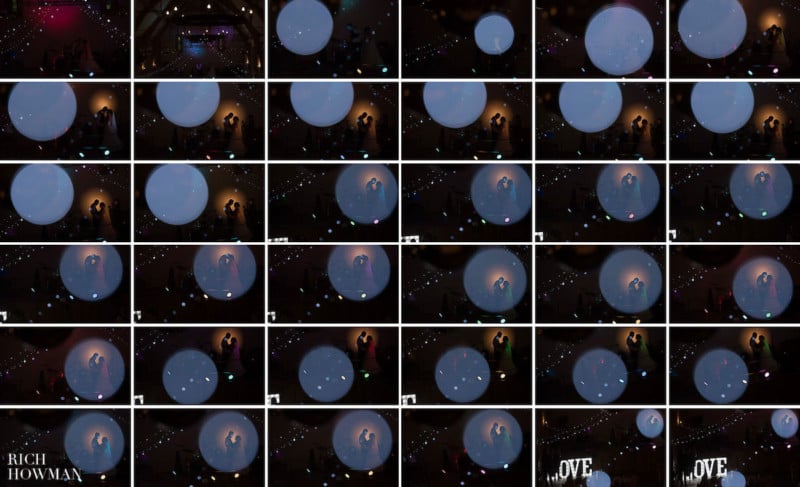
To give an idea of how many adjustments are needed to achieve this the photographs below are SOOC from a recent wedding. The resulting image shown before the contact sheets was the Fearless Photographers ‘Photo of the Day’ recently.
Sometimes when photographing in bright light holding down the ‘depth of field preview’ button will allow you to actually see the flare in the lens and from the prism, which you can then position where you want on the image. Bare in mind that this is all you will see in bright light and you will need to compose the image normally before doing this, remembering where the subject was in the frame.
I did say it can be a fiddly process! This photograph was made by shooting through a fairy light which is a great place to start to learn and experiment before adding prisms.
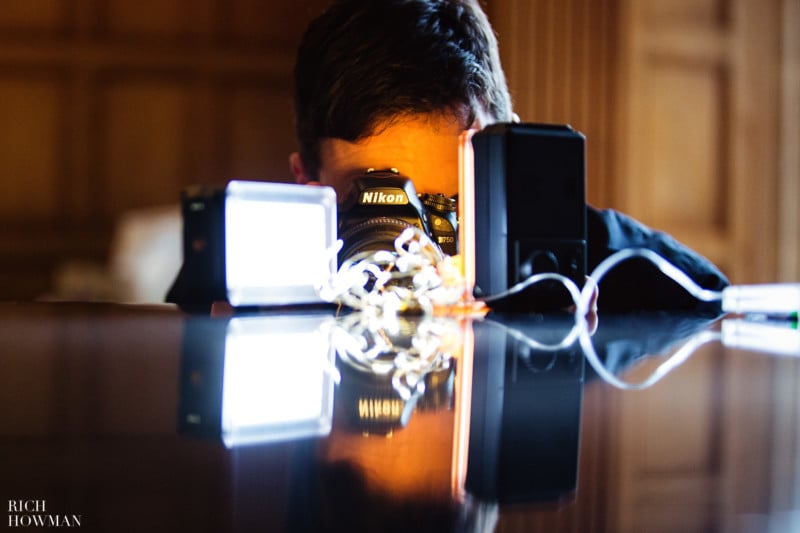
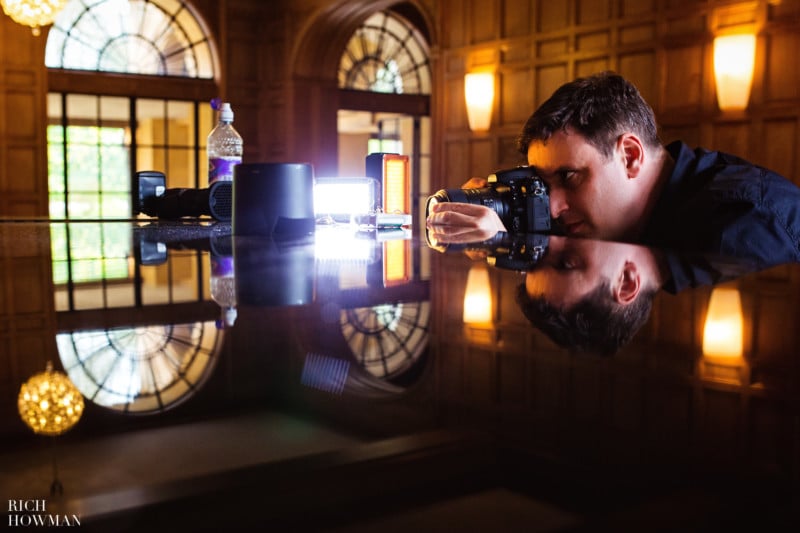
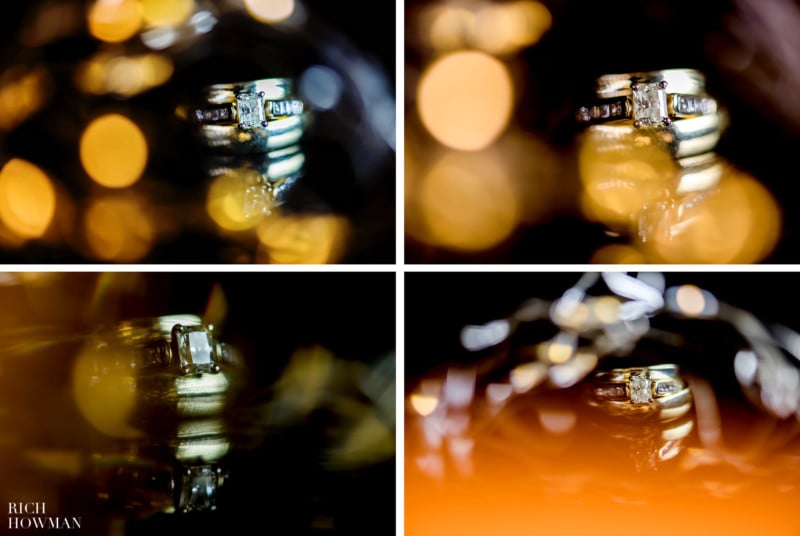
The same process applies for photographing little details too. Here I am at work photographing the wedding rings using a prism. It’s a simple setup using two LED panels and some fairy lights. The photos show it better than I can describe—the final photo is at the end.

About the author: Rich Howman is a Bristol, UK-based wedding photographer and owner of Élan Images. You can see more of his work on his website, Facebook, Instagram, and Twitter. This article was also published here.