How to Use Office and Art Supplies for Product Photos
I do a lot of product photography and there are two places I go to when I need to prepare supplies for a shoot: one is the hardware store to get some tiles and the other is our local bookstore/art/office supply store.
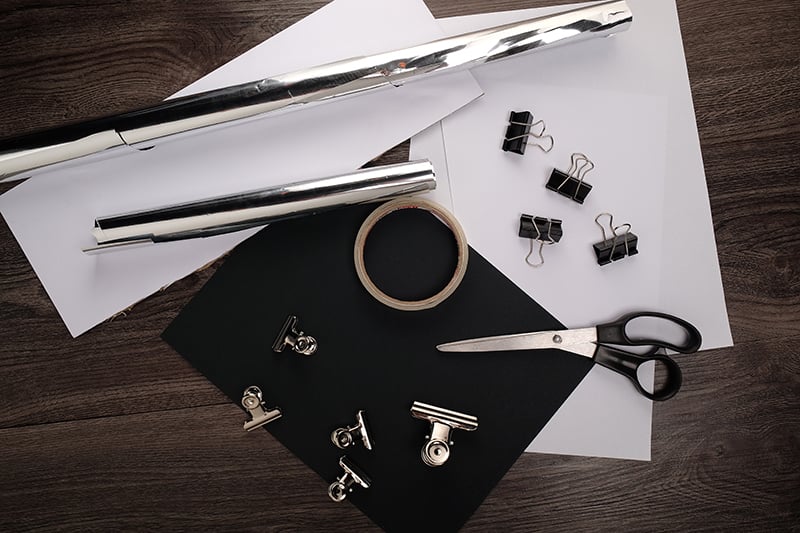
The things I buy from our local store:
- Bond paper
- Illustration board
- Binder clips
- Silver gift wrapping paper
- Tracing Paper
- Slider
Creating Small Reflectors and Fill Cards
The simplest yet most effective material I use for my shoots are my reflectors and fill cards. I have different shapes and sizes of fill cards depending on the shot that I need.
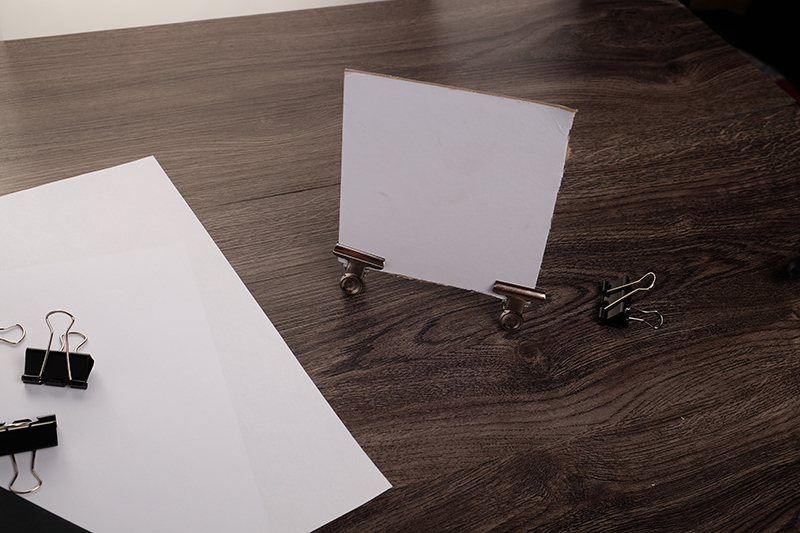
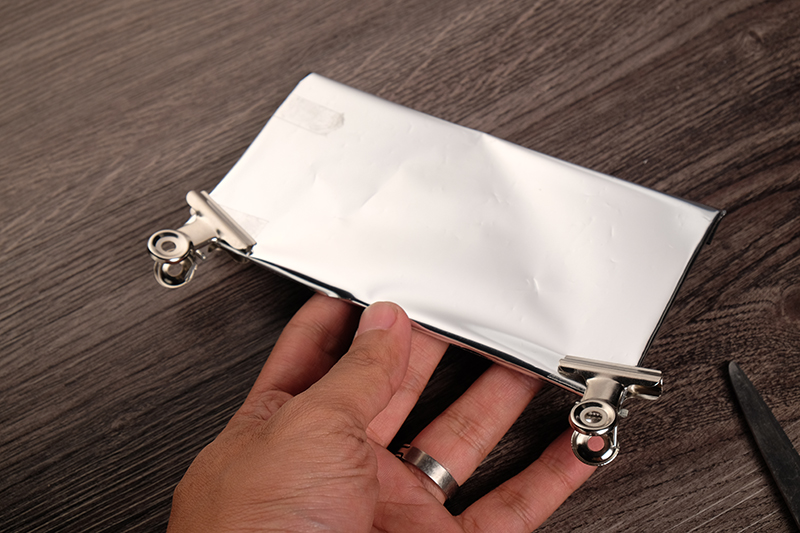
To make a white fill card I start of by cutting a piece of illustration board in the shape and size that I need.
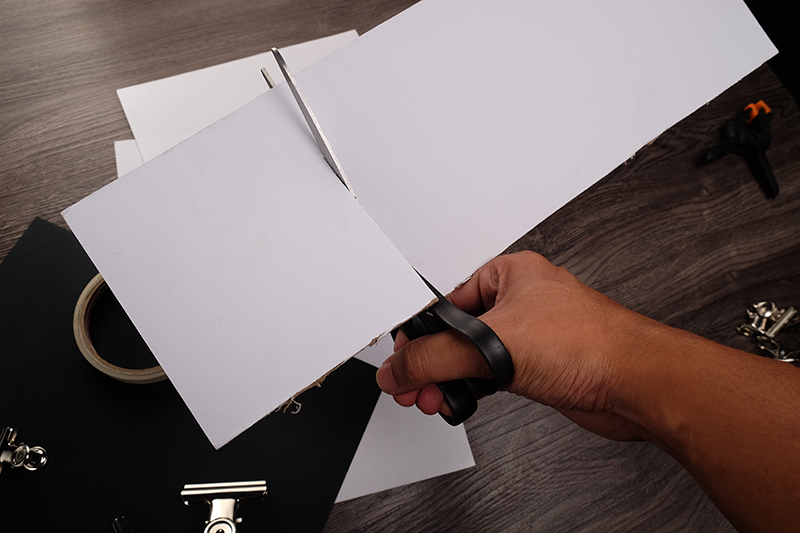
I use the binder clips to make the illustration board stand.
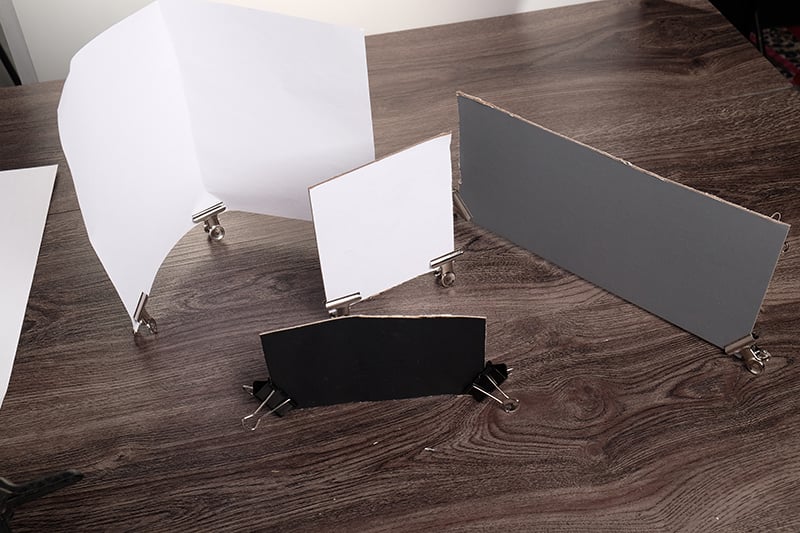
I have different shapes, colors, and sizes of fill cards. I sometimes just use a piece of bond paper if I need the fill card to be bent or curved.
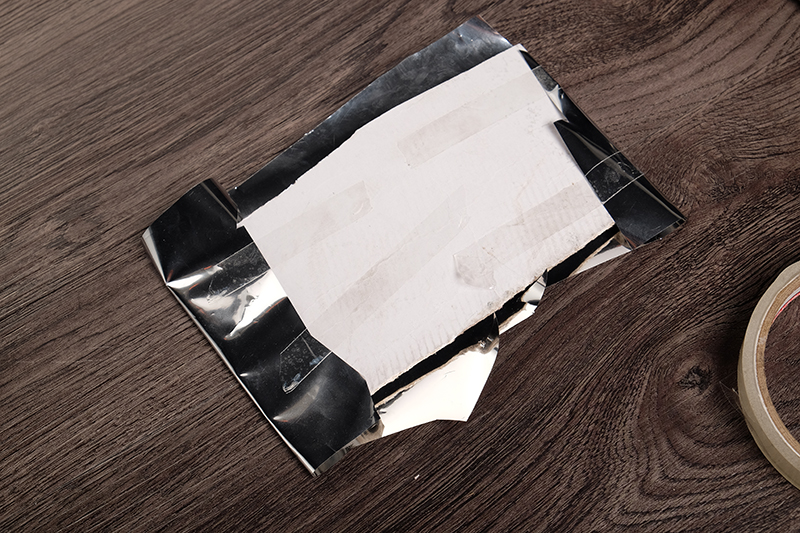
To make the silver reflectors I use a silver wrapping paper (that I also use for The El Bokeh Wall)
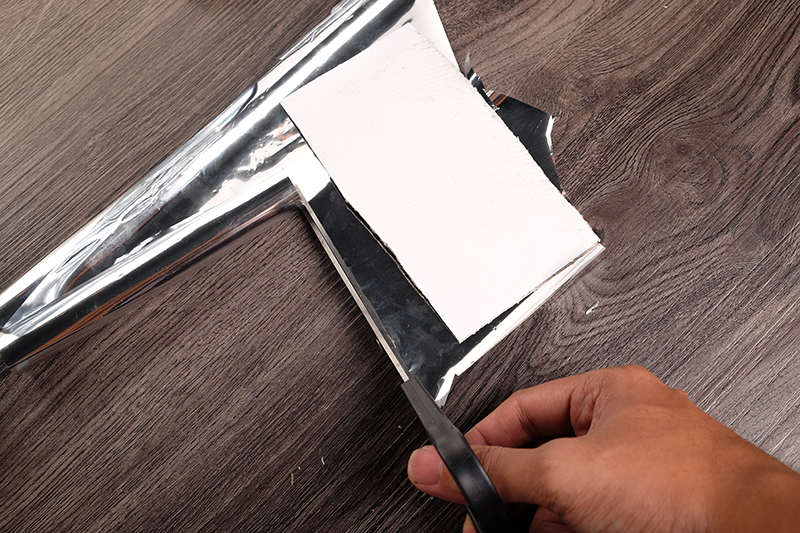
I cut a piece of silver wrapping paper and tape it to my pre-cut illustration board.
It’s advisable to have white, black and silver reflective cards for product photography.
Creating a Scrim
Another good thing to have for product photography is a scrim, in other countries you can buy a big roll of tracing paper and it’s very easy to just roll it over your light stand and your done, but the biggest piece of tracing paper I can buy locally is a 20 by 30 inch piece of paper.
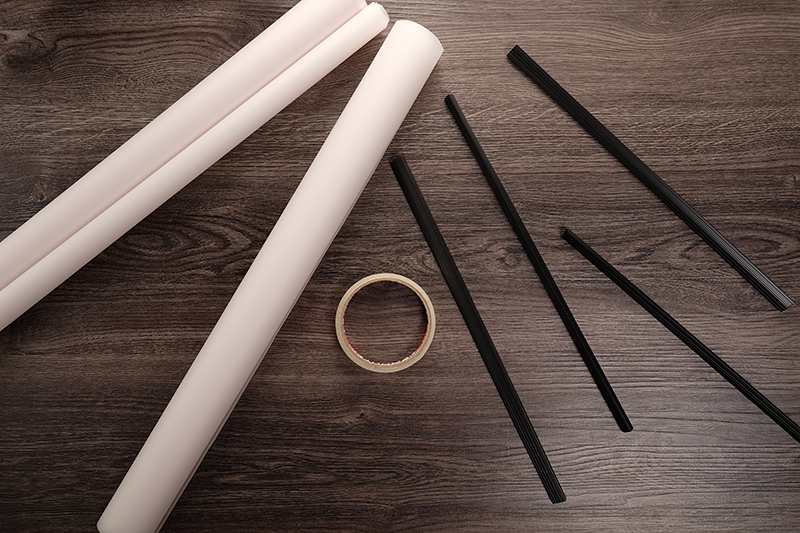
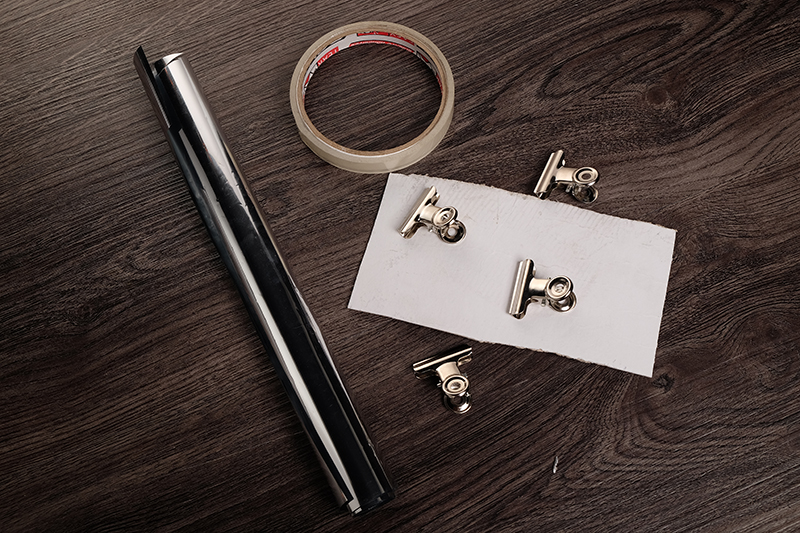
This technique was inspired by a post I saw on Instagram. I start off by attaching the plastic folder slider to both sides of the tracing paper.
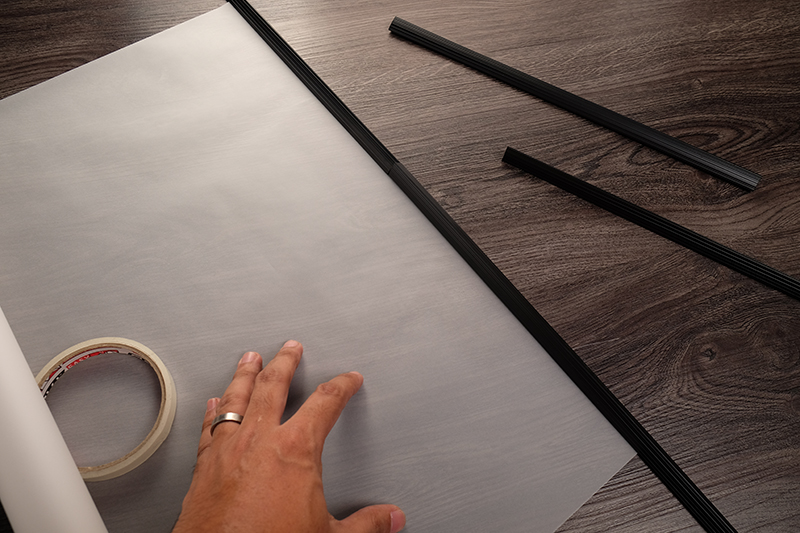
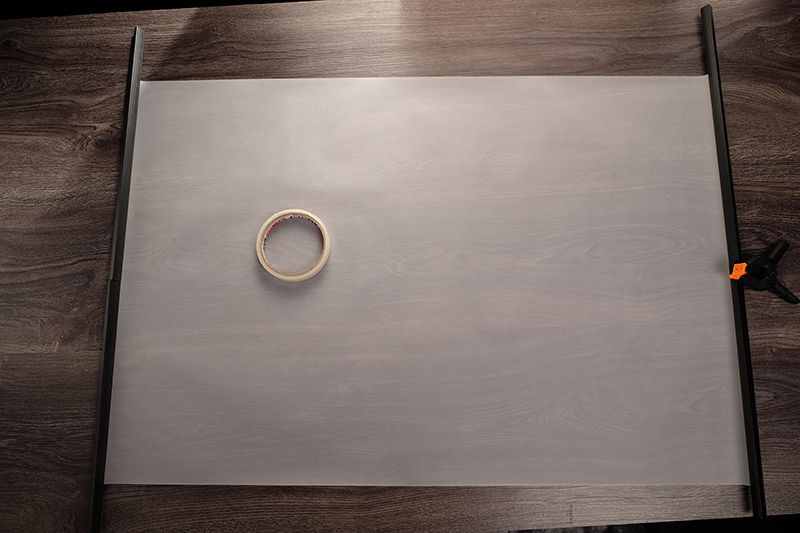
I tape the slider to the tracing paper just to make sure it doesn’t come off.
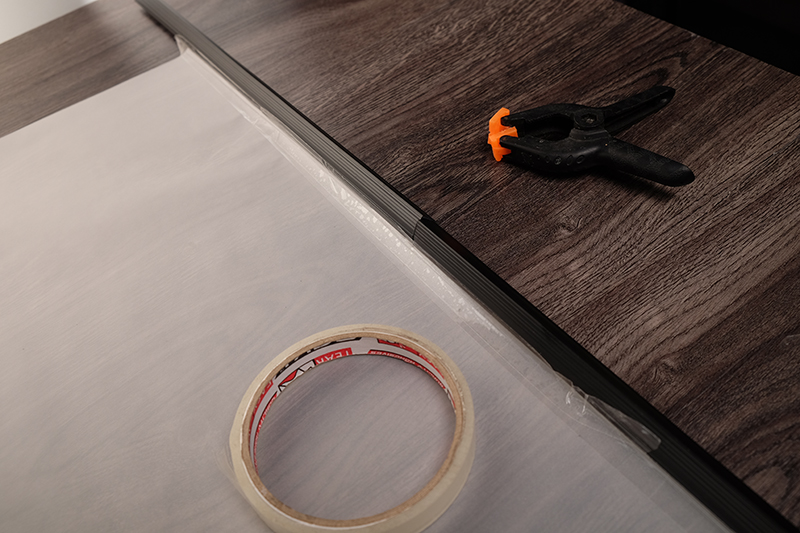
Attach it to your boom stand or C stand then, you have yourself a do-it-yourself scrim. Depending on the thickness of your tracing paper you might want to use two pieces of paper for one scrim.
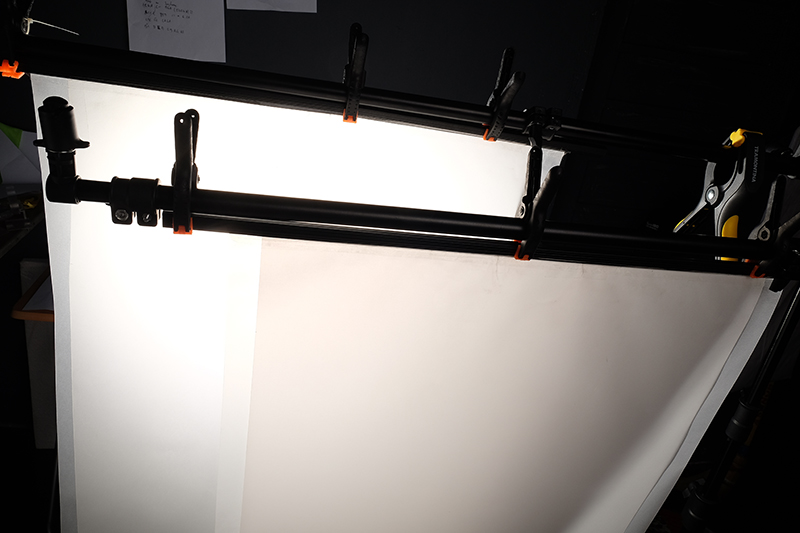
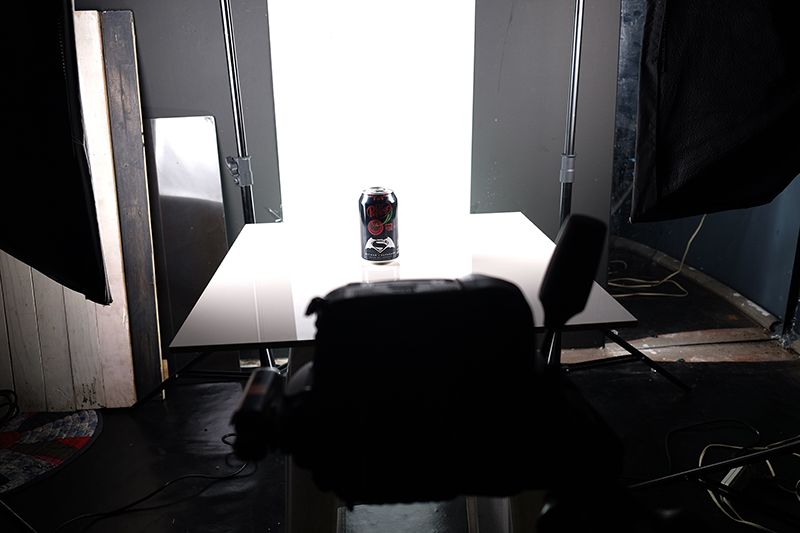
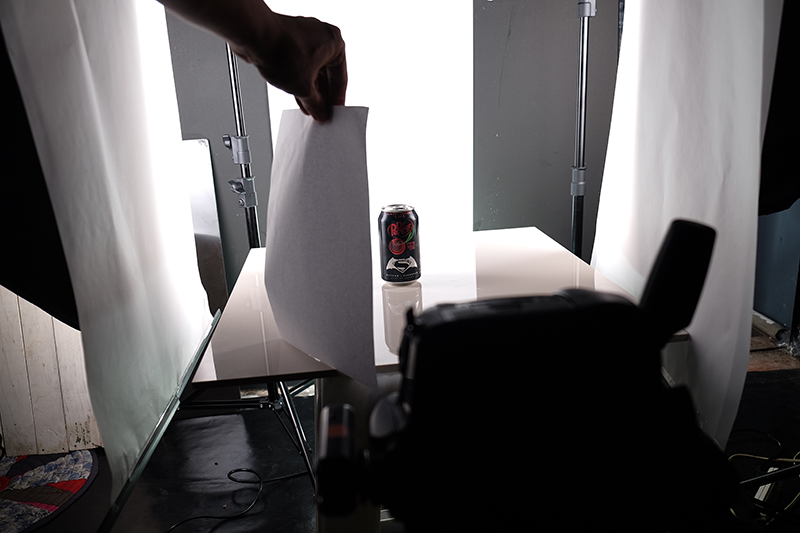
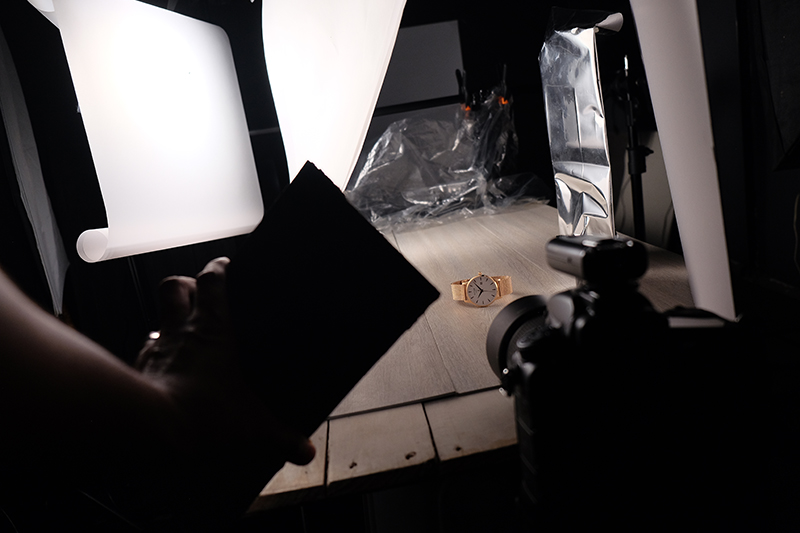
Here is a quick example on how I use my do-it-yourself scrims and fill cards for product photography.
How to Use It
Below are some examples on how I use the things I made and how I shoot some of my product photos. Let’s start with simple on white product photos.
If I want a reflective surface base I always use either my white granite tile for on white shots or black granite tile for my blacks.
I started off with placing an illustration board for my white background. I had a speedlight below the table pointing at the illustration board to make it white.
After that I got a studio strobe with a softbox and placed it on the right side of my subject.

To get some fill on the left side of the light meter I got a white fill board and placed it on the left side to reflect light coming from the back and right of the subject.
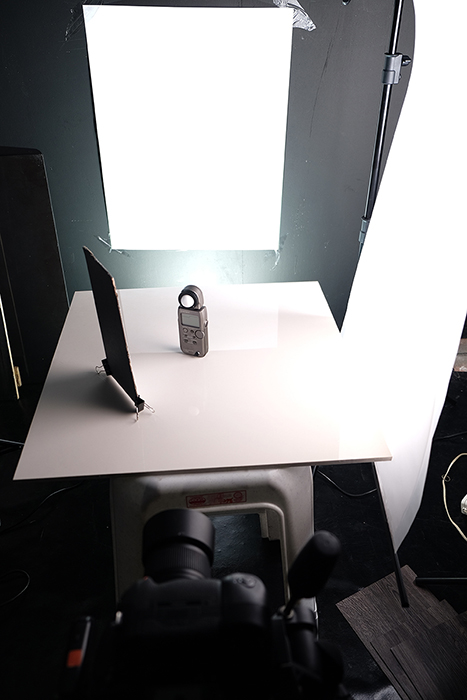
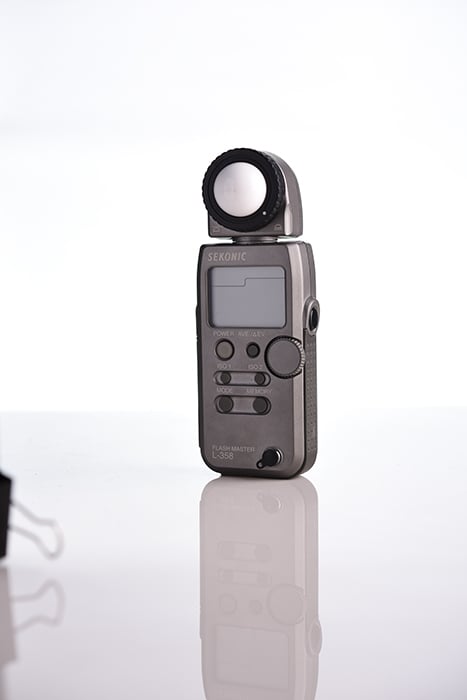
If you notice the left side of the light meter is still dark so I wanted to add some highlight or rim lighting to it. I got a Silver fill card and placed it close and towards the back left of the subject.
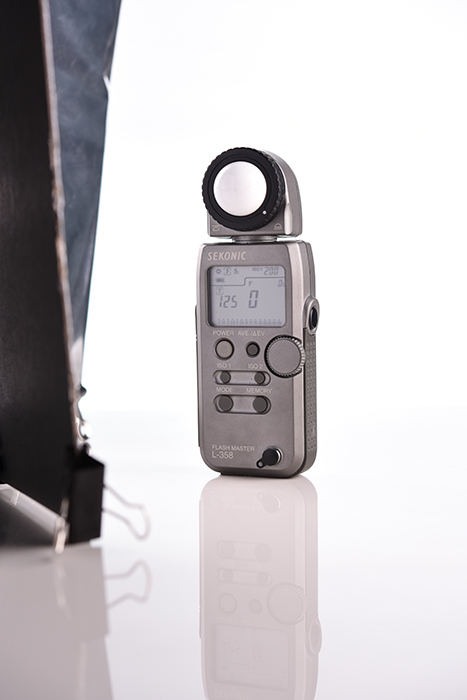
In Photoshop I just used a white brush to clean the background and create a gradient on the reflection of the subject.
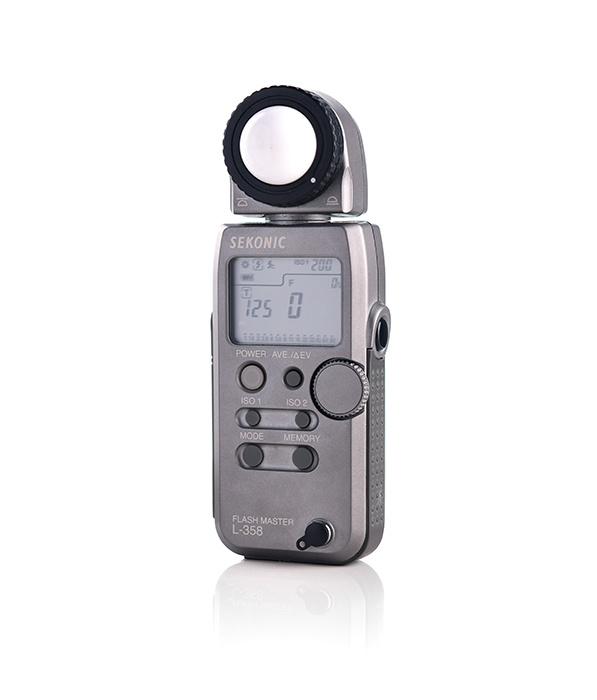
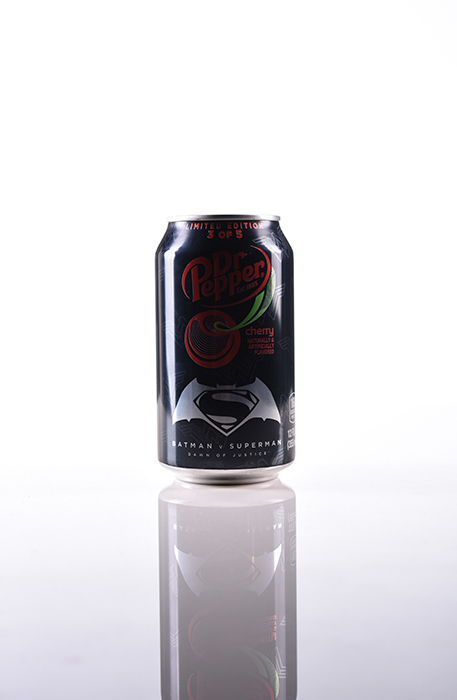
Final Image:
Still using the same setup I got another studio strobe with a softbox and placed it on the left side of the subject.
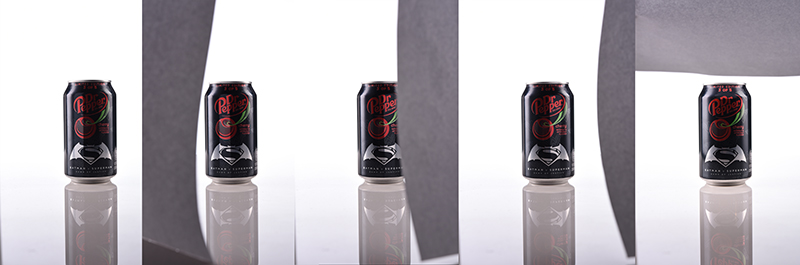
Notice how hard the reflection of the softbox is if you shoot it straight towards your subject. To get more gradient and softer reflections I used a scrim in front of the two softboxes.
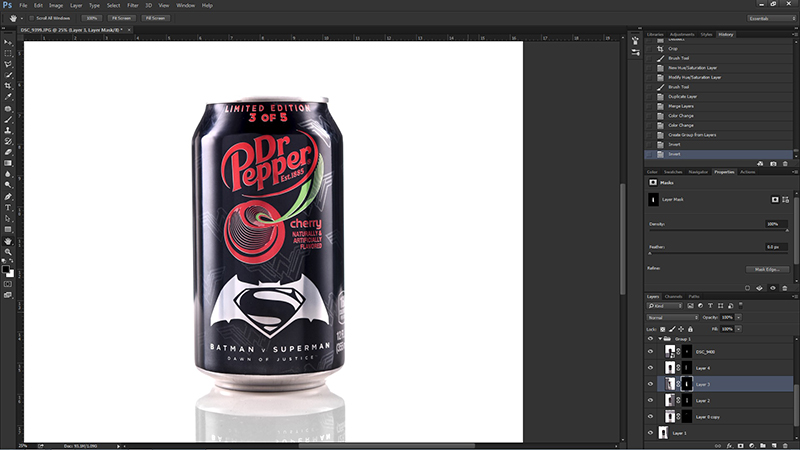
To get some light in front of the can I got a piece of bond paper and took several photos and moved the bond paper into different places until I lit all the labels in front of the can.
In Photoshop I used the layer mask and carefully brushed the parts I wanted lit. I will do a separate article on this method soon.
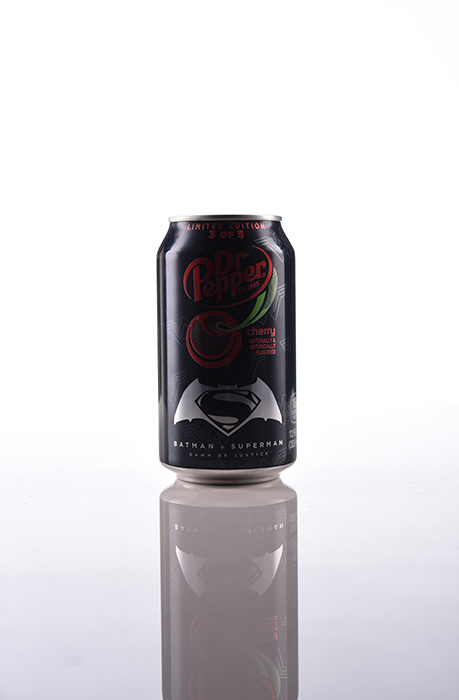
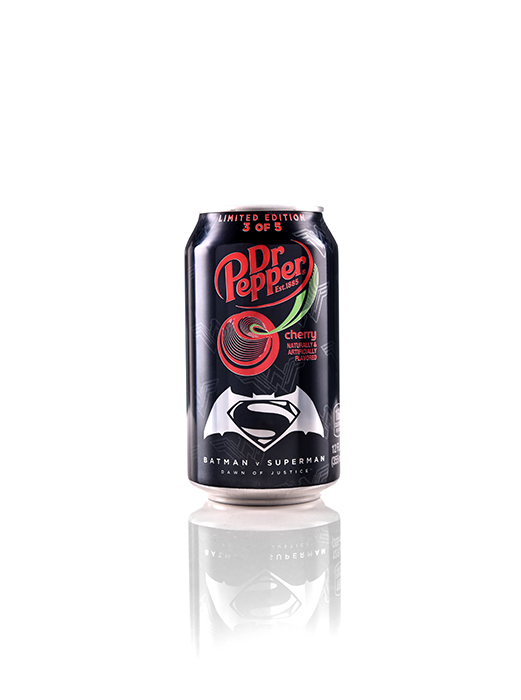
Final result:
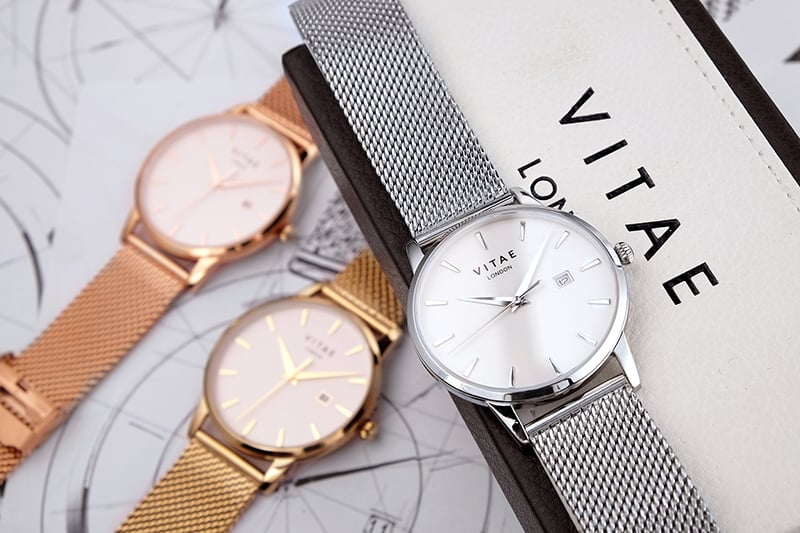
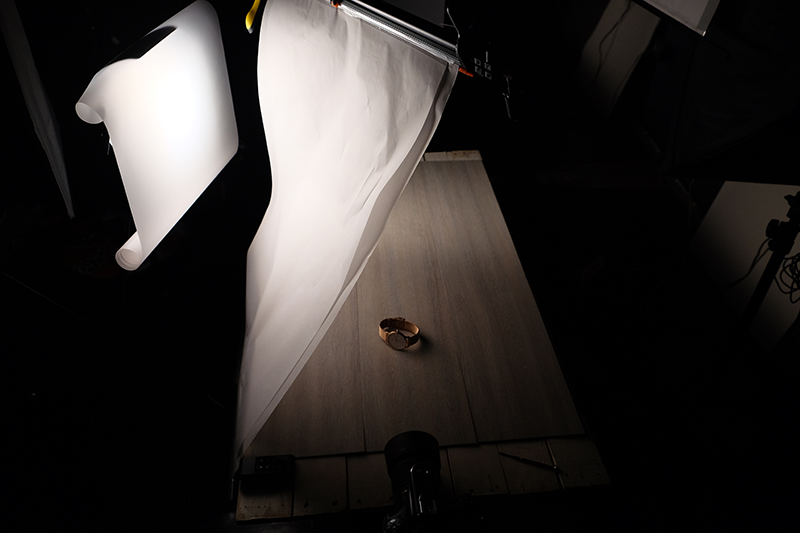
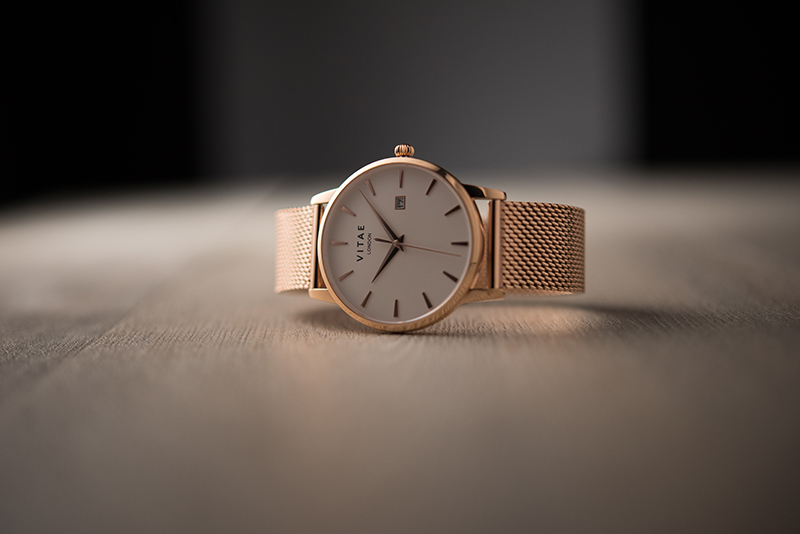
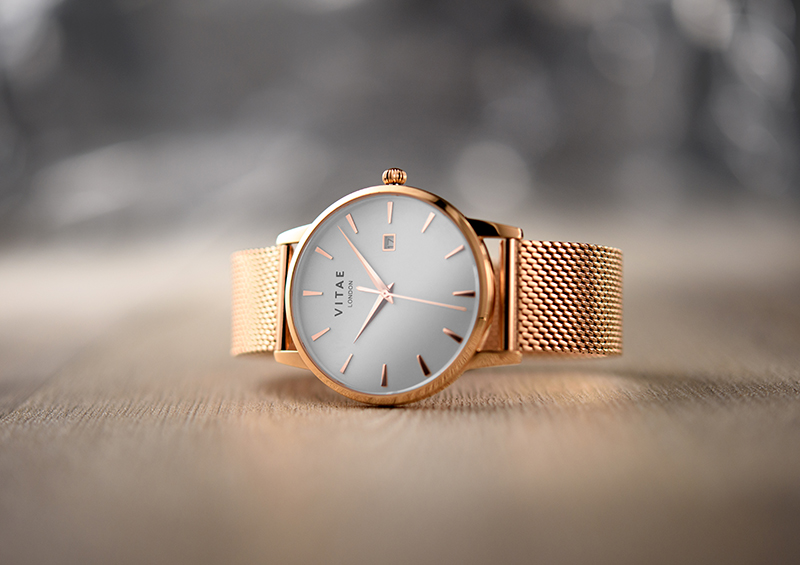
Using LED Video Lights to Shoot a Watch
I started off with a bare Led coming from back left of the subject.
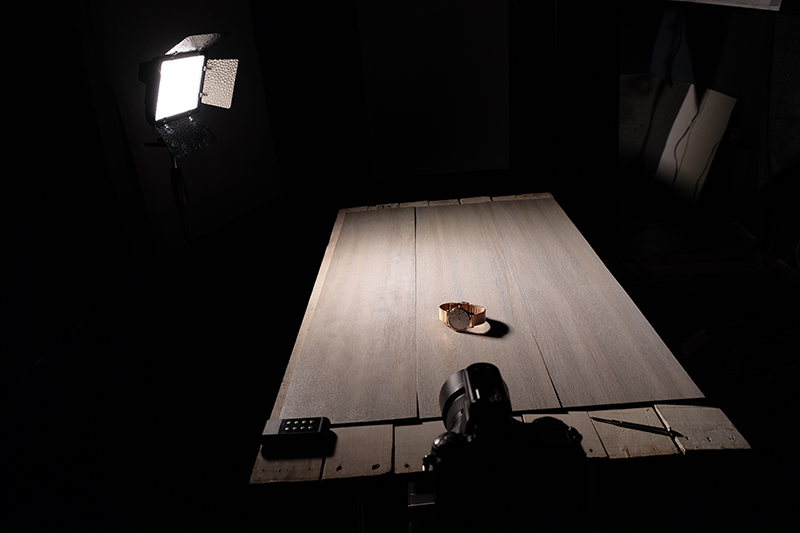
The bare LED video light is a bit harsh so to soften it I used a piece of tracing paper and just placed it in front of the light to create a small softbox. And to diffuse it some more I added the do-it-yourself scrim in front of the LED light.
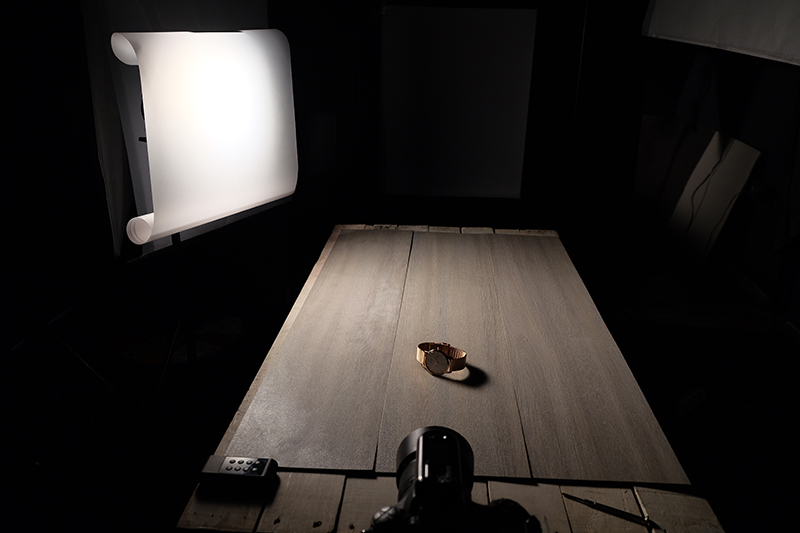

To add some soft fill of light on the right side I got a big piece of illustration board and placed it on the right side of the subject.
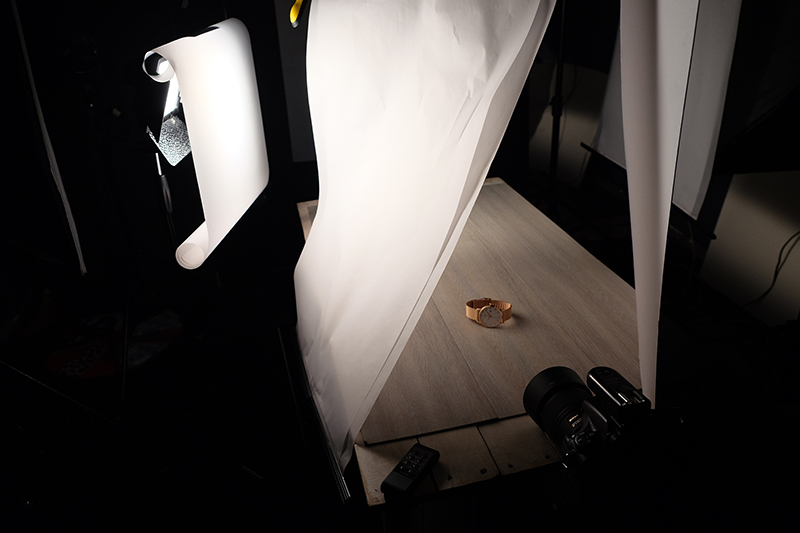
Now to add some highlights on the right I added a small piece of Silver reflective fill card on the right.
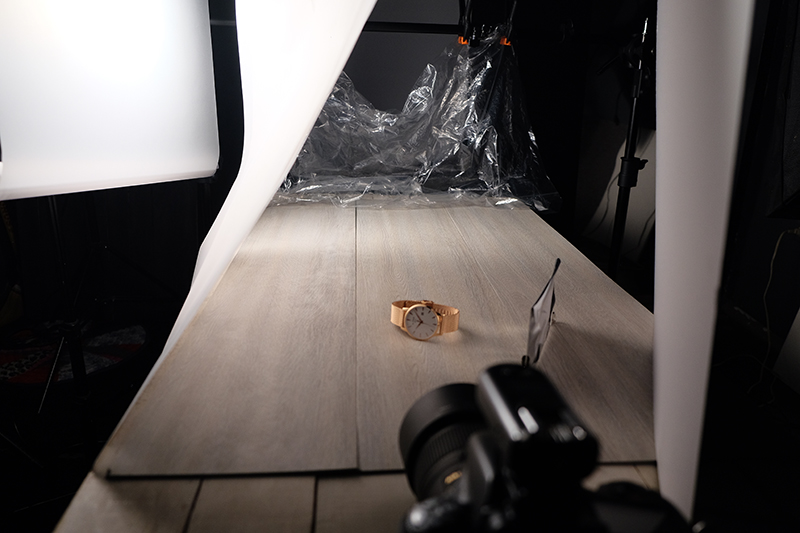
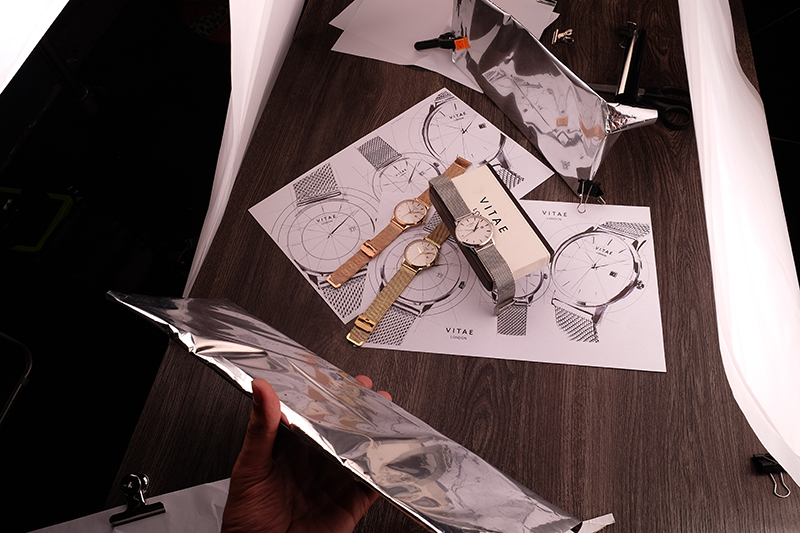
The background was a little bit bare so like my last article where I used a plastic bag for my portrait I got the same plastic bag and placed it in the background.
I also got a white piece of illustration board and hand held it at the right side of the camera to get some highlights on the face of the watch.
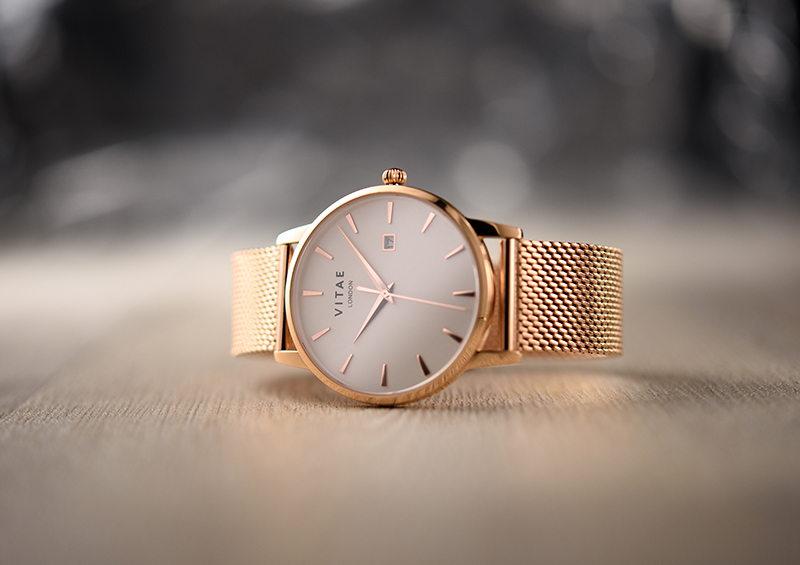
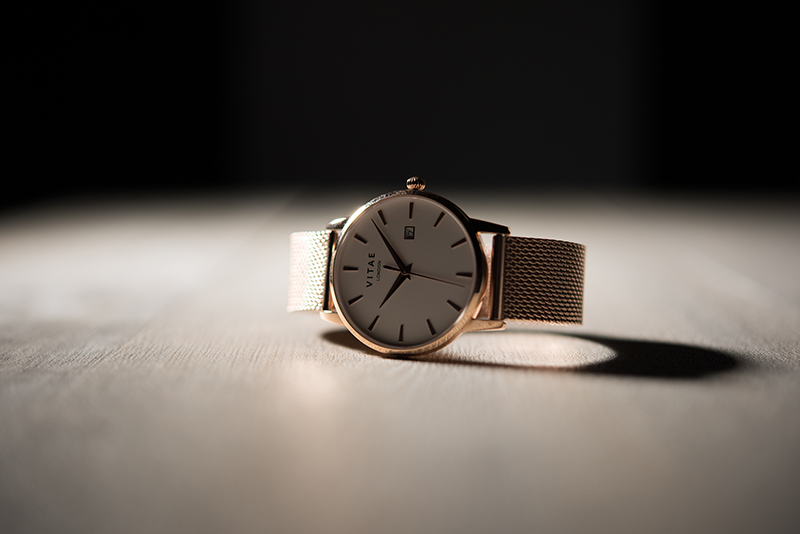
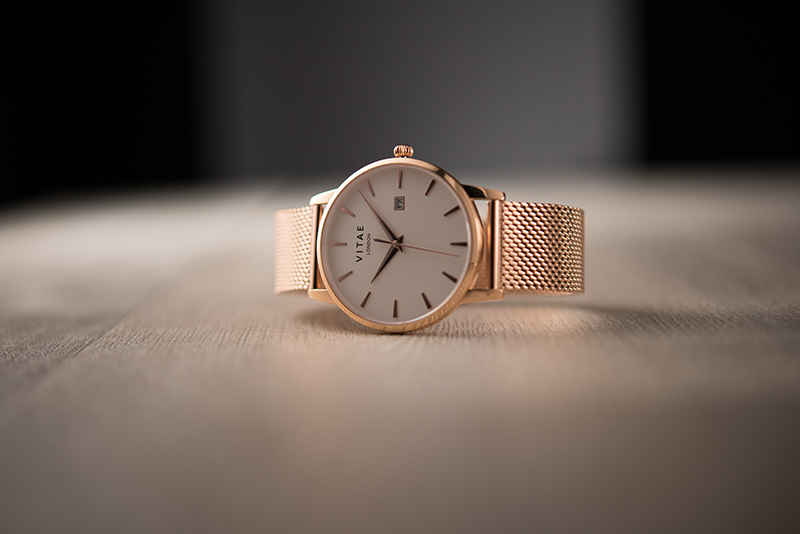
Final result:
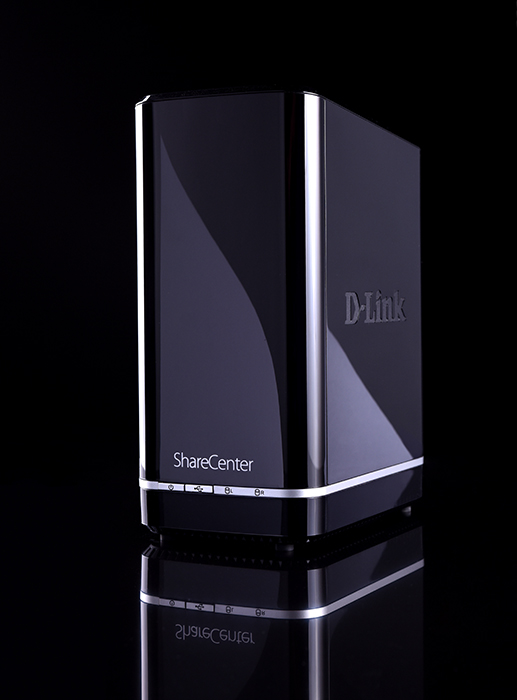
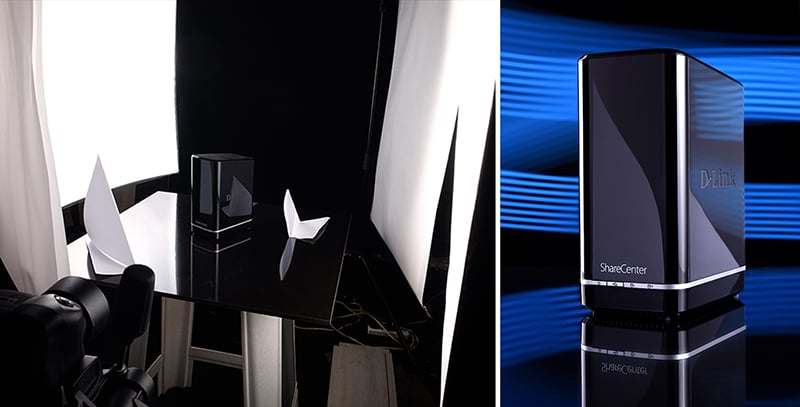
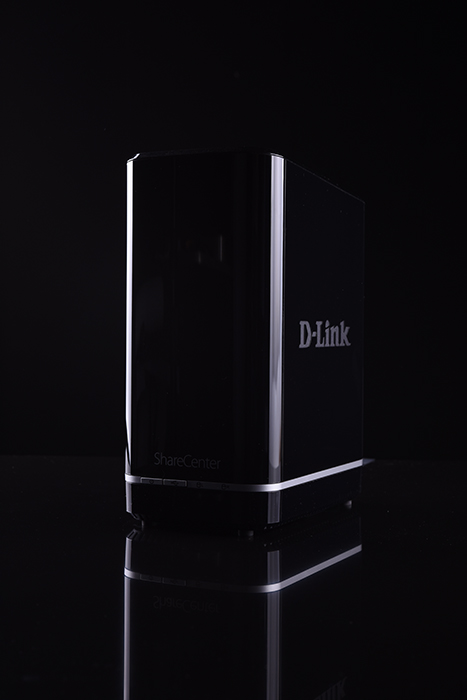
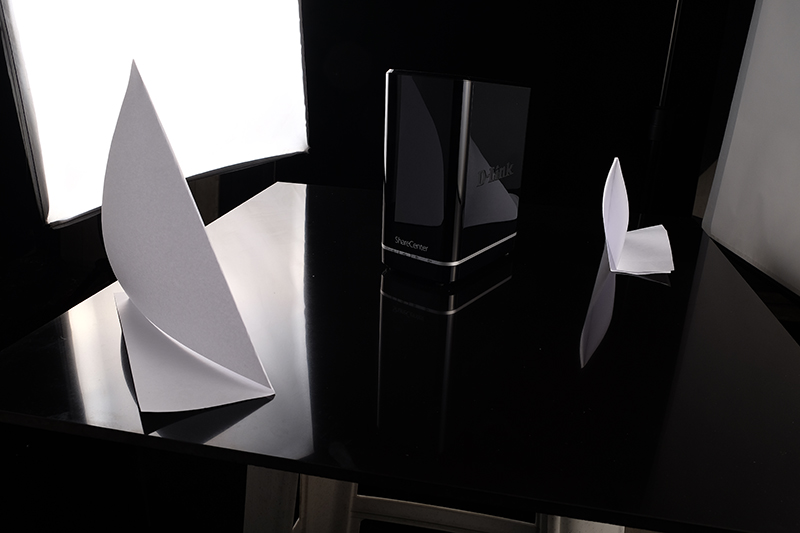
On Black Product Photography
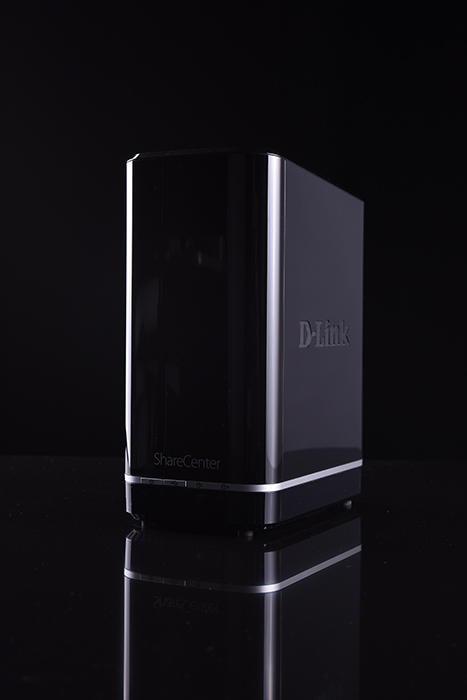
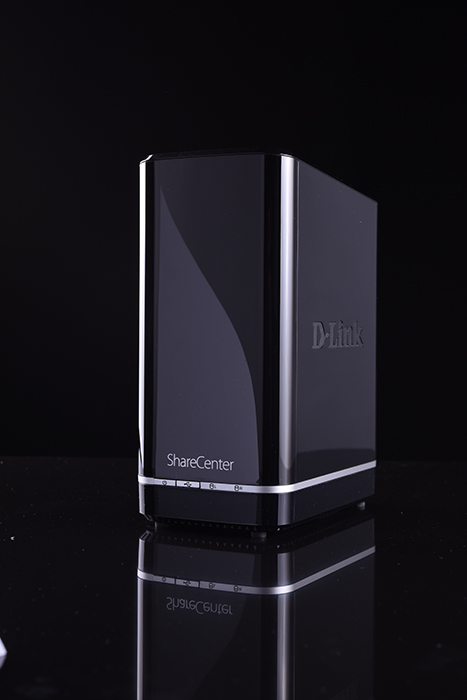
Working with reflective surfaces is very challenging. This is where scrims and fill cards are really put to good use. I have a hard drive share center as my subject for this ‘on black product photography shot’.
I started off by placing two softboxes on the left and right of the subject to get some rim lighting on the front of the subject.
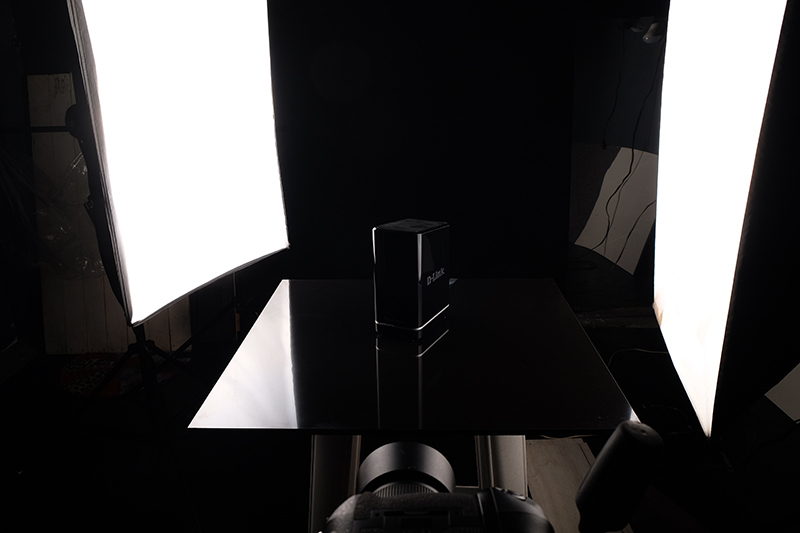
To get some gradient reflections and light on the right side of the subject, I got a scrim and placed it beside the subject with some parts in front of my softbox and to the right.
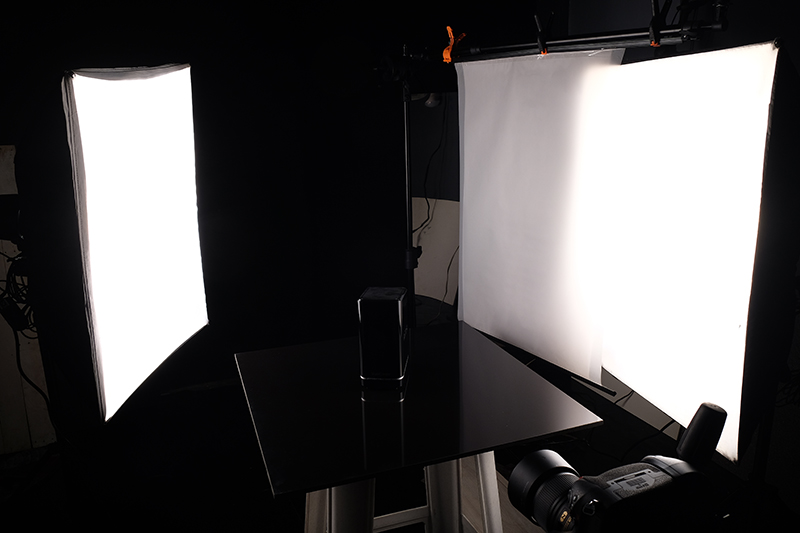
I placed another scrim on the left and front part of the subject to get some gradient reflection on the front of the subject.

I wanted to add a curved reflection on both the front and side plate of the subject. To add the curved reflection I got a piece of bond paper, folded it and placed it on the left side of the subject.
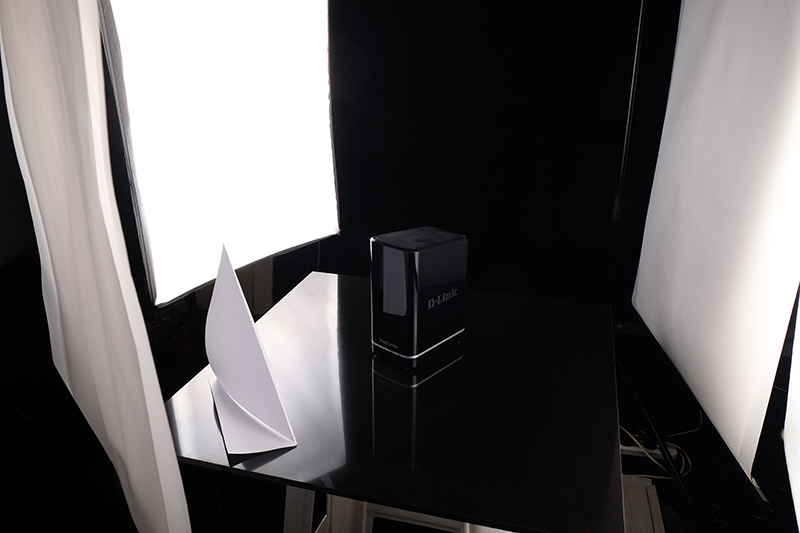
I did the same on the right side but placed a smaller piece of bond paper.
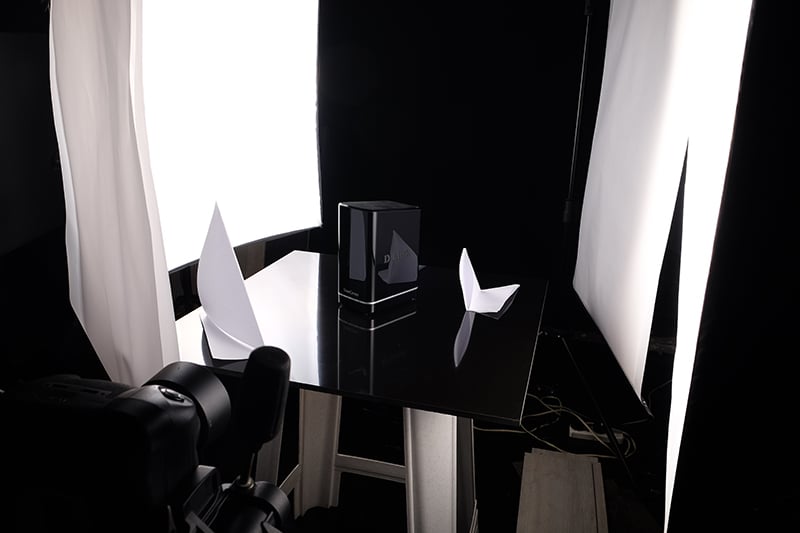
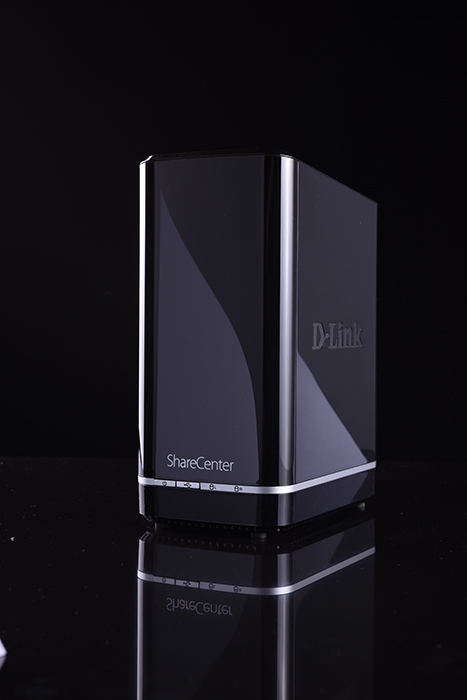
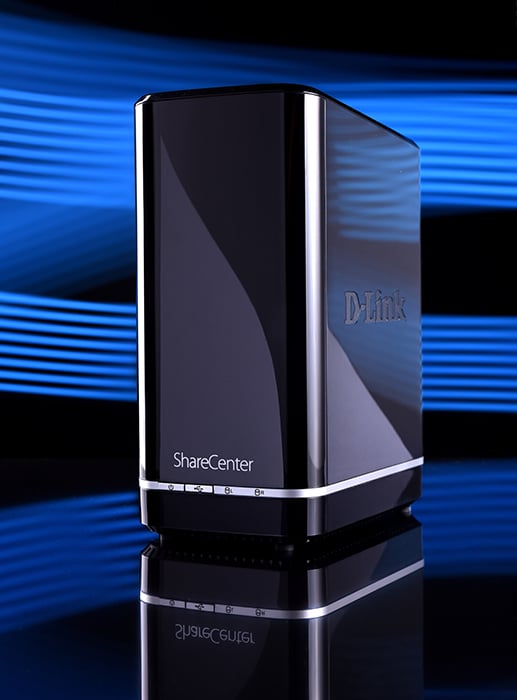
I also wanted to try to add some colored patterns on the background, so I lowered my shutter speed and light painted it.
Final results: