How I Built a Custom Desk and Wire-Free Workspace for My Photo Editing
For years I’ve struggled with my workspace, I’ve had loads of different ones, from small ones in the corner of the living room in my old apartment to ones that take up my entire 3 metre wide office in my current house, they have all had their merits but most frustratingly I have never truly liked working at any of them. They’ve all had massive issues that have made working at them difficult and as a result they are hardly the most inspiring way to work in the office.
Turns out it was considerably more work than I first thought and took a bit longer than I actually had in my calendar!
This was my setup just before I decided to build my own: three monitors and it took up the whole length of the room. Simply put, it was overkill, overwhelming and not needed.
After a while I found the triple monitor setup to be distracting rather than productive so I finally decided to make the change. The original desk here in the photo below was a modular desk from IKEA that I had owned for about 4 years. It had served it’s purpose but it was time to change it up.
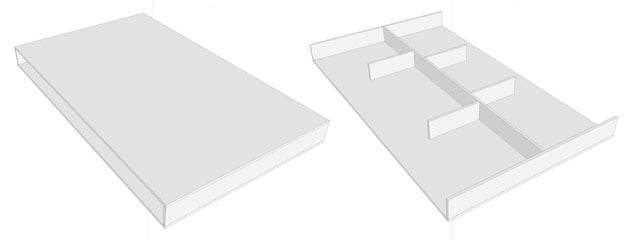
After analysing what I wanted and needed from this new desk, I knew it had to have a shelf for all my hard drives. It had to have storage and I wanted the desk to be 99% cable free. I also wanted a dual monitor mount sunk into the desk. After learning how to use Google Sketchup, I mocked up the simple design and took it to the timber merchant.
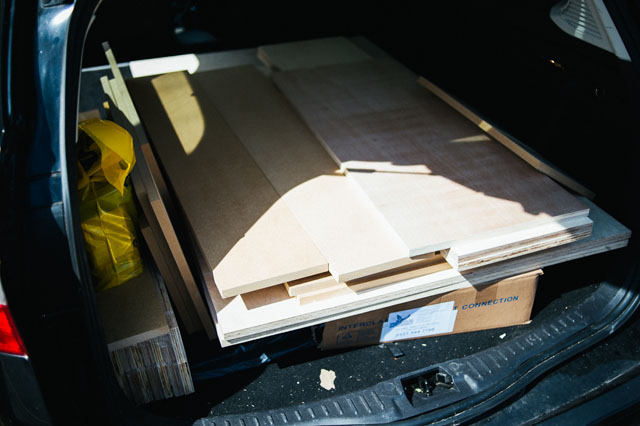
I chose 18mm plywood for the overall build. The top and sides are top quality Latvian Birch ply and the bottom and supports are made from regular run of the mill 18mm ply. Special thanks go to Champion Timber in Guildford for helping me choose the right wood and cutting it so precisely.
Onto the build. As this was going to be one of my first things I’d built for my office I wanted to make sure I made it as well as I possibly could, using the best materials and making it to the right specs. I thought about what I needed; the look and feel and how strong it needed to be. After taking all those factors into account I decided on a plywood top and a scaffold frame.

I ordered the scaffold parts and tubes from Kee systems. After a bit of research I found that I wanted to use handrail tube and fittings instead of actual scaffold as the Kee system is slightly smaller but would still easily take the weight. These all arrived and, to my surprise, I had made a wrong measurement on the tubes. Luckily they were too long, so a couple of cuts later they were perfect.
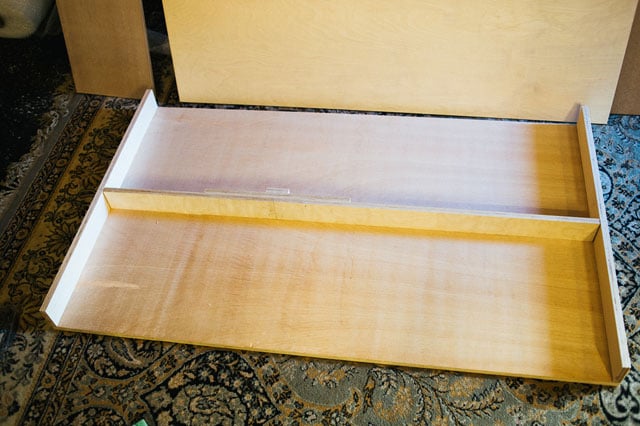
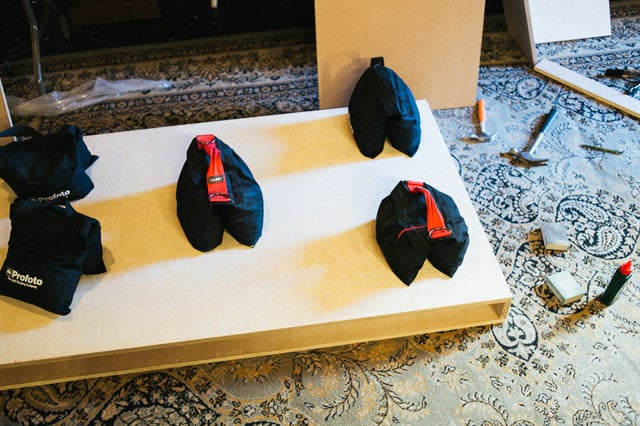
I laid out the base and centre support and after glueing everything in place I tacked it all in place and let it set. More glue and more tacking as the desk top went on (actual work surface). I left it to cure and settle overnight using all my studio sandbags to weigh it down evenly.
And the staining process began, the desk in total had 5 coats of Jacobean Oak oil stain. I had originally decided to do an ebony stain but after a test patch I decided it was too dark and knocked the grain out. After a bit more research I decided to use Jacobean Oak and build it up to get the right tone.
The oil stain went on surprisingly evenly and after it dried fully I started with the varnish. I used a Ronseal matte varnish and used 8 coats so I’d end up with a tough but soft sheen finish but nothing too shiny. It’s probably worth noting now that I sanded lightly between the last couple of coats, this made the final finish very smooth.

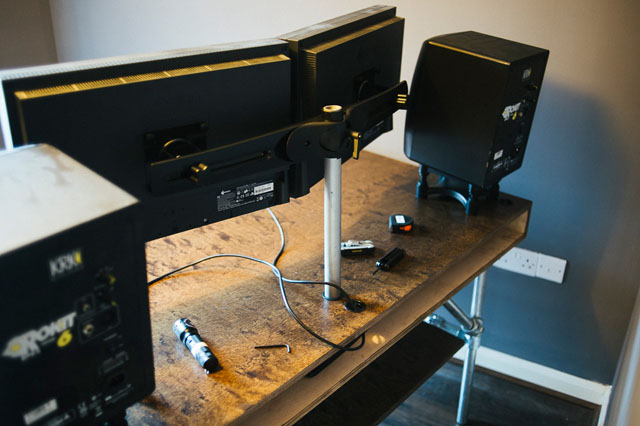
For the monitor mount I decided to use a different mount system entirely instead of using the XFX triple stand I had used on my last desk. After yet more research I knew I wanted a fixed bar system (to make sure the monitors are exactly the same height). I decided to go for the Ergotron DS100. I made a shim to fit some extra scaffold as I wanted to use scaffold instead of the black pole that came with the system.
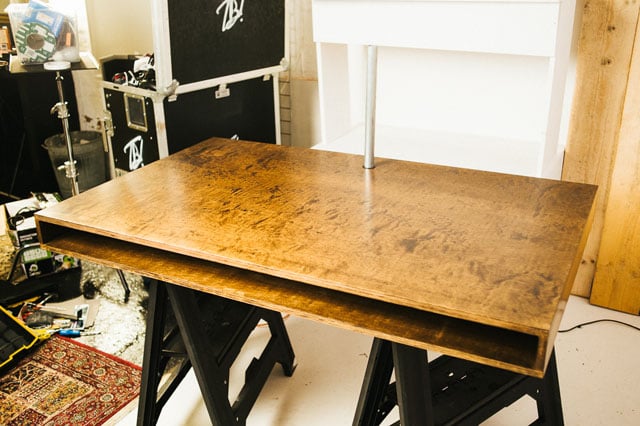
After the drying process, the varnish and stain looked great. The main reason for using a more expensive top wood is now apparent – you get this fantastic grain coming through.
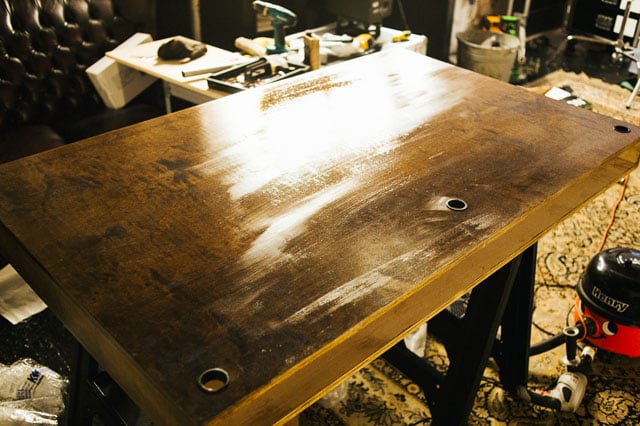
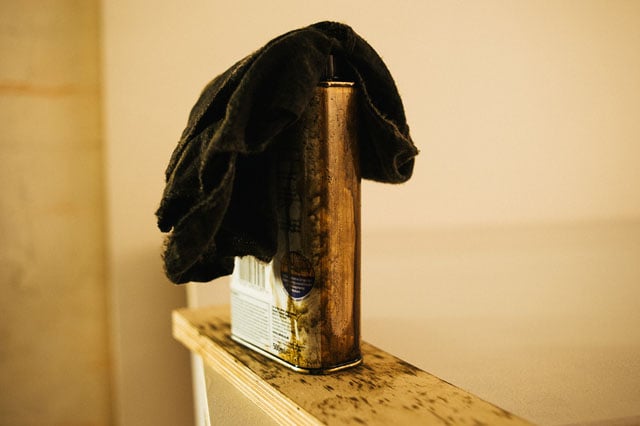
When everything had dried and settled, I started cutting the holes for the cables. Annoyingly, the wood was hard to cut into and my hand drills blew up. This particular drill set on fire:
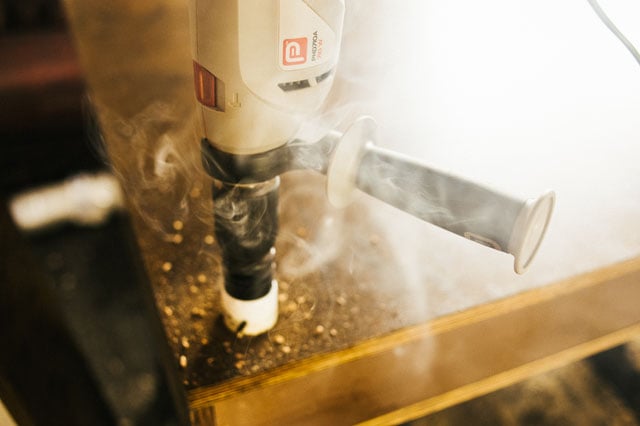
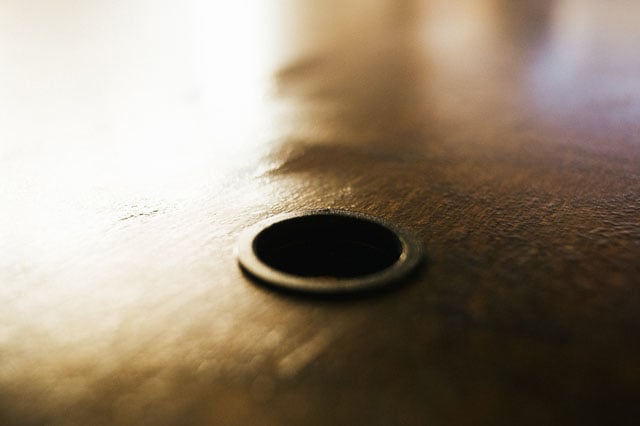
I used these plastic hole covers to make the holes look as smart as possible. Any cables coming up onto the desktop are wrapped in conduit to make it as neat as possible.
After the final coat of varnish had dried, it took three people to lift it into place in the office (it seriously weighs a ton). The first time I set it up I had made it too high and too wide. I cut down the pipe to make it the ideal height. It’s worth noting here that building your own desk is good for a variety of reasons, but my favourite so far is the height… For years I’ve struggled to find a desk that was the right height. Most are either too high or not high enough. At 6’6”, I’ve always needed to find a desk that I can sit at without smashing my knees into a million pieces.
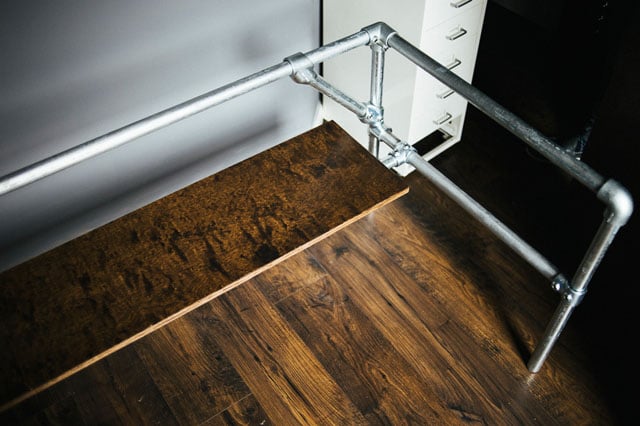
Once the desk was set at the proper height and the frame tightened, the top was placed and secured using specialist pipe fittings. After being pushed into the middle of the room, the wiring could start.
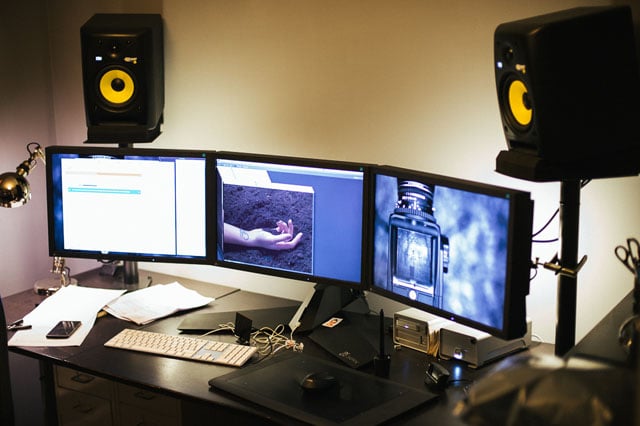
I’d decided that along with my new desk, I’d buy a new Mac Pro and revamp my overall setup, so everything got built in around that as the centre of the setup. It was time to upgrade my old computer and due to the amount of wiring involved I thought it might be a good time!

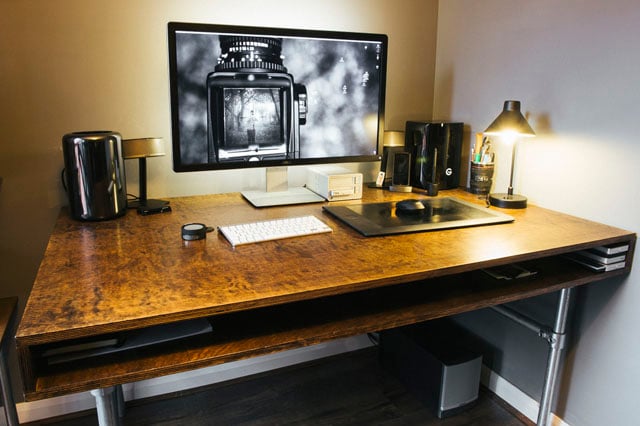
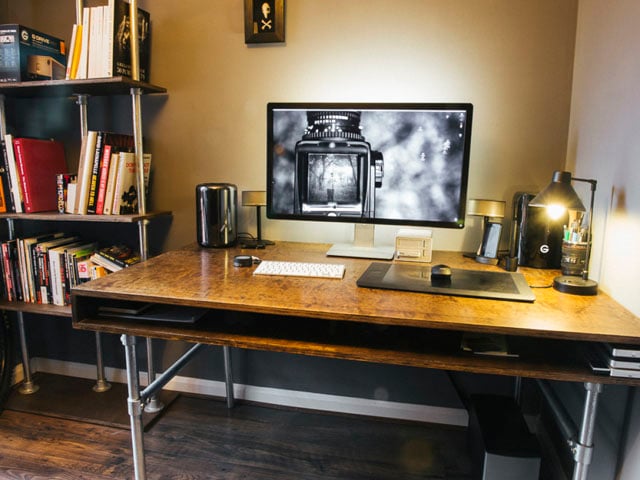
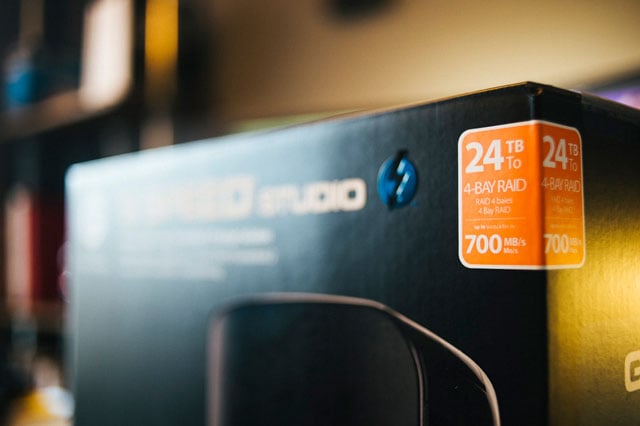
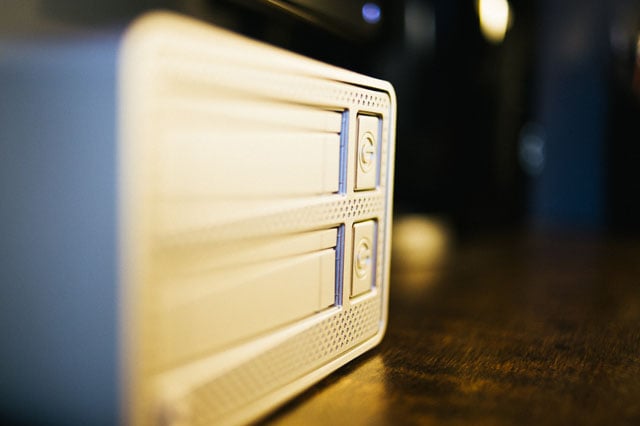
In addition to the new Mac Pro, I got one of the new G-Technology G-Studio Speed 24TB hard drive raid arrays. I have this set to a Raid 5 configuration so I have 18TB effective storage over Thunderbolt 2 connection. It’s basically the mutts nuts of hard drives and it looks freaking awesome. So instead of hiding it away like I used to with large arrays, this now proudly sits on the desktop.
Control wise I bought a new Cherry MX keyboard but after a couple of months with it I decided it was too loud. When you live in a quiet flat you can’t have the loudest keyboard when you need to do e-mails at 5am. So I got rid of it and bought an Apple wireless keyboard to hide more wires. I also had my trusty Wacom tablet 5 Pro Touch L handling mouse/pen duties.
Originally on my last desk I had a triple monitor setup with 3 Eizo displays. It was overkill and unproductive so I decided to ditch one monitor and move to a dual screen setup. I thought this would be much better and help reduce the area on the desk covered by a screen! After buying all the new stands and etc. to run the dual monitor, I hooked it all up and there was a problem…
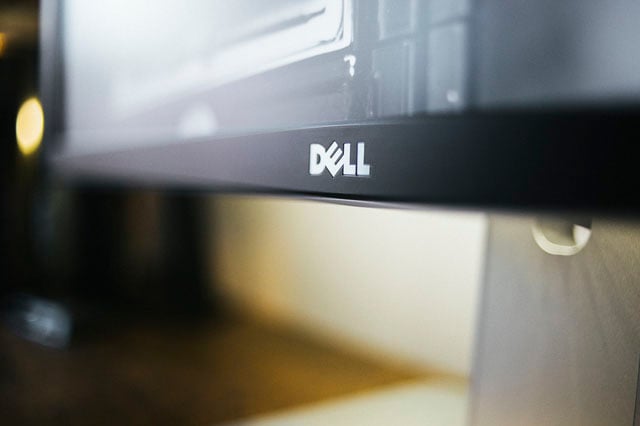
The new Mac Pro doesn’t seem to want to play nicely with multiple DVI monitors if you convert it to a Thunderbolt cable. I would often get glitched start ups and would have to do a hard reset in hopes it would work. After a month or two of this I decided to get rid of the dual monitor setup and move to a single monitor with a much higher resolution. I looked around and decided to get an IPS 4K monitor.
I settled on the Dell UP3214Q model. It turns out the 4K resolution is simply awesome. I’ve never had so much screen real estate to play with and it displays 99% of the Adobe RGB colour gamut, making it about as accurate as you can get. And the sharpness of the screen is simply fantastic.
To finish the top of the setup off was a G-Technology G-dock, which you should love and have as well. Behind the Dell I have two strips of LED lighting stuck to the back of the screen, which illuminates the wall behind the monitors. This helps prevent my eyes from straining when I’m working on long edits.
Sound wise I sacked off my large studio monitors I’d had previously. This new desk was all about minimising clutter so that setup was replaced with a much more compact Bose speaker system. Slight hit on sound quality but nice to get so much desk space back.
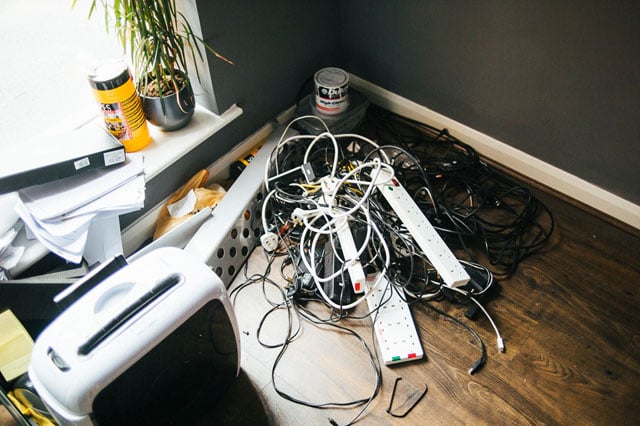
After connecting everything up to the computer and plugging into multiple 4 ways, I tucked all the mess of loose cables into the cavity built into the back of the desk. For me this was another key part of the design. I hate cables so wanted it to be as cable free as possible. This large cavity that runs the length of the desk allowed all the cables to fit inside with only a couple of small cables actually visible.
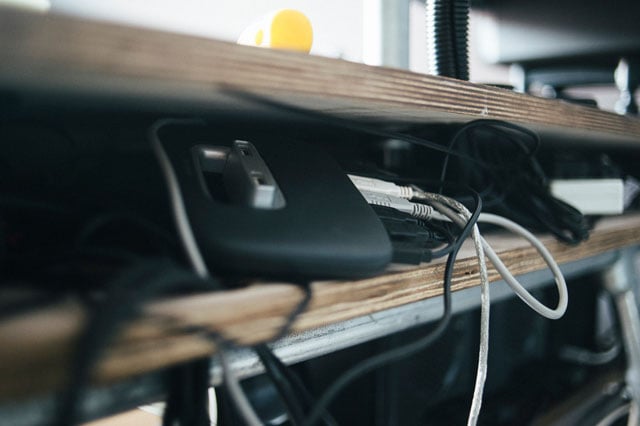
Whilst wiring everything up, I plugged up most things that require constant power to some 4/5 way power adapters but I also wired a few things up to some remote controlled plugs. Now when I sit down at the desk I can turn some things on all at once with one click (e.g. speakers, lamps, screens and behind screen lighting). I’ve found over the years that little things like that can save you loads of time in the long run. All the cables from the top of the desk were routed through 40mm holes that were cut using an auger bit and filled with a plastic cover for a neat look.
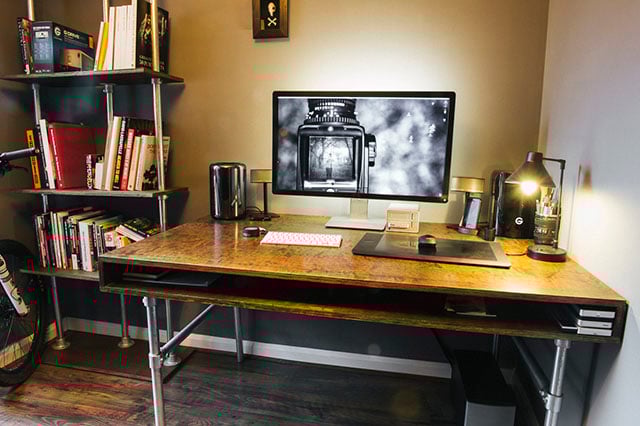
So here it is, my first foray into furniture making. I’m not quite ready to give up the day job but I think I’ll be able to work smarter and harder at this new workstation. I’ll always feel a little sense of accomplishment having put blood, sweat and tears into it. Turns out I liked the desk so much I decided to build a matching bookcase to hold some of my favourite photography books.