Painting a Large College Dormitory with Light for a Nighttime Photograph
I had the opportunity to photograph the newest dormitory on the Florida International University campus a couple of nights ago and I thought I would share a little insight on the process of lighting such a large structure.
- 5D Mark III with 16-35mm lens
- Two Lumopro LP160 flashes
- Red and blue filters
- Tripod
- Wireless flash transmitter
- A friend
Just after the sun went down, I started finding my shot and exposure. Once my shot was framed I never moved the tripod. I wanted to have slow shutter speed to catch passing car lights and also light up the building with the available light.
The additional flashes were mainly for color, not really illumination. Once we started to photograph I held the two flashes side by side and sharing the same filter.
I opted for blue and red (pink) for two reasons. First, they seem to be the strongest filter colors. They always come out vivid and cast a pleasing color. Colors like green, purple, orange don’t seem to have the same strength in my experience. The other reason is that I wanted to make this building look very “Miami Vice” and these are the two most popular neon colors of the 80s.
I walked around the building illuminating different segments while my assistant pushed the shutter button. Because the shutter was set to 0.3 second, the flash did not appear to be very strong. To compensate I used two flashes at the same time and set them on maximum power.
After taking about 70 photos I picked about 40 images and imported them into Photoshop. Each image with its individual flash was cut out and simply pasted onto the background image.
For the final touch I changed the sky from black to an earlier image where the sun had set and there was still a little light coming over the horizon. I also added in a few stars and a bright orange Miami moon to add some interest to the sky.
I am not a Photoshop wizard by any means but I was able to create this photograph using some very basic methods.
Here is what the scene looked like with a single exposure:

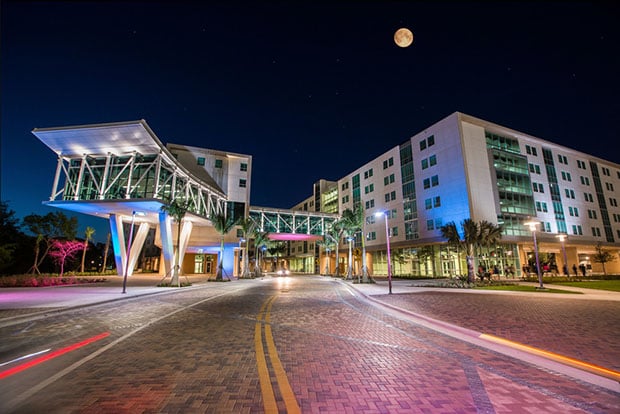
And here’s what the final image looked like with all the extra lighting composited in:

Here’s a time-lapse video showing how the image was created in Photoshop:
About the author: Douglas Garland is a Miami-based photographer and videographer, and the Senior Multimedia Producer at Florida International University. Visit his website here. This article originally appeared here.