What are Blinkies in Photography, and Do They Really Matter?
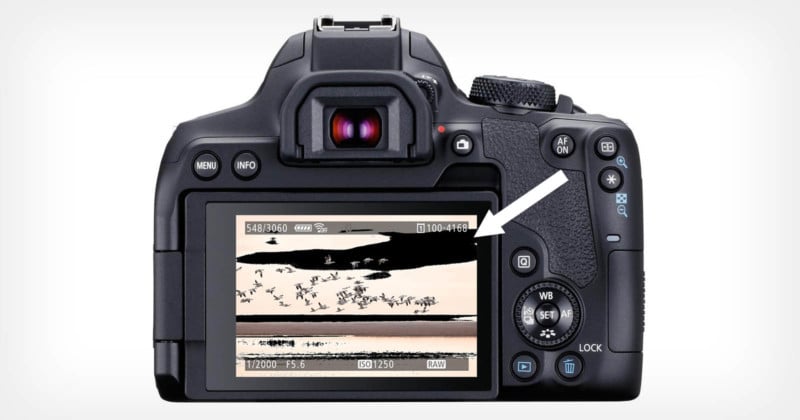
You’re out in the field, having scouted out a new location to grab a landscape vista. You release the shutter button and then chimp the back of the camera to see what you’ve captured… the sky’s blocked out, blinking back at you. You’ve got a dreaded case of the blinkies, but does it actually matter?
Table of Contents
What Are Blinkies?
Blinkies aren’t actually a “thing”, at least not in and of themselves. They are simply the way your camera shows you where you have overexposed highlights or their underexposed equivalent (lowlights?!); they are over/under-exposure warnings or alerts.
The same thing exists in Lightroom where Adobe refers to them as shadow and highlight clipping; if you’ve got blocked shadows then they are shown in blue, with blocked highlights shown in red.
If you’ve got a 24-bit image, then each pixel has an 8-bit value recorded for red, green, and blue separately. The bit-depth allows one of 256 different possible brightness levels to be recorded; blocked underexposure is where this is zero (i.e. no light recorded) and overexposure is where this is 256 (i.e. greater than the highest possible brightness level).
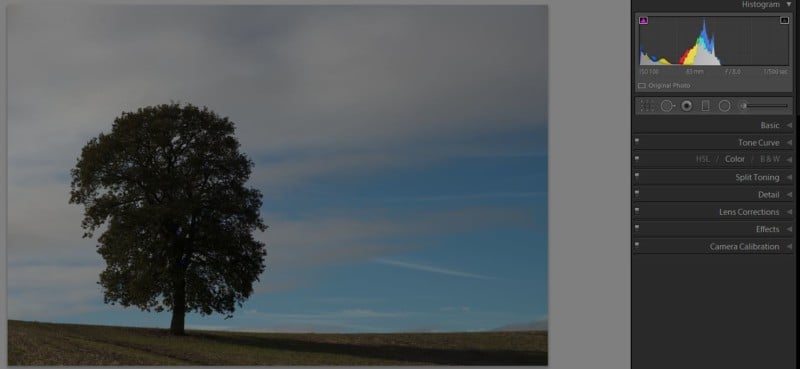
The image below is a good example of both over and underexposure in the same image; this was shot at sunset where the setting sun is very bright in the scene (with red clipping warnings), while the foreground is deep in shadow (and so blue clipping warnings).
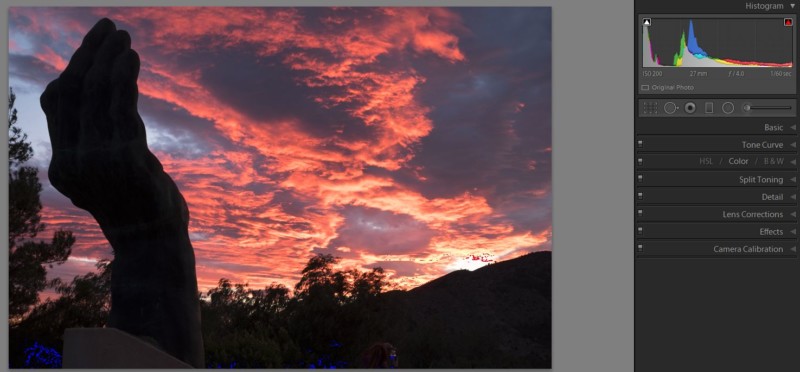
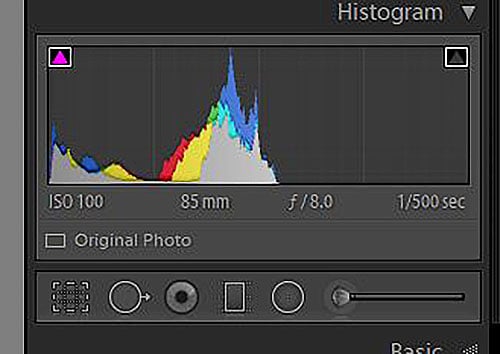
The reason Adobe calls them clipped becomes clear when you look at the histogram which plots (in grey) the average combined RGB brightness of every pixel in the whole image; the peaks show the most common brightness values.
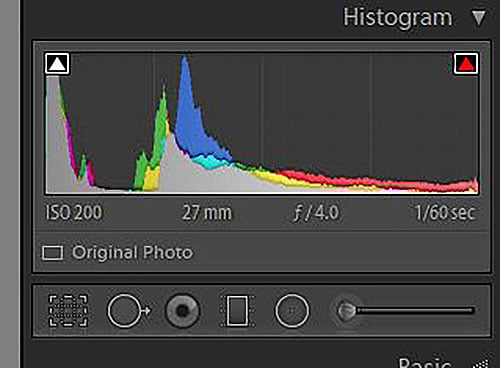
In this case, the large areas in shadow are represented by the peak at the left end of the histogram. There is only a small area of extreme brightness and this is principally red. They are “clipped” because, if you were able to record them, they would extend beyond the left and right ends of the histogram.
Using Blinkies
Blinkies are useful in Lightroom because they help direct your edits in post-production, but — and using the term clipping is useful here — in the shadows there is no light recorded, while in the highlights there is too much light to record. All of which means you have no information about the pixels that are clipped.
When you get to post-production, it is too late to actually rectify the problem as you can’t take the photo again; all you can do is hide it.
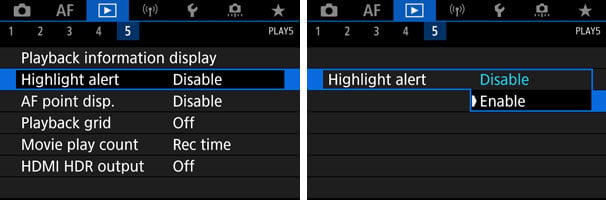
Turning on blinkies in-camera is much more useful because, when you chimp, at least you know if you have a problem and where it is. On Canon cameras, blinkies are called “Highlight Alert”, while on Nikon it’s the “Highlights” selection in “Playback Display Options.” As the name suggests, these are actually showing you clipped highlights rather than shadows.
But what are blinkies actually showing you? Remember that your camera is only storing a single layer or “image”, with individual red, green, and blue pixels recorded based upon the color filter array that sits on top of the sensors. Demosaicing (by your camera or Lightroom), takes that single image, separates out the red, green, and pixel pixels into three (partial) layers, and then interpolates the final image.
A JPEG preview, based upon the picture profile, is then created, which is what you see when you look at an image on the back of your camera. And it is also what the camera uses to activate blinkies and display the histogram.
All of which means that what you see isn’t what you get; it’s working off a JPEG copy. The raw file will have considerably more latitude (just one reason why you shouldn’t ever shoot only JPEG unless you have a good reason to do so).
Remember also that oversaturation can occur in any of the three red, green, or blue layers (which may or may not be a problem, depending upon your subject) and usually (depending upon the manufacturer) only activates when two of the three layers are affected. And even then… it will depend upon your picture profile!
If you go for something vivid that boosts saturation and brightness then the JPEG is more likely to clip, even if the raw file is perfectly fine. Selecting a neutral profile will give you a much better idea of what it’s really like.
What Are the Solutions to Blinkies?
Using blinkies is all very well and good, but they don’t tell you how much latitude you have in your image. Or rather, how much dynamic range there is.
The image below is underexposed and when you look at the histogram it’s clear that the right half is unused.
The obvious solution is to increase the exposure by at least a stop, a technique known as “exposing to the right”. This has the added benefit of reducing noise in the image. However, that won’t get over the general problem of not enough dynamic range, an issue in the image above.
One option would be to use a camera with a bigger dynamic range, such as the Nikon D850 (14.8 stops). Another option is to artificially increase the dynamic range by shooting bracketed exposures and then merging them into a high dynamic range (HDR) image. While these have bad press from the garish, heavily over-saturated, over-sharpened, stereotypes, they genuinely solve a problem when used sparingly.
Do Blinkies Really Matter?
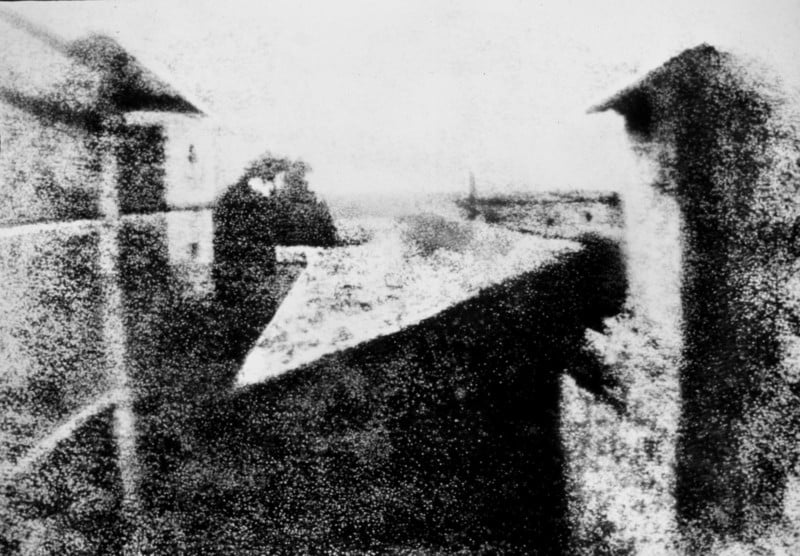
However, there is another solution, and that is to just ignore it. It’s pertinent to remind yourself that photography was invented nearly 200 years ago and that first image, View from the Window at Le Gras, had a low dynamic range and extensive blinkies.
In short, over-exposure and under-exposure have been a part of photography since the beginning and the masters not only learned to cope with the limitations of their medium but encompass it within their working practices. In fact, there is almost an expectation that black and white images will contain blocked shadows and highlights, even from proponents of the zone system such as Ansel Adams.
The mantra “expose for the shadows and develop for the highlights” is the original analog equivalent of “expose to the right”. So while these photographers might have had to ply their trade within the technical constraints imposed upon them, it wasn’t seen as a cap on their abilities.
Sure, photographers have always tried to push the boundaries of what has and can be achieved, but the root of both of these methods of shooting is the same: artistic vision.
That is to say, shoot with intent. Go out having already envisioned the image you want to produce and photograph with that in mind. It’s not necessarily about capturing reality as your eyes see it in the here-and-now. For example, if you want to capture silhouettes of people, there is no point in shooting bracketed five image sets to produce an HDR image that is then reduced back to a low dynamic range photo.
Conversely, if you want a hyper-real, panoramic, cityscape then you might want a gimballed tripod to shoot overlapping HDRs. And then everything in between. Understanding the dynamic range in your image, and how you want to use it, is critical to coming away with a shot you can work with.
Knowing the dynamic range of the real-world scene in front of you, and the tools and techniques by which you can tame it, may well just allow you to create what you have imagined.
Do blinkies really matter?